- Skip to primary navigation
- Skip to main content
- Skip to primary sidebar
- Skip to footer
Journey With Confidence

6 Ways To Keep Snow Off Your RV Roof

- Maintenance, Modifications and Repairs

Can Snow Damage RV Roofs?
Most people love the sight of falling snow, but it can spell doom for RV owners. Snow is deceptively heavy, and once it covers a flat surface like an RV roof, it can cause leaks and structural damage. If possible, it’s best to reduce the amount of snow on the roof or avoid it altogether.
To help you out, we’ve compiled 6 ways to keep snow off your RV roof (or at least minimize the amount of buildup). Some tactics will be more effective than others depending on where you live and the amount of snowfall you’ll be dealing with.
Yes, You Need to Keep Snow Off RV Roofs
Read on to choose the method(s) that will be most helpful for your situation.
Park near windbreaks
The first thing you can try is to park your RV near physical windbreaks. Large buildings, walls, and treelines can provide some shelter against wind and snow. Park on the side that is protected against the main direction of the wind. This way, most of the snowdrifts will build up on the opposite side and your RV will receive some level of protection.
This method isn’t foolproof because some snow can still fall straight down, or the wind might blow from another direction. However, providing your RV with physical protection on at least one side usually helps a bit.
Use a carport
One of the best ways to keep snow off your RV roof is to use a carport or another form of covered storage. Putting a roof over your RV will inevitably catch the vast majority of snow, although a little bit could still blow inward if it’s an open carport.
Of course, snow can still build up on the roof of the carport, so that will need to be dealt with. These lack the structural integrity of a building, but many of them come with peaked roofs that will prevent too much buildup from forming.
They can still crack or collapse if too much weight settles, so keep an eye on the snow level and sweep it off from time to time. It’s better to have snow on your carport roof compared to your RV roof!
Store RV with a cover
To add a layer of separation between the snow and the roof, always store your RV with a cover! These provide protection against wind, dirt, snow, water, and UV damage. If snow settles on the RV cover, it will be easier to shake it off. Snow and ice won’t be able to freeze directly on the surface of the vehicle, so it will be easier to remove.
If you’re looking for a good cover for storage, the KING BIRD Upgraded Travel Trailer RV Cover is a fantastic option. This is a breathable cover that comes with built-in UV protection. Tire covers are included as well, so your RV can enjoy total protection.
Covers won’t keep the snow’s weight off the RV roof, but it does provide a layer of protection from the elements. It’s always a good idea to use one of these because it protects your RV from all sorts of damage and keeps it in good shape for the future.
Install a slanted surface on your RV roof
The problem with most RV roofs is that they are flat. This makes it easy for snow to build up and the surface doesn’t give it anywhere to go. There’s no built-in slope that can let gravity do the work for you. To make snow removal easier, you can try to install a slanted surface on top of the RV.
Make sure your RV is fully ready for winter and protected by a good cover. Then you can prop a lightweight piece of plastic or plywood on top of the roof. You don’t want to place too much weight on the roof, so use lightweight frames for your slope. With luck, this addition will help deflect snow and keep the RV roof fairly clear.
Physically remove the snow
Sometimes it just isn’t possible to fully prevent snow from landing on the roof of your RV. After a while it will start to accumulate and you’ll need to take matters into your own hands to clear it off. Physical snow removal isn’t too difficult if you’re dealing with lightweight powdery snow. You can simply sweep this off with a long brush.
It gets tricky when you nee to remove thick masses of wet, heavy snow. You usually need to get up on the roof to clear this away, so be very careful when you choose your footing. Have someone spot you and use a good ladder to climb up.
Icy buildup can also be a problem because using too much force can damage the RV surface. Never use hot water or blunt force to remove snow and ice from an RV roof! These can cause cracks and water damage.
Use plastic tools to remove the snow because metal can cause damage. Plastic snow shovels are a good item to use to remove the thickest layers. Once you’ve gotten through the main layer, try to shake the RV cover to break up the remaining snow and ice.
Hire professional help
Usually, professional help won’t be necessary because RVs are short enough to be accessible to most people. But if all else fails, you can call in professional help to remove snow. If your home needs to have some snow cleared off the roof, see if the workers can service your RV as well. They may have separate rates for this type of job, but it never hurts to check!
We hope these tips were helpful for you. RVs and snow don’t mix very well, but there are lots of ways to prevent snow from making contact. If nothing else, you can try the methods above to make the job of snow removal easier.
Make sure you keep track of all your RV maintenance and repairs with an online tool such as RV LIFE Maintenance . Not only can you keep all of your documents in one place, but you’ll also receive timely reminders when maintenance is due to help you avoid costly repairs and potentially serious accidents.
Related articles:
- 8 Reasons To Avoid Storing An RV Outside In The Winter
- A Complete RV Winterizing Checklist
- Keep Your RV Roof From Leaking This Season
How to keep snow off RV roof | Try These Prevention Tips (Updated 2022)
Last Updated on August 15, 2022 by tawhid
If you live in an area where it snows, you know that one of the most difficult parts of winter is keeping the snow off your RV roof. It’s hard enough to keep your own driveway and sidewalks clear, let alone a large vehicle. And if you don’t keep the snow off, it can lead to serious problems like leaks and even collapse. So how do you keep the snow off your RV roof? Here are a few tips.
5 Ways To Keep Snow Off Your RV Roof
1. Use a roof rake: A roof rake is a long-handled tool that you can use to sweep snow off of your RV’s roof.
2. Install a snow guard: A snow guard is a device that helps to keep snow from sliding off of your RV’s roof.
3. Clear the area around your RV: Make sure to clear away any snow or debris that could potentially fall onto your RV’s roof.
4. Inspect your RV regularly: It’s important to periodically check your RV for any signs of damage, including leaks or cracks in the roof.
5. Be cautious when using heaters: Some types of heaters can actually damage your RV’s roof, so it’s important to be careful when using them.
Can Snow Damage RV Roofs?
When it comes to weather and your RV, most people think about the hot summer sun and the potential for heat damage. But what about winter weather? Can snow and ice damage your RV roof?
The answer is yes, snow and ice can damage your RV roof. The weight of the snow and ice can cause the roof to collapse, and the constant freeze-thaw cycle can cause cracks in the roof. If you live in an area where it snows, it’s important to take steps to protect your RV from the winter weather.
One way to protect your RV from snow damage is to install a metal roof. Metal roofs are strong and durable, and they can withstand the weight of heavy snowfall. Another option is to use a tarp or cover over the top of your RV when it’s not in use.
Yes, You Need to Keep Snow Off RV Roofs
4 Ways to Keep Snow Off RV Roofs
1. Use a roof rake: A roof rake is a long-handled tool that allows you to safely remove snow from your RV’s roof without having to climb onto the roof itself.
2. Use a soft brush: A soft brush can be used to gently remove snow from your RV’s roof without damaging the surface.
3. Use heat: You can use a heat gun or hair dryer to melt the snow on your RV’s roof, making it easier to remove.
4. Use an ice pick: An ice pick can be used to break up the snow on your RV’s roof, making it easier to remove.
Park near windbreaks
In the winter, it’s important to keep the snow off your RV roof. Otherwise, the weight of the snow could damage your RV.
One way to keep the snow off your RV roof is to park near a windbreak. A windbreak is a structure that blocks wind, and it can also help keep snow from blowing onto your RV.
Another way to keep the snow off your RV roof is to use a tarp or canvas cover. This will help protect your RV from the elements and keep the snow from accumulating on the roof.
Use a carport
A carport is a great way to keep snow off your RV roof. Here are some tips on how to keep your carport in top condition:
1. Check the roof of your carport regularly for ice and snow build-up. If you see any, remove it immediately.
2. Make sure that your carport is properly ventilated. This will prevent condensation from forming on the roof and walls, which can lead to ice and snow build-up.
3. Inspect the gutters and downspouts of your carport regularly. Make sure they are clear of debris so that melting snow can drain away quickly and efficiently.
4. Keep the area around your carport clean and free of clutter. This will help prevent windblown snow from accumulating on the roof or against the walls.
Store RV with a cover
Most people in cold weather states know the importance of keeping snow and ice off their vehicles. But what about your RV? Just because it’s not a car doesn’t mean it’s exempt from the dangers of winter weather. Here are a few tips on how to keep snow and ice off your RV roof.
One way to keep snow and ice off your RV roof is to use a cover. You can find covers specifically designed for RVs at most camping or outdoor stores. Another way to keep your RV roof clear is to brush the snow and ice off regularly. A soft brush will do the trick without damaging the roof.
If you live in an area with particularly heavy snowfall, you may want to invest in a heated RV cover. These covers use special heating elements to melt snow and prevent ice buildup.
Install a slanted surface on your RV roof
If you live in an area where it snows, you know that one of the most annoying things is having to constantly brush the snow off your RV roof. Not only is it a pain to do, but it’s also dangerous if you don’t do it right.
There are a few different ways that you can keep the snow from accumulating on your RV roof, but one of the best is to install a slanted surface. This can be done by installing special brackets that will hold the slanted surface in place.
Once you have the slanted surface installed, simply brush the snow off of it and let gravity do the rest. The snow will slide right off of your roof and onto the ground, where it belongs.
Not only does this method keep your roof clean and safe from accumulation, but it also saves you time and energy in the long run.
Physically remove the snow
Most people don’t think about their roofs during the winter, but if you have an RV, you need to be extra careful. Snow and ice can build up on your roof and cause serious damage.
There are a few things you can do to prevent this from happening.
1. First, identify where the majority of the snow is located and start there. A large brush or broom will help to remove the bulk of the snow.
2. For areas that are more difficult to reach, a long-handled squeegee can be used to push the snow off of the roof.
3. When using any kind of tool on the roof, be careful not to damage it. Work slowly and gently to avoid causing any unnecessary damage.
4. Once the majority of the snow has been removed, a hose can be used to rinse off any remaining residue. Be sure to use a gentle stream of water so as not to cause any further damage.
5. Allow the roof to air dry completely before applying any type of sealant or coating.
How do you keep snow from sticking to the roof?
When the snow starts to fall, it’s important to take steps to prevent it from accumulating on your roof. If left unchecked, the weight of the snow can damage your roof or even cause it to collapse. Here are a few tips for keeping the snow off your roof: 1. Use a roof rake to remove snow as soon as it starts to accumulate. 2. Install heat cables or strips along the edge of your roof. These will help melt the snow as it falls, preventing it from sticking. 3. Apply a thin layer of non-stick cooking spray to your roof before the first flakes fall. This will create a barrier that will make it harder for the snow to adhere. By following these tips, you can help keep your roof safe and sound all winter long!
How often should I treat the roof of my RV?
Assuming you are wanting tips on how to keep the roof of your RV in good condition and free of snow: It is important to treat the roof of your RV with care, as it is constantly exposed to the elements. You should inspect your RV’s roof at least once a year, and more often if you live in an area with harsh weather conditions. If you notice any cracks or damage, be sure to repair them as soon as possible. If you live in an area where it snows often, you may want to invest in a rooftop snow rake. This will help you remove snow from your RV’s roof without damaging it. Be sure to follow the manufacturer’s instructions carefully when using a snow rake. If you don’t have a snow rake, you can still remove snow from your RV’s roof by using a broom.
What is the best product to use on an RV roof?
If you’ve ever looked up at an RV and seen snow or ice on the roof, you know it’s not a good sight. Not only is it unsightly, but it can also be dangerous. Snow and ice can weigh down the roof of your RV, causing it to collapse. So, what’s the best product to use to keep snow and ice off your RV roof? There are a few different products on the market that claim to be the best at keeping snow and ice off your RV roof. But which one is really the best? After doing some research, we’ve come to the conclusion that the best product to use is SnowOff Roof De-Icer. SnowOff Roof De-Icer is a safe and easy way to remove snow and ice from your RV roof.
What is the best way to seal the RV roof?
There are many ways to seal an RV roof, but the best way to keep snow off an RV roof is to use a tarp or cover. Tarps and covers can be purchased at most hardware stores and come in a variety of sizes and colors. They are easy to install and can be used year after year. Another way to keep snow off an RV roof is to use a brush or broom to remove it. This method is not as effective as using a tarp or cover, but it will still help keep the roof clear. Be sure to only use a soft-bristled brush so you don’t damage the roof. If you live in an area with heavy snowfall, you may want to consider installing a metal roof on your RV. Metal roofs are very durable and will last for many years.
Conclusions
In conclusion, keeping snow off your RV roof can be a difficult task. However, by following the tips in this article, you can make it a little easier. Be sure to clear the roof of any debris before the first snowfall, and keep an eye on the weather forecast. If a storm is expected, take the time to remove any snow that has accumulated. By taking these precautions, you can help prevent damage to your RV and keep it in good condition for years to come.
Leave a Reply Cancel reply
Your email address will not be published. Required fields are marked *
Save my name, email, and website in this browser for the next time I comment.
Success usually comes to those who are too busy to be looking for it. Henry David Thoreau
How to Keep Snow Off RV Roof?

Winter can be a difficult time for RV owners, especially when trying to keep the snow off your roof. When temperatures drop and snowfall increases, it’s essential to know how to prevent snow accumulation on your RV’s roof. Fortunately, there are a few simple steps you can take to beat the winter freeze and ensure your RV is kept safe from icy damage. This blog post will discuss easy steps that will help you keep snow off your RV roof all winter long.
Table of Contents
How Can Snow Be Dangerous for Your RV?
Snow can be a beautiful sight, but it can also be dangerous for an RV. Heavy snowfall can cause damage to the roof of your vehicle, as well as ice dams forming underneath the vehicle. With proper maintenance and precaution, however, these risks can be minimized.
One important way to minimize risk is by ensuring that you regularly inspect your roof for any potential damage. If you notice a crack or hole, it’s important to seal this up with caulking immediately before the next snowfall. Additionally, if possible, try to keep the roof of your RV free of leaves and debris. This will reduce the risk of ice dams forming when the snow melts.
Finally, it’s important to be aware of the weight limit for your RV when dealing with snowfall. Heavy snowfall can quickly increase the weight of your vehicle, and exceeding the recommended weight limit can cause serious damage. If you’re uncertain about how much snow is safe for your RV, it’s best to consult with a professional before heading out on the road [1] .

How You Can Keep Snow Off Your RV Roof?
Get a slanted roof on your rv.
One of the most effective strategies to prevent snow buildup on the roof of your RV is to opt for a model that features a slanted roof design. The slanted roof not only allows for efficient runoff of snow and water but also minimizes the risk of heavy accumulations. This type of roof is renowned for its exceptional durability, enabling it to withstand even the harshest winter conditions and bear heavier snow loads effortlessly. By choosing an RV with a slanted roof, you can ensure optimal protection and long-lasting performance in snowy environments.
Use a flushing solution to remove snow
Another great way to get rid of snow on your RV’s roof is by using a flushing solution. This type of solution is designed to dissolve the ice and snow, allowing it to be safely removed from the surface without damaging the material. Flushing solutions can be found at most hardware stores and should be applied directly to the affected areas to achieve the desired results. Just make sure that you follow the manufacturer’s instructions and wear protective gear when handling any kind of flushing solution!
Install a snow rake
If your RV is located in an area where heavy snowfall is common, then installing a snow rake may be your best bet for keeping the rooftops clean and free of debris. A snow rake is a tool specifically designed to scrape off the accumulated snow from the roof without risking any damage to your RV’s exterior. These tools are usually aluminum-made and feature durable construction, which ensures optimal performance even in adverse weather conditions. With a snow rake at your disposal, you can easily remove all traces of ice and snow from your rooftop in a matter of minutes!

Park your RV in a storage facility
Another great way to keep snow off your RV roof is by parking it in a storage facility during the winter months. Storage facilities are designed to protect from adverse weather conditions and can be a great way to preserve your RV’s integrity over time. Not only will this ensure that your vehicle remains safe and secure throughout the winter season but also help to significantly reduce the risk of snow buildup on its rooftop.
Park against the direction of the wind
When parking your RV in an outdoor area, it is important to position the vehicle so that it faces away from any prevailing winds. This will help reduce the speed of incoming guests and keep snow from accumulating on the rooftop. If at all possible, try to avoid parking your RV in exposed areas, as this can increase its vulnerability to heavy accumulations of snow. Additionally, it is also advisable to tie down the vehicle with a rope or chain to prevent any potential movement that could lead to snow build-up.
Physically remove the snow
If you’re dealing with an accumulation of snow on your RV’s roof, the best course of action is to physically remove it. For this purpose, you can use a sturdy broom or brush to gently sweep away the snow and ice from the rooftop. Just make sure that you wear protective gear and grip the broom firmly when removing any debris from the roof of your RV. Additionally, it is also important to ensure that all snow and ice are completely cleared away before driving, as this can help reduce the risk of any potential damages or malfunctions.
Use RV covers
It is also possible to protect your RV from snow accumulation by using a cover. RV covers are designed to fit snugly over your vehicle and provide excellent protection against the elements. It is important to note that not all covers offer the same level of protection, so make sure you choose one that specifically states its ability to resist heavy snow accumulations. Additionally, it is also important to ensure that the cover you choose is made from a durable material and fits your RV properly for optimal performance.

Invest in high-quality roof coatings
Investing in high-quality roof coatings can be a great way to prevent snow buildup on your RV’s rooftop. Roof coatings are designed to create a protective barrier against the elements, ensuring that your RV’s exterior remains undamaged even during harsh winter conditions. Additionally, these coatings are also available in different colors and textures, allowing you to customize the look of your vehicle according to your preference. With a high-quality roof coating on your side, you can rest assured knowing that snow won’t be able to accumulate on your RV’s rooftop.
Choose an automotive de-icer
You can also use a specialized automotive de-icer to prevent snow buildup on your RV’s roof. These products are designed to dissolve the snow and ice quickly and effectively, allowing it to be safely removed without causing any damage. De-icers usually come in spray cans and can be found at most automotive stores, so make sure you have one on hand whenever snow accumulations are expected.
Hire Professionals
Finally, if you are unable to remove the snow and ice buildup on your RV’s rooftop yourself, it is advisable to seek professional help instead. Professionals can provide efficient services for the task at hand and ensure that all accumulations of snow are completely cleared away in a safe and timely manner. With their expertise on your side, you can rest assured knowing that your RV’s rooftop will remain protected from heavy snow and ice buildup all season long [2] .

How to remove snow off the RV roof manually correctly?
Even though removing snow from the RV roof can be a difficult and dangerous task, following these steps will help you complete the job safely.
- Make sure to wear thick gloves and boots with good grip for traction. It’s important to stay warm and safe while completing this chore.
- Check the area around your RV for power lines or any other obstacles that could be hazardous to work around.
- Carefully climb the ladder onto the roof, and begin brushing away the snow with a broom or special snow rake tool. Start from the edges and slowly move towards the center of your RV roof for best results.
- Once most of the snow is cleared off, use an ice scraper to get rid of any ice or snow chunks that may have been left behind.
- Once the roof is clear of debris, use a soft cloth to wipe down and remove any water from the surface of the RV.
- Finally, apply a protective coat of wax or sealant to help protect your RV’s roof against future snow accumulation and wear and tear.
These steps may seem like a lot, but following them correctly can help make sure that your RV roof stays safe and clear of any damage caused by snow or ice accumulation. Taking the necessary precautions before beginning this process can help alleviate some of the difficulty associated with removing snow from an RV roof.
How to maintain RV Roofs?
Maintaining the roof of your RV is key to ensuring its longevity and protecting it from weather damage. It’s important to inspect your RV’s roof regularly for any signs of wear or damage and to address any issues as soon as they arise. Here are some steps you can take to protect and maintain the roof of your RV:
- Clean the roof regularly. Use a soft brush and mild detergent to remove dirt, debris, or bird droppings from your RV’s roof. Avoid using harsh cleaners as these can cause damage to the membrane of the roofing material.
- Check for wear and tear. It is important to inspect your roof regularly for any cracks, tears, or punctures in the membrane. If any of these are found, they may need to be patched or replaced with a new piece of roofing material.
- Use sealants to protect against water damage. Sealants can help prevent water from entering through seams in your RV’s roof and causing further damage. Make sure to use the right kind of sealant for your particular type of roofing material.
- Seal any rust spots. Rust can occur on metal roofs, and it is important to address this with a sealant or paint as soon as possible before the rust spreads.
- Apply a UV protectant to prevent fading or cracking from sunlight exposure. Many RV roofs are exposed to direct sunlight for long periods, which can cause them to fade and crack over time. Applying a UV protectant can help prevent this from happening.
- Re-caulk any gaps or seams in the roof as necessary. This will help ensure that no water is entering through these areas and causing damage to the interior of your RV.
- Have your RV’s roof inspected by professionals every few years. Professional roofers can often spot potential problems that would otherwise go unnoticed and prevent them from becoming bigger issues in the future.
- Replace any missing or damaged shingles, tiles, or other pieces of roofing material. Make sure to use the same type of material as your existing roof so it will blend in seamlessly.
- Always use a ladder when inspecting or cleaning your RV’s roof. Never stand on the roof itself as this can cause damage to the membrane and create an unsafe working environment.
By following these steps, you can help ensure that your RV’s roof remains in good condition and protected from the elements for years to come. Taking care of your RV’s roof is essential for its longevity and should not be overlooked. With proper maintenance, you can enjoy your RV for many years to come [3] !

How do I keep snow from sticking to my roof?
There are several steps you can take to prevent snow from sticking to your roof. The first step is to ensure that your roof is clear of debris, such as branches or leaves, which can provide a place for the snow and ice to accumulate. You should also make sure that the slope of your roof is adequate to prevent snow buildup. Additionally, adding an anti-icing substance to your roof can help prevent snow from sticking. This could be anything from a commercial ice-melt product to something as simple as salt or baking soda. Finally, installing a heating cable on your roof may also be an effective way of preventing snow and ice buildup.
Do I need to remove snow from my RV roof?
Yes, you should remove snow from your RV roof to prevent damage and ensure the longevity of your vehicle. Snow accumulation can be dangerous as it increases the weight of your roof and puts stress on the structure. To remove snow safely, start by using a broom to loosen any snow that is sticking to your roof or use warm water to help melt ice and snow. You should also be careful not to scratch the surface of your roof when removing snow and ice. Once all the snow has been removed, apply a protective coating to help prevent it from sticking in future storms.
What is the best way to reduce ice damming?
The best way to reduce ice damming is by using insulation and ventilation to create an even temperature throughout the roof’s surface. Proper insulation will help keep warm air from escaping through the attic, which can cause melting snow on the roof to refreeze and form ice dams. Installing a ridge vent along the peak of your roof is also important as it helps to exhaust warm air out of the attic and prevent ice damming. Lastly, sealing any air leaks in the attic can help to prevent warm air from escaping and contribute to ice dam prevention.
How do you prevent snow buildup on a flat roof?
Several steps can be taken to prevent snow buildup on a flat roof. The first step is to apply an anti-icing product, such as a commercial ice melt or salt, before the storm hits. This will help prevent snow from sticking and forming large piles. Additionally, adding heaters to your flat roof may also help melt snow before it has a chance to accumulate. You should also ensure that your roof is properly sealed and insulated as this will help keep the temperature of your roof evenly distributed, which can help prevent snow buildup. Finally, you may consider adding additional slopes or ridges to your flat roof to provide space for any snow accumulation.
Useful Video: RV roof prevent collapse Winterize – stop sagging with heavy snow load. Support roof
Conclusion paragraph.
To keep snow off RV roofing, the first step is to regularly inspect your roof for any damage or wear. In addition, be sure to clean and seal your RV roof annually with a quality RV sealer. Sealing the roof prevents water from seeping through and causing long-term damage. Finally, it’s important to keep debris off of your RV’s roof by brushing off snow accumulations frequently. Taking these proactive steps can help ensure your RV roof remains in good condition and keeps your family safe for many years to come. References:
- https://drivinvibin.com/2023/01/03/can-snow-ruin-your-rv-or-trailer-roof/
- https://www.rvcampgear.com/how-to-keep-snow-off-your-rv-roof/
- https://www.outdoorsy.com/blog/maintaining-rv-roof
How to Repair RV Body Damage?
How to Remove Carpet From Under RV Slide Out?
How to Keep RV Cool in Arizona?
How to Manually Retract RV Steps?

How To Keep Snow Off RV Roof: Keeping Your RV Light and Dry
As an RVer, few things are more frustrating than waking up after a heavy snowfall to find your rig buried under piles of accumulated snow. While a picturesque snow-capped RV may look Instagram-worthy, all that extra weight and moisture can mean serious trouble. From collapsed roofs to major leaks, ignoring snow buildup on your recreational vehicle’s roof can lead to expensive repairs and winter headaches.
Therefore, here I am to help you in this case. I’ll share everything I know about keeping the snow off the RV roof including a few quick tips. This way you can keep your RV roof clear, prevent leaks, and rest easy knowing your rig stays structurally sound as the snowstacks grow taller all winter long. Simply put, you need to consider covered storage, quality RV covers, DIY shelters, roof treatments, or heated systems for prevention.

Snow Removal Challenges for RVs
Before getting into solutions, it’s helpful to understand exactly why snow buildup can be problematic for recreational vehicle roofs –

Excess Weight
Recreational vehicles typically feature flat or gently curved roofs, making them susceptible to snow accumulation. Unlike sloped house roofs designed to shed snow, RV roofs can amass several inches of densely packed snow, adding significant weight. This excess weight, especially when compacted, can impose hundreds of pounds of stress, potentially compromising the structural integrity of the roof over time.
Melting and Refreezing
The natural cycle of daytime solar warmth melting upper snow layers followed by freezing overnight leads to the formation of hard, uneven ice. This ice buildup poses a threat as it can obstruct vents, seals, and openings, creating potential points of entry for leaks. The expansion and contraction caused by the freezing and thawing cycle can accelerate wear and tear on vulnerable roof components.
Bending and Sagging
Gravity and moisture contribute to the gradual sagging, bending, or bowing of RV roofing material over a season. This ongoing stress compromises the structural supports, potentially leading to long-term damage. Regular exposure to the weight of accumulated snow exacerbates this issue, making it imperative to address it promptly.
Black Streaks and Stains
As snow slides off roofs, it collects dark grime and dirt, resulting in unsightly black streaks on the exterior walls of the RV. Not only do these streaks mar the appearance of the vehicle, but they can also indicate potential water runoff issues. Preventing the buildup of snow on the roof can mitigate the formation of these unattractive stains.
Smart Sheltering and Preventative Measures
Taking proactive measures to prevent the accumulation of heavy snow on your recreational vehicle is a wise investment that can save you significant hassle and potential damage in the long run. Here are comprehensive and detailed options to consider for safeguarding your RV from the challenges posed by winter weather –
Seek Covered RV Storage
Opting for covered storage is an ideal solution to prevent snow buildup. Securing a spot in a garage, carport, or covered storage lot shields your RV from direct exposure to snow. While this option is highly effective, it’s essential to consider the limitations of indoor space availability and associated costs. When booking a spot, measure your RV’s height and width to ensure a proper fit within the chosen covered space.
Invest in a Quality RV Cover
A well-fitted RV cover designed for winter conditions provides an affordable and protective layer over your RV’s roof. Look for covers made from thick, waterproof, and tear-resistant materials to withstand harsh winter elements. Proper installation is crucial to avoid sagging pockets, which can collect snow and compromise the effectiveness of the cover.
Build a DIY Shelter
For those seeking a more hands-on approach, consider constructing a DIY shelter using PVC pipes or lumber wrapped in durable polyethylene sheeting. These makeshift structures serve as temporary shelters during the winter months. It’s imperative to ensure that your design is stable and secure to prevent potential collapsing under the weight of snow.
Apply Protective Roof Treatments
Enhance your RV’s ability to shed snow by applying silicone or acrylic roof sealants and coatings. These products create a slick surface, preventing snow from sticking and accumulating. While some options claim to seamlessly clear snow, the effectiveness can vary. Regular application and maintenance are necessary for optimal results.
Install Heated Roof Systems
Consider the most proactive option of installing heated mats, cables, or panels on your RV’s roof. These systems actively melt snow using electric heat, ensuring that your RV remains snow-free. However, this option requires professional installation and an adequate power supply. It’s essential to factor in the associated costs, but the effectiveness of heated roof systems in preventing snow-related issues makes them a valuable investment.
Each of these options comes with its own set of considerations, costs, and benefits. By carefully evaluating your specific needs, budget, and available resources, you can choose the approach or combination of approaches that best suits your RV protection requirements in winter conditions.
Safe Manual Snow Removal Techniques
When snow inevitably does collect on your RV roof, promptly removing it is essential to avoid issues.
Low-Snow Situations
A light dusting of powder can be quickly cleared using –
Soft-Bristled Brooms: Use a soft broom with an extension pole to gently sweep snow off from the edges and the roof peak so it slides downwards. Don’t scrub hard or you may scratch the roof.
Foam Pushers: These square pads on telescoping poles allow gently “pushing” snow off the roof using a sweeping motion. Take care not to put too much pressure on roof seams and edges.
Long-Handled Roof Rakes: Also called snow rakes, these pole tools with curved plastic blades let you stand on the ground and pull snow off in strips. Angle the rake blade properly to avoid damage.
Heavy Snow Buildup
When dealing with a deep snowpack, you need reinforcements –
Light-Weight Plastic Roof Shovels: Carefully scoop up snow accumulations working in layers. Make smooth strokes to avoid scratching or damaging roofing membrane materials.
Specialized Commercial Snow Tools: Invest in sturdy metal roof rakes, extendable poles, and pusher/scraper combos designed for RV use for heavy snow-clearing jobs.
Snow Removal Services: Hire a professional mobile snow removal company experienced with RVs to safely and quickly clear rooftop snow buildup over a certain depth or weight.
Key Safety Recommendations
When tackling any roof snow removal project, make safety your top priority with these precautions –
Monitor Weather Reports: Prioritize safety by staying informed about weather conditions. Never attempt snow removal during active snowfall or wind storms. These adverse weather conditions can create hazardous situations, including reduced visibility and the risk of falling snow or ice.
Utilize Safety Equipment: Protect yourself from potential falls by using tie-off harnesses and boot traction aids. These safety measures, combined with the assistance of a spotter, can significantly reduce the risk of accidents. A spotter can provide guidance, help navigate potential hazards, and alert you to any dangers.
Dress Appropriately: Wear waterproof winter work gear to stay warm and dry throughout the snow removal process. Frostbite and hypothermia are genuine risks in cold conditions, and proper attire helps mitigate these dangers. Ensure that your clothing provides insulation without compromising mobility.
Exercise Caution Around Roof Features: Work carefully around roof vents, seals, and edges to avoid damage. Be mindful not to push snow onto slide-outs, as this can cause mechanical issues. Paying attention to the specific features of your RV roof ensures that the removal process does not inadvertently lead to structural damage.
Avoid Electrical Hazards: Keep extension tools, such as snow rakes or shovels, away from nearby electrical lines and cables. This precaution minimizes the risk of hazardous shocks or potential snags. Prioritize the safety of both yourself and your RV by maintaining a safe distance from electrical components.
Enlist a Helper: Having a helper is highly recommended for additional assistance and hazard monitoring. A second set of eyes can identify potential dangers, communicate effectively, and ensure that the snow removal process proceeds smoothly. This collaborative approach enhances overall safety.
Handy Winter RV Maintenance Tips
Vigilant maintenance helps minimize roof snow issues over the cold season –
- Frequently check for ice dams or heavy icicle buildup that can penetrate seals and cause interior leaks if left unchecked. Carefully remove with roof rakes or scrapers.
- After snow clearing, inspect the roof membrane and seals thoroughly for any new cracks, gaps, or damage needing repair.
- Prepare your RV for winter overall with freeze protection, winterizing appliances, de-winterizing supplies, and emergency cold weather gear.
- Monitor roof load capacity and clear snow before reaching the maximum weight limit to avoid structural issues.
RV roofs require special diligence to keep clear and prevent snow-related problems. Set your rig up for success with smart preventative steps before winter begins. Once the snow starts accumulating, regularly remove it using proper tools and techniques for your roof type and snow load. Avoid heavy ice buildup and look for signs of damage after storms. With a proactive roof snow removal plan in place using the right safety gear, you can confidently continue enjoying winter camping without worrying about your RV roof!
Similar Posts

Safe-T-Alert RV Carbon Monoxide Detector Beeping
On a chilly evening, while I was wrapped in a blanket inside my RV, a repetitive beep suddenly echoed, breaking the tranquillity. My Safe-T-Alert carbon monoxide (CO) detector was signaling something. After a few moments of panic and a quick consultation with the manual, I was on the path to deciphering and addressing the issue….

How to Choose the Right RV?
Recreational vehicles (RVs) open up a world of adventure and freedom. With an RV, you can travel across the country and enjoy the comforts of home along the way. However, RVs require a substantial investment. Most new models range from $75,000 up to $500,000 or more. Even used RVs typically cost $20,000+. With this level…

How I Adjusted the Sway Bar for My Travel Trailer (My Guideline)
Before we dive into the adjustment process, it’s essential to understand what a sway bar is and why it’s crucial for towing a travel trailer. A sway bar, also known as a stabilizer bar or anti-sway bar, is a component that connects the tow vehicle (usually a truck or SUV) to the travel trailer. The…

Upgrading to an Energy-Efficient RV Refrigerator (What You Should Need to Know)
Having an efficiently operating refrigerator represents one of the most crucial elements for comfortably sustaining any RV lifestyle long term. As one of the biggest daily energy drains onboard most recreational vehicles, an aging inefficient fridge can rapidly sap precious battery reserves during dry camping while simultaneously skyrocketing propane consumption using absorption cooling at RV…

How Much Snow Can an RV Roof Hold?
For those who love the freedom of the open road, RVs offer the perfect opportunity to explore new destinations while maintaining the comforts of home. However, RV owners also face unique challenges, such as the need to understand their vehicle’s limitations. One crucial aspect that often goes overlooked is the weight of snow on an…

How to Wash Your Face While Camping?
Camping is a fantastic way to connect with nature, but it can take a toll on your skin. Dust, dirt, and sweat can leave your face feeling less than fresh. That’s why it’s essential to learn how to wash your face effectively during a camping trip. In this article, I’ll discuss why it’s crucial to…
Leave a Reply Cancel reply
Your email address will not be published. Required fields are marked *
Save my name, email, and website in this browser for the next time I comment.

3 Easy Methods To Keep Snow Off RV Roof

Going out on camping trips with your loved ones can be a lot of fun. These trips let you make new memories with your loved ones while also visiting areas you had never been to before. Though, when it comes to storing all of the equipment for your trips, it can get a little congested when traveling in a small car. This is why people purchase larger vehicles like motorhomes and RVs instead.
These are designed for campers who want to stay out on their trips for a long time. Considering this, most of the features provided ensure that you can safely live in the vehicle. While these vehicles might be amazing, there are also some problems that you can run into with them. One common issue that has been reported is that snow starts gathering on the vehicle. This is why we will be using this article to teach you how to keep snow off your RV roof.
How to Keep Snow Off RV Roof
1. Parking Near Windbreaks
If you own an RV then there is a high chance that you enjoy going out for long trips. When staying out during a cold climate, one of the main problems that you will run into is snow forming above the vehicle. This can be annoying as well as dangerous for the motorhome. The main reason behind this is that snow contains water that can enter the roof of your vehicle.
This will then damage all its interior and frame as it is made out of wood. With that being said, you should understand why you must keep your vehicle away from all this snow. One of the easiest things that you can start with is parking your RV near windbreaks. This includes tall buildings or trees that will block the wind from hitting your vehicle.
If you have parked your RV perfectly then all the snow should stick to these windbreaks, leaving your vehicle free. Although, you should note that the method is not as good as it seems. While snow is usually carried along with the wind, there is still a chance that it might straight-up fall on your RV. Additionally, the snow can also fall from the windbreak you were parked next to.
2. Using A Carport
Another way to prevent snow from falling on the roof of your RV is to park the vehicle in a carport. These are covered storage units that will keep the vehicle free from rainwater or snow. Keep in mind that you can use any sort of storage that is covered. It is not necessary that you only park the vehicle in carports.
Aside from this, you should keep in mind that all the snow will still gather up above the storage. This is why it is necessary that you clear this as all the weight can sometimes cause the storage to collapse. Most carports now use peaked roofs that allow snow to fall off them to prevent this problem. However, if yours does not then you can keep in mind that you clear all of the gathered snow frequently.
3. Use RV Covers
Another thing that you can do to prevent this problem is to use a cover on the roof of your RV. These will help you in adding another layer between your RV roof and the snow. Considering this, all the snow will gather up on the cover instead of the vehicle itself. This should cause no problems and you can easily clear up the snow by removing your cover.
Other than this, the device also helps in protecting your vehicle from rains and UV rays. This is why it can be a good thing that you have these with you when traveling. Additionally, there are tons of companies manufacturing these so should not have much trouble purchasing them. Make sure that you go through the specifications of these products carefully.
This should help you in getting a product that will last you a long time. Keeping all of this in mind, you should now understand how to keep snow off your RV roof. Depending on your preferences, you should easily be able to select a solution that best suits you. Finally, you should note that a little snow covering your roof is not dangerous if you remember to clear it up regularly.
Leave a Comment Cancel reply
Save my name, email, and website in this browser for the next time I comment.
RV Zone is reader-supported. When you buy through links on our site, we may earn an affiliate commission. Learn more
The Best RV Roof Coatings to Protect Your RV Roof Properly

Writen by Tom Hank

Fact checked by Joseph Varney
The roof of your RV is the part that receives the most abuse. Not only do you expose the roof to constant abuse coming from the outdoor weather, but there will also be times when tree branches and other types of debris fall on it. Such may cause severe and potentially expensive damage in the long run.

Do not wait until your RV roof starts leaking, and the water that seeped inside causes a lot of damage. You have to do periodical examinations on your RV roof to check if the existing coating is still in good shape, or if you must scrape the entire thing away and reapply a fresh coat.
To deal with those problems effectively, look for the best RV roof coating that you can afford. This article provides a simple guide on how you can choose the best RV rubber roof coating, but first, let’s learn some of the best products in this category.
Table of Contents
Best RV Roof Coating Reviews
1. dicor rpcrc1 rubber roof coating.
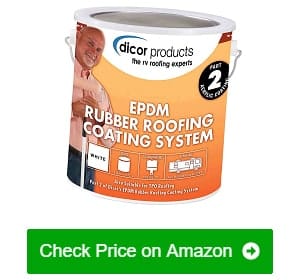
There is no sense in getting your RV a roof coating that requires constant maintenance. You want something that ensures periodic maintenance only. Luckily, the Dicor EPDM rubber roof coating is so durable and high-quality that you can forget about it for months right after applying it.
This flat roof coating is also elastic. It can move with the EPDM rubber roofing easily. Also, the coating stretches and contracts along with the roof due to thermal expansion. Such a feature is vital so the rubber coating will not tear or crack, which will cause water to seep into and damage the roof.
Once dried and cured, the Dicor rubber roof coating will start to protect the roof against the damaging rays of the sun. This liquid rubber roof product is UV-resistant, meaning the sun will not dry it up and cause cracks. The UV rays are also the reasons for the heat, and this product can reflect those rays, thus keeping the inside of your RV relatively cool.
I am also glad that this product is so economical. The EPDM rubber coating goes on smoothly, so much that it can fully cover the roof of a fifth wheel using just a gallon of it.
- A low-maintenance roof coating
- Excellent elasticity even after the passage of many years
- UV-stable, proving its ability to block most of the heat-producing UV rays
- Goes on relatively easy and evenly on different types of RV roof
- Only requires the application of two coats
- Can get messy, requiring more preparation before each use
2. Heng’s 1-gallon Rubber Roof Coating
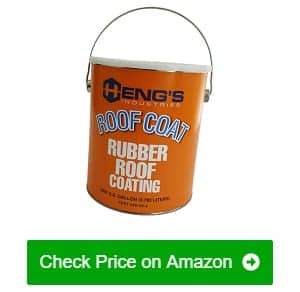
Heng’s rubber roof coating has always been one of my go-to RV roof replacement products. Hence, I used their EPDM rubber coating on my rather old RV. Fortunately, it works like a charm.
I like how efficient it is at reflecting the UV sun rays. I also noticed it because it was quite cool inside the trailer even without the A/C on.
One of the reasons why Heng’s rubber roof coating is so popular among RV owners is that it is highly elastic. Even after many months, the coating remains flexible. With that, I do not doubt its ability to last for many years.
Heng’s RV rubber roof coating is ideal for people without any prior experience in restoring RV roofs as there is no requirement for extensive preparation work on the surface before application. In my case, I did not even need to strip off the existing roof coating on my trailer. I just repaired the larger leaks and damages and then painted the coating over them.
This rubber roof coating alone is also thick enough to seal up minor tears, holes, and seams on the RV roof. You can still go over the seams with another coat of roof sealant . Although it is not that necessary, it is still better to be on the safe side.
Best of all, this product is made non-toxic and non-polluting, posing no risk to our health and the surroundings.
- Highly UV-resistant roof coating
- Elastic coating to move along with the roof without cracking
- Requires minimal preparation, excellent adhere on top of old roof coatings
- Seals tears, holes, and seams on the roof immediately
- Made of non-polluting and non-toxic formulation
- Takes quite a while before it dries and cures completely
3. HENRY HE587372 Roof Coating
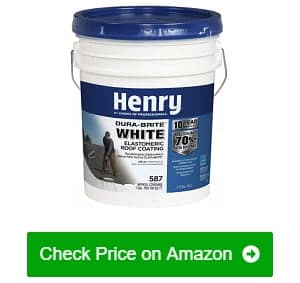
In my opinion, the best feature of the Henry roof coating is its ability to lower the temperature of the roof significantly. It can easily block almost all of the sun’s UV rays, which also happens to be the spectrum that carries the heat.
Even though this product is almost as thick as oatmeal, it goes onto the surface smoothly and spreads out evenly. I used a paint roller on my RV roof, and it took me just an hour or so to finish the first coat.
Furthermore, this incredibly thick coating makes a watertight seal that envelops your entire RV roof. Not even a drop of water will get through this coating. But it will still let water vapor to vent out, so it will not cause the paint to blister and break. It also prevents moisture spots considered as breeding grounds for mildew and algae.
Another thing I like about this product is that it reflects the majority of the sun’s heat. According to the manufacturer, the Henry roof coating can repel up to 91% of the sun’s heat and UV rays. It translates to lots of energy savings because your A/C system will not be running quite as hard as before.
- Highly elastic formula withstanding crack and tear
- Easy to use and does not need a primer coat
- Provides a watertight seal while allowing water vapor to vent out
- Can block almost 91% of the sun’s heat
- Prevents moisture spots – breeding grounds for mildew and algae
- Pretty thick in consistency, so you need to apply the first layer thinly
4. L R Store Liquid Rubber RV Roof Coating
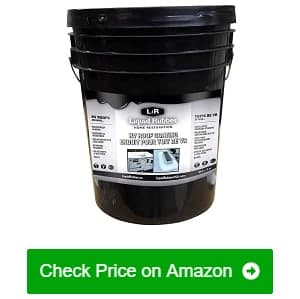
I always like how L R coating is safe to use indoors. If you seek such a coating product, the brand’s Liquid Rubber RV Roof Coating is an ideal pick.
This product is water-based, so it does not smell noxious. It means that it is usable even in enclosed spaces. Notably, you have peace of mind using this environmentally-friendly coating for your RVs. As the manufacturer adds to harmful solvents to this product, it is utterly safe.
Once this roof coating properly dries and cures, it turns into a highly flexible, tear-resistant, and puncture-resistant membrane. Not only can this coating flex and stretch to keep up with the movement of the RV and the EPDM rubber roof, but it can also withstand quite a lot of physical abuse like falling branches and other debris.
I am also glad that this product is easy to use. I used to use two-part coatings that are quite messy. This product, on the other hand, is usable straight from the bucket.
It truly is a liquid rubber roof coating, like a thick rubber membrane that covers the entirety of your RV roof. This canopy cover prevents water from seeping through and contacting the metal underneath. Hence it prevents the formation of rust and the possible growth of mildew.
- Water-based, contain no VOCs – safe for pets and plants
- Highly flexible, preventing cracks and tear
- Easy to apply – Brush it on the surface directly
- Watertight and reflects sunlight
- Takes a rather long time to cure properly
5. Dicor RPFRC1 Fiberglass RV Roof Coating
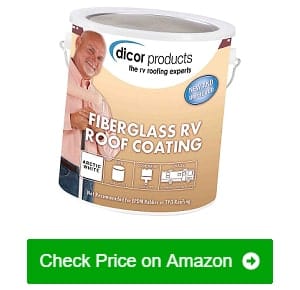
The Dicor fiberglass RV roof coating excels at blocking the heat of the sun. When let to dry and cure properly, this coating turns bright white and solar-reflective, cutting down the amount of heat in the RV considerably. It is a flexible product, preventing the coating from cracking or splitting due to heat.
Also, this product has impressive coverage. A gallon of this fiberglass RV roof coating is enough to cover 350 square feet with a single coat. With that said, I was able to give my 20-foot RV three coats using just two gallons of this stuff.
Another benefit of this fiberglass RV roof coating is that it is easy to clean . Unlike rubber RV roofs that you have to scrub hard, this coating will only need a good hosing down, so you can get rid of dirt and dust. Furthermore, it is resistant to mold, algae, and mildew.
This roof coating only needs a couple of hours until it is scorched to the touch so that you can apply the next coating. You can even finish painting your RV roof in just one afternoon. Also, this product cures entirely in just a day. Hence, you can go on your trip as soon as possible.
- Dries into a super white and solar-reflective finish
- Provides a complete paint coverage at 350 square feet per coat per gallon
- Effectively resists the growth of mold, algae, and mildew
- Promotes ease in cleaning without scrubbing
- Dries in just a couple of hours and cures in just a day
- Flexible, preventing it from cracking or splitting due to heat
- Still requires surface preparation using fiberglass cleaning
6. KST COATING KS0063600-16 Roof Coating
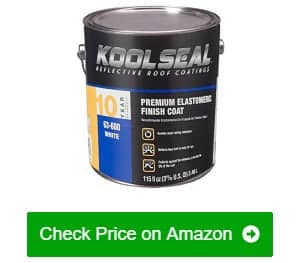
The thing Kool Seal roof coating assures that you do not even need to think about your RV roof for at least a year after its use.
Once properly cured, the elastomeric roof coatings layer provided by Kool Seal roof coating can bend, stretch, and contract every which way without cracking or tearing. It is ideal for RV roofs as not only does it deal with engine and road vibrations, but can also handle the thermal expansion of the roof quite well.
This liquid roof coating is also highly reflective and blocks most of the heat coming from the sun. With other roof coatings, you can feel the heat through the soles of your feet when you walk on them during a hot day. However, you will barely feel anything on a roof treated with this product.
Because the Kool Seal roof coating dries to a bright, solar-reflective finish, it takes less time and effort to clean your RV roof. Additionally, tree sap and road tar will not be able to stick onto this surface. The same is true for regular dirt and dust. If you feel like cleaning your RV roof, you can turn your garden hose on it.
- Highly elastic and super strong
- Effectively reflects heat and is UV-resistant
- Needs little surface preparation, not even a primer
- Easy to clean – with just soap and water
- Requires more than three coats for a long-lasting effect
7. Ziollo RV Flex Repair RV Roof Sealant

The selling point of the Ziollo RV Flex Repair is its resilient and near-indestructible coating. You might never need to reapply a new coating ever again if you applied this one correctly.
Here is another neat thing about this RV roof repair – it requires surface preparation no more than a thorough cleaning. You do not even need to sand the surface unless it is fiberglass. It is a bit difficult to make the coating spread out compared to other products, but not by much.
Once this coating properly dries and cures, it will create a near-indestructible, yet flexible, waterproof membrane. It will not allow even a drop of rainwater to go through it and will repel nearly all the heat from the sun. The surface remains cool to the touch even when you leave it under the midday sun.
It also does not matter what roof material your RV has because this silicone coating will have no problem bonding to it. If you follow the instructions correctly and clean the surface properly, the Ziollo Flex will cling to it without any problem. However, keep in mind that this is silicone, so your additional effort will be more than worth it.
More importantly, you can rest assured that this one is a safe product to use. Its formula contains no solvent or VOC, meaning it is a non-hazardous coating.
- Non-toxic and contains no VOCs
- Can flex and stretch along with the RV roof once cured
- Works on most types of RV roof materials
- Waterproof and heat resistant coating for RV roof
- A bit tricky to spread
8. Dicor Corporation RP-MRC-1 Coating
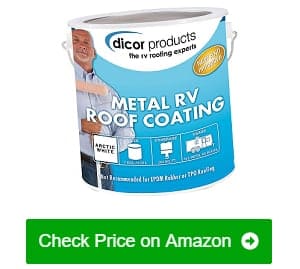
If you have a metal roof on your RV, then you know how hot it can get inside during the summer. The RV roof will also most likely get too noisy when it rains.
This best RV metal roof coating can help deal with such issues by providing a solar-reflective surface that significantly reduces the amount of heat that goes through the roof. It also provides a rubberized finish that offers a bit of soundproofing.
I also appreciate the elastic coating once it properly cures. Not only is the coating flexible enough that it can withstand the vibrations and thermal expansion of the roof, but it will not also tear nor puncture easily when tree branches fall on it.
If you tried to repaint the roof of your metal finish RV, then you know how hard it is to make most liquid roof products stick onto the smooth surface. It will never become a problem if you use the Dicor roof coating. You just need to follow the instructions and properly prepare the surface for painting, and it will go on without a hitch.
Speaking of painting, I always like the wide coverage of Dicor coating products in general. In this instance, I just needed a gallon of the product per coating on my 20-foot trailer, making it one of the most economical brands that I have ever had the pleasure of using.
- Can bond onto metal or fiberglass roof surfaces
- Provides a solar-reflective surface to reduce heat
- Offers a rubberized finish for soundproofing.
- Wide coverage – A gallon can cover 200 square feet
- Can stick well after careful surface preparation
- Not excel at stopping rust from forming
9. Rubberseal Liquid Rubber Protective Coating
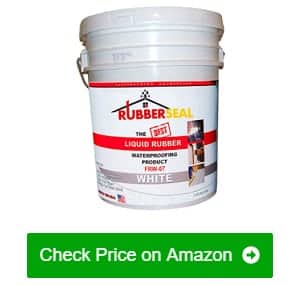
What truly blew me away about this elastomeric roof coating is how extremely efficient it is at reflecting sunlight and the damaging UV rays that come with it.
In truth, this coating prevents most of the sun’s heat from getting into the RV. Also, whatever amount of heat the roof gets, the coating lets it dissipate quickly.
Because it no longer gets too hot inside the RV, I find myself not turning up the air conditioner as often as before. It helps lower the cost of operating my RV significantly.
Furthermore, the finish comes on thick and is very elastic. So, the liquid RV roof coating will not have any trouble bending and flexing along with the RV roof. It means that the coating will not tear, puncture, or rip apart easily, thus keeping your roof in top condition.
Another thing that I like about this product is how thick its consistency is, allowing me to use it as an elastomeric seal. Once painted over seams and little holes and tears on the roof, it will cover all of them effectively. You may still need to go over some areas with proper sealants, but overall, it handles everything fine.
- Extremely high solar reflectivity
- Allows heat to dissipate quickly
- Keeps the inside of the RV relatively cool even on hot days
- Highly elastic coating, which can stretch and bend with the roof
- Thick consistency, offering help in plugging up holes and seams on the roof
- Takes some sunny days to cure completely
10. Liquid Roof Liquid EPDM Coatings
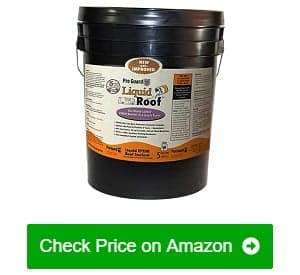
This product is not just a simple coating. It is an actual EPDM rubber roof coating that you can pour on your RV. If you are thinking of not just replenishing your RV roof, but replacing it entirely with a brand new one, then this product is for you.
Instead of fixing your old rubber roofs, get rid of it entirely and pour on a new one. Once it dries and cures, it turns into a hard, rubberized shell that is extremely flexible and can move along with the roof.
More importantly, this coating can twist, flex, and even stretch and contract. Unlike other roofing materials, this coating will not freeze and crack even in sub-zero weather.
This liquid roof RV coating is also virtually impervious to water. Although this RV rubber roofs coating might look porous when dried, it is still a watertight membrane that spans the entire roof. You no longer need to worry about water leaking into your recreational vehicle and having to deal with a severe mildew and algae infestation.
The thing that I like the most about this RV roof coatings is its efficiency at reflecting heat. It can block up to 90% of the sun’s heat. You can touch the roof without burning your hand, even when it is scorching hot outside.
- Goes on thick as it plugs up leaks and seams effectively
- Elastic while remaining strong and virtually indestructible
- Requires one coat to protect your RV roof properly
- UV-resistant, preventing the heat from penetrating
- Self-levels, preventing water from pooling on the roof
- Requires extensive surface preparation
11. Henry HE887HS073 Tropicool Roof Coat
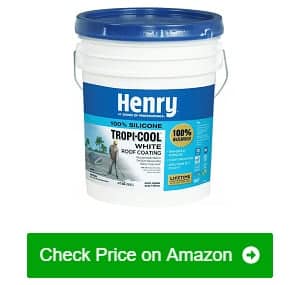
If you are looking for a roof coating that might outlast your recreational vehicle, you will need this one offered by Henry.
This product is a silicone-based coating that protects against rain and leaks and is highly solar-reflective. It means most of the sun’s rays will bounce off the surface, including the ultraviolet rays. Notably, it retains its reflective properties even after many years.
Another neat feature of the Tropicool coating is that it can already resist rain after just fifteen minutes after application. True to its name, the Tropicool roof coating is most suitable for use in places with tropical climates. Aside from resisting high heat and humidity, it can also protect against torrential rain.
I do not have that much time for RV repairs and maintenance. That is why I appreciate this product’s one-coating for optimal efficacy. I do not have to wait for hours to apply the second and sometimes third coating.
Another nice thing about this product is that it can bond onto any roofing material. Regardless of whether your recreational vehicle has an EPDM, fiberglass, or painted metal roof, the Tropicool roof coating will permanently bond onto it without any problem.
- Maintains its maximum solar reflectivity for years
- Can withstand rain after just 15 minutes from application
- Needs only one coating
- Aggressively bonds onto any surface
- Long-lasting – for decades even without too much RV roof maintenance
- Thick consistency – It has to be warm outside for it to flow freely
12. Rexoseal RV Liquid Rubber Roofing System
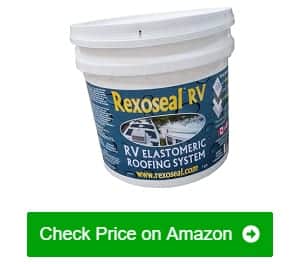
Although the Rexoseal rubber roof coating is sold at a higher price compared to other RV roof coatings, the kicker is that it contains more than 50% more rubber compounds.
In truth, the additional rubber content makes this coating a lot more durable and longer-lasting compared to the slightly cheaper brands.
This roof coating is also compatible with almost all kinds of RV roof coating available. Other specialized products need extensive preparation to bond with the roof material. Meanwhile, this Rexoseal liquid rubber roof coating will bond with all roofs, even without too much preparation other than cleaning the surface thoroughly.
The instructions on the packaging are already easy to follow. But to make things easier for you, this liquid roof coating also comes with instructional videos. Even if you do not have any prior experience reapplying roof coatings, you will not have any difficulty using this product.
The thing I like the most about it is that it is water-based and does not release any noxious fumes in the air. This means you can paint your RV in an enclosed area without any risk to your health. However, you will still need to wear breathing protection to be on the safe side. And open the garage door or the windows for proper ventilation if needed,
- Has up to 60% more rubber content compared to other brands
- Compatible with rubber roofs, wood, fiberglass, and painted metal
- Comes with an easy-to-follow instructional video
- Boasts of a water-based formula and does not give off noxious fumes
- Long-lasting and low-maintenance
- Needs at least three coatings to be effective
Best RV Roof Coatings Buying Guide

Shopping for an RV roof coating requires you to consider a few factors. They ensure that you are getting a product that will perform as expected. Thorough consideration can also prevent you from wasting your time and money on a product with subpar quality.
Your RV roof type – You have to know the actual composition of your RV roof. If you already know the kind of material your roof has, you can significantly narrow down the choices. For instance, if you have a rubber or EPDM rubber roof, you will only need to get an EPDM RV roof coating and ignore the ones for metal and fiberglass.
Companies will clearly state on the packaging what kind of roofing material a particular coating product is compatible with. So, you just need to read the labels carefully.
However, the best RV roof material is compatible with multiple types of roofing materials. Some can even bond on all of them. These products take less effort to use. Hence, they are good options for recreational vehicle owners who do not have prior experience applying roof coatings.
Price – Your budget will also help you determine what kind of coating you choose. If you have a sizable budget, you can most likely afford the top-of-the-line silicone coatings. If not, you can rest assured that there are still plenty of reasonably priced options of decent quality.
Ease of use – You will likely be doing a DIY project out of the reapplication of RV roof coating on your RV. So, do yourself a favor and buy something easy to use.
One way to figure out if something is easy to use is simply to read the instructions on the packaging. If you can easily understand the directions or you are skilled in using the required tools, you can be sure to have a hassle-free time using it.
Another way to gauge the ease of application of a particular coating product is to go online and search for credible customer RV roof coating reviews. You can find a lot of them on online retail sites like Amazon. If a particular product has way too many scores that are average to low, it is probably best to look for something else.
Cure time – It is not enough that you just let the coating dry completely. For it to work as intended, you must give it time to cure properly. Drying is just letting the solvents in the coating evaporate while curing entails having the coating undergo chemical changes.
You should read the label of the RV coating properly to get information on how long you will need the stuff to cure. It could be anywhere from a couple of days to a week or so. You must not use your RV until you give enough time for the coating to cure, or else you might need to reapply a new coat.
If you are planning to go on an RV trip the following week, make sure to get a product that can cure after just a couple of days as compared to one that requires weeks to cure properly.
Durability – Durability describes the ability of the product (properly dried and cured) to withstand stresses, both weather-resistance and from slight blunt forces. If you use your RV for most parts of the year, you are subjecting it to a slew of different stresses, like the extreme heat and cold, acid rain, torrential rains, hail, sandstorms, and other natural phenomena that will batter the roof.
You need a snow roof coating for RV that can protect the roof from all kinds of weather if you want your RV to last for many more years to come, as it should.
Longevity – Regardless of how much punishment your RV roof receives from Mother Nature, the liquid roof coating should still have a lifespan between 10 to 20 years. Anything shorter than that should not be acceptable.
Many liquid rubber roof brands claim that their product can outlast the RV you apply them on. It can still produce a problem – one of which is that there is no way for you to know the actual longevity of a product unless you see it yourself.
However, you can base your decision on other’s experiences with the product. Go to any online retailer that you can think of and check out the customer reviews section. You will most likely find a lot of unbiased opinions from people who have tried the product, and just base your decision on what most of them have to say.
Packaging size – Having the RV roof coating come in larger packaging sizes makes sense because you will be getting more product for the price. For instance, if you have a mid-sized RV, it will be more cost-effective to buy one large container of roof coating rather than multiple smaller containers. The packaging itself contributes to the final retail price.
Check out the labels of the products since they usually have some indications on how many square feet of roof surface the contents can effectively coat. By reading the label, you can also figure out if the content of the product is enough for your RV.
Water-resistance – Of course, all roof coatings should be waterproof. The issue here is that some are better than the others, sometimes to the extent that they are barely waterproof at all. Your task is to find a product that has the best waterproofing capabilities. To do that, you should once again look to elastomeric roof coating reviews for any indications that the product you have your eye on is not worth your money.
UV-resistance – You are continually exposing the roof of your RV to the sun, which means it is under a steady barrage of harmful UV rays. It is an invisible spectrum of light that does a lot of damage on surfaces exposed to it, like drying and cracking.
You should get a UV-resistant roof coating, meaning one that can resist and even repel the damaging UV rays of the sun. It can assure you that the product can last for many years without fading, drying, peeling, or cracking.
Taking most, if not all these factors into consideration will most likely ensure that you will get the best RV roof coating that you can buy. It also means that you will be extending the usable lifespan of your vehicle for many more years to come.
How Many Types of Roof Coatings for RV Are There?
There are several RV roof coatings for you to choose from – with each one offering different levels of protection and cost. Here are some of them:
Urethane coating – This type is one of the most durable RV roof coating options that you can get, which is why it is quite popular with RV owners. Urethane coating is like a hard-shell coating that can protect the roof from falling branches and other small debris that might hit it. It also does an excellent job of protecting against the elements.
However, one thing that you need to know about urethane liquid roof coatings is that it has a rather high application cost. It also means you will not be able to use your RV for at least a week because urethane coatings need at least two coats to be effective.
Acrylic Coating – If your budget cannot afford complete reapplication of urethane coating, but you want to keep your RV roof in good condition, you can use a rubber roof acrylic coating in the meantime.
Getting a rubber roof acrylic coating is a good idea if you need a quick stop-gap solution for protecting your RV. Other than not lasting quite as long compared to the other options, a rubber roof acrylic coating is also UV-resistant. It can also plug up any leaks, if there are any, on your roof.
Silicone Coating – Silicone roof coating is the costliest option out there, and it is also the most durable of all. It scored well on all accounts. It works well against weather damage and impact from falling debris. Also, it prevents water from pooling on the roof.
The silicone coating also remains elastic, allowing it to remain intact for many years to come. Aside from the high cost of application and the material itself, a potential downside of silicone RV roof coating is that it gets dirty quickly. However, it is just a minor inconvenience as you can easily get rid of the dirt by rinsing it off using a hose.
How Do RV Roof Coatings Work?
There are many ways for RV roof coatings to work when it comes to protecting your entire RV and not just the roof. Some ways where this product can help are:
For structural protection – The main purpose of an RV roof coating is to seal any cracks or holes on the roof that may let water inside the vehicle and cause all sorts of damage. A layer of RV roof caulking can also prevent the roof from warping by insulating it against the heat of the sun.
For temperature regulation – Speaking of the heat of the sun, the liquid roof coating can prevent it from getting inside the RV. It happens because the coating is UV-resistant, which also happens to be the reason for the heat coming from sunlight.
To lower operating costs – Because the coating prevents the outside heat from getting inside the RV, it helps the A/C run more efficiently, thus saving you more money in the long run. Moreover, having a proper roof coating will prevent water from leaking into your RV and causing all sorts of expensive damage.
Who Makes the Best Roof Coating for RV?
There are many brands of RV roof coating that you can choose from, but not all of them can provide your vehicle with the kinds of protection that you expect. However, in my years of maintaining RVs, I discovered that among the most trustworthy brands are Dicor, Heng’s, HENRY, L R Store, KST COATING, Ziollo, Rubberseal, Liquid Roof, and Rexoseal.
If you happen to stumble upon any of the mentioned brand names while you are in Home Depot, Lowe’s, or when shopping online for RV roof coatings, I highly suggest that you check them out. These brands have not failed me yet.
How to Apply Roof Coating for RV?
Before you can start applying the roof coating on your RV, you must first prepare the surface. You first need to inspect the roof thoroughly for any damage and take note of any that you find. Also, you have to remove any silicone sealants, even the ones that are still in good condition. It is vital because nothing sticks onto silicone.
You also need to remove any loose, non-silicone caulking or sealants. On the other hand, if the existing caulking is still in good condition, you can leave them be. Once you finish picking off most of the loose caulking and sealants, you can proceed to wash the roof thoroughly. You can use a deck brush and laundry detergent so you can remove all traces of oil and grease that are on the roof.
With that, you have an assurance that the roof coating will go on evenly. Do not use dishwashing liquids or anything that contains solvents. You can also use a pressure washer with a mild detergent if you have one. It can make the cleaning process much faster.
To prevent any of the coatings from dripping down the sides of the RV, you can cover the sides using masking tape and plastic sheets. You do not need to cover the entire sides of the vehicle. Just a short apron will do.
Now that the roof is clean go over it again and look for anything that needs repairs. For instance, if there is a part of the roof where a lot of water pools up, you will need to straighten out the surface as much as you can then use filler to level it out. It is also important to patch up any holes, tears, or open seams using RV roof seam sealant. After drying the sealants, give the roof another good rinsing and allow it to dry.
Once the roof is dry, and all the sealants have dried and cured, you can proceed to apply the roof coating. Remove the appliance covers, vent covers, and anything else that is protruding out of the roof. Then working in sections, use a roller brush to apply the coating. It is best that you work from the front of the RV and gradually go towards the back, terminating where you have access to the ladder.
Wait until the coating is dry and no longer tacky, which can be anywhere between four to twenty-four hours, before applying the second coating. When brushing on the new sealant, make sure that you push the material into any seams that you can spot.
After applying the RV roof sealant and letting it dry and cure, you can head back onto the roof for another round of inspections. Look for any unevenly painted areas and go back and reseal the seams and other potential causes of leaks that you can find.
How Often Should You Coat Your RV Roof?
Most brands of roof coatings have an average service lifespan of ten years, so it is a good idea to reapply a new roof coating before the old one starts to show its age.
What is the Best RV Rubber Roof Treatment?
It is hard to pinpoint the best roof treatment as it will be mostly subjective. The condition of one person’s roof may differ from yours so your opinion on what is best will be different as well.
However, most RV owners agree that silicone-based treatments are the best among the different kinds of roof coatings. So, if you have the option and the budget to choose, it is better if you use a silicone-based product.
Care and Maintenance
To ensure that your RV roof coating will last for as long as its manufacturer promises it will, you will need to take good care of it. For instance, if you use a silicone roof coating, it would be best to give it a good cleaning every week or two to prevent dirt and dust buildup.
You can also help keep the coating in top condition by limiting sun exposure as much as you can. If you do not have a garage big enough for your RV, consider investing in a proper RV cover, preferably one that can withstand snow and extreme summer heat.
If you have a bit of the coating left, you can keep it for a couple of months in storage. Make sure that the rim and lid are clean, and that you put the lid back on tightly to prevent the contents from drying too fast.
Also, stow away the leftover coating somewhere dark and dry. It should also be away from direct sunlight. You can use the leftover whenever you need to make roof repairs, so you better save as much of the leftover as you can.
Other RV Roof Coatings We Reviewed
KST COATING KS0063300-20 White Roof Coat
The KST Coating can offer elegant-looking coatings and a smooth finish.
Key Features:
- Brings a beautiful white roofing coat
- Resistant to extreme cold and heat
- Can potentially save up to 35% in energy costs
Flex Seal Liquid Rubber (32-oz) in a Can
Flex Seal liquid rubber in a can is not one of the most popular RV roof sealants just because of the infomercials. It gained popularity because of its overall quality and functionality.
- Easy to apply – You can pour it on the surface or brush it on, whichever is easier for you.
- Instantly creates a watertight seal and stop leaks
- Prevents the formation of corrosion while being resistant to mold and mildew
Jetcoat Cool King Reflective Roof Coating
The best thing about this product is that it helps keep the interior of the RV cool. The highly reflective finish prevents the heat and UV rays from penetrating through the roof.
- Wide coverage – A gallon can cover up to 70 square feet per coat.
- Needs only two coats for efficient use
- Dries in just 2-3 hours, completely cured and ready for another coat after just 6-8 hours
RC5000RV Liquid RV roof Coating
This roof coating needs a 20-mil thick layer to provide your roof with more than enough protection against the elements and other things that can potentially cause damage.
- Leaves a thin yet effective protective coating
- A gallon is enough to cover 100 square feet
- Bonds onto different roofing materials even without using a primer
Premier Pro Products All-N-1 Elastomeric Roof Coating
As the name suggests, this product is an all-in-one, high-performance, protective coating that is compatible with all kinds of RV roofing materials.
- Compatible with any RV roofing
- UV-resistant and prevents heat from getting inside the vehicle
- Easy to apply, save time and effort
- Go well on most roofing materials
KST COATINGS 1-gallon KST063300-16 Elastomeric Roof Coating
This elastomeric roof coating does not just prevent water from seeping into the RV but can also reflect almost all the rays, including the UV rays responsible for the heat.
- UV-resistant, making it capable of blocking up to 90% of the UV rays
- Highly elastic as it bends, expands, and contracts with the roof of the RV
- Effective against all weather conditions – Creates a completely watertight seal almost immediately upon application
Ames Maximum Stretch
This elastomeric acrylic RV roof coating is the best choice when you want to restore the roof of your old somewhat yet still reliable RV.
- Easy to apply and compatible with any roof material
- Can reflect up to 98% of the UV sun rays
- Elastic, making it easily resist cracking due to thermal expansion and RV roof rumble
Tuff-Gard HEAT-BLOCK – 5-gallon White Reflective Coating
Tuff-Gard specifically made this product to keep the UV rays from penetrating your roof. It works in protecting your RV and lowering A/C operating costs considerably.
- Eco-friendly as it does not contain any VOCs and solvents
- Can purportedly stretch to over 400% its original length when properly cured
- Useful in other roof surfaces apart from the ones in the RV
The roof of your RV is your first line of defense against the weather, so you need to take good care of it. The best way to do it is to apply a good protective coating on it. The RV roof coating provides a watertight seal. It should also protect against the UV rays of the sun and other possible damages that extreme weather may cause.
Since you have reached the end of this article, you have already gathered plenty of useful information to help you identify the best RV roof coating. With that, you can make an informed decision and not worry about wasting your money and time on the wrong product.
Hi, I am Tom Hank, an RV-er since 2014. Back then, I started without much help. As you can imagine, the struggles are endless. But now, you do not have to begin your adventures knowing next to nothing about RV lives.
- Account Settings
How to Avoid Snow Damage to Your RV
I was toying with the idea of doing this article, but started thinking that folks who live in the southern states wouldn’t see much value in it. Then I watched the weather and saw that Texas, Alabama and other traditionally warm states were dealing with loads of uncharacteristic snowfall. When the white stuff starts to pile up, you need to be careful how much of it lands on the RV, regardless of where you live.
Snow is a fact of life for many people. It falls and gathers, and looks pretty, but is can lead to problems. We all go to great lengths to properly store our RVs during the winter months , but issues can still come up.
If you’ve shrink wrapped your RV, hopefully the place that did it for you, or if you did it yourself, placed some kind of framing underneath to help snow fall off, much like a peaked roof on a house. I know it’s kind of late now, but if you’re planning for next year, make sure you do this. Framing is not too hard to make. Just take some plywood and 2×4’s and make some curved braces that go on your roof before you place the wrap. This will help prevent snow damage from the snow building up.
So, what’s the deal?

Snow is pretty, isn’t it? The problem occurs when it piles up and then saturates. By this, I mean that on its own, snow is light and fluffy. But it never stays that way; it piles up and compresses from either the shear mass of the snow piling up or the melt and refreeze action that often occurs with snow during the winter. The sun warms it up for a bit and it starts to melt, then it refreezes over the night. On average, snow that has had the chance to sit in one area for a short length of time has a weight of 20 pounds per cubic foot! That can be much lower when it’s light and fluffy, or higher still – up to 30 pounds.
That weight adds up in a hurry. Imagine your 25-foot travel trailer with 25-feet by 7-feet of roof space. For every square foot, now add a foot of snow, not an unrealistic amount in snowy areas. You can easily end up with over 3,500 pounds of snow on the roof of your RV. That kind of weight can do severe damage to your roof, especially to an older, or leaking roof. This is why it’s such a good idea to quickly repair leaking roofs .
Taking care of it

The easy fix to avoiding snow damage to your RV is to keep an eye on the weather and periodically brush the snow off your RV. The best thing to use is a snow rake much like you’d use for your home.
You can always try to set up a shelter, like something from ShelterLogic . I know these things work, as I have one myself. Just be sure to have it in the ground and settled in before winter gets there, or the winds pick up too much. I may have had to rescue one of these from the neighbor’s tree after a wind storm. To its credit, it was completely salvageable and I’m still using it.

I wouldn’t recommend using salt pellets like some use for melting ice on their homes. If it has a high salt content, it can cause added wear and damage to the aluminum of the roof. I’d also avoid electric heating tape unless you find some that is made specifically for RVs. I have yet to come across such a thing.
What tricks do you have for keeping snow from piling up on your RV?
Popular Article

How and Where to Go RVing in Ontario
You may also be interested in.

How to Find the Best RV for the Money

How To Tow Your Fifth Wheel

Go On One Last-Minute RV Camping Trip

10 Reasons to Never Own an RV

Five Maintenance Tips for Your RV

Five Common Mistakes to Avoid When Storing Your RV for the Winter

RV Tire Buyer’s Guide

RVs and Boat Launches Don’t Mix

Should You Buy a Used RV?

Six Secrets to Hosting the Ultimate RV Tailgate Party

How To Maintain Your RV Furnace

Five Tips for Going to an RV Show

Convincing Your Kids to Go On an RV Trip

East Coast RV Weekend Getaways

RV Flooring Buyer’s Guide

Staying Fit in Your RV

Five Essential RV Accessories

16 RV Essentials for Setting Up Your New Trailer or Motorhome
How Much Snow Can RV Roof Hold & Can It Collapse It?
This post contains affiliate links (I get a commission at no extra cost to you for purchases made through links in this post).
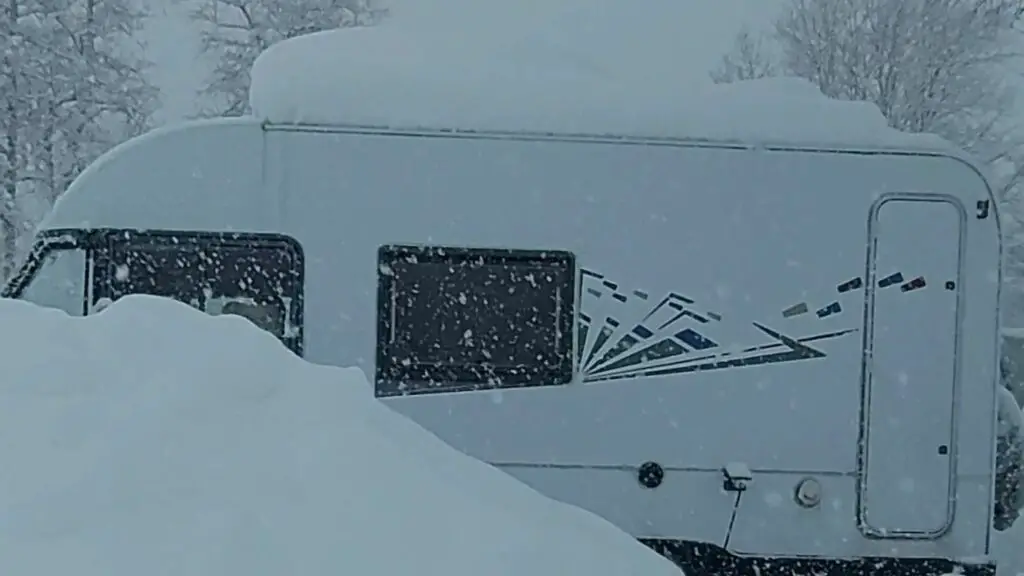
Thick snow is a common sight in many RVs during the winter. But is it safe? How much snow can an RV roof realistically handle before it gives up?
An RV roof can hold up to 2 ft (60 cm or 24 inches) of snow weighing 250 to 300 lbs (113-136 kg); remember that wet snow weighs more. These amounts can vary depending on the roof’s material and condition. If the snow gets too heavy, there is a risk of the RV roof collapsing.
Read on and find out how much snow RV roofs can hold and if the roof can collapse because of having too much snow. More importantly, I’ll share some of the best things to do to protect the roof of your motorhome.
Snow on RV Roof: How Much Is Too Much?
I have seen RVs stand a whole Norweigan winter with waist-deep snow on the roof once they finally shoveled it. I mean, that can’t be good! Most people shovel their roofs after every major snowfall. The benefit of doing it regularly is that it makes it easier every time.
That said, shoveling snow isn’t the most pleasant thing to do. The temptation to wait until it absolutely must be done is real for many RVers. If that sounds familiar, you must know how much snow your RV roof can hold before shoveling becomes overdue.
So, how much snow is too much for an RV roof?
There’s no definite answer to this question. The amount of snow an RV’s roof can hold depends on the following:
- The RV model.
- The materials the roof is made of.
- The age and condition of the RV. (Water damage affects this seriously)
- Other items on the roof.
Most RV roofs can support up to 2 feet (24 inches or 60cm) of snow or 250 to 300 pounds (113-136 kg).
If you’re unsure about your RV’s weight capacity, I recommend checking the user manual. If you can’t find this information in the manual, check the RV’s ladder; you’ll most likely find the weight rating somewhere on it.
Factors Affecting the Amount of Snow RV Roofs Can Hold
I briefly mentioned that the amount of snow an RV roof can hold depends on many factors. However, I didn’t explain how each factor affects an RV’s roof weight capacity, and that’s what this section is all about.
The Roof Material
RV roofs are made of different materials, each with their respective weight capacities. Here are the most common roof materials and the average weight they can support. Of course, it will vary a great deal how the roof is supported and the structure under it but as a rule of thumb;
- Rubber: It’s the most common among RV roof materials. It’s available in two main types (EPDM and TPO), and both can support about 250 pounds (113kg).
- Fiberglass: This material is known for being harder than its more flexible counterparts, such as rubber. Hence, it can support more weight – as much as 300 pounds (136kg).
- Aluminum : You’d expect aluminum roofs to hold much weight, given they’re made of metal. However, that’s not necessarily the case. In most cases, they will hold a maximum of only 250 pounds.
Fiberglass is a great option if you have to choose between these materials. It’s rigid enough to withstand significant snow weight. Still, the amount of snow it can hold will depend on the overall construction quality and not just the choice of material.
Learn what type of roof material you have in this complete guide to it, where I also talk about the pros and cons of each and what products you can use on the different roof types for maintenance.
Age and Condition
Like the other parts of an RV, the roof deteriorates over time. The older the RV gets, the more the roof degrades. This is especially the case if you ignore roof care and maintenance.
Using the wrong cleaning products can also weaken your RVs roof. For instance, some products have petroleum distillates . These cleaning products aren’t just a health hazard; they can also cause your roof to swell and deteriorate, especially if it’s made of rubber.
Other Things on the Roof
The weight of snow isn’t the only thing your roof needs to hold. RV roofs hold other essentials like a satellite dish or an A/C unit. Some people also install racks and use the roof as extra storage.
The more items the roof holds, the less snow it can accommodate.
The manufacturer of your motorhome also has a crucial role to play. Some manufacturers are known for using high-quality materials, while others leave much to be desired. That’s why you must research online how some companies make their roofs before buying an RV.
Here are a few examples of brands with the best RV roofs:
- Forest River.
- Happier Camper.
- Sunseeker.
- Venture RV.
Some of the popular brands known for having inferior roofs include:
The Danger of Too Much Snow on Your RV Roof
Heavy snow loads can collapse an RV roof. It may not happen instantly, but the roof can gradually crack as the ice gets thicker and heavier. If you let the snow keep piling up, the crack will get bigger, and the roof will eventually collapse.
Your motorhome isn’t safe even if the roof does not collapse because of thick snow. Snow might end up melting and re-freezing, causing the roof to crack. This begins with water from the melting snow creeping into all the little spaces on the roof. As the water refreezes, it expands inside those spaces, widening them significantly and eventually cracking the roof.
Not only do you need to worry about a collapsing roof when the above is happening but more likely water damage that won’t be easy to notice.
The worst part is that most roof damages because of snow are discreet. It may be too late before you realize the problem. Also, you might have noticed a small stain on the ceiling but only paid attention once the crack was more visible.
If you are convinced that maybe it is time for you to shovel your RV roof, well, then I recommend you to check out this article I have written on how to do so efficiently and safely!
Snow on your RV’s roof can result in an ice dam . While most people experience ice dams in homes, it can also happen to RVs. The snow build-up from the freeze-thaw cycle can result in structural and aesthetic damage.
All About the Weight of Snow
It’s difficult to accurately predict how much snow is on your RV’s roof. In most cases, it’s almost impossible to tell. Most will judge based on the thickness rather than the weight of snow accumulating.
When calculating the weight of snow , one of the most important is to look at what type it is. For example, fresh snow weighs three pounds (1.36 kg) per square foot if it’s light and dry. On the other hand, wet and heavy snow can weigh as much as 21 pounds (9.53 kg) per square foot.
Once snow turns into ice, it becomes heavier. On average, one inch (2.54 cm) of ice weighs five pounds (2.27 kg) per square foot. That means one foot of ice might be as heavy as 57 pounds (26 kg) per square foot.
Take note that there can be regional and national considerations. For instance, snow in some countries can be heavier than the others. Nevertheless, the numbers mentioned above can provide a reasonable general estimate.
Signs That Snow Is Overloading Your RV Roof
Knowing how much snow an RV roof can hold is important, but you must also be familiar with the signs that it’s overloaded. This way, you can act before the situation worsens and save yourself a lot of trouble.
One of the first things to look out for is sound. Creaks, pops, or cracks near the roof are signs that the weight is too much.
Other signs to look out for are warps and water stains on the ceiling. These indicate that there are cracks and water has penetrated the top layer of your RV’s roof.
The formation of ice dams around the roof can also be a clue of an overloaded roof . Ice dams aren’t something you want to ignore because they can add a lot of pressure, potentially causing irreversible roof damage.
Tips for Removing Snow on Your RV Roof
Living in a motorhome in the winter is fun, but removing snow from the roof can be a bit of a hassle. Here are a few things you can do to make the process easier:
Don’t Wait Too Long
One of the most common mistakes people make is to wait too long before they act. This increases the chances of roof damage and makes your job harder. The thicker the snow, the harder it is to remove.
So whenever the weather permits, I recommend you climb on the roof or, even better, on a ladder and get rid of the snow. Make this routine, and you might never have to worry about your RV’s roof caving in from too much snow.
Avoid Using a Shovel
Many people consider a shovel the best tool for removing snow on the roof. But while it can get the job done, a shovel isn’t necessarily the best tool you can use.
The problem with shoveling snow off an RV roof is the risk of applying too much force. This leave can leave dents in the roof and damage roof installations such as satellite dishes and solar panels.
So instead of using a shovel, use an extendable snow brush. It’s safer for your roof and any other installations you might have on it. If you insist on shoveling, do it when the snow is thick and switch to a snow brush or rake as it gets thinner.
Clueless about how to use a snow brush to remove snow on the roof? Watch the short video below and find out how to do it.
How to Prevent Snow Accumulation on Your Roof
There are a couple of things you can do to prevent snow from accumulating on your RV roof:
Find the Right Parking Spot
This seems like a no-brainer, but it’s a trick many people miss . Any structure with a roof will do; the whole point is to prevent snow from falling onto your RV’s roof.
If you can’t access a structure with a roof, look for a spot with windbreaks, such as treelines and large buildings. Some snow might still find its way onto your RV roof, but it won’t accumulate as much as it would with no protection.
Invest in an RV Cover
Adding an RV cover is a great way to protect the roof from potential snow damage and other external elements, such as wind and water.
RV covers come in various sizes, so choose one that fits your RV. As for the material, I recommend sticking to polyester or polypropylene. There are a few other options, but none are as waterproof as polyester or polypropylene.
Add a Slanted Surface
Most RV roofs are flat, which makes it easy for snow to accumulate on the top. One of the practical solutions you can try is adding a slanted surface on the roof and letting gravity do the work. This way, snow will fall on the sides instead of amassing on your RV’s roof.
Inspect Your RV Roof Regularly
While this might not necessarily prevent snow accumulation, it can minimize potential damage. Regular inspection keeps you in the know of cracks and other problems so you can repair them before they escalate into bigger issues. The net effect of this is a stronger roof that offers better protection from the weight of the snow.
Conclusion
To summarize, too much snow is terrible for your RV’s roof. It can collapse your motorhome’s roof and cause other costly problems.
On average, RV roofs can support only 250 to 300 pounds (113-136 kg). The thicker the snow gets, the more problems it can cause.
How I Keep My Motorhome (RV) Warm In Winter! With 9-Tips!
Should RV Batteries Be Removed in Winter? Or Just Charged?
How To Store an RV Outside During Winter!
- The Fun Times Guide to RVing
- Jeffsetter Travel
- National Pesticide Information Center
- RV and Playa
- RVing Know How
- Trail and Summit
Rikard Adamsson
Hello! My name is Rikard Adamsson; I am the creator of Motorhomeking.com. I live full-time in my motorhome, and right now, I am traveling through Europe the right way, without campsites; yes, wild camping and being off the grid works excellent even in a real beauty from 1996. I have done a lot of rebuilding and upgrades. I am happy to share my experiences with everything regarding motorhomes, RVs, or caravans with you here at motorhomeking.com.
Leave a Reply Cancel reply
Your email address will not be published. Required fields are marked *
Save my name and email in this browser for the next time I comment.
Recent Posts
When Is It Time to Replace the Locks on RV Doors?
If you own your caravan for long enough, you’ll discover that parts will break down or fail here and there and need replacing. That has you thinking about the integrity of your front door. You...
Do I Need an Alarm or Security System in My RV?
Over the last two weeks, I’ve introduced you to RV alarm and security systems. Now that you’re properly acquainted, you might be readier to make a purchasing decision. The question becomes, which...
RVing Guide
Real People. Real Experiences. Real Helpful.
Maintenance, Repairs & Add-Ons Outdoor Fun
Winter Snow Load Can Seriously Damage Your RV

This post may contain affiliate links. If you buy thru these links, we may earn a commission at no additional cost to you.

Even though you may be more concerned about keeping warm at home and tossing logs on the fire at this time of year, you should know that all the snow that’s accumulating on your RV can easily do some serious damage .
With economy being a high priority today, many RVs are constructed very lightweight. One of the areas where manufacturers can save some weight is the roof. In fact, a lot of the travel trailers built now are constructed with thin enough material that simply walking on the roof requires laying down some plywood to spread the weight, in order to prevent damaging the sheeting under the rubber membrane.
Imagine how much weight is involved when wet slushy snow is allowed to build up on this same roof about 12″ to 18″ deep. With the levels of precipitation that have been falling this winter, you can see this amount after just a few weeks of snowfall. Something you can hardly afford to overlook.
The Wrath Of Snow
Any amount of snow beyond a few inches is enough to cause serious damage.
As Spring gets closer, the melting and refreezing cycle will let water creep into all kinds of little places. When it freezes and expands, any “slightly leaking” seams will turn into major entry points for water. Soon, the insulation will be saturated and water stains will start appearing on the ceiling.
If the extreme weight of the heavy snow isn’t enough to outright collapse the roof, the water seeping in will quickly do damage amounting to many thousands of dollars.
Unfortunately, the damage often remains hidden, and once the stain on the ceiling dries out you may think you’re good to go. However, water that will remain trapped in the insulation can quickly start the process of dry rot, de-lamination, or worst of all mold. All of that can easily de-value your RV by a very large percentage.
How To Remove Snow From The Roof

Leave your large aluminum snow scoop in the garage. Rubber membrane roofs can tear if the corner of a metal shovel catches while you’re shoveling off the snow. A plastic shovel is much less likely to catch and tear your RV’s rubber roof .
Concentrate on removing the snow, but leave any ice buildup alone. By breaking up ice, you will also disturb the seam sealer that is preventing leaks at any seams or joints. Once the ice is exposed to sunlight, it will melt and run off on its own. Using a hammer to break it up will cause more harm than good.
Melting Snow Leads To Water Damage
Surprisingly, the heavy layer of snow acts like a super insulation. The layers close to the roof can melt and remain slushy, while the top of the snow is still nice and fluffy. This isn’t as pronounced in an unheated RV, but as the sun climbs higher in the sky in early Spring you can still be faced with water under the snow.
If you remove the heavy layer of snow, the ice will quickly disappear.

Of course, there is one easy way to avoid all this snow removal inconvenience.
Before the snow season arrives, fire up the motorhome, or hitch up that trailer and point the front bumper south. Be sure to head out early — plenty of other snowbirds will have the same idea.
The last time I checked Tucson or Tallahassee, they both remained snow free all winter!

I’ve been involved in RVing for over 50 years — including camping, building, repairing, and even selling RVs and motorhomes. I’ve owned, used, and repaired almost every class and style of RV ever made. I do all of my own repair work. My other interests include cooking, living with an aging dog, and dealing with diabetic issues. If you can combine a grease monkey with a computer geek, throw in a touch of information nut and organization freak, combined with a little bit of storyteller… you’ve got a good idea of who I am. To date, I’ve shared my RV knowledge in over 300 articles here at The Fun Times Guide! Many of them have over 25K shares.
Montana Holding Company Helps RVers Bypass The Tax Man
Can freezing temperatures harm the lcd tv in your rv, featured articles.
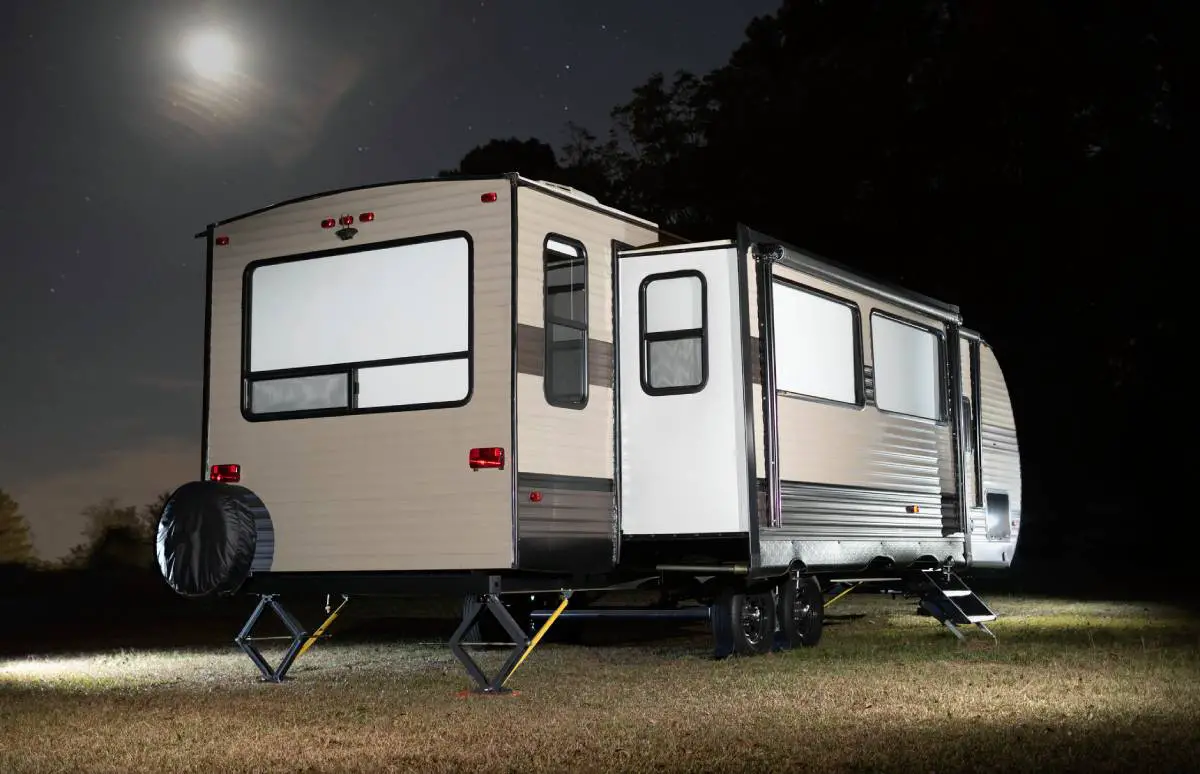
Help! My RV Slide-Out Is Stuck… How Do I Adjust The Slide-Out Manually?

DIY RV Dinette Replacement: Make Better Use Of Your RV Living Space By Removing The RV Dinette Table
Need A Replacement RV Mattress? RV Mattress Sizes & Shopping Tips
Can Snow Ruin Your RV or Trailer Roof?
By: Author The Drivin' & Vibin' Team
Posted on January 3, 2023
When the snow starts falling outside, it’s easy to forget that it’s piling on your roof too. If you’ve ever shoveled snow, you know that it can be cumbersome.
So can snow ruin your RV or trailer roof? Is there anything you can do about it? Let’s look and see!

Unfortunately, snow is weighty and can cause severe issues for an RV or trailer roof. These roofs are flat and can be an ideal surface for snow accumulation. Placing too much weight on the top can damage the structure. In addition to structural damages, you could also experience leaks.
You should repair damage or leaks as soon as possible. If not, you could experience some severe water damage to your rig, especially when the snow starts to melt.
Water damage can destroy an RV or trailer from the inside out. The longer you leave it alone, the bigger the situation can become for the owner.
How Much Snow Is OK for an RV Roof?
RVs can typically handle anywhere from 220 to 280 pounds, but this can vary by the type of RV and construction materials.
While there are many factors to consider, a typical RV roof can hold approximately four to six inches of snow. However, some snow contains more moisture than others, causing it to weigh more than other types of snow.

How Do You Remove Snow From a Travel Trailer Roof?
Depending on where you live and how much snow you can expect, you may not wait until it stops to remove the snow. By the time the snow stops falling, it could be too late. You’ll need to access your roof and remove the snow.
Many RVers use a broom to push or pull the snow off the top.
Depending on the snow, you could use a leaf blower to blow the snow off your RV’s roof. This can be a quick and effortless method to do the job. However, whichever way you choose, you want to keep safe and avoid climbing icy ladders or steps.
Pro Tip: We like a cordless blower because you can get a good amount of snow off of your RV from the ground or step stool (if your roof isn’t too tall)

How to Keep Snow Off Your RV Roof
If you want to keep the snow off the roof of your RV, there are several things you can do. You may not always have some of these options, but they’re excellent methods. Let’s examine how you can keep the snow off your RV’s roof.
Store in a Carport or Park Inside
The best way to keep snow off your RV’s roof is to keep it out of the snow. If you have a carport or can park it inside, snow won’t be a problem.
However, these storage facilities can be challenging to find and very expensive when you reach them. If you don’t have private storage space, these spots can cost several hundred dollars monthly.
We keep ours in an enclosed unit, but. here are the different storage options you have .
Use an RV Cover
An RV cover can help keep snow and ice off your RV roof. This is possible because the cover will blow in the wind and help shake off any snow that settles onto your roof. In addition, it will create a layer of separation between the snow and your roofing materials.
Purchase a cover that correctly fits your RV to avoid any damage to the RV from rubbing or friction that may occur.
Park Where There’s Natural Shelter
If you can park close to a shelter, you’ll drastically reduce how much snow accumulates on your RV roof. Trees and rock walls are great natural shelters that protect you from the wind and snow. However, taller buildings and other structures are also great options to consider.
Remove the Snow Regularly
The key to preventing snow from building on top of your RV is to remove it regularly. If you wait until you have several inches of snow on your RV’s roof, you’re likely to damage something. You won’t see vent pipes and other crucial features when this much snow accumulates on your RV.
It would be best if you tried to remove the snow from your RV’s roof every couple of inches to avoid letting it build up. If the temperatures drop overnight, you could find an inch or two of ice on your RV. This will drastically increase the weight and could set you up for potential damage.
Hire Someone to Keep the Snow Off
If you can’t do it yourself, hire someone to do it for you. No matter how much it costs, there’s a good chance it will be cheaper than any medical bills you’ll receive if you hurt yourself.
A good professional will likely not only remove the snow off your roof but also shovel a clear path to and from the entrance of your RV or trailer. You won’t have to worry about stepping through several inches of snow or tracking it inside.
Honestly, this is a pretty good option because it’s likely cheaper than storage and someone is keeping an eye on your roof regularly.
Are There Consequences for Not Removing Snow From Your RV Roof?
The consequences of not removing snow from your RV or trailer roof can be costly. Several inches of snow can cause your RV’s roof to collapse and damage your RV. The damages can cause structural issues and water to seep into your RV.
Save yourself the hassle, and ensure you regularly remove snow from the roof of your RV or trailer. Trust us; you don’t want to deal with the consequences of not removing the snow.
Will you store your RV outside or adventure in the snow this winter?
Discover the Best Free Camping Across the USA
To be honest with you, we hate paying for camping . There are so many free campsites in America (with complete privacy).
You should give it a try!
As a matter of fact, these free campsites are yours. Every time you pay federal taxes, you’re contributing to these lands.
Become a FREE CAMPING INSIDER and join the 100,000 campers who love to score the best site!
We’ll send you the 50 Best Free Campsites in the USA (one per state). Access the list by submitting your email below:

You are here: Home // RV Maintenance & Repair // RV Roof Damage: Protect Your Camper From Snow And Hail
This post may contain affiliate links or mention our own products, please check out our disclosure policy .
RV Roof Damage: Protect Your Camper From Snow And Hail
Published on December 22nd, 2022 by Dave Helgeson

How To Prevent RV Roof Damage This Winter
RV roof damage can lead to a host of problems if not found and repaired quickly. Moisture can gain entry through the impaired area, causing water damage to interior panels, upholstery, drapery, carpet, and more.
If left unattended, this will lead to wood rot, mildew, and mold, which could render your RV uninhabitable. Your best defense against RV roof damage is to take preventative measures, especially from snow and hail.
“Keeping your RV clear of snow, hail, and other elements that are thrown its way will keep it in tip-top shape and help you save money on repairs down the line.” DON’T MISS OUT ON DO IT YOURSELF UPDATES Sign up for the newsletter today! Please enter a valid email address. An error occurred. Please try again later. × Thank you for subscribing to the Do It Yourself RV newsletter, keep your eye on your inbox for updates. Per Wholesale Direct Carports
Here are a few ways to avoid RV roof damage this winter.

Cover your RV roof
Keep snow and hail from landing on the roof of your RV. No roof damage can occur if snow and hail never fall on your RV.
RV covers will prevent potential roof damage from moisture intrusion but do little to protect your RV roof from hail damage or the weight of snow. If a cover is the only option, consider using slanted/pitched sheathing under the cover to help shed snow and protect against large hailstones.
Also consider using an extra thick cover to soften the blow of hailstones. Those with towable RVs may consider an inflatable cover to protect their tow vehicle from hail damage.
Move your RV
Weather apps do a pretty good job at providing information on approaching storms that are likely to produce snow or hail.
Radar images on these apps will also display the approaching storm and the expected track it will take. With this information, you have time to move your RV out of harm’s way.
Store it undercover
This can be in a commercial facility or in a structure on your own property. Possibilities include garages, pole buildings, metal RV carports, etc. This article covers many of the options listed.
Protect items on your roof
The top membrane on most newer RV roofs is made of rubber or PVC. Both of these materials are quite flexible and do a good job of keeping moisture out and repelling hail without damage.
However, your vent covers, air conditioning shroud, plumbing vents, skylights, etc. are made of plastic that can easily be damaged by medium-size hail stones or collapsed by heavy snow. This is especially true of plastics that have become brittle after years of exposure to the sun’s UV rays.
To protect these items when hail or heavy snow is expected, consider covering them for protection. Items RVers use include wood sheathing, inverted metal wash tubs, inverted Rubbermaid containers, old wooden fruit boxes, etc.
Avoid parking under trees
Tree limbs can break off during hailstorms or from the weight of snow, sending them crashing onto the roof of your RV. To minimize the chance of roof damage to your RV, avoid parking under trees when snow or hail is a possibility.
Remove snow from the RV roof
Even if the snow falls as light, fluffy powder, it will eventually start melting and turning to ice. The repeated freeze/thaw cycle of ice on the roof of your RV can potentially cause all kinds of damage to seams and fixtures.
The other concern is heavy rain following a snowstorm. Like a sponge, snow can absorb copious amounts of water. Snow left on the roof of an RV can eventually become so heavy with rainwater that it can collapse the roof.
Use caution when on the roof of an RV removing snow. Also, use something soft like a broom to sweep away the snow. Sharp objects like a snow shovel can easily cause damage to the roof membrane or vents/covers.
Retract slideouts
By retracting your slideouts before a hail or snowstorm, you can protect the slideout roofs/slideout toppers from potential damage.
While it won’t prevent RV roof damage, you should also retract your patio awning before a hail or snowstorm to avoid damage to the awning.
Carry insurance
While comprehensive RV insurance can’t prevent roof damage, it can provide peace of mind that you are protected from the unexpected, like being caught unprepared in a hail or snowstorm.
You can start with policy shopping from an online provider like RVerInsurance.com . RVer Insurance Exchange offers free quotes for RV Insurance , Health Insurance, even Extended Warranties .
Get tips from other RVers
Forums such as iRV2.com and blog sites like RV LIFE , Do It Yourself RV , and Camper Report provide all the information you need to enjoy your RV. You’ll also find brand-specific information on additional forums like Air Forums , Forest River Forums , and Jayco Owners Forum .
Related articles:
- The Ultimate DIY RV Rubber Roof Replacement Guide
- What Is The Best Camper Roof Sealant (And How Do You Use It?)
Share this post:
Related posts:.

RV Cleaning Options: Which One Is Best for Protecting Your Camper?

Responsible RV Recovery: Avoiding Desperation and Damage When You Get Stuck

Save Your Trip with This Must-Have RV Tire Inspection Checklist

- Types Of RVs
- Tow Vehicles
- Maintenance & Repairs
- RV Power & Electrical Supplies
- RV Appliances
- Living In An RV
- Travel & Destinations
- RV Gear Buyer’s Guides

8 Best RV Roof Sealants for 2024: Choosing the Ideal Roof Coat and Caulk
- Last Updated: May 24, 2024
- 46 minutes read
Finding the best RV roof sealants is paramount for ensuring your RV remains in top condition.
With an extensive range of products on the market, it can be daunting to select the one that truly suits your needs.
Throughout my journey, I’ve personally tested over 30 sealants and coatings designed for RV roofs, evaluating them on criteria such as durability, ease of application, compatibility with various materials like metal and fiberglass , and their effectiveness in repair and leak prevention .
The goal was clear: find the most reliable products that not only protect your RV roof but also extend its lifespan.
This quest led me to discover the Dicor 95D40-35 Epdm RV Rubber Roof coating , standing out as the best overall due to its exceptional durability, ease of application, and versatility across different RV roof materials.
Whether you’re dealing with minor seam sealing or major leak repair, this guide ensures you have the most efficient solutions at your fingertips.
Based on my experience, the top sealants are:
- Dicor 95D40-35 Epdm RV Rubber Roof coating : Best overall for durability and versatility.
- Dicor RP-MRC-1 Elastomeric Coating : Excellent for UV stability and flexibility.
- Heng’s Rubber Roof coating for RV : Great choice for large scale applications, offering a solar reflective finish.
- EternaBond RSW white RoofSeal Sealant Tape : Top option for quick repairs, with a microsealant UV stable formula.
- Geocel GC24201 Pro Flex RV coating : Good for spot sealing with strong adherence to silicone surfaces.
- Dicor 501LSW-1 Self-Leveling Lap Sealant : Ideal for seam sealing and leak repair on fiberglass roofs.
- Flex Seal rubber coating for RV : Suitable for a variety of surfaces, including metal, with leak repair capabilities.
- Liquid Rubber Waterproof RV Roof Coating : Top pick for a completely waterproof, durable seal on camper roofs.
IN THIS ARTICLE
What kind of sealant do you use on an RV?
When sealing an RV, it’s crucial to select the appropriate sealant based on the material of your vehicle. For metal surfaces, a silicone-based sealant is the perfect choice, providing a robust waterproof barrier designed to endure for years. Alternatively, for fiberglass or other non-metal surfaces, an acrylic sealant is your best bet, boasting excellent adhesion and flexibility while also resisting cracks and peeling that may occur with some silicone-based sealants.
Regardless of the sealant you opt for, always make a point to thoroughly read the product instructions and adhere to all safety measures during application. Additionally, ensuring the surface is clean and dry before applying any sealant is imperative, as this significantly contributes to a successful application. Lastly, don’t forget to allocate sufficient drying time for the sealant before exposing it to water or other environmental elements.
What is the difference between RV roof coating and sealant?
RV owner, it’s essential to understand the differences between roof coatings and sealants to ensure the longevity and protection of your vehicle’s roof. Let’s dive into these two primary products used to safeguard the roof of recreational vehicles.
Roof coatings are typically liquid-applied products designed to create a protective layer over your RV’s existing surface. Acting as a waterproof barrier, these coatings shield the roof from detrimental factors such as UV damage, water pooling, and other weather-related issues.
On the other hand, sealants are generally thicker and more adhesive than roof coatings. This essential feature allows them to create an airtight seal around potential leak-prone areas, such as vents and seams. By focusing on preventing damage and providing a longer-lasting roof, sealants offer that extra layer of protection against water intrusion.
Both roof coatings and sealants are crucial in protecting your RV’s roof from the elements. It’s vital to utilize and maintain both of these products properly for an extended lifespan and peak performance of your recreational vehicle’s roof.
1. Best Overall: Dicor 95D40-35 Epdm Rubber Roof coating

If you need to apply a new coating layer to an EPDM rubber RV roof, the Dicor Corporation EPDM rubber roof is an excellent choice.
It’s also suitable for rubber TPO roofing and it does require the pre-application of Dicor’s Cleaner/Activator for EPDM rubber roofing in order to ensure a strong bond with your roof material.
This coating comes in a one-gallon size that can cover up to 125 square feet of RV roof surface.
It’s compatible with all rubber RV roofs and helps eliminate irritating roof rumble that can cause extra noise (and annoyance!) while driving.
This is an acrylic coating with excellent water and UV resistant properties. It also contains fire retardant characteristics for a greater degree of protection.
You’ll need to apply two coats in order to achieve maximum effectiveness, so be sure to double the measurements of your RV’s roof surface to make sure you have enough coating solution for proper application.
When you’re applying this coating, don’t be surprised if your nose picks up a faint ammonia-like odor.
If you think this might bother you, be sure to wear a mask or other face-covering that protects you from the smell.
But it doesn’t have a high freezing point, which means you can apply this solution at lower temperatures, as long as it doesn’t dip below freezing.
A couple of other things I like about this coating include its flexibility and lifespan.
It flexes very well so that it won’t crack or flake when exposed to the movement of your RV.
And it also requires less lifetime maintenance than other coatings, which means more time adventuring between applications.
Things We Like
- Fire Resistance: This coating contains fire-retardant properties.
- Flexibility: This solution has excellent elasticity.
- Eliminates Roof Rumble: This makes for a smoother ride with less noise while driving.
- Less Lifetime Maintenance: This coating requires reapplication less frequently than other solutions.
Things We Don’t Like
- Not a Standalone Coating Solution: Requires pre-application of Dicor’s Cleaner/Activator for EPDM rubber roofing.
- Smell: You might notice a faint ammonia-like odor when applying this coating.
2. Best For Metal or Fiberglass Roof: Dicor RP-MRC-1 Elastomeric Coating

If your RV has a metal or fiberglass roof, the Dicor Corporation Elastomeric Coating is an excellent way to add another layer of protection against the elements.
This acrylic coating contains 100% acrylic elastomeric resins and comes in a one-gallon container with a super bright white color.
Once applied, it forms a rubber-like coating that will expand and contract along with the movement of your RV roof.
The natural expansion and contraction of this coating help to reduce the likelihood of cracks or tears forming over the life of the product.
The coating is also resistant to both mildew and algae formation.
Because this coating will be bright white when you’re finished with the application, it may appear dirtier than others.
But it easily cleans up with water and a mild detergent when you need to clean it to improve that appearance. To achieve maximum effectiveness, you’ll need to apply two coats.
One gallon of this coating is enough to cover up to 200 square feet of roof space.
And because you’ll need to apply two coats, you’ll need to make sure you purchase enough quantity to cover your entire roof twice.
The application process for this coating also requires a clean surface and the removal of any rust if you’re working with a metal roof.
For metal roofs, the application of a primer might be required to achieve a stronger bond.
This coating should also be applied when temperatures are above 50 degrees Fahrenheit (10 degrees Celsius).
- Mildew Resistance: It’s resistant to the formation of mildew and algae.
- Easy Clean-Up: Once dry, the coating can easily be cleaned with soap and water.
- High Reflectivity: Reflects sunlight and helps to lower temperatures inside your RV.
- Long-Term Benefits: Essentially converts a fiberglass or metal roof into a rubber roof, which can reduce the buildup of rust over time.
- Roof Coverage: One gallon of this coating is suited for roofs up to 200 square feet in size.
- Only For Metal or Fiberglass Roofs: And these roof types tend to be less common than others.
- Application: Requires two coats for maximum effectiveness.
3. Best For Spot Sealing: Heng’s Rubber Roof coating for rV

Heng’s RV Rubber Roof Coating is best used for sealing around vents and air conditioner units on top of your RV.
It’s also great for re-sealing seams and tears in your existing RV rubber roof. It’s compatible with both EPDM rubber roof and rubber TPO for more versatile applications.
Although it’s not made to be a solution for resealing an entire RV roof, this is a great option if you just need a more affordable way to seal small tears or seams in your RV roof.
It’s super easy to apply and simply rolls or brushes on like thick paint. You won’t need to apply any sort of activator beforehand, although you should make sure the area you need to seal is thoroughly clean and completely dry before applying.
As a nature lover myself, I appreciate the fact that this coating is made with non-toxic and non-polluting chemicals.
This makes me feel less guilty if I get a little heavy-handed and accidentally spill a little on the ground while applying it.
I also like that it offers excellent impact resistance if you park your RV in a spot where pine cones or other projectiles are likely to fall on the roof occasionally.
Although it’s only rated to cover about 100 square feet of surface area, Heng’s is more suited to spot applications.
So if your RV roof doesn’t necessarily need to be completely resealed, this is a great choice to help you address those few problem spots before they grow into a larger issue.
- Environmentally Friendly: This coating is made with non-toxic, non-polluting chemicals.
- Spot Sealing: Designed for addressing seams and tears in rubber roof, as well as sealing around vents and A/C units.
- Impact Resistance: It’s a good solution for RVs parked in areas where objects may fall on the roof regularly.
- UV-Resistance: Slows down roof wear and tear from UV exposure.
- Easy Application: It rolls or brushes on like thick paint. No activator needed.
- Not a Whole Roof Solution: This coating isn’t designed to seal or coat an entire RV roof.
- Coverage: It’s rated to cover about 100 square feet of roof surface.
4. Best For Leak Repair and Seam Sealing: EternaBond RSW white RoofSeal Sealant Tape

If you’ve found yourself in the unfortunate position of noticing a leak and needing a repair solution, check out the EternaBond RoofSeal Sealant Tape.
This tape isn’t necessarily designed for preventative roof maintenance, but it will help you stem the tide if you already have minor leaks in your RV roof.
This sealant tape is a regular choice of many roof repair specialists because it can bond to almost any RV roof type.
This includes EPDM, TPO, all metals, most PVC, and a variety of other roofing materials.
It’s even rated to be especially stable when exposed to UV radiation, with products being tested and rated to last up to 19 years in full sunlight.
This tape comes in strips that are four inches wide and 50 feet long. Each strip contains a built-in primer that allows for a stronger bond with whatever surface it is applied upon, although it’s still recommended to thoroughly clean and dry the surface around the leak before applying the tape.
The strip design of this tape actually makes it a great solution for sealing all of the seams along the edges of your entire RV roof.
These seams are notorious for leaking in older RVs and extra sealing is often required in these areas.
This tape will give you a permanent watertight seal along those seams and can be installed at temperatures down to -20 degrees Fahrenheit (-28.89 degrees Celsius).
- Made for Roof Repair: It’s a great option if you need to repair an RV roof leak.
- Versatility: It can be used on virtually any RV roof type.
- Durability: It’s rated to withstand up to 19 years in full sunlight.
- Built-in Primer: This makes for easier application and ensures a stronger bond with your roof material.
- Not For Preventative Maintenance: This tape isn’t the most economical solution for preventatively assuring the health of your RV roof.
- Not A Whole Roof Coating Solution: This product is designed for sealing leaks or the seams along the edges of your RV roof.
5. Best Budget-Friendly: Geocel GC24201 Pro Flex rV coating

The Geocel Corporation Pro Flex RV Instant Repair coating is the best option I could find if you’re needing to stop leaks in your RV roof but you’re on a tight budget.
It’s the most affordable option I could find but it’s also specifically designed for metal roofing systems.
It’ll work, however, on steel, wood, vinyl, sheet metal, and other common substrates.
As its name suggests, it’s made for stopping leaks fast and it’s also useful for sealing breaks, seams, splits, or holes in metal roofing.
When a leak crops up unexpectedly (and maybe at an inopportune moment), this solution will seal it fast and prevent your RV roof from sustaining further damage that will be more expensive to repair.
After applying this Instant Repair, your RV will be road-ready in under one hour. So you can keep rolling or continue your RV living worry-free.
It only requires a single coat for effective application and can be applied in adverse weather conditions, including low and high temperatures and icy or wet conditions.
This sealant comes in a one-gallon size and it can be painted directed onto metal RV roofs.
Once cured, it has mildew and UV-resistant properties and it’s durable enough to hold up under intermittent foot traffic when you need to walk on your roof every now and then to re-inspect its integrity.
I also really like that this sealant doesn’t require any primer to achieve a strong bond with your metal roofing material.
This will save you time in the application process, even if you need to clean the area you’ll be applying it to thoroughly and ensure that any rust is removed if you want to achieve a strong bond and an effective seal.
- Price: It’s the best roof sealant solution for RV owners on a budget.
- Quick Setup: It’s made for stopping leaks fast and sets up in under one hour.
- Application: It only requires a single coat and can be applied in adverse weather conditions.
- Durability: This coating has mildew and UV-resistant properties.
- Not A Whole Roof Solution: This instant repair is better suited for sealing holes, cracks, splits, or seams on your roof.
- Compatibility: It only works with metal RV roofing systems.
6. Best For Roof Edges: Dicor 501LSW-1 Self-Leveling Lap Sealant

If you only need to seal small areas along the edges of your RV roof, the Dicor Corporation Self-Leveling Lap Sealant is much more affordable than a paint-can style sealant.
And it’ll also work well to seal around vents, air conditioners, roof antennas, and anywhere else that water may leak into the substructure of your RV roof.
This sealant is best suited for EPDM rubber roofs or rubber TPO, but it will also adhere strongly to aluminum, mortar, wood, vinyl, galvanized metal, fiberglass, and concrete.
It is compatible with other Dicor Products and may be used after their Cleaner/Activator and EPDM Rubber Roof Coating system, respectively, for a full roof sealant solution.
You’ll need a caulking gun to apply this sealant and it has self-leveling properties to help with a smoother, more complete seal where applied.
Each tube contains 10.3 ounces of sealant and that small quantity will mean you might need a good number of tubes to seal the edges or seam around your entire RV.
For example, one user used a total of five tubes to seal the edges around a 13-foot trailer.
So, extrapolating that number out, you’d need 10 tubes for a 26-foot RV and a minimum of 14 tubes for a 33-foot rig.
Furthermore, this sealant is rated to be reapplied every three months or so for maximum effectiveness.
This means that you might need to spend more time applying this sealant than you’d need with other solutions.
If you do go with it, however, make sure you apply the sealant when outside air temperatures are between 50 and 70 degrees Fahrenheit (10 to 20 degrees Celsius). Doing so will help you maximize the lifetime of the sealant.
- Affordable: It’s a very cheap option for sealing seams and edges on your roof.
- Easy Application: Requires the use of a caulking or silicone gun for a squeeze application.
- Versatility: This sealant can adhere to a wide variety of roofing materials.
- Compatible with Other Dicor Products: This can be used as Part 3 of Dicor’s EPDM Rubber Roof Coating System.
- Only For Edges: This isn’t a realistic option for resealing your entire RV roof surface.
- Quantity: You may need to purchase multiple tubes to seal all edges and seams on your RV roof.
- Lifespan: This product is recommended to be reapplied about every three months.
7. Best Pour-On Application: Flex Seal rubber coating for RV

Many of us know Flex Seal products ‘As Seen on TV’, but the Flex Seal Liquid Rubber in a Can really does offer one of the easiest pour-on applications of any RV roof sealant and coating.
It comes in a one-gallon size with a white color that provides great reflectivity to keep the temperatures down inside your RV once applied.
Just like you might’ve seen in one of their infomercials, this stuff sets up quickly to stop leaks fast.
One gallon of this solution is enough to cover about 150 square feet of RV roof area, so you might need two gallons for a complete application, depending on the total roof square footage of your particular rig.
Once it sets up, it forms a watertight, flexible rubber coating that effectively seals your roof from moisture and also protects it from damaging UV radiation.
It’s also super-safe to apply as the solution itself is non-hazardous, non-toxic, and non-flammable.
It also protects your roof from mildew growth and damage that can occur from exposure to other chemicals.
Additionally, it prevents rust and corrosion from occurring on metal roofing systems, which maximizes the lifespan of that roofing type.
While it’s rated to work well with a variety of roof substrates, it hasn’t been tested on top of an elastomeric roof coating, so you might want to apply a small amount to a test area before utilizing this solution if you’ve previously applied this type of coating.
And finally, another thing that impressed me about Flex Seal is how it works to minimize noise and vibrations while you’re driving to provide a smoother, quieter ride.
As someone who’s had to repair a roof leak with Flex Seal at midnight in the middle of a Texas deluge, I can also personally vouch for the reliability of the Flex Seal brand.
- Pour-On Application: Simple requires a paintbrush roller to spread evenly over your roof surface.
- Reflectivity: Reflects UV radiation to keep temperatures cooler inside your RV.
- UV Protection: Reduces wear and tear on roof substrate from UV exposure.
- Safe: Flex Seal is non-toxic, non-flammable, and non-hazardous.
- Smoother Rides: This sealant will help to minimize noise and vibrations while driving.
- Resistance: Prevents buildup of rust and corrosion.
- Can’t Paint Over It: Paints won’t adhere to this liquid rubber, although I wouldn’t even recommend trying.
8. Best To Prevent Adhesion Failure: Liquid Rubber Waterproof RV Roof Coating

For those that have previously used an RV roof sealant and coating that didn’t quite hold up the way you expected, the Liquid Rubber RV Roof Coating is our choice for a solution that will form a strong bond with your RV’s roofing material.
This hopefully prevents the need to reseal your roof before you’re ready to get up there again.
This sealant is available in one-gallon and five-gallon sizes so that you can be sure you have enough to cover the total square footage of your RV roof.
A single gallon of this coating is designed to cover only 50 square feet of RV roof surface.
Additionally, it’s recommended to applies two to three heavy coats of this sealant to achieve maximum effectiveness.
To do a little math, you’ll need a five-gallon container to cover a maximum of 250 square feet with those 2-3 heavy coats.
This is typically enough to cover a 30-foot RV, but if you have a larger rig you’ll need even more quantity.
So be sure to factor this in when considering this as a viable solution to seal your RV roof.
On the plus side, this is a truly preventative RV roof sealant and coating.
It’s UV-stable to prevent the sun from damaging your roof substrate and it reflects solar rays to keep the inside of your RV cooler during the summer months.
The solution itself boasts 1000% elongation, which serves to prevent adhesion failure and create a strong bond with your roofing material.
You’ll also enjoy an easy application process with this sealant. Simply pour it on your roof and spread it evenly using a paint roller.
You may need a smaller paintbrush for edging work, which is actually recommended to do before covering the main flat surface of your roof.
It’s also recommended to apply this coating at temperatures above 50 degrees Fahrenheit (10 degrees Celsius).
- Longevity: When applied properly, this sealant has one of the longest lifespans of any product on the market.
- 1000% Elongation: Guarantees a strong bond and prevents adhesion failure.
- Solar Reflectivity: Reflects UV rays and keeps temperatures down inside your RV.
- Easy Application: Use a paintbrush or roller to spread this coating evenly on your RV roof.
- Environmentally Friendly: This is a water-based solution that contains no VOCs, solvents, or harmful odors.
- Coverage Area: One gallon is rated to cover about 50 square feet.
- Application: It’s recommended to apply 2-3 heavy coats of this sealant.
- Price: This solution could get a little pricey once you buy enough to cover your entire RV.
Features To Look For In RV Roof Sealants
Now it’s time to get into the nitty-gritty of RV roof sealant and coating. You should be careful to consider each of the factors outlined below when comparing and contrasting your sealant and coating options.
Types of RV Roof Sealant & Coating
Let’s begin our Buying Guide by providing some brief definitions of the various types of roof sealants and coatings that you’ll find out there.
RV Rubber Coating
RV rubber roof coatings are the most common type on the market today. They’re actually available in two distinct classifications.
One is primarily constructed from thermal poly Olefin and the other is made of ethylene propylene monomer.
The differences in the construction of these two types of rubber coating require different application and maintenance procedures.
Just make sure you understand the specific procedures recommended by the manufacturer before finalizing your purchase decision.
Acrylic Coating
This is one of the more affordable types of roof coatings out there that will still do a decent job at sealing your RV roof.
The application of most acrylic coatings requires two coats. The first is the primer and the second is called a ‘fabric reinforce’. These two coats help with reflectivity, leak protection, and UV resistance.
The downside of the acrylic coating is that it doesn’t do very well in super wet climates. If your RV roof is frequently wet or develops pools of water, an acrylic coating is more likely to degrade and begin to peel off.
Silicone Coating
Silicone coatings are typically sold by the gallon and they can be one of the more pricey coating options out there.
The added cost comes with benefits, however, as this type of RV sealant only requires a single coat to be effective.
This means less application time and it eliminates the need for a primer, which can also bump up the overall cost of resealing your RV roof.
Silicone coatings have high reflectivity and resistance to both wind and weather degradation.
They also stay elastic for quite some time after application, which means it won’t become too hard or brittle and begin to peel off within a few months.
Liquid Coating
Liquid RV roof coatings tend to offer natural water repellency, which serves to prevent corrosion from occurring on your RV roof.
This type of coating is also very easy to apply and can often be poured directly onto your roof before being spread out evenly.
The application method for a liquid coating is very similar to applying a fresh coat of paint to a wall in your home.
You can use a rolling brush to apply it to a large surface area like your RV roof. Liquid coatings are also UV-resistant and can improve the visual appearance of your RV roof.
Fiberglass Coating
Fiberglass coatings offer financial advantages because they generally require less maintenance over time than other types of RV coatings.
But this type of coating does tend to require more initial effort to apply and can be more expensive at the outset than other coating types.
Finally, fiberglass coatings also add significantly more weight to your RV roof, which can sometimes cause issues if the structural integrity of your roof is even slightly compromised before you apply this type of coating.
Urethane Coating
Urethane coatings are more durable than both acrylic and silicone options. They also provide excellent impact resistance if you frequently store your RV in an area with some potential for pine cones or other projectiles to fall onto the roof (which I don’t recommend!).
This type of coating also offers good UV resistance and reflectivity while being able to remain intact if exposed to excess moisture for long periods of time.
But the downside of urethane coatings is the strong and often unpleasant odor they can produce during the application process. Urethane coatings also tend to be more expensive than other coating types.
Your Roof Material
The four main materials used in RV roofs are EPDM rubber roof, rubber TPO, aluminum, and fiberglass.
The composition of your RV roof determines which sealant/coating products can be used on it.
If you’re not sure which type of material was used in the construction of your RV roof, it’s time to climb up there and have a closer look!
Aluminum roofs are hard to the touch and, while it’s the rarest type, they are very obvious due to their metallic sheen (think Airstream!).
An aluminum roof rarely requires a new coating because of its natural durability and weatherproof qualities.
Fiberglass roofs are also hard to the touch and slightly more common than aluminum roofs, but not by much.
Clearly, fiberglass roofs don’t have the metallic appearance that you’ll see with an aluminum roof, but they’ll also be noticeably harder than a rubber roof and they tend to require less overall maintenance than rubber roofs.
Rubber EPDM (ethylene propylene diene monomer) and Rubber TPO (thermal poly Olefin) are the most common RV roof materials.
The differences between these two types, however, are difficult to discern from the look or feel alone.
So be sure to consult the owner’s manual for your RV to determine exactly which material was used in your roof’s construction.
The answer you find will dictate the exact type of RV roof sealant and coating product you’ll need to ensure a strong bond.
The durability of an RV roof sealant or coating product is determined by how often you’ll need to reapply it.
For example, you can be safe in assuming that a product that recommends re-application every six months is going to be less durable than an alternative that only needs to be reapplied every two years.
Depending on the application process of the specific product you choose, it might require a full weekend for a proper application of a sealant/coating.
So it’s obvious that you probably don’t want to repeat that process very often because, if you’re like me, you’d rather be off enjoying new campgrounds and scenic byways in your RV.
The durability of liquid sealants and tapes also depends on their elasticity and tear resistance.
Because your RV will naturally twist, turn, and bounce around while you’re driving, the sealant/coating your apply to your roof must be able to twist and turn without becoming compromised.
UV Resistance
Your RV’s roof is constantly exposed to the sun unless you put a cover on it for part of the year or you live in Washington (Sorry Washingtonians!).
Over time, UV exposure can lead to significant wear and tear that can be difficult to reverse if you haven’t regularly maintained your RV roof.
Because of this, you need a roof sealant/coating that offers UV protection. But fortunately, most of the best RV roof sealant and coating solutions are designed specifically for this purpose.
If a specific product doesn’t mention UV resistance, however, it’s a good bet to steer clear of it.
Ability to Repel Water
Water-resistance is one of the primary functions of an RV roof sealant and coating.
Water pooling on the roof of your RV or leaking into the substructure can cause damage that will require a much more expensive fix than what you’d spend on a quality roof sealant or coating.
Most of the best RV roof sealant and coating solutions offer a high-degree of water resistance because this is exactly what they’re designed to do!
But because there’s not really a universal metric by which you can compare the water-resistance of one coating versus another, the best way to analyze a coating’s effectiveness on this metric is to read through consumer reviews.
Ease of Application
Consider the application process required before choosing a roof sealant or coating.
The easiest applications involve a single coat and the use of a squeegee or paint roller to spread the solution evenly over your roof’s surface.
More complication applications require multiple coats and the additional purchase of a primer or other solution in order to ensure a secure bond.
If the RV roof sealant and coating you’re interested in requires additional products for proper application, just make sure you’re aware of that and factor the cost of those additional products into your total budget for the project.
Chemical Composition
The chemical composition of an RV roof sealant or coating plays a large role in the safety precautions you’ll need to take when using it.
Many of the best options utilize non-toxic chemicals so that they’re safer and easier to use.
However, this isn’t the case for all sealants and I simply want to make sure you consider each sealant’s chemical composition so that you can ensure your own safety and the safety of anyone else helping you apply it to your RV roof.
Choosing a sealant/coating that uses non-polluting chemicals also ensures less likelihood of negative environmental impact when/if the coating degrades and begins to crack or flake off.
As always, we RVers who love to visit beautiful places in our rigs should always be considered about the environmental impacts of our travels.
So, Which is the best sealant for RV roofs?
There are a few good reasons why we chose the Dicor Corporation EPDM Rubber Roof as our pick for the best overall RV roof sealant and coating.
For one, EPDM rubber roof and rubber TPO are the most common roofing materials used in modern RV construction.
And Dicor’s complete rubber roofing sealant system is specifically designed for resealing these types of roofs correctly the first time around.
This sealant is also great for reducing UV damage and minimizing roof rumble so that you enjoy a smoother, quieter ride once it cures and you’re back on the road.
Furthermore, we chose it because it helps to ensure the safety of your RV (and everyone inside it!) with its fire-retardant characteristics.
But if you’re looking for a solution with a super-easy pour-on application, you also won’t go wrong with the Flex Seal Liquid Rubber In A Can .
This RV roof sealant and coating offers one of the simpler application processes of any solution.
Simply pour it directly onto your roof and spread it evenly using a standard paint roller.
You may need to use a smaller paintbrush to complete the edging work, but you should still be able to apply this coating in an hour or two on a warm day.
Frequently Asked Questions
These RV roof sealant and coating solutions aren’t complicated. But I can assure you that the fun is only just beginning once you’ve identified the right product for your needs.
So let’s cover some frequently asked questions about the roof sealing and maintenance processes.
What is an EPDM rubber roof?
EPDM stands for ethylene propylene monomer. It is a synthetic membrane that often comes in strips ranging from 7.5 to 50 feet long and 45 to 60 millimeters thick.
The material’s primary ingredients (ethylene and propylene) are derived from oil and natural gas.
EPDM rubber roof strips typically need to be secured at the edges using a liquid adhesive or specially formulated tape.
This material has been a trusted choice for low-slope roofs in the construction industry for over 40 years.
How to apply an RV roof coating?
The simple answer is that the application process will depend on the product you choose. Different types of coatings have very different application requirements if you’re going to obtain a quality bond between the sealant and your roof material.
That being said, the realistic first step you need to take before applying any type of roof coating is to measure your roof and understand just how much square footage you need to cover.
If the coating you’re buying requires the application of two coats, you’ll need to double the square footage of your roof in order to make sure you buy enough sealant for two coats.
You’ll also need to prep your roof before applying any type of sealant or coating.
Most products will bond better to a clean surface, so it’s recommended to power wash or thoroughly scrub your RV roof with soap and water and allow it to dry completely before applying a sealant.
If there are any pieces of your old sealant that are loose or flaking, you should carefully remove them before applying a fresh coating.
Additionally, many RV roof sealant and coating solutions contain flammable properties. So make sure to remove any potential source of ignition before beginning the application process.
And finally, many new RV owners make the mistake of wearing shoes up onto their roof when going to apply a fresh coat of sealant or coating.
What can happen if you do is that you actually end up tracking up more dirt or debris that you then seal into your roof and this can compromise the effectiveness of your sealant.
It’s always a good idea to pop your shoes off and just wear socks while applying roof sealant or coating to your RV.
Otherwise, you can invest in shoe covers that easily pull over your shoes before you step onto your roof.
What are the best RV roof sealant brands?
For starters, there’s a good reason you’ll find three different sealants and coatings made by Dicor Corporation in our reviews.
Many Dicor products include a roof cleaner/activator that preps your roof for the application of the sealant.
This ensures a more lasting bond between the coating and your roof material.
Other brands you can trust include Flex Seal, Liquid Rubber, EternaBond, Geocel Corporation, and Heng’s.
Can I use Flex Seal on my RV roof?
Unequivocally yes! Flex Seal is widely considered one of the more versatile products out there and can adhere to various roof materials, although it’s best for use on metal or fiberglass roofs. This includes vent pipes, skylights, and RV roof gutters.
One reason Flex Seal is so effective is its ability to naturally seep into (and seal) cracks and holes.
It also retains its elasticity very well, even once fully dried, which helps to promote better flexibility, water resistance, and durability.
However, if your RV has an EPDM rubber roof, you’ll be better suited with a product like Dicor Corporation’s EPDM rubber roof coating.
How does roof sealant/coating work?
An effective RV roof sealant/coating seals your roof from the elements, including ice, rain, wind, snow, and other forces of Nature.
It has waterproof properties and many add impact resistance to your roof to protect it against falling leaves, branches, pine cones, and other projectiles.
Furthermore, an RV roof sealant and coating prevents damage to your roof from prolonged UV exposure.
And it can also prevent water from leaking into the inside of your rig and reduce heating and cooling loss to keep the interior of your RV at a more comfortable temperature year-round.
Camper roof sealant: What is the best camper roof sealant?
The best camper roof sealant depends on your budget, preference, and the condition of your roof. Some factors to consider when choosing a sealant are:
- Durability: How long will the sealant last and resist weathering, cracking, or peeling?
- Compatibility: Will the sealant adhere well to the material of your roof, such as rubber, fiberglass, or metal?
- Ease of application: How easy is it to apply the sealant and how much time and effort does it require?
- Coverage: How much area can the sealant cover with one application and how thick is the layer?
- Cost: How much does the sealant cost per unit and how often do you need to reapply it?
RV sealant: What is the best RV sealant?
The best RV sealant depends on the material of the RV surface, the climate, and the budget. Some factors to consider when choosing an RV sealant are durability, flexibility, UV resistance, ease of application, and cost.
Rubber roof sealant: What is the best rubber roof sealant?
The best rubber roof sealant depends on the type and condition of the rubber roof, as well as the budget and preferences of the user. EPDM, TPO, and silicone-based products are some of the most popular rubber roof sealants.
RV rubber roof coating: What is the best RV rubber roof coating?
The best RV rubber roof coating depends on the type of roof material, the climate, and the budget of the RV owner. Some of the most popular RV rubber roof coatings are acrylic, silicone, and polyurethane.
Best RV roof sealant: What is the best RV roof sealant for my needs?
The best RV roof sealant for your needs depends on several factors, such as the material of your roof, the climate you travel in, the size of the area you need to cover, and your budget.
Here are some tips to help you choose the best RV roof sealant for your needs:
- Liquid RV roof sealant is a thick coating you apply with a brush or roller. It can fill small gaps and cracks, and create a waterproof barrier. Liquid RV roof sealant is suitable for most types of RV roofs, such as rubber, fiberglass, metal, or wood.
- Tape RV roof sealant is a self-adhesive strip that you stick over the damaged area. It can seal large holes and tears, and provide a flexible and durable repair. Tape RV roof sealant is easy to use and requires no tools or drying time.
- Spray RV roof sealant is a aerosol can that you spray over the affected area. It can cover small to medium-sized leaks and cracks, and form a rubber-like layer. Spray RV roof sealant is convenient, fast to apply, and can reach hard-to-access areas.
What is the best camper roof sealant?
I think the best is:
- Dicor Self-Leveling Lap Sealant
- Eternabond Roofseal Sealant Tape
- Geocel ProFlex RV Sealant
- Sashco Through The Roof Sealant
- 3M Marine Adhesive Sealant 5200
What is the best RV roof sealant?
The best RV roof sealant for you depends on your needs and budget. But here is a small list:
What is the best RV roof coating?
Here are some of the best RV roof coatings:
- Dicor RPCRC1 White EPDM Rubber Roof Coating
- Heng’s Rubber Roof Coating
- Dicor RP-MRC-1 Elastomeric Coating for Metal RV Roofs
- Dicor Fiberglass RV Roof Coating
- LLD RC5000RV Liquid RV Roof Coating & RV Roof Repair
These coatings are highly rated by customers and provide a long-lasting, weather-resistant barrier for your RV roof.
What is RV sealant?
RV sealant is a critical part of keeping your RV in good condition. It helps prevent leaks and water damage, which can be costly and time-consuming. There are two main types of RV sealants: liquid sealants and tape-based sealants. Liquid sealants are easier to apply, but getting a good seal can be more difficult. Tape-based sealants are more difficult to apply but provide a stronger seal.
I recommend using a liquid sealant for most RV roofs. It is easy to apply with a caulking gun, and it can be used to seal small cracks and gaps. You may want to use a tape-based sealant if you have a metal roof. It is more difficult to apply but will provide a stronger seal against leaks.
What is Dicor RV roof sealant?
Dicor RV roof sealant is a liquid sealant designed to seal roofs on recreational vehicles (RVs). It is a versatile sealant that can seal various materials, including EPDM, TPO, and PVC roofing membranes. Dicor RV roof sealant is also UV-resistant and can withstand extreme weather conditions.
What is RV rubber roof coating?
An RV rubber roof coating is a liquid or semi-solid material applied to an RV’s roof to protect it from the elements. It is typically made of a rubber or acrylic base and is designed to be flexible, water-resistant, and UV-resistant.
RV rubber roof coatings can help extend your RV roof’s life by protecting it from weathering, cracking, and leaks. They can also help to improve the insulation of your roof, making your RV cooler in the summer and warmer in the winter.
Take it from someone who has experienced the downfall of an RV roof.
Once you notice sagging in your roof, you’re already looking at a much more expensive fix than you’ll need to spend on a quality RV roof sealant and coating solution.
At that point, there’s little you can do to salvage the integrity of your roof.
Also, follow the manufacturer’s recommended air temperature for effective application.
I’ve applied sealants when the air was far too cold in the past, which effectively turned out to be a complete product waste.
So even if you have to wait a few weeks, you’ll still be able to make the most of your investment.

About Author / Aaron Richardson
Aaron Richardson is an expert RVer and the co-founder of RVing Know How. Aaron, along with his wife Evelyn, has been living and traveling in their Keystone Fuzion RV since 2017. Their adventures span across the country and beyond, including memorable RVing experiences in Mexico. Aaron's passion for the outdoors and RVing shines through in his writings, where he shares a blend of travel stories, practical tips, and insights to enhance the RV lifestyle.
 26")
9 Best Cars to Live In: Find the Perfect Vehicle to Live In (2024 Pros and Cons)
10 best camper vans with fully equipped bathroom, shower and toilet for 2024.

You Might Also Like

Exploring Nature’s Haven: Mountain Stream RV Park

RV Propane Not Flowing To Appliances? Here’s How To Troubleshoot

How To Choose The Best 5th Wheel Hitch For Your Pickup Truck
Start typing and press Enter to search
Building A Roof Over Travel Trailers – Full Guide
Table of Contents
The travel trailer is a must-have for those that love exploring the world by road.
It gives you the convenience of traveling alone or with your family and also affords you the feel of the comfort of your home.
But, like every other vehicle, the travel trailer has its fair share of challenges, one of which is the roof.
The roof might need changing because it is bad or to make it more permanent.
But whatever the reasons are, this article will provide you with a complete guide on how you can build a roof over your travel trailer.
Types Of Travel Trailer Roof
When it comes to changing the travel trailer roof, the type of roofing material or sheet is essential.
Before making your choice, you should have all the information about the roofing material’s quality, durability, and costs.
Aluminum Roof
The aluminum roof is made from aluminum panels that are malleable, lightweight, and corrosion-resistant.
It is very durable and the best when it comes to weight because its strength-to-weight ratio is higher than other roofing metals.
Aluminum roofs boast easy maintenance, unique style coloration, and a long lifespan. Though it is a good roofing material, it is costly and prone to damage.
The cost of maintenance is higher when compared to other roofing materials.
Rubber Roof
The rubber roof is best suited for low-sloped and flat roofs. It is designed with water tight seal to prevent water from seeping into the travel trailer.
Other roof types rely on gravity to repel moisture, so they are built to form a steep slope to avoid moisture seepage.
The rubber roof has numerous benefits, like a long lifespan of up to 50 years, and is easy to clean and maintain.
Also, it is energy-saving, fast, and easy to install, and it improves curb appeal.
There are two types of rubber roofing, the ethylene propylene diene terpolymer (EPDM) and the Thermoplastic Polyolefin (TPO).
You might need the services of a technician to install this type of roof, and it has a high installation cost.
The Vinyl roof significantly impacts the environment regarding smog and greenhouse gas emissions and reduces the urban heat island effect.
The vinyl roof is also called the Polyvinyl chloride (PVC) roof; it is regarded as a low slope, high-performing, single-ply roofing solution.
The PVC has a reflective ability that helps to keep the travel trailer cool in a hot climate. But, this type of roof is costly compared to other roofing materials.
Fiberglass Roof
The fiberglass roof is a roofing material made from glass fibers, hence fiberglass.
Fiberglass roof is solid and durable, and they can withstand stormy weather conditions and last for many years.
Also, fiberglass has some advantages ; it is light, fire-resistant, and does not require painting.
There are two types of fiberglass roofing materials in the market you have corrugated and sheets fiberglass.
The corrugated fiberglass roofing panel is the most popular because of its layered design. It is a very economical choice for roofing compared to other roofing materials.
Tools Needed For Building A Roof
There are some equipment and materials that are necessary to build a roof over your travel trailer, and they are listed:
- 4 X 4 pressure treated lumber posts
- 2 X 6 wooden beams
- 2 X 4 lumber for rafters
- Plywood decking
- Metal roofing materials (e.g., Aluminium)
- Screws and power screwdriver for metal roofing
- Post hole diggers
Step By Step Guide To Build Roof Over Travel Trailer
The following are the easy step-by-step guides to building a roof over your travel trailer.
Place Pegs Around The Trailer
You have to measure the distance of the trailer to the pillar supporting the roof. After measuring as convenient to you, place four pegs each on both sides.
Also, measure out a square around the pegs for the concrete base.

Dig A Hole And Place The Pressure Treated Posts In It
Use the post-hole digger to create a spot from the marked square around the trailer. Then, place the 4 X 4 pressure-treated lumber posts into the hole.
Cement Around The Posts
After placing the posts into the hole, cement around it to keep it firm on the ground.
Cut And Nail The Beams To The Posts
Cut some 2 X 4 lumber to the beam’s proper size, attach them to the 4 X 4 pressure-treated lumber posts, and drill the nails to hold them firm.
Repeat this process to connect all the posts along the perimeter of the trailer using the beam.
Cut And Nail The Rafters To The Beam
Cut the 2 X 4 lumber to form a rafter, and nail the rafter to the beam across the trailer from one end to the other.
Cut And Nail Plywood To The Rafter
After nailing all the rafters, you can cut out plywood to size and nail them to the rafters.
Ensure that the plywood is correctly placed on the rafters before nailing it.
Apply Tarpaper
This step is for shingles roofing, but if you use metal roofing, ignore this step and move to step 9.
Apply the tarpaper to the plywood decking, and nail it down with roofing nails.
Nail Shingles To The Tarpaper Deck
If using shingles, nail them to the tarpaper deck and ensure that they are well fitted.
Screw The Metal Roofing To The Decking
With the help of a screw, attach the metal roofing (Aluminium) to the plywood decking .
Important/Safety Tips
- The trusses at each end of the structure should be pre-built.
- The trusses on the end of the structure should be nailed to the decking.
- To enclose the roof, apply siding to match the trailer.
- Give an extra 8-12 inches when measuring the rafter.
- Wear slip-resistant shoes when installing a metal roof.
How To maintain Metal Roofing?
The maintenance tips are listed below:
Always Clean Debris From The Rooftop
Climb the roof using a ladder, and clean it using a 5% mix of sodium hydrochloride. Place the solution on the rooftop and flush it with a hose after 20 minutes.
Clean Snow And Ice From The Top Of The Roof
Removing snow or ice requires using a broom with a long handle or a roof rake. Use the broom or rake to sweep off the snow or ice.
Break Off Any Tree Branch That Is Overhanging Above The Roof
Overhanging branches over your roof is a source of more debris on the rooftop. Also, it can be a breeding ground for algae.
Check The Roof Regularly For Laks Or Scratches, And Fix It Immediately; If Any
Do a regular check-up for any leaks, so you can fix them immediately to prevent further damage.
Building a roof over your travel trailer can be less tedious when following the abovementioned guidelines.
But, while following the steps, ensure that you carry out safety measures to protect yourself from any harm.
Safety is always paramount, so stay safe as you build your new roof.
Related Posts:

Leave your cans out, park your truck: DeSantis signs bill to rein in overbearing HOA fines
Hoa directors, managers have new education requirements.

Florida residents with oppressive and obsessive HOAs , your day of freedom may be at hand.
Homeowner associations (HOAs) were created to maintain standards, uniformity and a sense of community while collecting dues to pay for common areas, services and general neighborhood improvements. But they also tend to attract people with strong opinions about what their neighbors can do.
It seems that everyone who has lived in an HOA has a horror story about petty or arbitrary fines that keep increasing, harassment, inflexible and overly restrictive rules regarding the appearance of homes and lawns, the lack of budget transparency, or just the ongoing grind of living under the watchful eyes of HOA busybodies with tape measures and a lot of free time who care deeply about where you park.
A new bill, signed Friday by Gov, Ron DeSantis, may change all that when it takes effect July 1. Or at least make life a little more manageable.
HB 1203 , Homeowners' Association, was just one of several HOA bills introduced in this year's legislative session but it may be the most sweeping one, amounting to essentially a Homeowner's Bill of Rights. Under state law, HOAs will be restricted from some of the most complained-about rules and fines and required to be more transparent. This law comes just after another one forcing HOAs to allow homeowners to harden their homes against hurricanes.
Here's what changed.
What Florida HOAs can't do to homeowners anymore
As of July 1, 2024, HOAs will be prohibited from:
- Enforcing rules on some residents but not others
- Banning homeowners or their invited guests from parking personal, business or first responder vehicles (including pickup trucks) that are not commercial vehicles in their driveways or any other area where they have a right to park per state, county and municipal regulations
- Banning contractors or workers from the homeowner's property
- Fining residents for leaving garbage cans at the curb or the end of their driveway within 24 hours of a scheduled trash collection
- Fining residents for leaving up holiday lights or decorations past the HOA's rules without prior notice, after which the homeowner will have one week to take them down
- Limiting or creating rules for the inside of a structure that isn't visible from the street, a neighbor's property, an adjacent common area or a community golf course
- Banning vegetable gardens or clotheslines, if they can't be seen from the street, a neighbor's property, an adjacent common area or a community golf course
- Require review and approval of plans for central air conditioning, refrigeration, heating or ventilation system that isn't visible from the street, a neighbor's property, an adjacent common area or a community golf course and is similar to previously approved systems
If a construction or improvement request is denied, the HOA also must provide written notice "stating with specificity" exactly why and under which rule or covenant.
Law requires HOA transparency
Every HOA must keep its official records (bylaws and amendments, articles of incorporation, declaration of covenants, current rules, meeting minutes, insurance policies, contracts, financials, budgets, tax returns, voting records, etc.) for at least seven years. Destruction of accounting records within that time is a first-degree misdemeanor.
HOAs with more than 100 parcels must post all of their rules, convenents, budgets and related documents on their websites by Jan. 1.
HOAs must provide notice and agendas for any scheduled meeting of its members at least 14 days in advance in plain sight on its website. Any document to be considered and voted on must be posted online at least seven days before the meeting.
An HOA with at least 1,000 parcels must prepare audited financial statements.
Official records must be made available to a parcel owner within 10 business days of receipt of their written request, with some restrictions on how many physical copies are permitted, or the HOA must pay damages. Violation is a second-degree misdemeanor. Refusal to comply with the intent of avoiding criminal investigations or punishment is a third-degree felony.
If an HOA receives a subpoena for records from a law enforcement agency, they must provide a copy or make them available for copying within five business days.
Every three months, a homeowner may make a written request for a detailed accounting of any and all money they owe to the association related to their parcel, and get it within 15 business days. If the board does not comply, any outstanding fines the person owes older than 30 days that they never received written notice of will be waived.
HOA director education, and bribes
A newly elected or appointed director must complete education on financial literacy and transparency, recordkeeping, levying of fines, and notice and meeting requirements within 90 days and repeat it at least every four years.
On top of that, the director of an HOA with fewer than 2,500 parcels must complete at least four hours of continuing education every year or be suspended until they do.
An HOA officer, director or manager who solicits offers or accepts kickbacks commits a third-degree felony and must immediately be removed from office.
HOA managers or management firms have to be involved and easy to find
An HOA manager or a representative of the HOA management firm must:
- Attend, in person, at least one annual member or board meeting
- Provide the name and contact information for every HOA manager or management form rep assigned to the HOA along with their hours of availability and a summary of their duties, which must be posted to the HOA's website and kept current
- Provide a copy of the contract between the manager or management firm and the HOA and keep it with the HOA records
- Complete at least five hours of continuing education on HOAs, with three hours relating to recordkeeping
What are HOAs?
A Homeowner's Association or HOA is an organization in a planned community, neighborhood subdivision or condominium building that creates and enforces rules for the properties, residents and guests. It charges fees to be used for the maintenance of the community and may levy fines against residents who violate the rules.
HOA rules are often in place to maintain conformity among the permitted architecture, color schemes, landscaping and decorations. HOAs also enforce parking restrictions, noise complaint policies, home occupancy limits, vacation rentals and more.
Anyone buying property within the jurisdiction of an HOA automatically becomes a member of the HOA and subject to its restrictions and covenants.
IMAGES
VIDEO
COMMENTS
Use a carport. One of the best ways to keep snow off your RV roof is to use a carport or another form of covered storage. Putting a roof over your RV will inevitably catch the vast majority of snow, although a little bit could still blow inward if it's an open carport. Of course, snow can still build up on the roof of the carport, so that ...
Need to get the snow off of your RV roof? Let's take a look at the easiest way to do that. Enjoy. Links For Full Moon Adventure ClubInstagram https://www.in...
Is your trailer roof covered in some serious snow? What's the best way to remove it? Or should you actually remove it at all? There are lots of conflicting o...
4 Ways to Keep Snow Off RV Roofs. 1. Use a roof rake: A roof rake is a long-handled tool that allows you to safely remove snow from your RV's roof without having to climb onto the roof itself. 2. Use a soft brush: A soft brush can be used to gently remove snow from your RV's roof without damaging the surface. 3.
Get a slanted roof on your RV. Use a flushing solution to remove snow. Install a snow rake. Park your RV in a storage facility. Park against the direction of the wind. Physically remove the snow. Use RV covers. Invest in high-quality roof coatings. Choose an automotive de-icer.
Why You Should Remove Snow From Your RV Roof. Having snow on your RV's roof may not look like it can be dangerous to your RV. Contrary to what you may have believed, an accumulation of snow on the roof can become a major source of concern. A square inch (6.45 square cm) of snow will weigh about 12 pounds (5.44 kg). Imagine about 5 square ...
Snow buildup can damage your RV. Here's how we eliminate the snow off of our RV Roof so you can have a worry free vacation in the outdoors.
Specialized Commercial Snow Tools: Invest in sturdy metal roof rakes, extendable poles, and pusher/scraper combos designed for RV use for heavy snow-clearing jobs. Snow Removal Services: Hire a professional mobile snow removal company experienced with RVs to safely and quickly clear rooftop snow buildup over a certain depth or weight.
How to Keep Snow Off RV Roof. 1. Parking Near Windbreaks. If you own an RV then there is a high chance that you enjoy going out for long trips. When staying out during a cold climate, one of the main problems that you will run into is snow forming above the vehicle. This can be annoying as well as dangerous for the motorhome.
The Dicor brand name has always been synonymous with quality, and this EPDM rubber roof coating of theirs will certainly not disappoint. It can help add many more years of life to your RV. 2. Heng's 1-gallon Rubber Roof Coating. Heng's rubber roof coating has always been one of my go-to RV roof replacement products.
Imagine your 25-foot travel trailer with 25-feet by 7-feet of roof space. For every square foot, now add a foot of snow, not an unrealistic amount in snowy areas. You can easily end up with over 3,500 pounds of snow on the roof of your RV. That kind of weight can do severe damage to your roof, especially to an older, or leaking roof.
Keep it clean. For those who do not have a covering or protection for your RV, clearing the snow from the roof regularly is the next best option. As snow piles up, and eventually begins to melt, it can cause major issues. Water will always find somewhere to go, and the smallest scratch on the membrane or crack in the seals of your roof can lead ...
If you do decide to remove some snow, leave 3-4 inches to keep protect your membrane from your roof rack or shovel. I would recommend having the TT nose high or low, to encourage any melt to flow off a little faster. __________________. 2012 Jayco X23B. 2020 Ram Laramie 3500 SRW Air ride 50Gal fuel tank.
An RV roof can hold up to 2 ft (60 cm or 24 inches) of snow weighing 250 to 300 lbs (113-136 kg); remember that wet snow weighs more. These amounts can vary depending on the roof's material and condition. If the snow gets too heavy, there is a risk of the RV roof collapsing. Read on and find out how much snow RV roofs can hold and if the roof ...
Surprisingly, the heavy layer of snow acts like a super insulation. The layers close to the roof can melt and remain slushy, while the top of the snow is still nice and fluffy. This isn't as pronounced in an unheated RV, but as the sun climbs higher in the sky in early Spring you can still be faced with water under the snow.
Chad Shepard from http://PetesRV.com provides tips on properly removing snow from your RV roof. Key things to remember are not using a metal shovel, careful...
Several inches of snow can cause your RV's roof to collapse and damage your RV. The damages can cause structural issues and water to seep into your RV. Save yourself the hassle, and ensure you regularly remove snow from the roof of your RV or trailer. Trust us; you don't want to deal with the consequences of not removing the snow.
Snow left on the roof of an RV can eventually become so heavy with rainwater that it can collapse the roof. Use caution when on the roof of an RV removing snow. Also, use something soft like a broom to sweep away the snow. Sharp objects like a snow shovel can easily cause damage to the roof membrane or vents/covers.
Here's a step-by-step on how we used Heng's Rubber Roof Coat to recoat an aging travel trailer roof: 1. Prepare the surface. Use a scrub brush and a bucket of soapy water. CAREFUL! Heng's tells us it's extremely important to use the right kind of soap.
Camper roof replacements typically cost between $300 and $325 per linear foot. For example, if your RV is 30 feet long, it would cost between $9,000 and $9,750 to replace the roof of your RV. The cost largely depends on the type of roof material, and the labor costs of the auto shop completing the job.
I give an overview of what I check during the winter months while our travel trailer is in storage. NOTE: At the time of filming I was not aware that RV ant...
Based on my experience, the top sealants are: Dicor 95D40-35 Epdm RV Rubber Roof coating: Best overall for durability and versatility. Dicor RP-MRC-1 Elastomeric Coating: Excellent for UV stability and flexibility. Heng's Rubber Roof coating for RV: Great choice for large scale applications, offering a solar reflective finish.
The trusses at each end of the structure should be pre-built. The trusses on the end of the structure should be nailed to the decking. To enclose the roof, apply siding to match the trailer. Give an extra 8-12 inches when measuring the rafter. Wear slip-resistant shoes when installing a metal roof.
Here's what changed. What Florida HOAs can't do to homeowners anymore. As of July 1, 2024, HOAs will be prohibited from: Enforcing rules on some residents but not others