
Unleash Your Inner Geek on a Bike

How to Raise the Handlebars on a Trek Bike
Shahed Parvej

Affiliate Disclaimer
As an affiliate, we may earn a commission from qualifying purchases. We get commissions for purchases made through links on this website from Amazon and other third parties.
As an Amazon Associate, I earn from qualifying purchases.
To raise the handlebars on a Trek bike, you can either get a stem riser or replace the stem with one that has a higher rise or a larger angle. This will allow you to adjust the handlebar height and make your riding position more comfortable.
Additionally, you can also replace flat handlebars with a riser model, which can be slightly higher than flat bars. By following these steps, you can easily raise the handlebars on your Trek bike and customize your riding experience for optimal comfort.
Step 1: Assessing Your Handlebar Height
To raise the handlebars on a Trek bike, start by assessing the handlebar height. This can be done by adjusting the stem or using a stem riser. Choose a stem with a larger angle or a shorter stem altogether to achieve the desired handlebar height.
Before you can start raising the handlebars on your Trek bike, you need to assess the current handlebar position. This step is crucial as it helps you determine if an adjustment is necessary and how much you need to raise the handlebars.
Checking The Current Handlebar Position
To check the current handlebar position, follow these steps:
- Stand in front of your bike and ensure it is on a level surface.
- Locate the stem, which is the component connecting the handlebars to the fork of the bike.
- Note the position of the stem in relation to the steerer tube. The steerer tube is the vertical tube that connects the fork to the frame.
- Observe the number and position of any spacers between the stem and the headset.
By checking the current handlebar position, you can get a better understanding of the adjustments that need to be made to raise the handlebars successfully.
Identifying The Need For Adjustment
After checking the current handlebar position, you can now identify whether an adjustment is needed. Here are a few signs that indicate the need to raise the handlebars:
- You experience discomfort or pain in your wrists, shoulders, or back while riding.
- Your riding posture feels too hunched over, causing strain on your neck.
- Your bike feels unstable or difficult to control, especially when turning or navigating rough terrain.
- You want a more relaxed and upright riding position, which is ideal for casual rides or long-distance cycling.
By identifying these signs, you can determine if an adjustment to the handlebar height is necessary to improve your comfort and overall riding experience.
Step 2: Tools And Materials Needed
To raise the handlebars on a Trek bike, you may need tools such as a stem riser or a stem with a higher angle or shorter length. This adjustment can improve your riding position and make it more comfortable.
Step 3: Loosening The Stem Bolts
To raise the handlebars on a Trek bike, start by loosening the stem bolts. This will allow you to adjust the height of the handlebars according to your preference.
Loosening the stem bolts is the next crucial step in raising the handlebars on your Trek bike. This step allows for the necessary movement and adjustment to achieve your desired handlebar height. Follow these simple instructions to ensure a smooth and successful process:
Preparing The Bike For Handlebar Adjustment
- Find a suitable workspace where you can comfortably work on your bike.
- Ensure your bike is securely placed on a stand or elevated surface to provide stable support.
- Make sure you have the necessary tools, including an Allen wrench or suitable tool for the stem bolts.
Loosening The Bolts To Allow Movement
Now that you’ve prepared your bike for handlebar adjustment, it’s time to proceed with loosening the stem bolts. Follow these steps:
- Locate the stem bolts on the top of your bike’s steerer tube. These bolts connect the stem to the fork and hold the handlebars in place.
- Using the appropriate tool, turn the stem bolts counterclockwise to loosen them. Be sure to loosen each bolt evenly to allow for a balanced adjustment.
- Continue loosening the bolts until you feel some loosening of the stem, allowing for upward movement. Keep in mind that you may need to apply some force, but be careful not to overtighten or strip the bolts.
- Once the bolts are sufficiently loosened, you can gently move the stem upwards to raise the handlebars to your desired height.
Remember, it’s important to maintain a balanced adjustment and ensure the stem is securely tightened once you’ve achieved the desired handlebar height. This will provide stability and safety while riding your Trek bike.
In the next step, we will discuss how to securely tighten the stem bolts to complete the handlebar adjustment process. Stay tuned!
Step 4: Adjusting The Handlebar Height
Adjusting the handlebar height on a Trek bike is a simple process that can improve your riding comfort. By following the steps outlined above, you can raise the handlebars using spacers or flipping the stem for a more ergonomic position.
Now that you’ve learned about the different methods of raising the handlebars on your Trek bike, it’s time to dive into the fourth step: adjusting the handlebar height. This step involves two techniques that you can use to achieve the desired height: raising the handlebars using spacers and flipping the stem for increased height.
Raising The Handlebars Using Spacers
If you’re looking for a simple and cost-effective way to raise the handlebars on your Trek bike, using spacers is a great option. Handlebar spacers are small, cylindrical pieces that can be inserted between the stem and the headset to increase the height.
To raise the handlebars using spacers, follow these steps:
- Loosen the stem bolts using an Allen wrench.
- Gently lift the stem and handlebars upward to create some space.
- Place the desired number of spacers on top of the headset.
- Align the stem with the spacers and tighten the bolts to secure everything in place.
- Ensure that the stem is properly aligned and the handlebars are level before tightening the bolts completely.
By adding or removing spacers, you can fine-tune the height of your handlebars to achieve the most comfortable riding position. Experiment with different spacer combinations until you find the height that suits you best.
Flipping The Stem For Increased Height
If you’ve already reached the maximum height using spacers or want to explore other options, flipping the stem can provide further elevation for your handlebars. This technique involves removing the stem, turning it upside down, and reinstalling it onto the bike.
To flip the stem for increased height, follow these steps:
- Remove the stem from the headset by pulling it upward.
- Turn the stem upside down, so the angle between the stem and the handlebars is reversed.
- Reinsert the stem into the headset and align it with the desired height.
- Tighten the bolts to secure the stem in place.
Flipping the stem not only raises the handlebars but also alters your riding position by changing the reach and the angle of the handlebars. Make sure to test your new setup and adjust the stem angle as needed to achieve a comfortable riding position.
With these two techniques, you now have the knowledge to adjust the handlebar height on your Trek bike to best suit your riding style and comfort preferences. Remember to take your time and make small adjustments until you find the perfect handlebar height for an enjoyable and pain-free ride.
Step 5: Ensuring Proper Tightening
To ensure proper tightening of the handlebars on a Trek bike, follow these steps carefully and avoid any overused phrases. Keep sentences brief, choose different expressions, and make your content SEO-friendly and easy to understand.
Tightening The Stem Bolts Securely
Testing the stability of the handlebars, step 6: checking for comfort and fit.
To raise the handlebars on a Trek bike, follow these steps. First, loosen the stem cap and remove any spacer above the stem. Then, adjust the stem to your desired height and tighten the bolts. Finally, reassemble the stem cap and test for comfort and fit.
Making Adjustments For A Comfortable Riding Position
Once you have raised the handlebars to your desired height, the next step is to make further adjustments for a comfortable riding position. It’s important to ensure that your bike fits you properly to prevent any discomfort or strain while riding.
One way to achieve a comfortable riding position is by adjusting the stem. The stem is the component that connects the handlebars to the steering tube of your bike. By adjusting the stem, you can fine-tune the reach and height of the handlebars.
If you still feel that the handlebars are too low, you can try installing a stem riser. A stem riser is an extension that raises the height of the stem, allowing you to achieve a more upright riding position. Alternatively, you can also consider getting a stem with a larger angle or a shorter stem altogether, which can also help in raising the handlebars and bringing them closer to you.
Testing The Handlebar Height Before Finalizing
Before finalizing the handlebar height, it’s crucial to test and ensure that it feels comfortable and provides a good fit for your body. Here are a few things you can do to check the handlebar height:
- Take your bike for a short test ride around your neighborhood. Pay attention to how your body feels in relation to the handlebars. Are you able to maintain a relaxed and comfortable grip? Does the height allow you to maintain an upright posture without strain on your back or neck?
- Experiment with different handlebar positions. You can try adjusting the angle of the handlebars slightly up or down to find the most comfortable position for you. Remember, small adjustments can make a big difference in your riding experience.
- Consider your riding style and preferences. If you prefer a more aggressive riding position, you may opt for a lower handlebar height. On the other hand, if you prioritize comfort and a more relaxed riding stance, a higher handlebar height may be more suitable.
Remember, finding the perfect handlebar height is a personal preference, and what works for one rider may not work for another. It’s important to listen to your body and make adjustments accordingly. Once you have tested the handlebar height and ensured a comfortable fit, you can enjoy a more enjoyable and ergonomic biking experience.
Step 7: Additional Considerations For Trek Bikes
For those looking to raise the handlebars on their Trek bike, there are several additional considerations to keep in mind. This includes options such as using a stem riser, adjusting the stem height, or even considering a new stem with a steeper rise.
Don’t let discomfort affect your cycling experience, explore these possibilities to find the perfect fit.
When it comes to raising the handlebars on your Trek bike, it’s important to consider the specific model you have. Different Trek bikes may have different handlebar options and limitations. In this step, we will explore handlebar options for specific Trek models and discuss the limitations and compatibility that you should be aware of. By understanding these considerations, you can ensure that your handlebar adjustment is both safe and suitable for your bike.
Exploring Handlebar Options For Specific Trek Models
Each Trek bike model may have its own unique handlebar options. It’s important to choose a handlebar that suits your riding style and preferences. Here are some popular handlebar options for specific Trek models:
Understanding The Limitations And Compatibility
When raising the handlebars on your Trek bike, it’s important to be aware of the limitations and the compatibility of different components. Here are a few key considerations:
- Compatibility with stem: Ensure that the new handlebars are compatible with the stem of your Trek bike.
- Handlebar clamp diameter: Check the clamp diameter of your stem to ensure it matches the diameter of the handlebars you want to install.
- Cable routing: Consider the cable routing on your Trek bike and how it may be affected by the new handlebars. Ensure that the cables have enough length and can be properly routed.
- Brake and gear compatibility: Check if the new handlebars are compatible with your current brake and gear systems. Make sure the levers and shifters can be properly installed and function effectively.
Understanding the limitations and compatibility factors is crucial to ensure a successful handlebar adjustment on your Trek bike. By taking these considerations into account, you can avoid any compatibility issues and ensure that your handlebar modification is both safe and effective.
Credit: www.trekchicago.com
Frequently Asked Questions Of How To Raise The Handlebars On A Trek Bike
Can you raise the handlebars on a trek bike.
Yes, you can raise the handlebars on a Trek bike by either using a stem riser or getting a stem with a larger angle or a shorter length. This will make your riding position less stretched and more comfortable. Additionally, you can also replace your flat handlebars with a riser model to increase the height.
What Is The Problem With The Handlebars On A Trek Bike?
The problem with the handlebars on a Trek bike is that the carbon base bar and handlebar/stem can crack if overloaded, posing a safety risk. Trek has issued a recall for these products to ensure customer safety. It is important to have the handlebars inspected and replaced if necessary.
Can You Raise The Height Of Bike Handlebars?
Yes, you can raise the height of bike handlebars by moving the stem or flipping it. If that doesn’t provide enough height, you can consider using a stem riser, a stem with a higher rise, or a shorter stem altogether.
Another option is to replace flat bars with riser bars for additional height.
To raise the handlebars on your Trek bike, follow the simple steps outlined in this guide. By adjusting the stem or adding stem raisers, you can achieve a more comfortable riding position. Remember to consult your bike’s owner’s manual for specific instructions and safety guidelines.
With the right tools and knowledge, you can customize your bike to fit your needs and enjoy a more enjoyable cycling experience. Don’t forget to prioritize your safety while making any adjustments. Happy riding!
About the author

I’m Shahed Parvej, the proud owner and founder of this platform. As a passionate Bike Enthusiast, I’ve embarked on a journey to share my knowledge, experiences, and insights with fellow enthusiasts, newcomers, and everyone intrigued by the world of biking.
Leave a Reply Cancel reply
Your email address will not be published. Required fields are marked *
Save my name, email, and website in this browser for the next time I comment.
Latest posts

Discover the Ultimate Best Bike Brake in 2024 for Unbeatable Cycling Performance
As an Amazon Associate, I earn from qualifying purchases.Looking for the best bike brake in 2024? The shimano xtr m9100 disc brake offers top-notch performance, reliability, and precision, making it a standout choice for cyclists. The importance of a reliable bike brake cannot be overstated, especially when it comes to ensuring safety on the…

Can You Put 27 5 Wheels On A 29Er: Unveiling the Ultimate Upgrade
As an Amazon Associate, I earn from qualifying purchases.Yes, you can put 27.5 wheels on a 29er bicycle as long as the frame and brakes allow for the smaller wheel size. Swapping to smaller wheels can improve agility and maneuverability on rough terrain. It’s essential to consider the impact on the bike’s geometry, bottom…
What is a Wet Bike
As an Amazon Associate, I earn from qualifying purchases.A Wet Bike is a planing motorized watercraft that combines the features of a motorcycle and a jet ski. It is propelled by pump jets, similar to other personal watercraft. The original Wetbike was introduced by Spirit Marine and marketed as a “water motorcycle” with the thrill…
- More Networks

How To Raise The Handlebars On A Trek Bike
If you’re looking to raise the handlebars on your Trek bike, there are a few things you’ll need to do. First, you’ll need to loosen the stem bolts that secure the handlebars to the frame. Next, you’ll need to raise the handlebars to the desired height and tighten the stem bolts. Finally, you’ll need to check the handlebar height to make sure it’s comfortable for you. Follow these steps and you’ll have your Trek bike set up in no time!
- Unscrew the cap at the top of the stem
- Insert a hex key into the bolt and loosen it
- Raise the handlebars to the desired height and retighten the bolt
- Screw the cap back on
Trek bike handlebar/stem extender
- 1 Trek bike handlebar/stem extender
- 2 How do you adjust the handlebar height on a Trek bike?
- 3 How do I raise the handlebars on my bike?
- 4 How do you raise the trek Marlin handlebars?
- 5 How do you raise the handlebars on a trek verve 2?
- 6 How to change your handlebar height
- 7 Conclusion
If you ride a bike, you know how important it is to have a comfortable grip on the handlebars. But what do you do when your bike’s handlebars are too close together? That’s where a Trek bike handlebar/stem extender comes in handy. A Trek bike handlebar/stem extender is a simple device that attaches to your bike’s handlebars and extends them outwards, giving you a wider grip. This can be extremely helpful if you have large hands or if you’re riding a bike with narrow handlebars. Installing a Trek bike handlebar/stem extender is a quick and easy process. Simply remove the screws that hold on your bike’s existing handlebar grips and then screw on the extender. It’s that simple! Once installed, you’ll immediately notice a difference in the way your bike feels. You’ll have more control and a more comfortable grip on the handlebars. And, you won’t have to worry about your hands slipping off the handlebars while you’re riding. If you’re looking for a way to improve your bike riding experience, consider installing a Trek bike handlebar/stem extender. You won’t be disappointed!
How do you adjust the handlebar height on a Trek bike?
Assuming you would like a blog post discussing how to adjust the handlebar height on a Trek bike: Many people think that you can only adjust the handlebar height on a Trek bike by taking it to a bike shop. However, this is not the case! You can actually adjust the handlebar height on a Trek bike yourself, and it’s pretty easy to do. The first thing you need to do is loosen the handlebar clamp bolts. To do this, simply unscrew the bolts with an Allen wrench. Once the bolts are loosened, you can slide the handlebars up or down to the desired height. Once you have the handlebars at the desired height, tighten the clamp bolts back up. That’s it! You’ve now successfully adjusted the handlebar height on your Trek bike. Keep in mind that you may need to readjust your stem if you adjust the handlebar height by more than a few centimeters. Also, if you have a carbon handlebar, be careful not to overtighten the clamp bolts, as this could damage the handlebar.
How do I raise the handlebars on my bike?
Assuming you would like tips on how to raise the handlebars on your bike: If you’re finding that your handlebars are too low and you’re struggling to ride comfortably, you may need to raise them. This is a relatively simple process that can be completed in just a few minutes with the right tools. First, you’ll need to gather a few supplies. You’ll need an adjustable wrench, an Allen key set, and a Phillips head screwdriver. Once you have your tools, you can begin the process of raising your handlebars. Start by loosening the bolts that secure your handlebars to the stem. These bolts are typically located at the top of the stem, and you’ll need to use your adjustable wrench to loosen them. Once the bolts are loose, you can begin to raise the handlebars. Raise the handlebars slowly and evenly until they’re at the height you’re comfortable with. Once they’re in the desired position, you can use your Allen key set to tighten the bolts back into place. Make sure the bolts are tight enough that the handlebars won’t move, but don’t overtighten them as this can damage the bolts. And that’s it! You’ve now successfully raised your handlebars and can enjoy a more comfortable ride.
How do you raise the trek Marlin handlebars?
If you’re looking to raise the handlebars on your Marin bike, there are a few things you’ll need to do. First, you’ll need to loosen the stem bolts that hold the handlebars in place. Next, you’ll need to remove the handlebars from the stem. Once the handlebars are removed, you can add spacers to the stem to raise the handlebars to your desired height. Finally, you’ll need to re-attach the handlebars and tighten the stem bolts. Follow these steps and you’ll have your Marin bike set up with higher handlebars in no time!
How do you raise the handlebars on a trek verve 2?
If you’re looking to raise the handlebars on your Trek Verve 2, there are a few things you’ll need to do. First, you’ll need to loosen the stem bolt using an Allen wrench. Next, you’ll need to unscrew the top cap and remove the star nut. Once these two things are removed, you can raise the handlebars to your desired height and tighten the stem bolt back down. Finally, put the top cap and star nut back on and you’re all set!
How to change your handlebar height
To raise the handlebars on a Trek bike, first loosen the bolt at the base of the stem using an Allen wrench. Next, raise the handlebars to the desired height and tighten the bolt. You may need to readjust the brake cables and shifters after raising the handlebars.

How To Raise The Handlebars On A Trek Bike
Trek is a well-known bike brand known for how well they work. One thing that makes Trek bikes so easy to ride is that the handlebar height can be changed. This lets riders find the one that fits their needs the best.
Many riders like Trek bikes because they are well-made and work well. You need to set the handlebars to the right height for the best ease, control, and posture while riding.
You want to know how to raise the handlebars on a trek bike? This article will show you to raise the handlebars on a Trek bike so that you can ride it more comfortably.
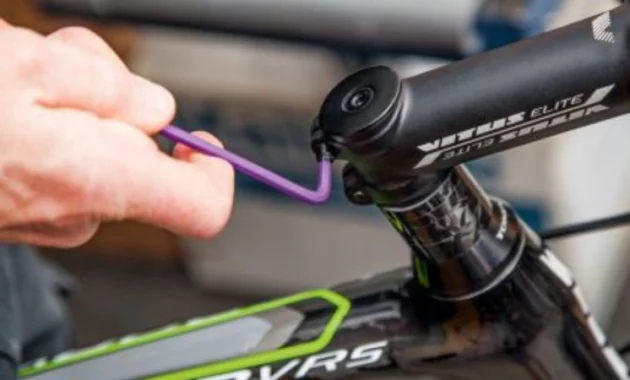
How To Determine The Appropriate Handlebar Height For A Trek Bike
Finding the right handlebar height for your Trek bike is important if you want to ride easily and healthily. Here are some steps that will help you figure out the right height for the handlebars:
Style and Preference : Consider your riding style and preferences when choosing handlebar height. Choose a lower handlebar height if you prefer a more active and aerodynamic ride. A higher handlebar height may be better for a more relaxed and upright position.
Body Mechanics and Flexibility : Consider your body’s flexibility when adjusting your handlebar height to avoid discomfort in your back, neck, and shoulders. Consider your arm height based on your flexibility, core strength, and any injuries or limitations you have.
Bike Fit Assessment : Give your bike a thorough fit exam. This can be done by talking to a skilled bike fitter or using online calculators or guides for a bike fit. These tools usually suggest an initial handlebar height based on your height, inseam length, torso length, and arm length.
Initial Adjustment : Based on the assessment or suggestions, start with a handlebar height that is on the low side. It’s always best to start with a little higher handlebars and then make changes as needed. This lets you fine-tune the setting based on how comfortable you are and how you like to ride.
Test Rides and Adjustments : Take a few test rides on your Trek bike with the handlebars at the starting height. Pay attention to any pain or strain in your body, especially in your neck, shoulders, and lower back. If you feel uncomfortable or like you can’t keep control of the bike, this could mean that the handlebars need to be changed.
Changes Made Gradually : Adjust the handlebars in small increments by moving them up or down about 5mm at a time. Test ride the bike after each adjustment to see how it affects your comfort and riding experience. Make small adjustments until you find the right height that gives you optimal ease, stability, and control.
How To Adjust Trek Bicycle Bars
Raising the handlebars is an easy job. Just read the steps to do the job like a professional:
Step 1: Gather The Required Tools
Before starting the handlebar adjustment process, make sure you have the following tools:
Allen wrench set : Depending on your bike’s specifications, different sizes may be needed.
Adjustable wrench : This may be necessary to loosen or tighten certain components.
Step 2: Evaluate The Existing Setup
Take a moment to analyze your current handlebar position. Identify the style of the handlebar stem on your Trek bike, as it will determine the specific steps required for adjustment. The two most common stem styles are quill stems and threadless stems.
Quill stems : These stems have a long vertical tube that slides into the bike’s fork steerer tube. They are secured in place with a single bolt at the top. To raise the handlebars on a quill stem, you will need to adjust the stem’s height.
Threadless stems : These stems consist of a horizontal steerer tube and a stem that clamps onto it. The stem height can be adjusted by adding or removing spacers and by repositioning the stem itself.
Step 3: Raising Handlebars On Quill Stems
If your Trek bike has a quill stem, follow these steps:
Loosen the bolt : Locate the bolt at the top of the stem. Use an appropriately sized Allen wrench or adjustable wrench to loosen the bolt. Turn it counterclockwise until it is loose enough to allow the stem to move.
Adjust the stem height : Gently lift the stem upwards to the desired height. Take note of the maximum height indicator line on the stem. Ensure that the stem remains aligned with the front wheel.
Tighten the bolt : Once you have set the desired height, tighten the bolt by turning it clockwise. Make sure it is securely tightened to prevent any movement or slippage during rides.
Test the adjustment : Give the handlebars a firm shake and apply moderate pressure to ensure they are properly secured. Make any additional adjustments if necessary.
Step 4: Raising Handlebars On Threadless Stems
If your Trek bike has a threadless stem, the process involves adjusting the stem’s position and possibly adding or removing spacers:
Evaluate spacer arrangement : Inspect the spacers positioned above and below the stem. If there are no spacers above the stem, proceed to step 2. If there are spacers above the stem, you will need to reposition them below it.
Loosen stem bolts : Locate the bolts on the side of the stem where it clamps onto the steerer tube. Loosen these bolts by turning them counterclockwise using an appropriately sized Allen wrench.
Adjust the stem height : Gently lift the stem to the desired height. If you need to add or remove spacers, slide them below the stem or lift them off the steerer tube, respectively.
Align the stem : Ensure that the stem is aligned with the front wheel. Verify that the gap between the stem and the top tube is equal on both sides.
Tighten the stem bolts : Once the stem is at the desired height and properly aligned, tighten the stem bolts by turning them clockwise. Start with a snug fit, and then gradually increase the tightness of each bolt in a crisscross pattern until they are securely tightened.
Test the adjustment : Similar to the quill stem adjustment, test the handlebars by shaking them and applying pressure. Confirm that everything is secure and there is no movement or slippage.
Properly adjusting the handlebars on your Trek bike is crucial for maintaining a comfortable and efficient riding position. By following the step-by-step instructions outlined in this essay, you can confidently raise the handlebars on both quill and threadless stems.
Remember to pay attention to safety, ensure all components are tightened correctly, and test the adjustments before embarking on your next cycling adventure. Enjoy your ride with elevated handlebars, providing you with a more enjoyable and ergonomic cycling experience.
Mike Anderson
Hello Dudes, Mike Anderson here! I am a freaky traveler who goes anywhere, on any kind of track or path with my bicycle. In that way Mehedi and Laura found me. And, I love to talk about the different types of cycling issues (almost about all Bikes) in my blog post.
How To Paint Spoked Motorcycle Wheels
Maxxis exo vs maxxis exo+ [which is better], leave a reply cancel reply.
Save my name, email, and website in this browser for the next time I comment.

How to Raise Handlebars on Trek Mountain Bike
Last Updated on March 10, 2022
Trek is one of the biggest and most popular bike manufacturers in the globe. And there’s a good chance you might ride one!
If so, you might have asked yourself how to raise handlebars on Trek mountain bike . Well, you’ve just found the perfect place.
Because here, we’ll show you the right way on how to raise handlebars on Trek mountain bike . We’ll also tell you the tools needed and some tips to adjust your handlebar.
Table of Contents
Tools needed
- Torque wrench
Related: What Mountain Bike Tools Do I Need
How to add headset spacers?
The best way to raise your bike’s handlebar is to add spacers. The first thing to do is to place your bike on your workstation stand.
Make sure that the wheels are firm on the ground. Then slowly loosen the clamp bolts on your stem’s rear area. Add a bit of grease on the top cap’s bolt. This is important to avoid seizing especially if you always ride on gnarly trails.
The next thing to do is to remove the top cap. This is the one that sits directly above the stem’s top part. Then slowly slide the stem away from the steerer tube. You’ll see that it’s like how the bolt and top cap looks like.
Thread these into a star nut. This holds them in place and ensures it won’t topple off when hitting jumps and drops.
But you need to use a bung if you have a carbon handlebar. This is an expanding wedge which makes the adjustment process easier and more accurate.
Decide how many centimeters you’ll raise your handlebar. You need to add more spacers if you want to have a very high handlebar. You’ll usually need 2 or 3 additional spacers if you ride downhill trails.
This provides better maneuverability and control when tackling technical sections. Add a bit of grease so that the two surfaces won’t rub and damage each other. Then slowly slide the stem directly into your steerer tube.
Make sure there’s enough gap between your stem, spacer, and steerer tube. This gap usually measures around 3 to 5 mm. This ensures that there is enough space for the top cap headset to clamp back on your headset bearing.
It also allows the headset to preload. Then slowly palace the bolt and top cap on top of the stem. Tighten it until you feel some kind of resistance. But make sure it’s not too tight as this can break your stem. It’s best if you use a torque wrench to get the right tightness.
The next thing to do is to align your stem with your front wheel. This ensures that the handlebar is at your wheel’s right angle. It also makes it easier for you to straddle on the bike’s top tube. This makes your ride more controllable and comfortable, especially if you always ride downhill.
Get your torque wrench once you’ve aligned the stem and front wheel. Use the torque wrench to clamp the bolts back to the bar.
We recommend you set the torque around 5 to 8 Nm. This isn’t tight or loose, but just right. This is important because a very tight stem might break your handlebar especially if it’s carbon.
Then check the adjustment of your headset. Hold your front brake with one hand, while the other is on your headset. Then slowly rock the handlebar sideways and back and forth.
Get a feel of the rocking motion to see if it’s installed properly. Loosen the clamp bolts again if you feel any rocking motion. Then tighten the top cap bolt again. You’ll usually need just a quarter turn. Then use your torque wrench to tighten the bolts again.
How to flip the stem on a Trek mountain bike?
The most popular way to raise your handlebars is to add spacers. But if these aren’t enough, then you can just flip the stem. This changes the bar height because the shape of the stem is upside down.
Note that most stems are in a positive position which creates an upward angle. But you can flip it so it goes the other way around. Unbolt the handlebar from the stem’s front part. Make sure that both your bike’s wheels are on the ground so it won’t move.
We also recommend putting it on a workstation stand to secure it in place. Remember the angle of the handlebar and brake lever. This is important so you can keep your preferred angle later.
Use masking tape to mark the handlebar and face plate’s original angle. This will help you get the correct angle when refitting. Then undo the bolts which connect the handlebar to the stem’s frontal section. Remove the faceplate of the stem.
Then slowly release the handlebar and let it gently drop to the side. Then follow the steps mentioned above on how to add spacers. Flip the stem that is off the bike and slide it back to its original place on the steerer tube.
Reinstall the handlebar and follow the original angle of the handlebar and brake lever. Tighten the stem to the recommended torque. This is usually around 5 to 8 Nm. Make sure that all bolts are tightened evenly so there’s no gap.
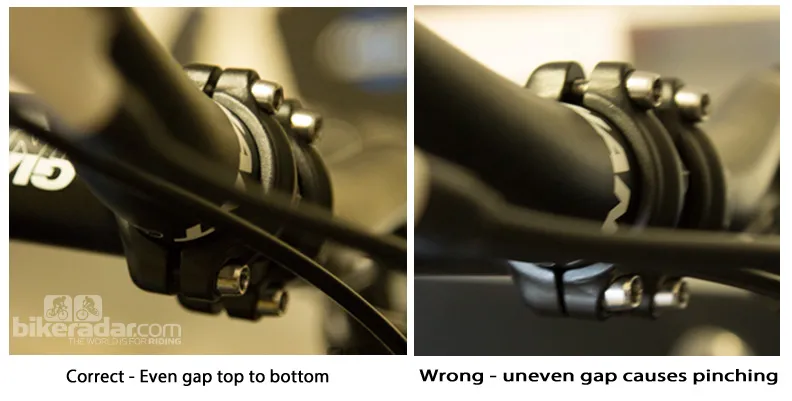
This is very important, so your cockpit won’t rattle and get loose when you jump your bike . There should also be an even gap from top to bottom. The handlebar is pinched if the gap isn’t even. This can damage the bars if left unfixed in the long run.
Knowing how to raise handlebars on Trek mountain bike is important. Not only does this ensure that you are comfortable on your ride. But it also gives better control and safety.
The steps on how to raise handlebars on Trek mountain bike isn’t really difficult. In fact, it’s easy as long as you follow the right steps!
Just remember to take good care of your bike, use the right tools, and ride safely. When you do, then you’ll surely have a fun time riding your Trek mountain bike.
How to Change Handlebar Grips on a Mountain Bike
How to Cut Carbon Handlebars
How to Measure Mountain Bike Handlebars
This site is reader-supported and we earn commissions if you purchase products from retailers after clicking on a link from our site. As an Amazon Associate, I earn from qualifying purchases.
© MTB Rules
Privacy Policy | Terms Of Service
- MAGAZINE OFFERS
- BIKE INSURANCE
- Best Products
- Maintenance
- Accessories
- Long-Term Reviews
- BikeRadar Podcast
- First Look Friday
- Bike of the Week
- Tech Features
- Routes and Rides
- Bike Galleries
- BikeRadar Bargains
- Buyer's Guides
- Fitness & Training
- Sizing & Fit
- Mountain Biking UK
- Cycling Plus
- Bike of the Year 2024
How to adjust the handlebar height on your bike
Why and how you should experiment with bar height
Stan Portus / Our Media
One of the key things we do to make our test bikes handle better is adjust the handlebar height. Often, the off-the-shelf bar height doesn't lend itself to optimal handling, nor is it dialled in for fit. With that in mind, here's our guide on how to lower or raise the handlebars on a bike.
Riders will often experiment with adjusting saddle height , changing tyre pressure , bar angle and suspension settings , but few are aware of the benefits of adjusting bar height, despite the handlebar playing a crucial role in the way your bike handles.
Bar height is also known as saddle drop, which is the measurement of how far the top of the saddle sits above (or below) the bars.
Generally speaking, a lower handlebar height reduces your centre of gravity. By placing more weight over the front wheel, you increase traction. Additionally, a lower bar height provides a more centred position between both wheels to improve bike control, especially during climbing. These traits are even more noticeable off-road.
There is a limit; going too low can make the bike difficult to control. A lower handlebar can also negatively affect handling in steep terrain.
On the road, elite riders normally have a significant drop, where their bars sit below the saddle. This is typically done to provide a more aerodynamic position.
Recreational riders are usually best served by a handlebar that is in line with the saddle or above it. This usually gives a very comfortable position and is a good starting point for experimentation.
Luckily, experimenting with bar height is easy and most often free, so you can adjust to your heart's content until you find the right position for you.
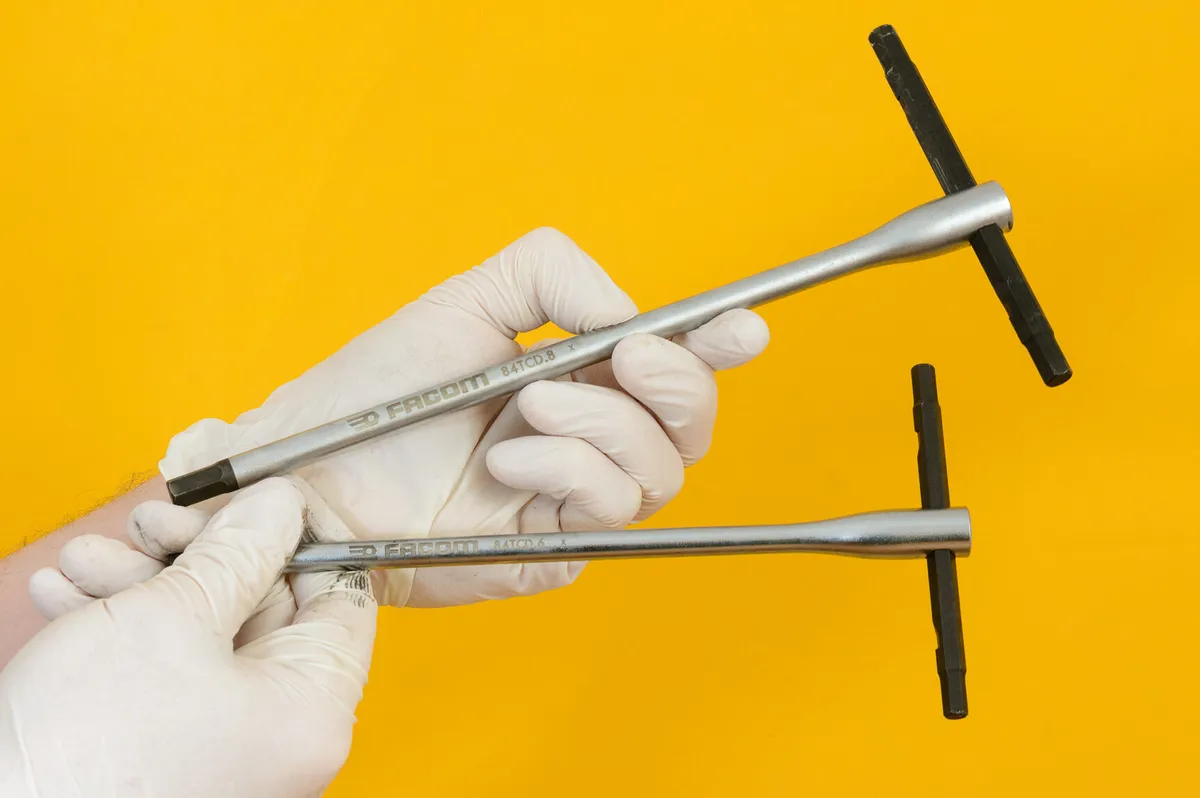
The guide below applies to modern threadless-style stems and headsets, and will help you to learn how to lower or raise bike handlebars. If your stem has bolts pinching it onto the steerer tube, it’s most likely threadless.
We also cover how to adjust the height of a quill-style stem below.
- Time : 15 minutes
- Skill rating : Easy
- Cost : Free
Tools you’ll need
- A multi-tool or a set of Allen keys
- A torque wrench or pre-set Torx key is recommended, especially if working with carbon or lighter parts
- Some stems, such as those from Zipp, Ritchey and Syncros, will use Torx keys rather than Allen bolts and so a T20, T25 or T30 Torx key will be required
- Possibly a hammer for some quill stems
How to add or remove headset spacers
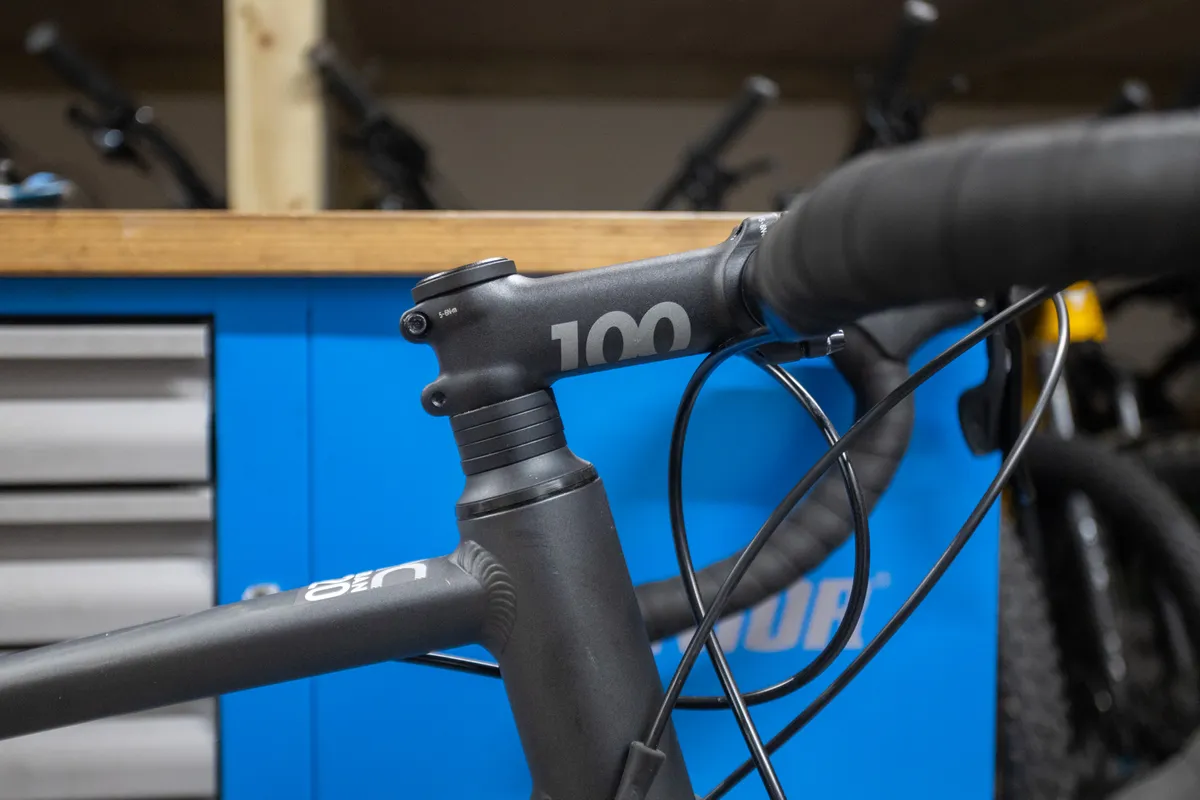
The first and easiest way to adjust handlebar height is by moving headset spacers.
Headset spacers sit on the fork's steerer tube and help pre-load the headset bearings during adjustment.
Generally, most bikes have 20 to 30mm of headset spacers that can be moved freely above or below the stem. All bolts in the stem are standard-threaded (i.e. ‘lefty-loosey, righty-tighty’).
It’s easier to perform this task with the bike on the ground rather than on a repair stand . It makes adjusting the preload on the headset bearings as accurate as possible and stops the fork falling out of the frame.
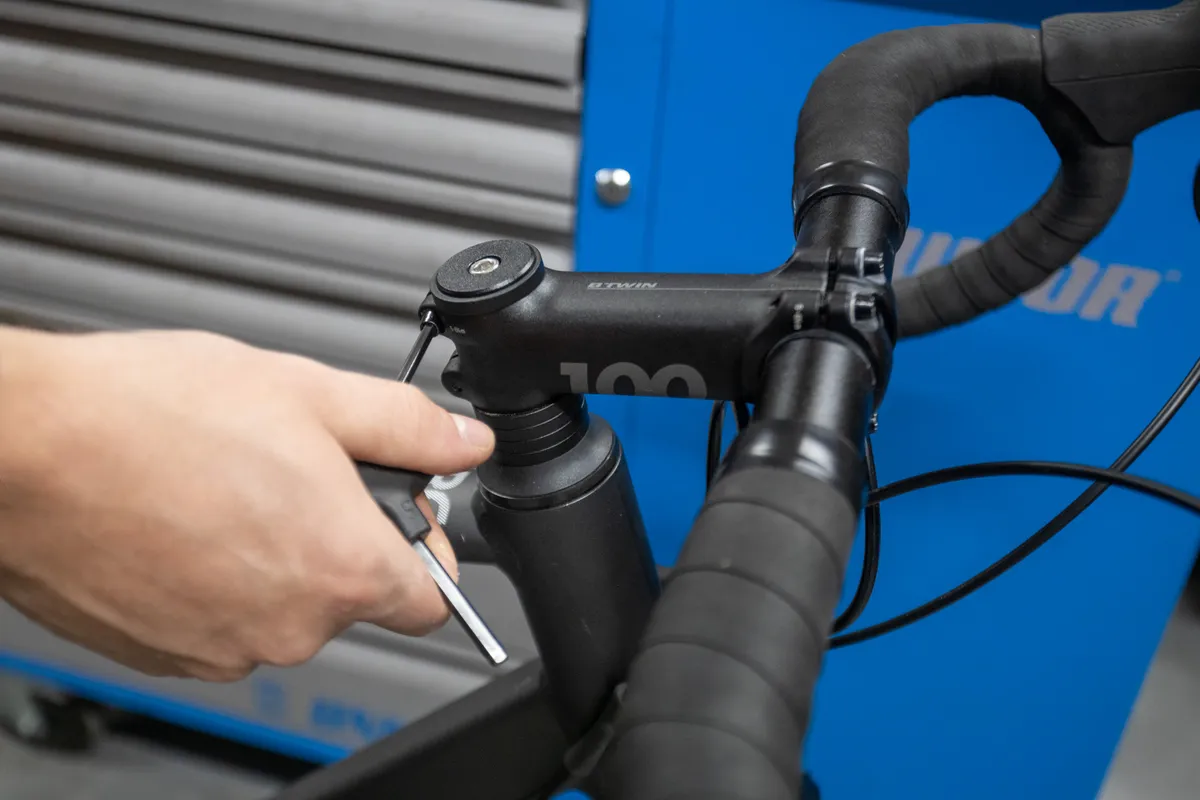
First, equally loosen the clamp bolts on the back of the stem. You don’t need to undo them fully – just enough so the stem is free to move.
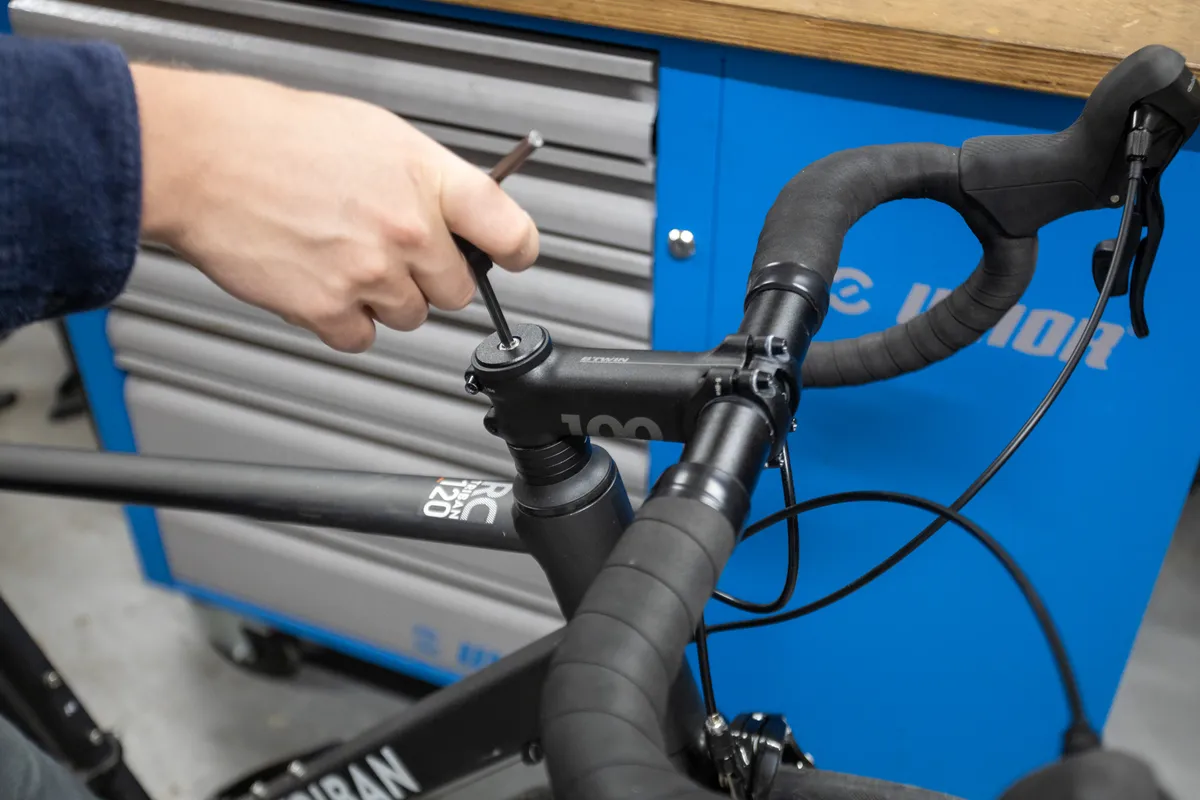
Remove the top cap that sits on top of the stem.
This is a good time to add a little fresh grease to the top-cap bolt, which can easily become seized in place.
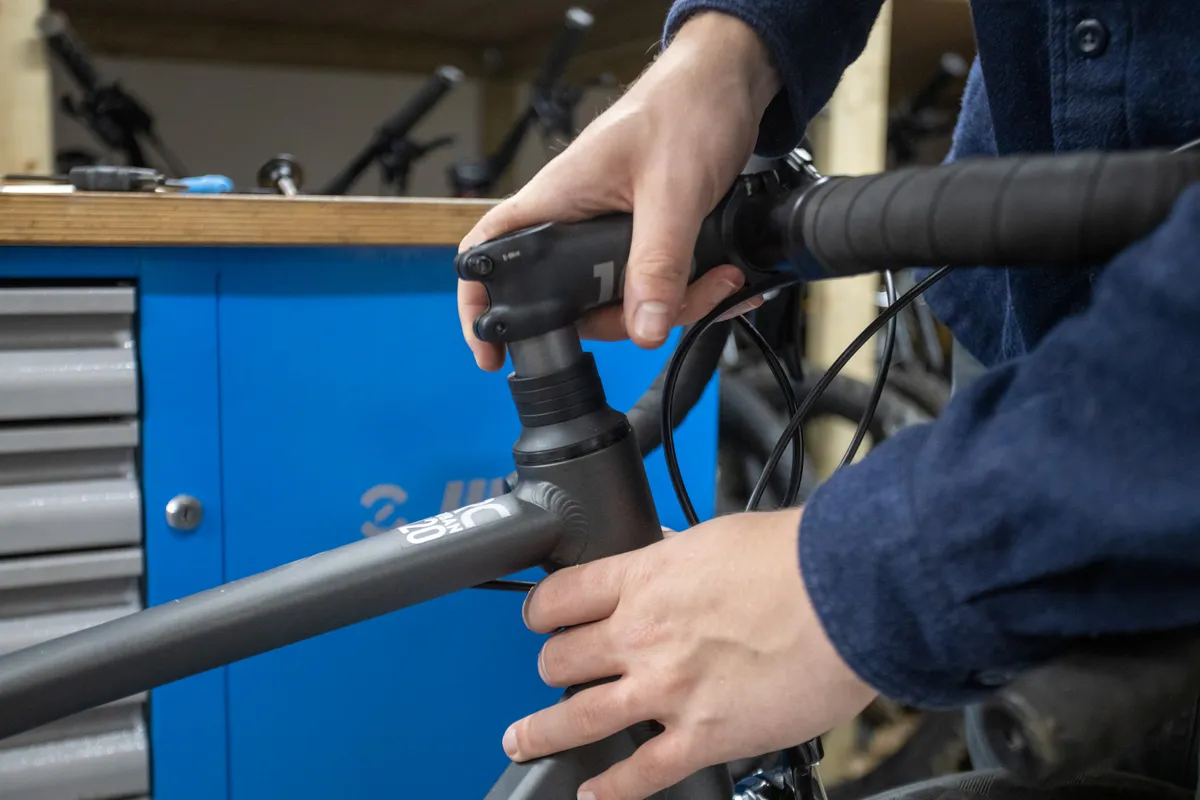
Slide the stem off the steerer tube.
This is what the top cap and bolt look like when undone. These pieces thread into a star nut on a metal steerer tube or an expander plug on a carbon steerer tube.
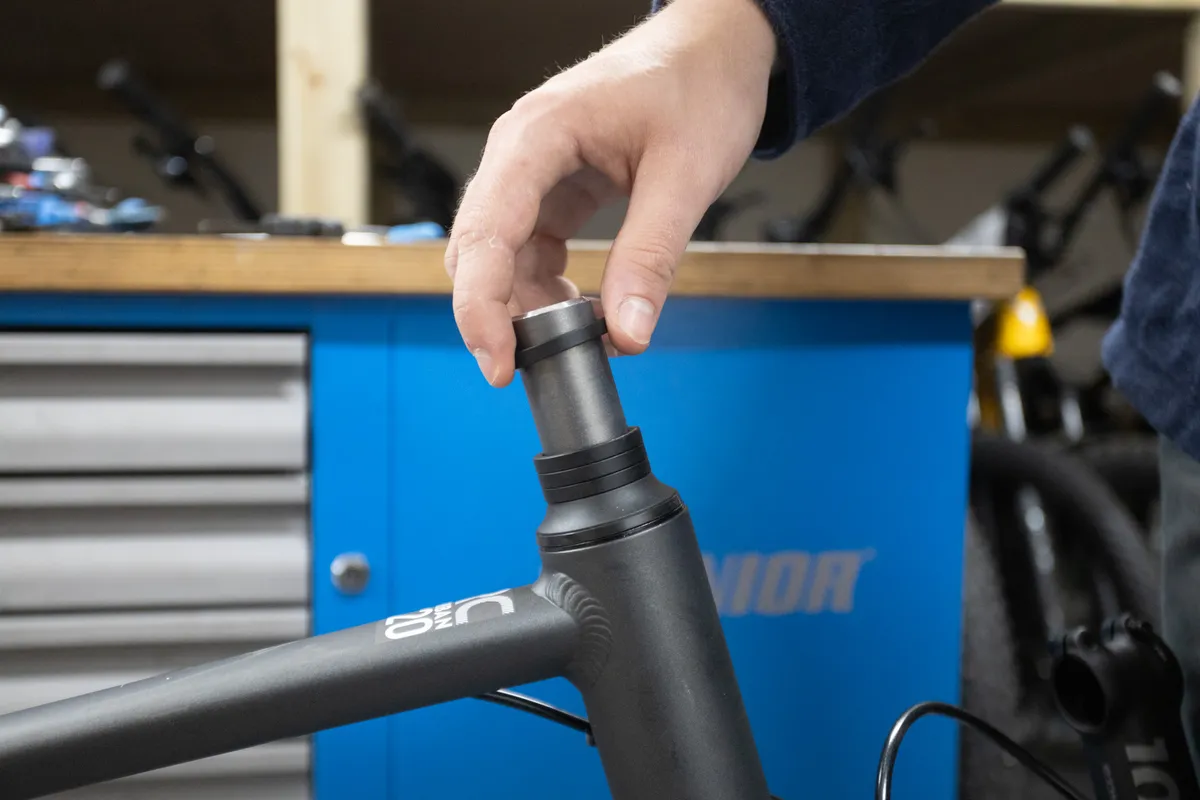
Decide how much you’d like to lower or raise your bar and add or remove the appropriately sized spacer(s).
Once you're happy with your position, it’s well worth cutting down the fork steerer tube to prevent any risk of injury from the tube in a crash.
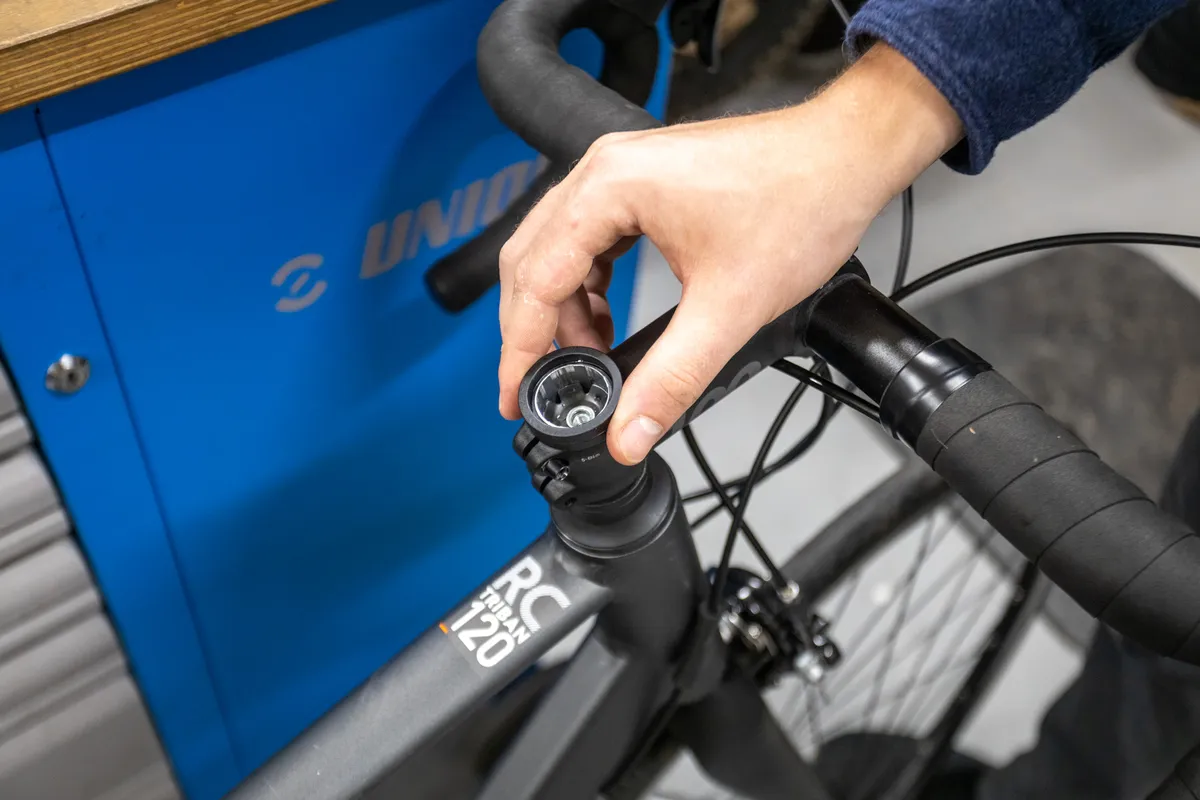
Slide the stem back onto the steerer tube and replace the spacers you just removed into position above the stem.
Ensure there is a 3 to 5mm gap between the steerer tube and the top of your stem/spacer. This will ensure there's enough space for the headset top cap to clamp down and pre-load the headset bearing.
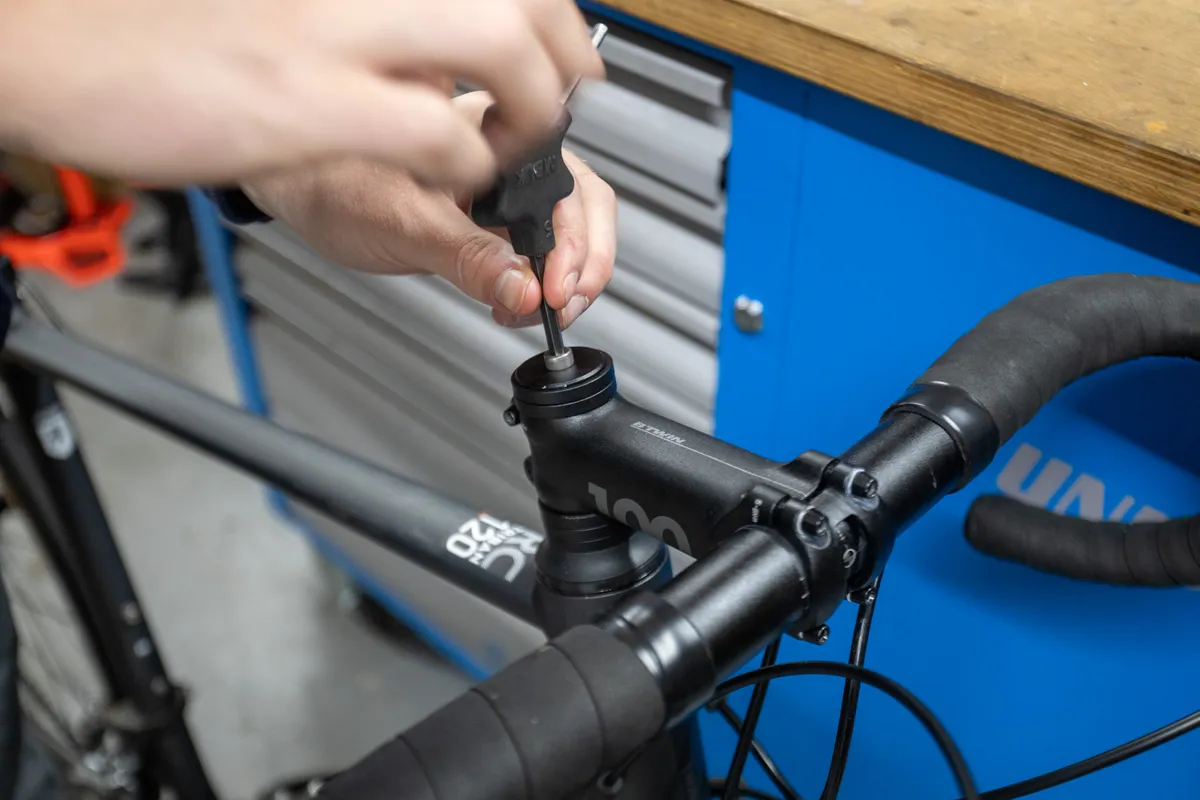
Now replace that top cap and bolt, and tighten until you feel some resistance. This top-cap bolt is used to pre-load the headset bearings.
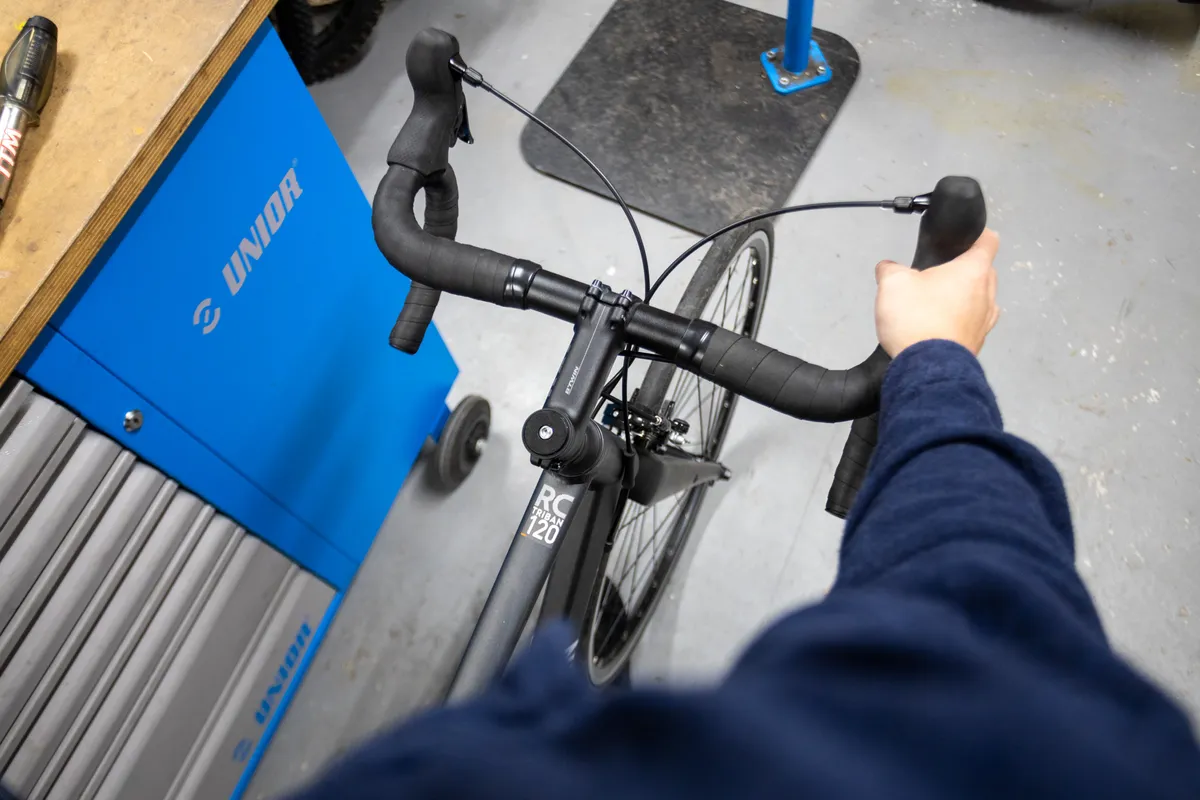
Next, align the stem with the front wheel, so the bar is at a right angle with the wheel. This may take some patience – it helps to straddle yourself over the top tube of the bike.
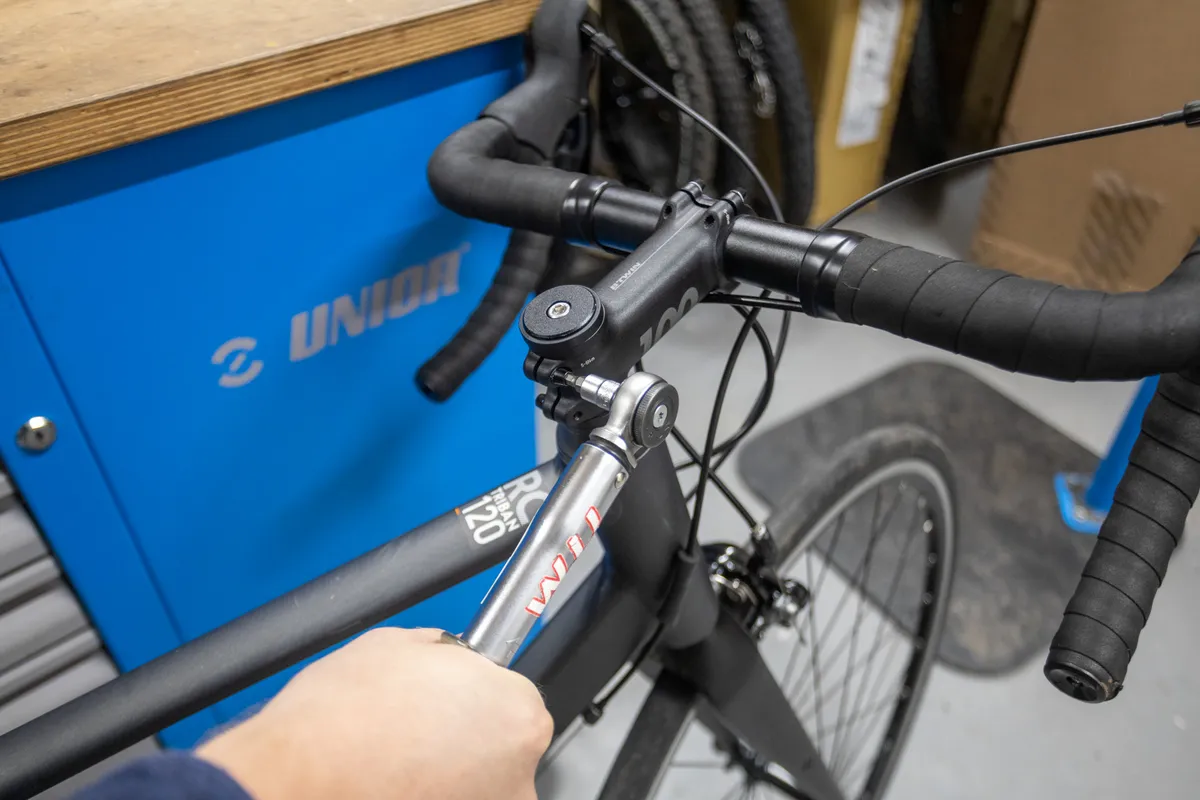
Once the wheel and stem are aligned, torque the stem-clamp bolts evenly to the manufacturer's recommended value using a torque wrench . This is often around 5 to 8Nm.
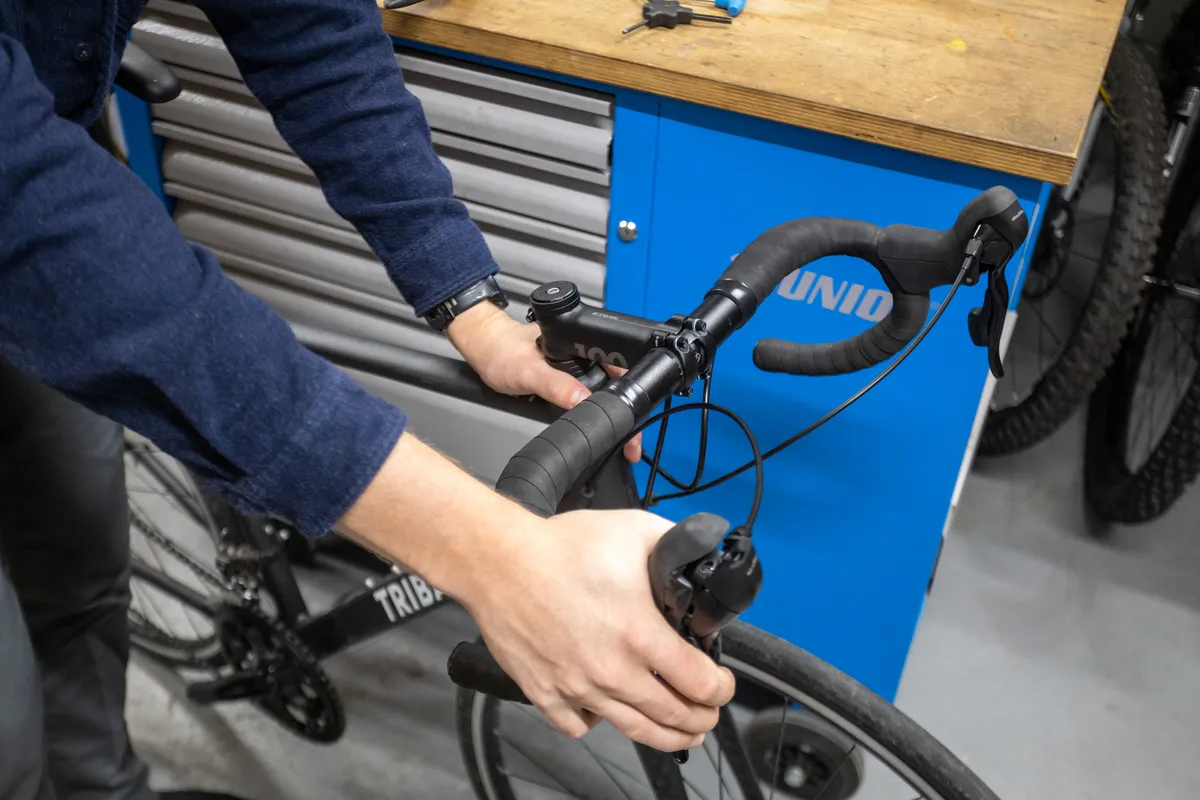
Check your headset adjustment.
An easy trick to get this right is to hold the front brake and put one hand on the headset, then rock the bars gently back and forth. Feel for the steerer rocking back and forth inside the head tube of the bike.
If you feel this, loosen the stem-clamp bolts and tighten the top-cap bolt another quarter-turn, then re-torque the stem-clamp bolts.
Repeat until all signs of bearing movement have disappeared and the handlebars still turn smoothly. If you've tightened the bolts too much, you'll feel a tight spot when turning the handlebars.
If your headset feels rough, it may be time to service or replace your headset bearings .

How to flip the stem on your bike
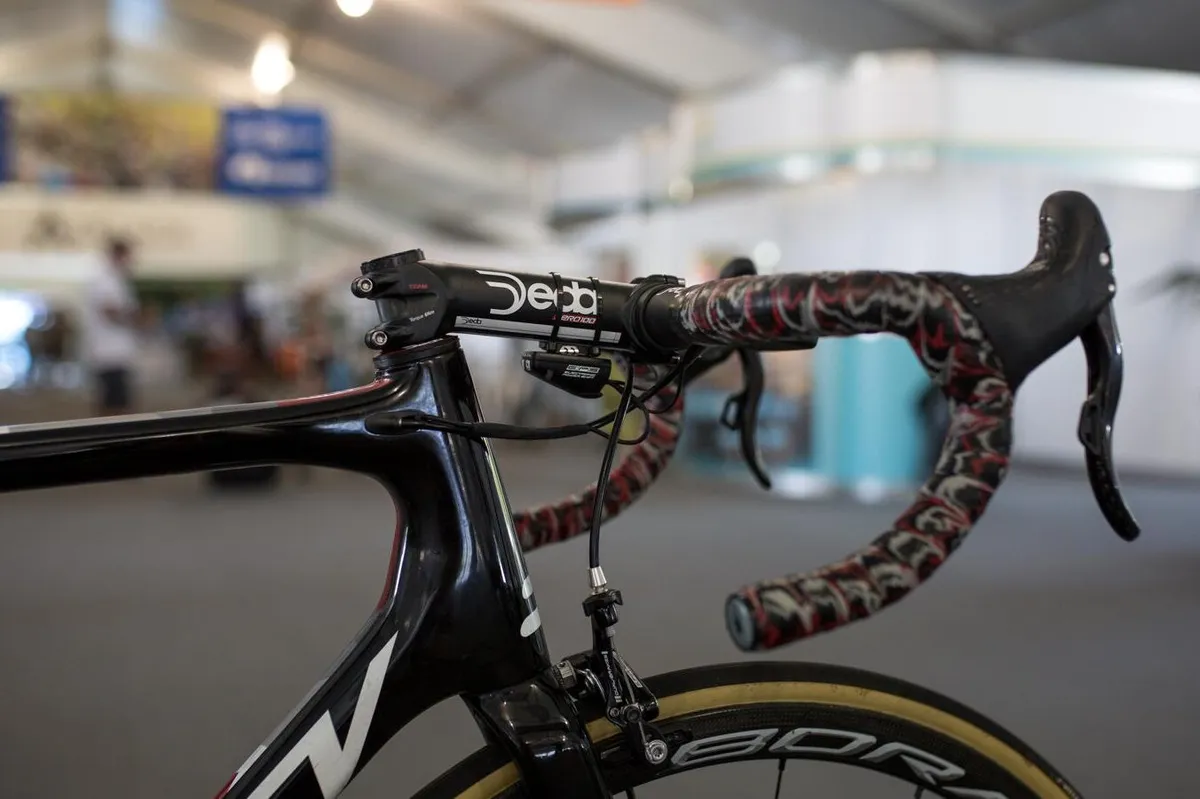
If spacers aren't enough to achieve the effect you want, you can flip the stem to make a further change to the bar height.
Most mountain bikes will be set up with the stem in a positive position, creating an upward angle, but you can use it the other way round.
This uses all the steps above with the addition of unbolting the handlebar from the front of the stem.
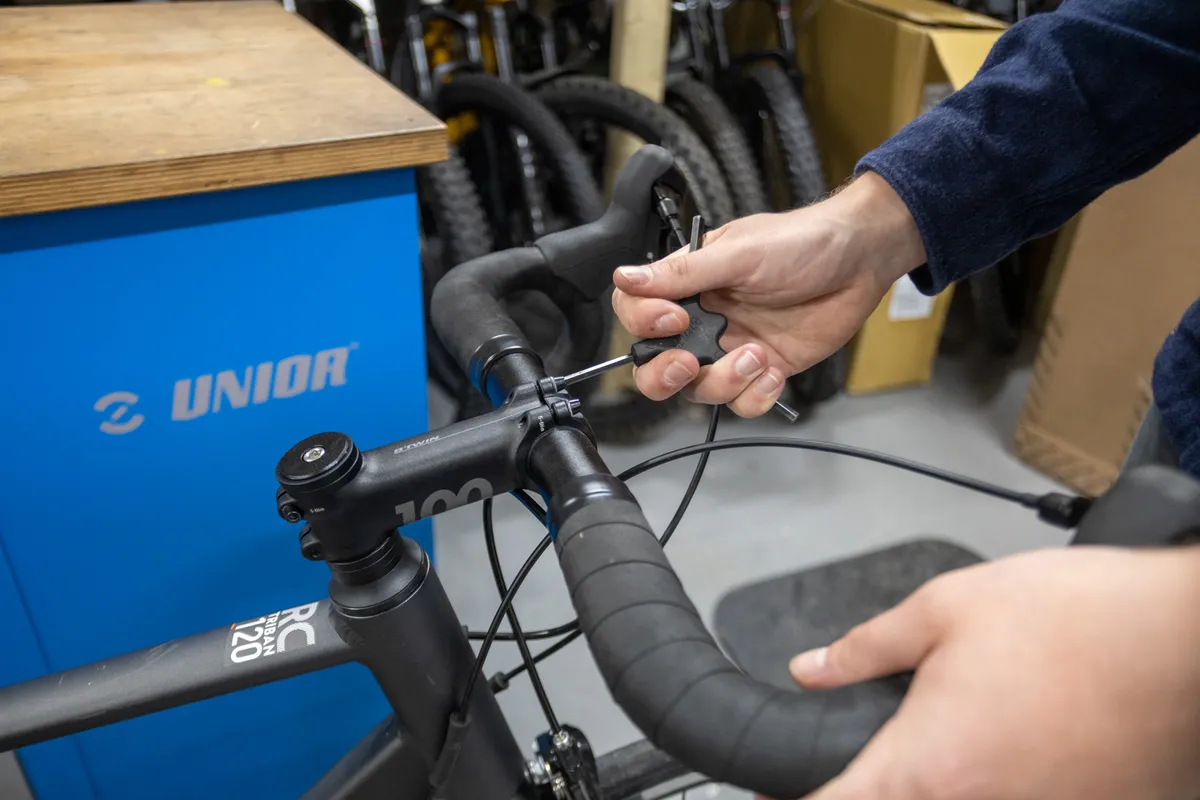
With the bike’s wheels firmly on the ground, make a mental note of the handlebar angle and the brake lever angle.
Matching up a piece of masking tape on the faceplate and bars will make sure you get the angle spot on when refitting.
Evenly undo the bolts that hold the handlebar to the front of the stem. Remove the stem's faceplate and store it somewhere safe.

Let the handlebar gently droop to the side and now follow the procedure for swapping spacers, outlined in steps 1 to 4 above.
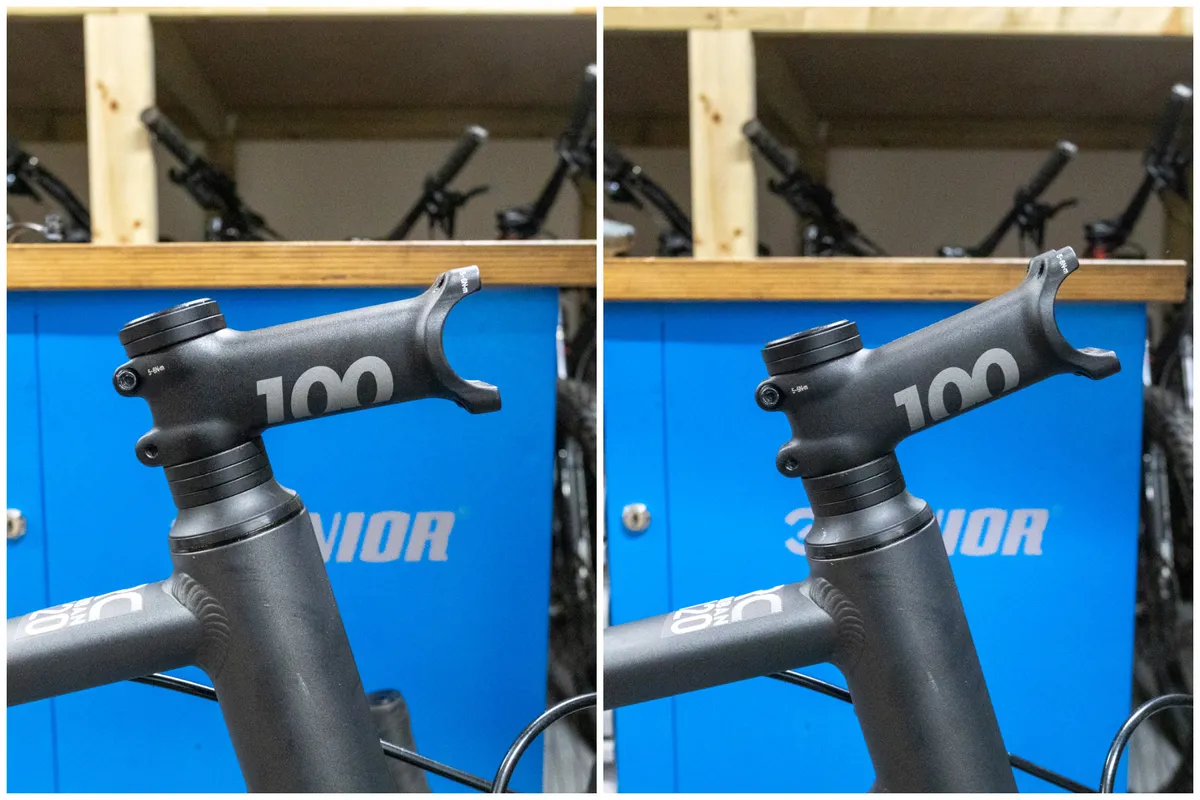
While the stem is off the bike, flip it over and then slide it back onto the steerer tube.
Reinstall the handlebar, replicating the previous brake lever and handlebar angle.
Tighten the faceplate to the manufacturer's recommended torque (generally between 4 and 8Nm). Ensure that all bolts are done up evenly, a little at a time, and that there is an even gap top to bottom with the faceplate once they're tight. If the gap isn’t even, the handlebar is being pinched.
While it's usually the case, it's not always suggested that stems should have an even gap at the top of the faceplate. Check your user manual if in any doubt.
Proceed with steps 3 to 7 above to pre-load the headset and tighten the stem.
How to raise handlebars on a bike
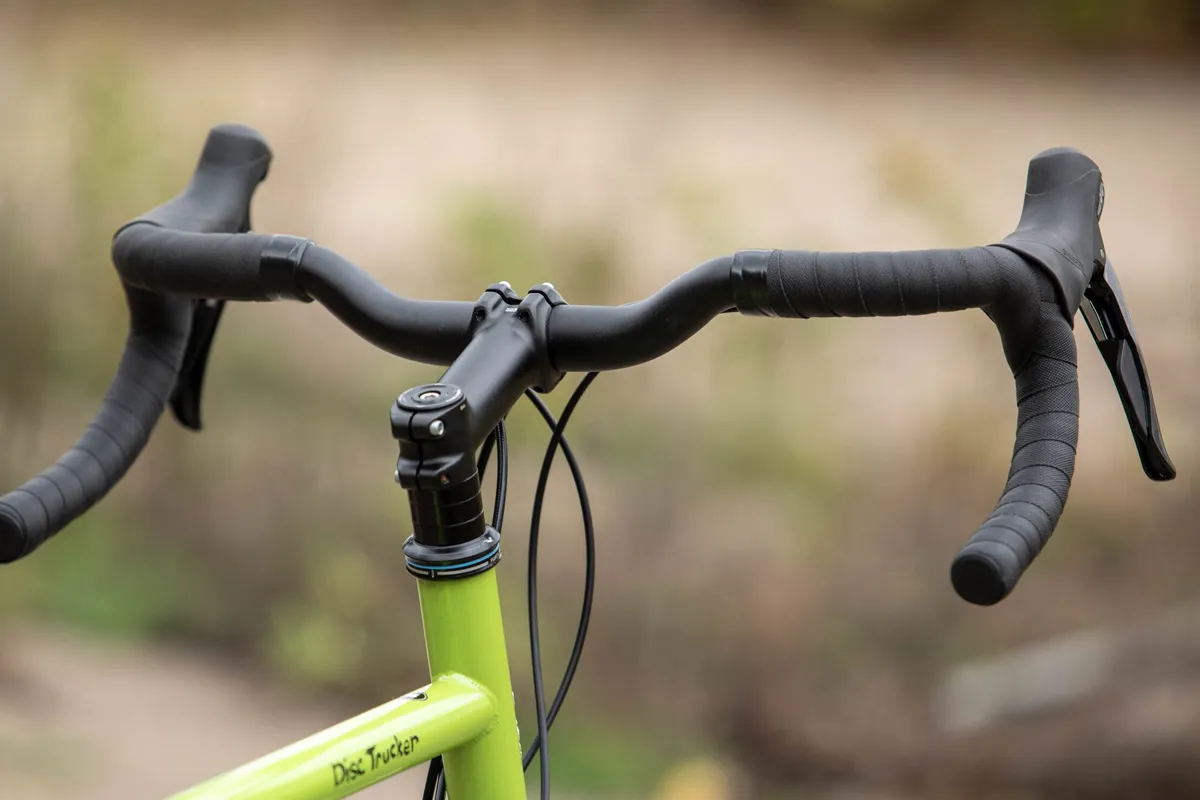
You can raise the handlebars on your bike using the steps outlined above by moving the stem so it's above as many headset spacers as possible or flipping the stem.
However, if the handlebar is still not high enough for you, there are other steps you can take.
You can replace your stem with one that has a greater degree of rise (the angle of the stem relative to the steerer tube). Bicycle stems come in different amounts of rise, typically between six and twenty degrees.
You can also install a stem riser. This is an attachment that fits to the fork steerer. Stem risers effectively lengthen your steerer tube allowing you to have stem and handlebar higher.
Stem risers can put greater strain on a fork steerer, particularly if it’s carbon.
What if my bike is integrated?
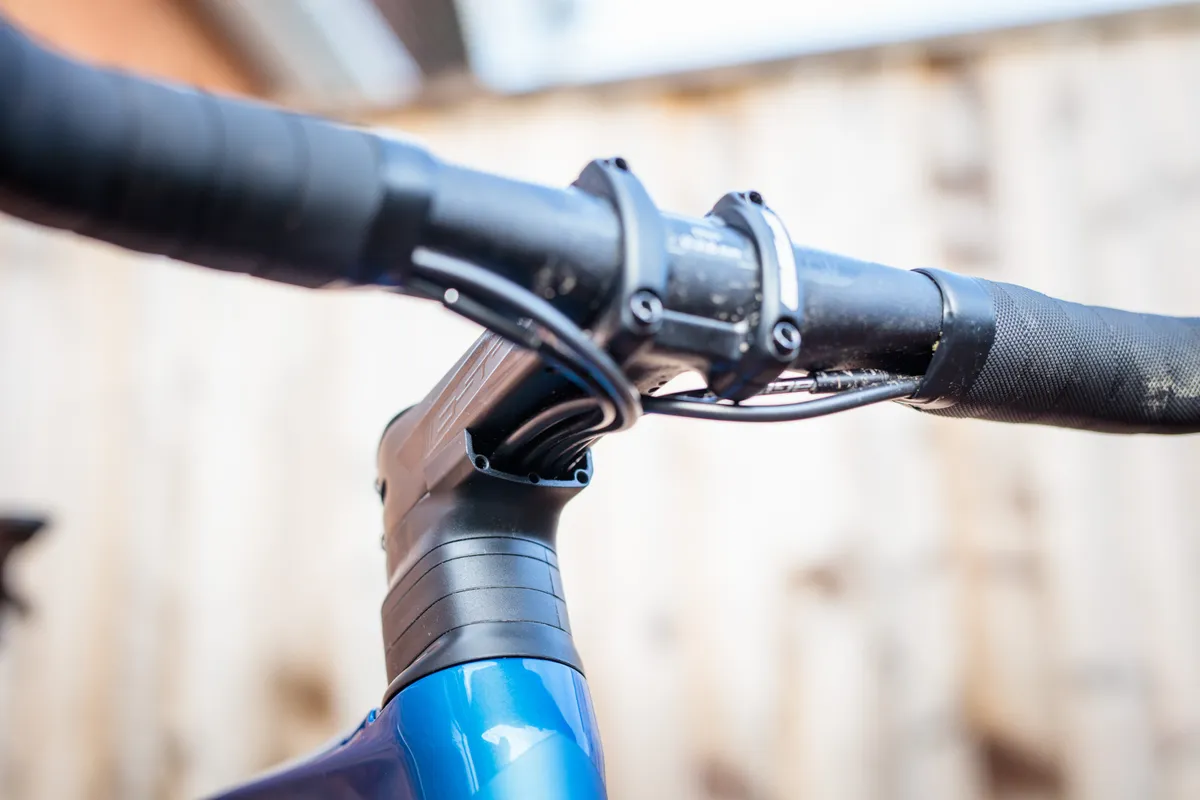
Many of the latest bikes across riding disciplines feature integrated front ends, with cables and hoses running through the handlebar and stem, and into the frame.
As a result, these bikes often make lowering or raising handlebar height more complicated.
Lowering your handlebar on these bikes generally isn’t too difficult. Many brands have introduced split headset spacers, which can be removed without having to remove the stem entirely.
Raising your handlebar can be trickier. You’ll want to make sure there is sufficient slack in the cables and hydraulic hoses. If they are too short, they will need to be replaced to introduce the required length.
How to adjust the height of a quill stem
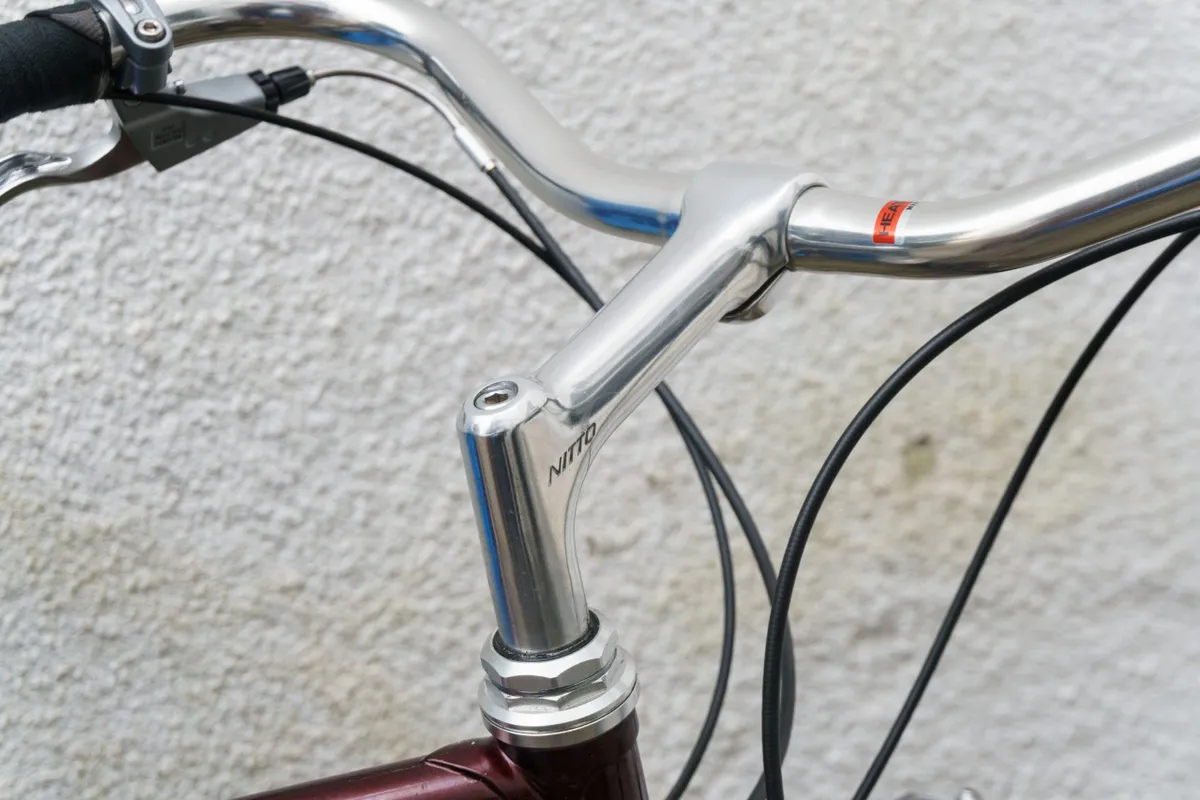
Quill stems were the norm before A-head/threadless style stems hit the market. They are still commonly seen on bikes of all styles and disciplines.
Quill stems slide into the steerer tube of the fork and are secured with either an expanding bung or sliding wedge that presses against the inside of the tube.
Adjusting their height is slightly different – but arguably much easier – than a threadless stem.
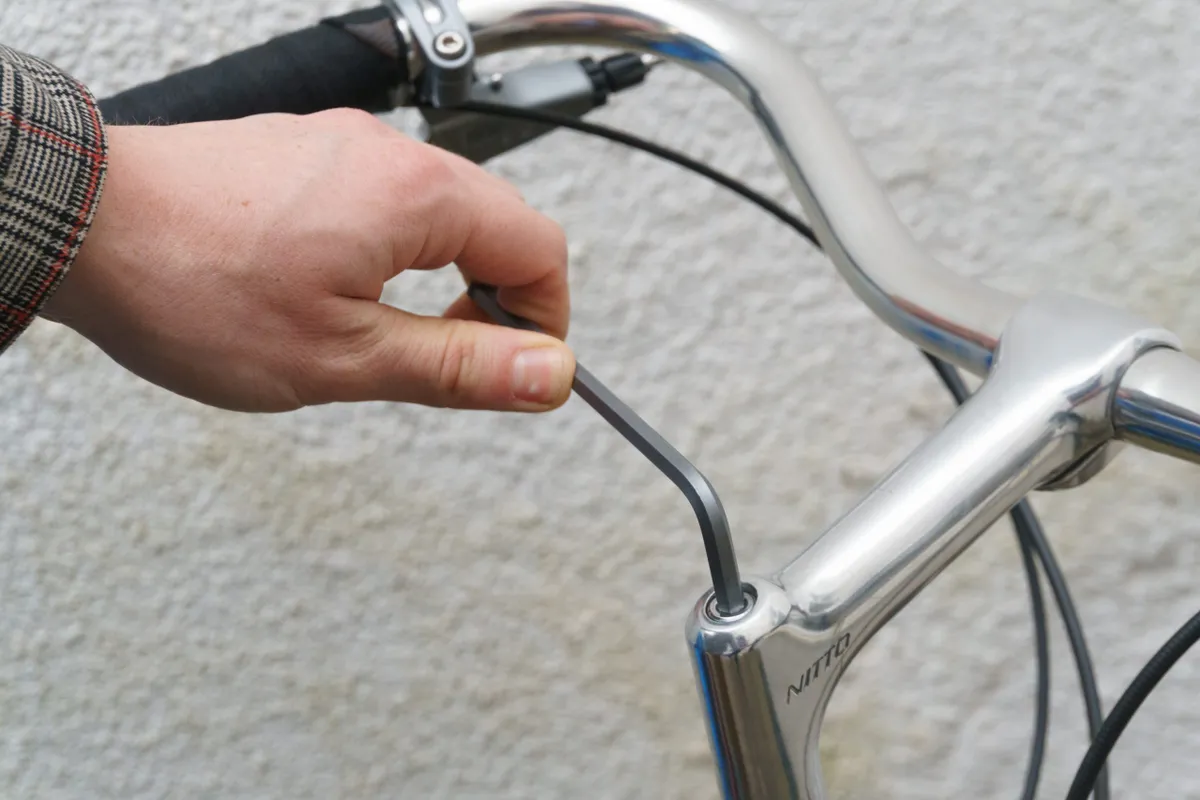
Begin by loosening the bolt on the top of the stem. Most use a hex head bolt, but some will use an external bolt.
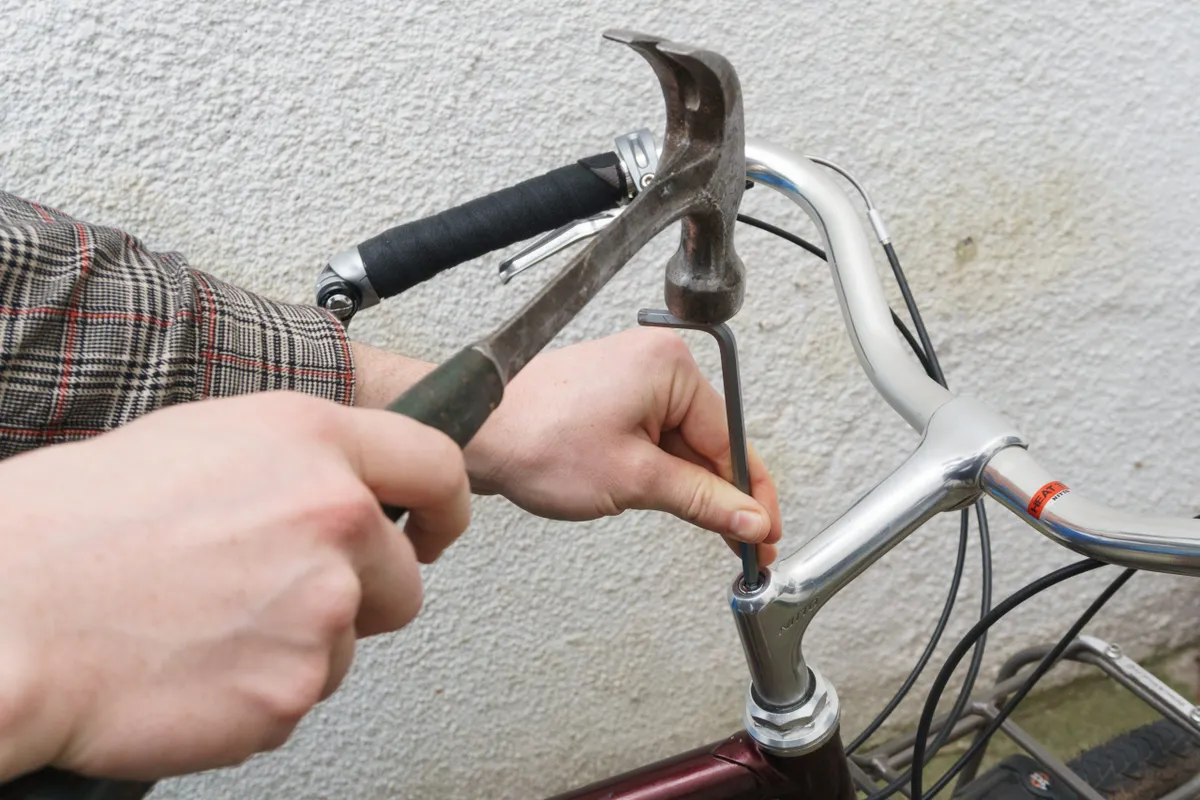
Once loosened, you may be able to move the stem freely.
If the stem hasn't been adjusted in some time, you may need to gently tap the bolt with a hammer to free the wedge or bung.
If the bolt is sitting proud of the stem, strike this directly. If it is flush with the top of the stem, you can use your hex key to gently tap the bolt.
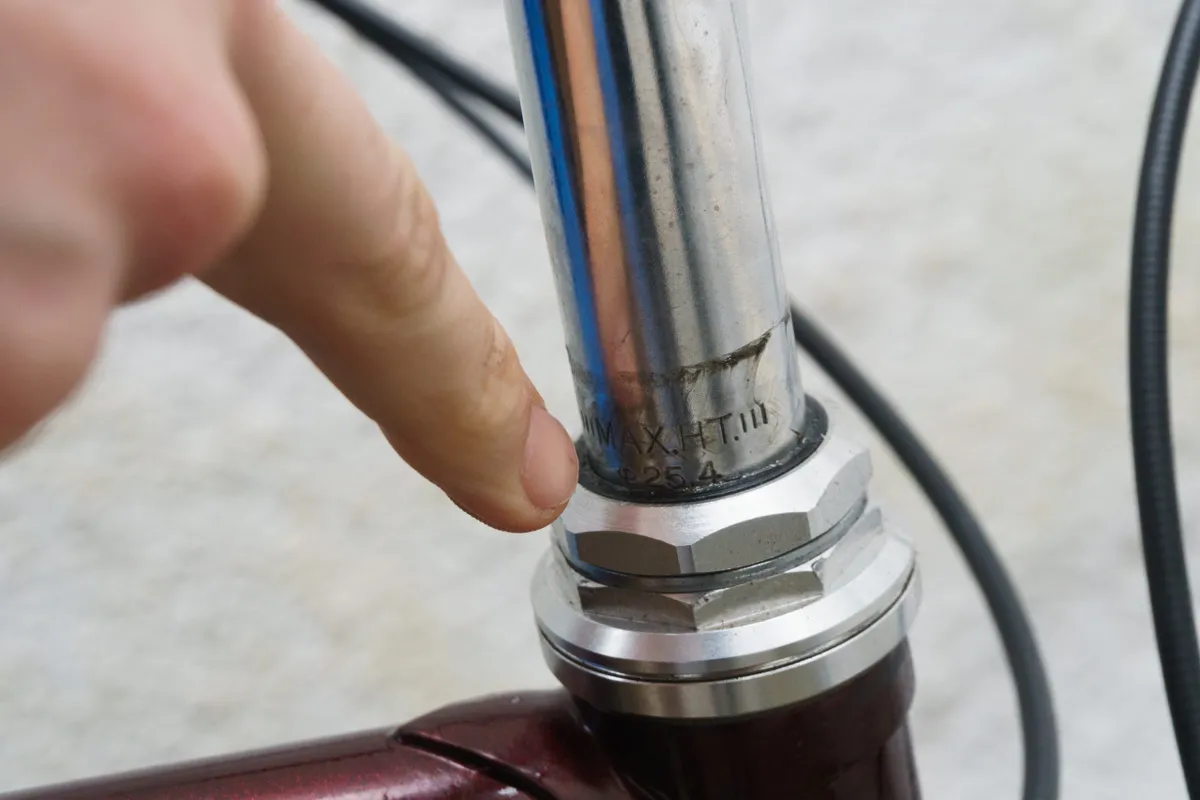
The stem can now be adjusted to your heart's content. Be sure to check for any minimum and maximum insertion marks on the stem and adhere to these.
It is good practice to periodically grease the shaft of a quill stem because they frequently seize if left dry.
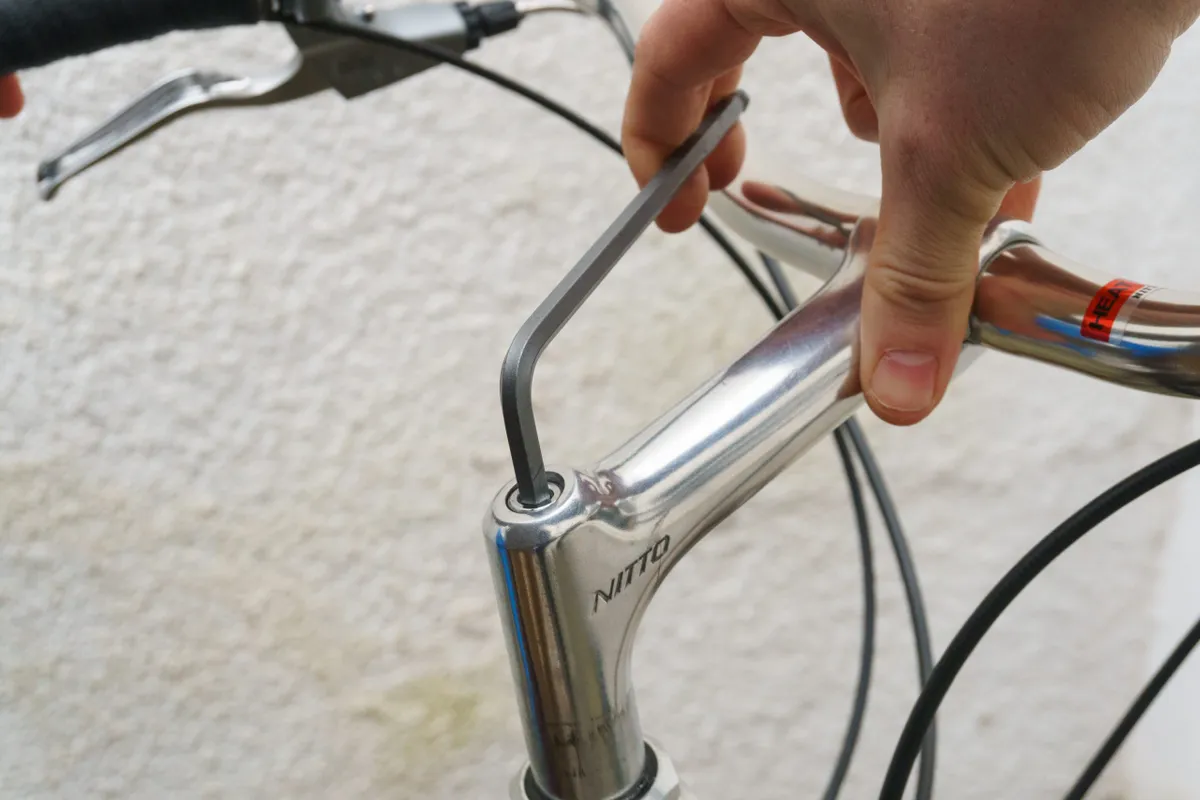
Once you have set the height of your stem and lined it up with your front wheel, you can re-tighten the wedge bolt to spec.
You’re now good to hit the trail and/or road to test out the bike's new handling characteristics.
It may take some trial and error along with patience to find that perfect height, but once you've got it, you'll be far closer to realising the bike's true potential.
Share this article

Deputy editor

- Terms & Conditions
- Subscribe to our magazines
- Manage preferences
- Search forums
- General Ebike Forums
- Discussion by Brand & User Reviews
- Aventon Forum
Level 2, how can I raise my handle bars 2-3 inches?
- Thread starter riplipper
- Start date Oct 25, 2023
- Oct 25, 2023
What have others done and how did you do it. I will probably have to lengthen my front break cable as well. And, while I am at it, the grips......has anyone replaced them with something more comfortable. thanks.
fooferdoggie
Well-known member.
this is the easy way. https://www.amazon.com/LERWAY-Bicycle-Bike-Stem-Riser/dp/B00G2VMXCO/ref=sr_1_1_sspa?crid=ZIU5KN2RM4HK&keywords=handlebar+riser&qid=1698241626&sprefix=handlebar+riser%2Caps%2C173&sr=8-1-spons&sp_csd=d2lkZ2V0TmFtZT1zcF9hdGY&psc=1
riplipper said: What have others done and how did you do it. I will probably have to lengthen my front break cable as well. And, while I am at it, the grips......has anyone replaced them with something more comfortable. thanks. Click to expand...
Tom@WashDC said: I have this on my Aventon and on my other three bikes. FOMTOR Adjustable Stem Click to expand...
Thanks for the replies guys. Yeah, I like the adjustable, but I think I would rather not have to move the headlight if I don't have to. I am assuming our stock stem is 1/1/8" diameter??? And did you guys have to get a longer front brake cable? Thanks again.
riplipper said: Thanks for the replies guys. Yeah, I like the adjustable, but I think I would rather not have to move the headlight if I don't have to. I am assuming our stock stem is 1/1/8" diameter??? And did you guys have to get a longer front brake cable? Thanks again. Click to expand...
Nvreloader said: You can get one of this type of handlebar adjustment stems, allows to to adjust the angle and sweep back you want. Amazon.com Click to expand...
Attachments
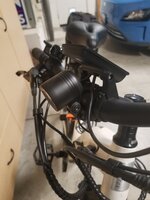
- Oct 27, 2023
Taylor57 said: I'm going to add new handlebars with more sweep and a little raised and hope my cables are long enough. I also bought new grips. The stock grips look nice but are not super comfortable when cruising more than a few blocks... Click to expand...
- Oct 29, 2023
riplipper said: What grips did you end up getting. I am thinking of these from cycling deal View attachment 165452 Click to expand...
SAPLIZE HANDLEBAR GRIPS

- Oct 30, 2023
PedalUma said: @riplipper , With inline barrel adjusters you don't need all new housings. Just add six inches to each side and run longer cable inside. Easy. Click to expand...
Oh, in that case the easiest way is to buy pre-bled levers and calipers of the correct length. They will need to be externally routed. They are not all that expensive and it makes for much less labor.
PedalUma said: Oh, in that case the easiest way is to buy pre-bled levers and calipers of the correct length. They will need to be externally routed. They are not all that expensive and it makes for much less labor. Click to expand...
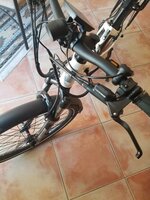
For the front, how about cleaning the rotor with acetone and isopropyl, and using multi-metallic pads?
PedalUma said: For the front, how about cleaning the rotor with acetone and isopropyl, and using multi-metallic pads? Click to expand...
Pour some right between the pads and wipe the rotors. And work them rolling the bike. I expect a lot of black gunk will come off onto a paper towel.
- Dec 19, 2023
I ended up buying longer brake line and a flush kit for about 25 bucks amazon. Little work but now the Lerway extender gave me about 3.5 inch rise.
Similar threads
- Wiley Coyote
- Feb 27, 2024
- Mar 16, 2024
- May 12, 2024
- Introductions & Bike Garage
- May 17, 2024
- Riese & Müller Forum
- Oct 3, 2023
- We use cookies to ensure that we give you the best experience on our website. Accept Learn More…

Is It Illegal to Ride a Bicycle Without a Helmet? Let’s See
Why are bikes expensive tips for buying bikes, how to hang a bike step-by-step guide, how to measure a bicycle tire find the answer, how fast does a 125cc dirt bike go read the ultimate guide, how high should my bike seat be essential things you need to know, what is a dirt bike all you want to know, cycling cadence: what is it & tips for improving, what is a road bike all explained, what is a bmx bike all you want to know.
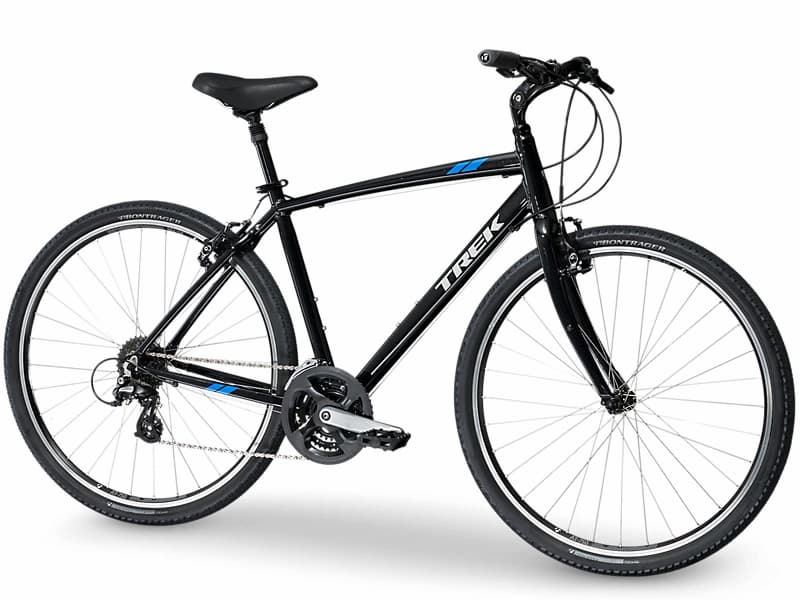
Trek Verve 2 Review: Is It Worth Buying
What is the trek verve 2 review?
The Trek Verve 2 hybrid bike is made for convenience and enjoyment on errand runs, road trips, and fitness rides. A suspension seatpost, a padded saddle, and weather-resistant disc brakes are just a few of the thoughtful features that contribute to a secure and comfortable ride.
Please continue reading so I can give you more specific information about the Trek Verve 2 review.
Table of Contents
Trek Verve 2 Review
Frame review.
According to me, the frame accounts for roughly 70% of the bike’s appearance and feel, so it should be taken into account when making a purchase decision. The Alpha Gold Aluminum frame on the Trek Verve 2 represents the pinnacle of aluminum engineering for Trek bicycles.
The frame guarantees a solid ride while still feeling very light and forgiving while riding. The first time you test-ride this bike, you’ll quickly realize how important this is.
The bike has a shorter reach than other traditional fitness bikes because the comfort of the rider is given top priority when designing the frame. This also makes sure that you are riding this thing in a more upright position, which is suitable if you have ever experienced back, neck, or shoulder problems.
You can also easily look around while changing lanes or crossing streets when you’re standing up straight.
Fork Review
This bike has a steel threaded steerer tube and a Verve alloy fork for excellent handling. The frame’s inclusion of a ThruSkew axle is yet another surprise to me. This guarantees that your front wheel won’t come off while you’re riding and makes it simple and quick to access your front wheel.
The absence of a suspension is one of the choices in this new model with which I disagree. As a front suspension is something you would anticipate on a comfort hybrid bike like this one. But as it turns out, the suspension on a bike like this doesn’t really increase comfort as much as you might think.
Since this is a hybrid, you won’t be required to perform jumps or ride on trails as frequently, and riding upright means your weight is distributed more toward the back of the bike. Additionally, in order to significantly benefit from a front suspension, you would need to ride more aggressively and shift your weight forward, which is not in the best interest of a comfort bike.
But at this price, the Trek Marlin 5 will be a great option if you’re looking for something that can be used for both regular commutes and trail runs.
Additionally, you can lighten the bike up and make it more comfortable by removing the front suspension. You won’t experience any significant shocks with this fork as long as you stay on well-paved roads and ground limestone, and it has an adjustable suspension seat post and a taller stack.
Drivetrain Review
The drivetrain of Trek Verve 2 consists of
- Shimano Altus M315 8×3 shifters
- Forged alloy 3 speed 48/38/28 crank with a Shimano Tourney TY710 front derailleur
- 8 speed 11-32 Shimano HG31 cassette with a Shimano Altus M310 read derailleur
You can see that the drivetrain on this bike is made entirely of Shimano parts. It’s advantageous because it avoids the need for additional tuning and other brand-specific compatibility problems. Shimano is regarded as the best for drivetrain components and is used and adored by the top athletes worldwide, which should give you peace of mind if you are new to cycling.
You will have a wide range of speeds to choose from for any gradient thanks to the 8×3 setup. As they allow a full stroke, easier gears are ideal for riders who have been away from bikes for a long time or for those who are attempting to recover from leg injuries.
Handlebar And Stem Review
This hybrid bike has a 620mm/660mm wide alloy handlebar from Trek’s own brand Bontrager, whose products are well-known. You’ll see a lot of Bontrager components in the following. This particular handlebar has a comfort sweep, giving it a subtle “M” shape similar to what you typically see on a comfort cruiser.
Because the stem part includes a Bontrager alloy quill, you can effectively adjust the handlebar rise into any of the 64 degrees it allows. This makes the stem part a little unique. The stem is also longer—85mm or 105mm, depending on the size you choose—which is typical for road and commuter bikes because it gives you more room to turn.
Seatpost And Saddle Review
The adjustable suspension seatpost that is included with the Trek Verve 2 is made of alloy, and it is a key component of the extra comfort that it provides when riding upright. For those road bumps and shocks, this has an adjustable range of up to 27mm.
The ride quality is flawless and is undoubtedly one of the most praised aspects of the bike, along with the Bontrager Boulevard comfort saddle. Longer rides are very comfortable because of the extensive cushioning.
Brakes Review
You are fortunate in this regard because, up until a few years ago, the Trek Verve 2 only had rim brakes. Trek made a wise decision to upgrade to hydraulic disc brakes from Tektro HD-M275, giving rise to the name Trek Verve 2 Disc. which are much better in every way and more trustworthy. Even in wet conditions, where rim brakes are dangerous to operate, they function flawlessly.
Additionally, they have the highest stopping power, which is extremely helpful when you are carrying more weight. Hydraulic disc brakes have the added benefit of being very simple to use and maintain over time, which is another advantage over mechanical ones.
Wheels Review
The front and rear hubs are both made of Formula DC 6-bolt alloy (DC-20 in the front and DC-22 in the back). For a stiffer ride and greater overall strength of the wheels, Bontrager Connection rims are double-walled and made of aluminum alloy.
The Bontrager H5 Comps, 700x45c stock tires that come with this bike are wider than those you’d find on a road bike but not as much as those on a mountain bike. On well-paved roads and gravel, which is typically the case for commuting and recreational riding, they roll fairly well.
Because of these wider tires, the lack of front suspension is concealed. Since there are no power losses when pedaling, getting rid of the suspension allows for better energy transmission on the road.
Weight Review
A size medium Trek Verve 2 weighs 30.26 lbs, or 13.73 kg, and can support a rider weight of 300 lbs, or roughly 136 kg, plus any cargo.
Sizes And Colors Review
This is a typical Trek bike and is available in 4 sizes: S, M, L, and XL. Below is a table with the Trek Verve 2 size chart and geometry.
Both the stunning colors Lithium Grey and Rage Red are available for this bike.
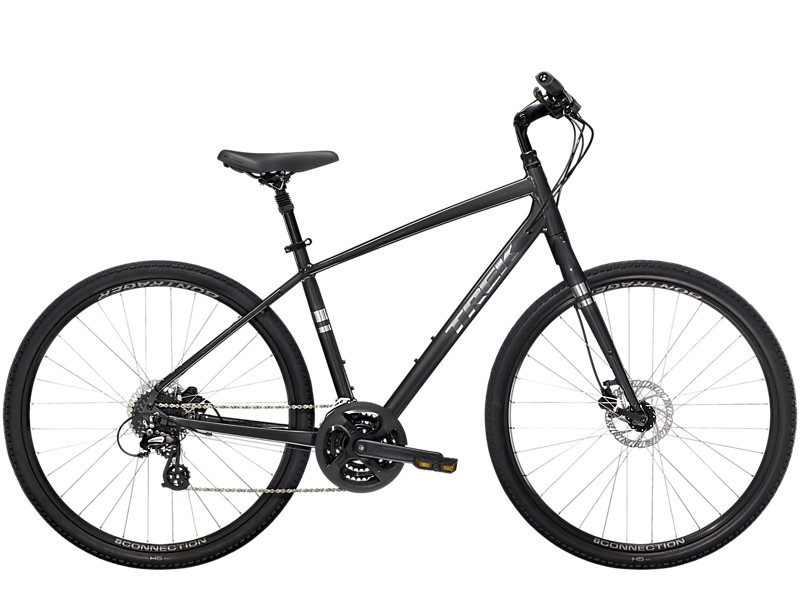
Customers’ Review To Trek Verve 2
Excellent bike.
In my early 20s and throughout graduate school, I was an avid rider. After that, I became preoccupied with other tasks, and my bike washed up on the side. I was anxious to start riding again because I wasn’t certain that it would be comfortable or that I would still enjoy it as much as I did in the past. I chose the Verve 2 bike after doing some research and don’t regret it. The bike is enjoyable and comfortable to ride. I wish I hadn’t waited so long and am looking forward to my time spent hiking. But the real test is: Would I buy another bike if this one broke tomorrow? Yes, right away. I am incredibly pleased with the purchase, and the Bicycle Garage’s staff in Bloomington was wonderful. fantastic overall experience
The Best Bike I Have Ever Owned Is This One.
I’ve switched between a road bike, mountain bike, hybrid bike, and now the Verve 2 Disk. I have discovered the ideal fusion of comfort and speed at the age of 66. At the end of a 26-mile ride, I can get off the bike pain-free thanks to the upright position and simple gear transition. I now want to ride again because that truly makes a difference. This bike will accompany me until dusk. PS: I got lucky that Gateway Cycle in North Saint Paul had this Verve 2 Disc in Gray in stock. I rode it for a short distance as a test drive before bringing it home.
I Adore This Bike Utterly…
I just picked up my new Verve 2 Disc this morning and went for a 6 mile ride. I love it so much! I have been riding a recumbent exercise bike ever since this whole Covid thing started, so I made the decision to get another bike and enjoy the summer. I’m a 58-year-old man who is currently trying to get back in shape. I’ve had issues with various other styles of bikes in the past, but this bike is comfortable on my knees and shoulders. Despite having a factory saddle, the bike is surprisingly comfortable, light, and agile. If you’re looking for a comfortable and casual form of exercise, stop right here! I’m hoping you’ll adore yours too!
Does Not Age Well
To go along with a Specualized Sirrus that I had bought in 2013, I bought this bike in early 2021. I rode both of them over the past year (roughly the same distances and terrain). The Verve is beginning to tremble, and the frame feels less sturdy than the Sirrus, who is nine years old. The Verve appears to have deteriorated more in a year than the Sirrus did in nine years, given the same circumstances and care. I want to trade my Verve in for a new Sirrus. Who knows though; perhaps the design of simple bikes was more advanced ten years ago….we shall see…
Is The Trek Verve 2 An Excellent Bicycle?
If you’re after a hybrid bike with fantastic braking power thanks to the hydraulic disc brakes, great reviews, and lots of features – the Verve 2 is a fantastic option!
If you’re looking for a drawback, I’d say the pedals need to be upgraded. It’s not a big deal to me, though, because I can’t recall ever using the pedals that came with a new bike instead of my own.
It also boasts an alpha gold aluminum frame that keeps the kgs down to a very respectable and desirable 13kg!
How Do Trek Verve 1 And 2 Differ From One Another?
The disc brakes make a significant distinction. The disc brakes on the Verve 2 Disc bicycles are hydraulic. The Trek Verve 1 has mechanical disc brakes.
This is significant because, when it comes to cycling, hydraulic disc brakes are more dependable and easier to maintain.
The brakes and gearing will both matter if you like to travel at high speeds…
The Verve 2 disc also benefits from a Shimano drivetrain . SunRace cassette is available for the Trek Verve 1.
Does it really matter?
Your shifters’ responsiveness may be impacted by the various materials these derailleurs are made of.
Ideally, the derailleurs will react immediately when you shift gears on your shifters.
Each Verve comes with an aluminum alloy frame, which is impressive considering some of the price points!
The Verve 2 Disc scores higher in terms of versatility because it offers a wider variety of gears!
The Trek Verve 2’s Weight Is How Much?
One of the features I love about the Trek Verve 2 disc is how lightweight it is as a bike. It weighs 13.2kg.
That is impressive for a hybrid bike with hydraulic disc brakes.
Then when you factor in that you get a load of extras such as the puncture protection tires , which yes, do weigh more but we’re talking grams and These tires, in my opinion, are worth the added weight.
Let’s not forget the rack, fender, and lights that are all included!
It is a lightweight bicycle overall.
Is A Trek Bike Value For The Money?
Despite the fact that every Trek bike is unique, the company still makes some good bikes. A high-quality, reasonably priced hybrid bike is the Trek Verve.
The post focused on trek verve 2 review.
without sacrificing any effort in order to improve riding comfort on the Trek Verve. a great balance of performance and selling price in the Trek Verve 2 Disc: a comfortable, enjoyable commuter, leisure, and fitness bike. providing a ride that is secure and comfortable with many thoughtful features. So this is a great hybrid bike to buy
I appreciate you reading.
Leave a Reply Cancel reply
Your email address will not be published. Required fields are marked *
Save my name, email, and website in this browser for the next time I comment.
More Stories
Trek dual sport 3 reviews in 2022: is it right for me.
What is the trek dual sport 3 review? High-performance hybrid bikes like the Dual Sport 3 can withstand long rides...
Trek Verve 3 Review In 2022: Pros & Cons [Updated]
To start with, what are trek verve 3 reviews? Designed for comfort on roads, paths, and city streets, the Verve...
Sole Bicycles Review In 2022 [Uodated]: All You Want To Know
SOLE Bicycles reviews and online research have resulted in an overall SOLE Bicycles rating of 4.3 out of 5. The...
Public Bikes Review: What Customers Say
What do you think public bikes? What are the public bikes reviews? Public holds the exact same opinion as Public...
Hyper Bicycles Reviews: Buy Or Not To Buy
What are the hyper bicycles reviews? If you are considering Hyper, you should buy them because they are a top-notch...
Verve 1 Trek Review: Buy Or Not To Buy
What are the verve 1 trek reviews? For many reasons, we strongly advise Verve 1. First of all, its lightweight...

- Stores Stores
How To Fit Your Bicycle
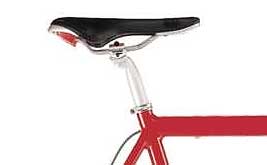
- A level seat supports your full body weight, offers optimum pedaling efficiency and makes it easier to move around on the seat when necessary. (It's logical to think that tilting the seat down will ease pressure on sensitive areas. But, when you do this, it causes you to slide forward when riding, which puts extra pressure on your arms, hands and knees, which can lead to injury.)
- Most riders do fine with level seats. If you experience discomfort, tip the seat slightly (no more than 3 degrees) up or down. Women typically tip it down; men tip it up.
- If the seat won't move after loosening the bolt(s), the parts are probably stuck. Tapping the seat with the heel of your hand should free the parts.
- If your seat has a channel down the middle or a raised tail, don't use these as a reference. Your goal is to get the area you sit on level, not the high or low parts, but the overall sitting surface.
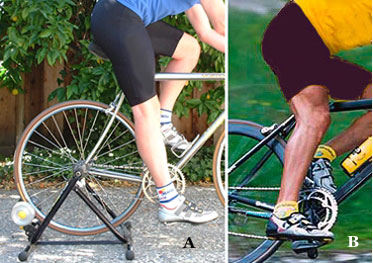
- This is a starting position. If it feels too low or high, adjust the seat up or down. But, only slightly to fine-tune the adjustment.
- When you've found the perfect position, mark it with an indelible marker (or wrap electrical tape around the post to mark it) so you won't have to go through the fitting process again. Do NOT scratch the seatpost to mark it as this can cause it to possibly break.
- Consider memorizing the measurement, too (measure from the top of the seat to the middle of the crank). This will help you set your seat height fast on a rental or borrowed bike.
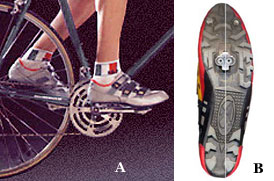
- We're experts in positioning cleats. Ask for help if you're having trouble.
- When you've found an ideal cleat position, trace lines around the cleats so you can easily replace a worn cleat and reposition a loose one.
- Use quality tools, lubricate threads and work with care so you don't strip the cleat bolts.
- Also, check your hardware to make sure it’s still tight after about 5 hours of riding.
- If you're using toe clips and straps, make sure the clips hold your feet in the optimum position (balls of the feet over the centers of the pedals). If not, get different-size clips. If you've got huge feet, place spacers between the clips and pedals to "lengthen" the clips.
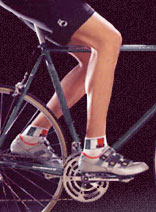
- As with the other adjustments, this is a safe starting position.
- If you're over 6-feet tall, ride long distances, climb a lot and pedal at about 90 rpm, you may prefer to be as much as 1 to 2 cm behind the end of the crankarm. If you're less than 6-feet tall, spin at 95 rpm or faster and like to sprint, you'll probably prefer to be directly over the end of the crankarm.
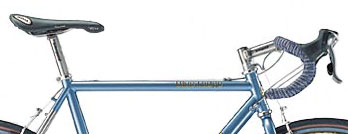
- If you'd like to measure the difference between your seat and bar height, rest a straightedge on the seat (if the seat's not level, level the straightedge) so it extends over the bars and measure the difference with a ruler.
- It's important to realize that there's a limit to how much you can raise the handlebars. The amount of adjustment depends on the frame and component design. In some cases, it may be necessary to install longer cables and housing to raise the handlebars, too.
- Tall riders (long arms and large hands) usually favor lower handlebars and short riders prefer higher ones.
- Achieve a comfortable back angle of approximately 45 degrees (depending on your degree of flexibility).
- When the bars are the right height, it should feel natural to look ahead (no neck craning).
- Another way to "raise" mountain-bike handlebars is to replace your flat bars with a riser model. These can be an inch or two higher than flat bars.
- It's usually not a good idea to raise the handlebars too much. Once they're higher than the seat, your body weight is shifted more over the rear of the bike, which can mean greater jolts from bumps in the road. This can lead to discomfort and pain.
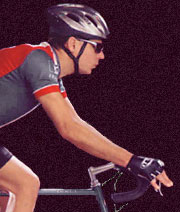
- If you don't have a helper, photograph/video yourself from the side and check the picture.
- If you feel the need to scoot forward on the seat while riding, your stem is probably too long (and vice versa).
- Indicators of proper reach include: being able to always comfortably bend the elbows while riding, no hump in the back, a natural neck angle and equal pressure on the hands and seat.
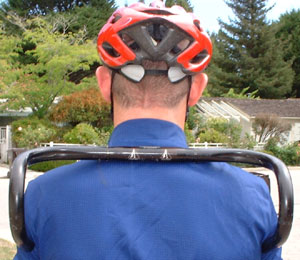
- If your flat handlebars are too wide, you can shorten them with a tubing cutter or hacksaw. But don't overdo it. Measure carefully and be sure to leave ample room for the brake and shift levers, etc.
- Wondering how different bar shapes feel? Come on in and try some out!
Bikes Insider
Trek Verve 2 Disc Review
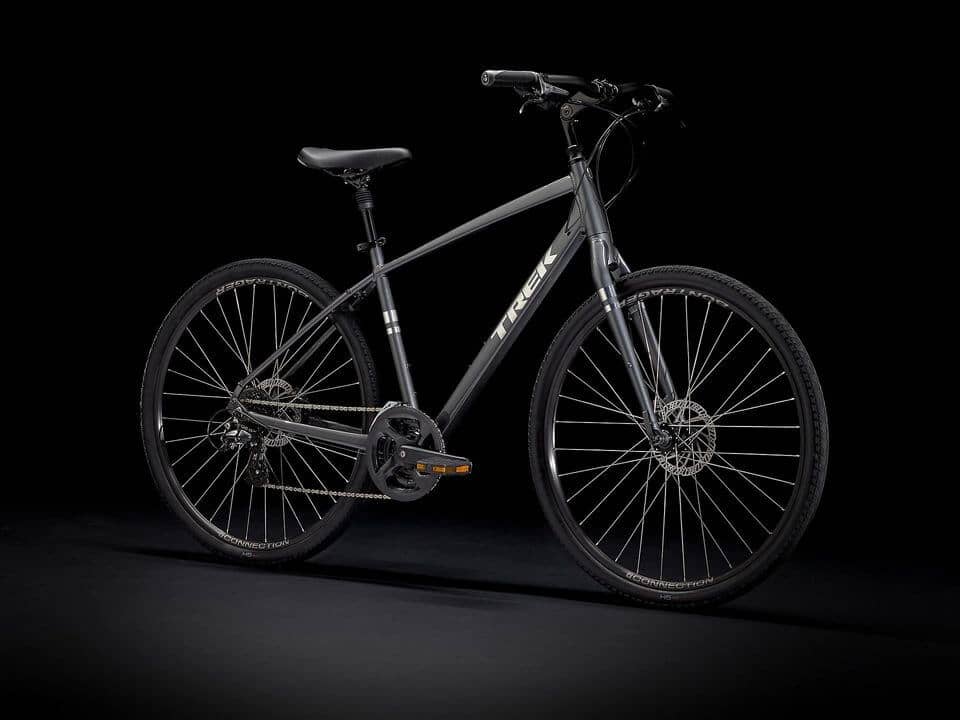
Today we are going to take a look at Trek Verve 2 which is a budget hybrid bike. It is the second of the Verve series, Trek’s take at recreational hybrid bikes which are built for comfort and versatility. Trek Verve series has three bikes to offer,
The Trek Verve 1 which retails at $530, Verve 2 retailing at $670, and finally Verve 3 retailing at around $820.
I choose to review Trek Verve 2 Disc first, mainly because I think this is a bike many would come to love at the price point. Don’t get me wrong, Verve 1 is already a great bike for what its worth. But for just another $140 you will be getting a lot more of a bike than the base model.
This is a comprehensive rundown of all the features you would expect when getting a Trek Verve 2 and if you are looking for a specific component of the bike use the table of contents below to quickly navigate around the review.

The frame makes for around 70 percent look and feel of the bike in my opinion and should be a major consideration when you are thinking of getting a bike. Trek Verve 2 comes with an Alpha Gold Aluminum frame, which is top of the line aluminum technology for treks bikes.
The frame ensures a strong ride while still feeling very light and forgiving during the rides. This is something you will quickly come to appreciate the first time you test ride this bike.
The frame is designed for comfort as its priority, as a result the bike as a shorter reach than other traditional fitness bikes. This also ensures that are in a more upright position while riding this thing which is compatible if you have had any issues with your back, neck, or shoulders.
The upright position also makes it easy for you to look around while switching lanes or crossing streets.
Trek Verve 2 is offered in two variants,
- A standard high-step model which has the diamond frame
- A low step model which is designed for more clearance and convenience
This bike can also be a good commuter as the frame comes with mounts for racks and fenders. So if you want to stay dry during the rain or carry some extra cargo with you, this bike can handle it pretty well.
Some of the good features of this Verve 2 frame are that you get internal cable routing which keeps the cables away from your sight. This gives the bike a very clean and minimalist look but also offers extra protection to the cables when using a trunk mount or something similar.
This sounds like nitpicking but if you are going to carry your bike up the stairs by hand, your hands will appreciate if the cables are not harassing them every time you carry it by the top-tube. And aluminum won’t rust on contact with moisture so don’t worry about that.
Another good addition, which you won’t see a lot these days is the amount for one of those traditional wheel locks. Trust me when I say that this lock gives you that peace of mind when you have to quickly go into a store and don’t want to bother locking your bike.
Trek Verve 2 frame also has Integrated DuoTrap S digital sensor compatibility which you can use to wirelessly track your ride data directly from your bike to any ANT+ and Bluetooth enabled phone.
The fork on this bike is made of Verve alloy and threaded steerer tubes made of steel which gives great handling. Another thing that came as a surprise to me is that the frame comes with a ThruSkew axle. This means your front wheel will never drop out during rides and enables quick and easy access to your front wheel.
One of the choices I didn’t agree with this new model is the lack of a suspension. As a front suspension is something you’d expect on a comfort hybrid bike like this one. But turns out, the suspension on a bike like this doesn’t add that much to comfort as you’d think.
As this is a hybrid, you won’t be expected to do jumps or ride on trails, at least not as often, and riding in an upright position means your weight is more towards the back of the bike. And to get considerable benefits of a front suspension, you would need to ride more aggressively and have your weight more forward faced and this is not in the interest of a comfort bike.
But if you are looking for something to act as a double for trails and regular commute, Trek Marlin 5 will be a great choice at this price.
And by removing a front suspension, you also get some weight off the bike for a lighter and relaxed ride. And with adjustable suspension seat post and a taller stack, this fork offers you won’t feel any large shocks as long as you stick to well-paved roads and ground limestone.

The drivetrain of Trek Verve 2 consists of
- Shimano Altus M315 8×3 shifters
- Forged alloy 3 speed 48/38/28 crank with a Shimano Tourney TY710 front derailleur
- 8 speed 11-32 Shimano HG31 cassette with a Shimano Altus M310 read derailleur
This bike comes with all Shimano components for the drivetrain as you can see. This is good because this eliminates the need for extra tuning and other compatibility issues that come with using different brands. To give you peace of mind If you are new to cycling, Shimano is considered the best for drivetrain components and is both used and loved by the top of athletes all around the world.
The 8×3 setup means you will be having a lot of speeds you can choose from for any gradient. Easier gears are suitable for people who are away from bikes for a long time or riders who are trying to rehabilitate and recover from leg injuries as they allow a complete stroke.
Handlebar and Stem

The handlebar on this hybrid bike is a 620mm/660mm wide alloy handlebar from Trek’s in-house brand Bontrager whose products are very reputable and you’ll be seeing a lot of components made by Bontrager hereinafter. This particular handlebar has a comfort sweep which gives the handlebar a subtle ‘M’ shape which you normally see on a comfort cruiser.
The stem part is a little bit special because it comes with a Bontrager alloy quill which essentially means you can adjust the rise of the handlebar into any of the 64 degrees it permits. The stem is also longer, 85mm or 105mm depending on the size you are getting, which is a considered a norm for road and commute oriented bikes as you have more clearance for making turns.
Seatpost and Saddle

Trek Verve 2 comes with an alloy made Seatpost with adjustable suspension which plays an important role in adding the extra bit of comfort while riding in an upright position. This has an adjustable range of up to 27mm to absorb those shocks and bumps along your way.
This along with the Bontrager Boulevard comfort saddle, the ride quality is immaculate and easily one of the most appreciated features on the bike. It has a lot of cushioning and stays very comfy during longer rides.

You are lucky in this aspect as Trek Verve 2 only rim brakes until a few years ago and Trek made a great choice of switching to Tektro HD-M275 hydraulic disc brakes, Hence the name Trek Verve 2 Disc. Which are far more reliable and better in every aspect. They work flawlessly in any weather condition including damp conditions where rims brakes are scary to work with.
And they also offer the highest stopping power which comes in real handy when you are carrying more weight. Another pro of getting Hydraulic disc brakes as opposed to mechanical ones is that they are really easy to apply and maintain over time.

Both front and back hubs are made of Formula DC 6-bolt alloy (DC-20 in the front and DC-22 in the Back). Rims are Bontrager Connection which is double-walled and made of aluminum alloy for stiffer ride and strength of the wheels overall.
The stock tires which come with this bike are Bontrager H5 Comps, 700x45c which are wider than what you’d see on a road bike but not as much as a mountain bike. They roll pretty well on well-paved roads and gravel which is mostly the case for commuting and recreational riding.
The lack of front suspension doesn’t show due to these wider tires. Getting rid of the suspension allows for better energy transmission on the road as there are no power losses during pedaling.
Trek Verve 2 weighs in at 30.26 lbs or 13.73 kg for a size medium and has a total weight limit (weight of rider+cargo+bike) of 300 pounds or around 136 kg.
Sizes and Colors
As a typical Trek bike, this comes in 4 different sizes S, M, L, and XL, and a table with Trek Verve 2 size chart and geometry will be provided below.
This bike comes in Lithium Grey and Rage Red which are both stunning choices.

Trek Verve 2 Geometry Chart

Verve 2 Women’s
This bike is discontinued from 2019 but luckily you can get most of the features of Verve 2 Women’s from buying a Trek Verve 2 Low-step model. It has more standing clearance and accessibility of the women’s model.
Leave a Comment Cancel reply
Save my name, email, and website in this browser for the next time I comment.

- Forum Listing
- Marketplace
- Advanced Search
- MTBR Discussion Forums
- Beginner's Corner
is it possible to raise the handlebars on my trek 3700
- Add to quote

You cant raise your handlebars without spending money what kind of riding position are you looking for anyway? your handlebars look quite high as they are... are you looking for a beach cruiser type position?
The Shop.... wasn't trying to swindle you, they are correct. The only way to raise the bars on a bike with a threadless steerer, like your's has, is to get a new stem with a steeper rise or higher rise handle bars. Good Dirt
FLMike said: You cant raise your handlebars without spending money what kind of riding position are you looking for anyway? your handlebars look quite high as they are... are you looking for a beach cruiser type position? Click to expand...
Buy a shorter stem...that will sit you back a bit...but understand this is a mountain bike not a beach cruiser. Did you not test ride it before you paid for it?
rich 5150 said: i just got it they will tweak things and give general maintenance for a whole year free of charge, so if they were to raise them for me it wouldnt cost a thing i just want to know if i can raise them or if the guys at the store are scumbags and want to make another dollar off me cuz i dont know any better im just tryint to raise them about another inch and im only riding on flat concrete/dirt surfaces so id like to sit in more of an upright position than lean foward Click to expand...
Nice bike. Get some bar ends. Maybe that'll help you. And get a new seat, that'll help me.
theMeat said: Nice bike. Get some bar ends. Maybe that'll help you. And get a new seat, that'll help me. Click to expand...
just got back from riding it now ..... took it on an 8 mile course and im kinda adjusting to it yea i test drove it and i did change the origional seat on it.....i like to be comfortable i have a bad back and the other seats hurt my back when i ride if your going to comment on anything comment on the bike the seat is my prefrence i like it that way hows the bike for a beginner????? i just got it 2 days ago ..... test drove this 3700 and a hardrock and the trek felt so much better
Looking at your photo, looks like your stem is already a steep angle (20 or 30 degree) and 120mm(?) length to give your handle a higher position than most mountain bikes. But it seems you are looking for a comfort-type ride so perhaps a combination of a steeper angle stem and high rise bars might help. steep angle stem adjustable stem high rise handlebar
captainjoon said: Looking at your photo, looks like your stem is already a steep angle (20 or 30 degree) and 120mm(?) length to give your handle a higher position than most mountain bikes. But it seems you are looking for a comfort-type ride so perhaps a combination of a steeper angle stem and high rise bars might help. steep angle stem adjustable stem high rise handlebar Click to expand...
AndrwSwitch said: The bike should be fully adequate for what you're doing with it. That seat is going to get really uncomfortable if you start going on longer rides. Having a bad back is kind of a tough situation because the balance and load distribution that makes a conventional setup comfortable really relies on the rider exerting force on the pedals pretty continuously, being centered somewhere between the crank axle and the front pedal when it's horizontal, and having the balance and core strength to do all that without sitting heavily on the saddle or leaning on the handlebars. Is the plan to do rides under an hour around your neighborhood, or are you looking at rehabing your back and getting into cycling as a sport? Click to expand...
The key to a happy back is a strong stomach. Been there, done that. Just kiddin about the seat but really, on longer rides it's gonna hurt. The adjustable stem is a good way to go, to try out multiple angles, then, if you want, get the fixed angle u know u will like. No more love for bar ends? I love um on long rides. Gives me more positions.
theMeat said: The key to a happy back is a strong stomach. Been there, done that. Just kiddin about the seat but really, on longer rides it's gonna hurt. The adjustable stem is a good way to go, to try out multiple angles, then, if you want, get the fixed angle u know u will like. No more love for bar ends? I love um on long rides. Gives me more positions. Click to expand...
I enjoy bar ends that're long after the bend. Usually keep them wrapped with some grippy handlebar tape. Makes them thicker and not slipery when sweaty. For me, the shorter 1's without the bend, get caught on branches easier, and don't offer as many positions. Nother thing I discovered. Found that my front wheel was breaking loose more than the back so went with a bigger tire in front. As a result the handebars became higher than the seat. I'd bet with the right combo that could offer u another inch or 2. Enjoy the bike each time u make 1 change so u know what helped.
rich 5150 said: it says you can in the manual but it says it requirs special tools and knowledge QUOTE] I'd guess they're referring to taking any spacers that are on top of the stem and reinstalling them below the stem, thereby moving the handlebar higher. All your spacers are already under the stem, so that won't help. My guess is that the "reaching forward too much" sensation is due more to the very long stem on there (is that stock???) than the bars being too low. In fact, I wonder if a lower and closer h-bar might help your hands fall more naturally on them, instead of reaching long and high for them. Just a guess. Anyhow, some shops have a set of used stems that they'll install on your bike to help you find the right one - go when they're not busy. Click to expand...
Ryder1 said: rich 5150 said: it says you can in the manual but it says it requirs special tools and knowledge QUOTE] I'd guess they're referring to taking any spacers that are on top of the stem and reinstalling them below the stem, thereby moving the handlebar higher. All your spacers are already under the stem, so that won't help. My guess is that the "reaching forward too much" sensation is due more to the very long stem on there (is that stock???) than the bars being too low. In fact, I wonder if a lower and closer h-bar might help your hands fall more naturally on them, instead of reaching long and high for them. Just a guess. Anyhow, some shops have a set of used stems that they'll install on your bike to help you find the right one - go when they're not busy. Click to expand...
Ryder1 said: does anybody know a good website that sells add on parts like bar ends and different types of handlebar grips??????? id like to see more options than what my store can offer me Click to expand...
pricepoint is awesome
Jenson USA U can also try riser bars and adjust reach and hieght by rotating the bars.
This is off topic but your back trouble my be the result of spinal stenosis. Sciatica is a symptom. Just didn't want you to have to wait years for this to be properly diagnosed as happened to me. It may sound scary but I still ride my bike and work in the woods. Good luck.
Speaking of that awesome seat....who makes that thing? John Deere?
net wurker said: Speaking of that awesome seat....who makes that thing? John Deere? Click to expand...
That awesome seat doesn't allow you to grab the seat between your thighs. A huge part of controlling the bike is side to side weight shifts with your thighs pushing against the side of the seat. I bet if you switch to a regular seat, you will like it. And sometimes, a comfortable looking seat is not, and visa versa.
- ?
- 15.5M posts
- 519K members
Top Contributors this Month
30-Day Unconditional Guarantee
Ride it and love it, or we'll take it back
- filter controls Items 24 24 48 72 filter controls Sort by Featured Featured A-Z Z-A Price Low-High Price High-Low

IMAGES
VIDEO
COMMENTS
2. Loosen the stem expander bolt two to three turns. 3. Tap the top of the stem expander bolt with a wood, rubber, or plastic faced mallet to loosen the stem wedge. 4. Adjust the handlebar to the desired height, making sure the minimum insertion line is inside the frame. 5. Align the stem with the top tube.
Step 1: Assessing Your Handlebar Height. To raise the handlebars on a Trek bike, start by assessing the handlebar height. This can be done by adjusting the stem or using a stem riser. Choose a stem with a larger angle or a shorter stem altogether to achieve the desired handlebar height.
Learn how to adjust your stem height and change the position of your handlebars in this easy tutorial video. Perfect for beginners and e-bike riders.
About Press Copyright Contact us Creators Advertise Developers Terms Privacy Policy & Safety How YouTube works Test new features NFL Sunday Ticket Press Copyright ...
Seat fore-aft adjustment. Slide the seat on the seatpost or rails to adjust it fore and aft. This adjustment changes how far you have to reach to grasp your handlebars, and it shifts your weight distribution on the bicycle, both of which affect how your bike handles. As the seat position is changed, the angle of the hip rotation also changes.
If you're looking to raise the handlebars on your Trek Verve 2, there are a few things you'll need to do. First, you'll need to loosen the stem bolt using an Allen wrench. Next, you'll need to unscrew the top cap and remove the star nut. Once these two things are removed, you can raise the handlebars to your desired height and tighten ...
Step 3: Raising Handlebars On Quill Stems. If your Trek bike has a quill stem, follow these steps: Loosen the bolt: Locate the bolt at the top of the stem. Use an appropriately sized Allen wrench or adjustable wrench to loosen the bolt. Turn it counterclockwise until it is loose enough to allow the stem to move.
Step 1. The best way to raise your bike's handlebar is to add spacers. The first thing to do is to place your bike on your workstation stand. Make sure that the wheels are firm on the ground. Then slowly loosen the clamp bolts on your stem's rear area. Add a bit of grease on the top cap's bolt.
Adjusting the handlebar height on your bike is not difficult once you know how. This detailed guide walks you through the process of adjusting threadless and quill stems.
Adjusting Handlebar Tilt. Loosen the stem bolts holding the stem faceplate where the stem meets the handlebar. These bolts almost always use a 5 mm Allen wrench, but some stems on older Trek bicycles may use a 4 mm or 6 mm wrench. Bontrager stems come in two-bolt and four-bolt types; loosen each bolt evenly using the appropriate Allen wrench ...
If there's a spacer above the stem, you can raise the handlebars a bit, but if there isn't a spacer left above there, you'll need to buy a new stem or an extender for the steering tube. If there is a spacer, you could probably find something on YouTube for moving that below the stem. Be careful - the stem bolts need to be pretty tight and ...
Nvreloader said: You can get one of this type of handlebar adjustment stems, allows to to adjust the angle and sweep back you want. Amazon.com. I've seen those. I have added Redshift stems to a few bikes. Level 2's stem includes the mount for the headlight. If you change out the stem you need to relocate the light...
The Trek Verve 2 hybrid bike is made for convenience and enjoyment on errand runs, road trips, and fitness rides. A suspension seatpost, a padded saddle, and weather-resistant disc brakes are just a few of the thoughtful features that contribute to a secure and comfortable ride. ... Handlebar And Stem Review. This hybrid bike has a 620mm/660mm ...
Step 2: Adjust Seat Height. The easiest do-it-yourself seat-height adjustment is done on a trainer or indoors in a doorway and requires a friend or spouse to help. Put on your cycling shorts and shoes, mount your bike in the trainer or place your bike in the doorway, get on and hold onto the doorjamb to support yourself.
You will need to loosen both the stem cap as well as the bolts that clamp the stem to the steerer tube. You will then need to remove the cap and any spacers, then remove the stem/bars, place the spacers on the tube, then the stem/bars go back - it can be tricky to make sure they're straight. Next step is very important- replace the stem cap ...
The Trek Verve 1 which retails at $530, Verve 2 retailing at $670, and finally Verve 3 retailing at around $820. I choose to review Trek Verve 2 Disc first, mainly because I think this is a bike many would come to love at the price point. Don't get me wrong, Verve 1 is already a great bike for what its worth.
6757 posts · Joined 2003. #3 · May 26, 2010. The Shop.... wasn't trying to swindle you, they are correct. The only way to raise the bars on a bike with a threadless steerer, like your's has, is to get a new stem with a steeper rise or higher rise handle bars. Good Dirt.
You should take the 15% hit and get that fx. The handlebars are merely one part of the whole package. You can't change the geometry of the frame, it's extra weight, and the shifters for that type of handlebar are super expensive.
Bontrager Elite IsoZone VR-SF Road Handlebar. $104.99. Compare. Select a color.
Test rode bikes like Trek 7000 and 7300, Specialized Crossroad, etc. Also looked at more fitness bikes like the 7.2 FX or a Canonndale Quick. Like the lighter weight of the fitness bikes but would like to sit up straight.
First 2 pictures are from one back, second 2 are from a second bike. My household has gotten interested in cycling and we've each purchased a Verve 2. 2 bikes came with a particular handlebar/saddle combo that matched the pictures on the website, but 2 of them came with a different and unbranded saddle/handlebar combo.
You need to buy a stem riser. You cannot raise them without it. Yea stem riser or, in a pinch, get a stem with a larger angle or a shorter stem altogether. Will make your position a little less stretched out. 30K subscribers in the TrekBikes community. Ride bikes, have fun, feel good.
I recently posted re: visiting a Trek store, trying on a Verve 3, and finding that it was the most perfect fitting bike I'd ever tried. I decided to just go ahead and buy either the Verve 2 or the Verve 3. I noticed the Verve 3 is supposed to have a "vibration-reducing handlebar." Is this somehow different than the one on the Verve 2?