The leading authority in photography and camera gear.
Become a better photographer.
12.9 Million
Annual Readers
Newsletter Subscribers
Featured Photographers
Photography Guides & Gear Reviews

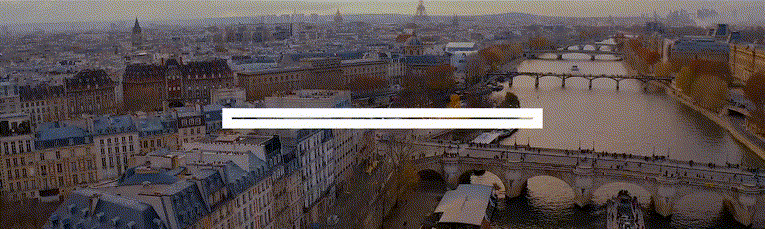
How to Plan, Shoot & Edit a Hyperlapse Video
Master the art of hyperlapse videography, from strategic planning and shooting techniques to post-production editing for cinematic results.
Learn Filmmaking | By Leonardo Cavazzana
In this guide, you’ll learn everything you need to create smooth professional-looking hyperlapses.
We will cover basic concepts from what gear you’ll need to how to edit a hyperlapse video.
Hyperlapses can portray the passage of time in a way that is dynamic and captivating for the viewer, so knowing how to create one is a powerful tool to have in your creative toolbox.
So let’s dive into creating your first timelapse videos.
Table of Contents
What is Hyperlapse?
Hyperlapse videos are timelapse videos with movement. They’re a visually captivating technique that portrays the passage of time in a very dynamic way.
Creating a hyperlapse video involves capturing a series of photos taken at set intervals while moving between each shot, to only then combine these photos into a final video. It’s essentially a moving timelapse.
Capturing a hyperlapse with patience and planning, combined with proper editing and stabilizing the footage ensures the smoothest possible result.
What’s the Purpose of Hyperlapse Video?

Hyperlapses are often used to create dynamic shot, showing a journey through a location or around a subject.
They’re popular in travel videos, commercials, and vlogs to showcase urban environments, landscapes, and events.
For example, a hyperlapse might show a sunrise over a city, where the camera not only captures the passing of time but also moves through the streets of the city, providing a dynamic perspective on the environment.
Overall, a hyperlapse works well when you want to show the passage of time with a bit of sauce and fun to keep the viewer captivated.
What’s the difference between timelapse and hyperlapse?

While both time lapse videos and hyper lapse videos portray the passage of time in an accelerated manner, time-lapse is a stationary capture of changing scenes, often shot with a steady camera on a tripod.
A hyperlapse is a bit more complicated because it introduces camera movement into the equation, creating the effect of the viewer being taken on a journey.
This movement can be linear, circular, or even complex routes through urban environments or natural landscapes.
A timelapse video is primarily used to show a long event or process in a short amount of time. For example, showing a flower blooming, a sunset, or the movement of stars at night.
A hyperlapse on the other hand creates a dynamic, moving perspective through an environment, often used to show journeys or pathways through spaces.
For instance, a hyperlapse video might take you through a bustling city street or around a landmark.
Understanding Movements in Hyperlapse

Include brief examples or visuals to illustrate each movement type.
In hyperlapses, camera movements are executed in a step-by-step manner over distances and intervals, unlike traditional video where they’d be executed in real-time.
Here’s a breakdown of the different types of camera movements and how they can be applied in hyperlapse:
- What is : Panning involves moving the camera horizontally from a fixed position. It’s like turning your head left or right.
- Hyperlapse Application : Instead of a smooth turn, the camera is moved a set distance and direction (e.g., turning 5 degrees to the right) between each shot. Over the duration of the hyperlapse, this creates the effect of a panoramic sweep across a scene.
- What is : Tilting is moving the camera vertically up or down from a fixed position as if nodding your head.
- Hyperlapse Application : Similar to panning, but the camera is tilted upward or downward by a consistent angle between shots. This can be used to gradually reveal tall structures or landscapes.
- What is : Zooming changes the focal length to get closer to or farther away from the subject without physically moving the camera.
- Hyperlapse Application : Achieving a zoom effect in hyperlapse is tricky. It requires changing the lens focal length incrementally between shots while adjusting the camera’s position to maintain framing consistency. This creates a “dolly zoom” or “vertigo” effect, where the background appears to shift in relation to the foreground. I, personally, rather do this in post.
Dolly Shots
- What is : A dolly shot involves moving the entire camera forward or backward, typically on tracks, gimbal or a dolly.
- Hyperlapse Application : The camera is moved forward or backward by a consistent distance between each shot. The resulting hyperlapse creates a sensation of traveling through space, such as moving down a long corridor or approaching a building.
Handheld Techniques
- Traditional Meaning : The camera is held by the operator, without the aid of stabilizing equipment. This often results in a more “organic” or shaky feel.
- Hyperlapse Application : Instead of using a tripod, the photographer moves and aligns each shot by hand. This method can be more flexible and faster, but it often requires a lot of time in post-production stabilization if you mean for it to be smooth at the end. Some photographers use gridlines, screen overlays, or specific points in their frames to ensure consistent alignment.
What Gear Do You Need to Create Hyperlapse Videos?

Creating hyperlapse videos requires specific gear to ensure precision, stability, and quality.
Here’s a list of equipment you might need to make hyperlapse videos:
- A DSLR or mirrorless camera offers the best quality and control.
- Many modern smartphones have built-in time-lapse or hyperlapse modes which, while not as flexible as professional cameras, can still get you impressive results.
- A wide-angle lens is often preferred for its broader field of view .
- Essential for stabilizing shots and ensuring consistent camera height and orientation.
- Some hyperlapses can be done handheld, but stabilization in post-production will be necessary.
Intervalometer
- Some cameras have a built-in intervalometer which can automatically take photos at set intervals.
- If your camera doesn’t have one, you might need an external intervalometer, which triggers the camera to take photos at specific intervals. You don’t have to, but it helps for a smoother result.
Neutral Density (ND) Filters

- These reduce the amount of light entering the lens, allowing for longer exposures in brighter conditions.
- They’re useful for capturing motion blur , especially in daytime hyperlapses.
Grid Overlays or Screen Markers
- Useful for maintaining consistent framing and alignment between shots, especially when done handheld.
Tape Measure or Rangefinder
- Helpful for ensuring consistent distances between each camera movement. You don’t have to, but it can be helpful if you want to be clinical about it.
Batteries and Storage
- Hyperlapse photography can quickly consume battery life and storage space, so bring extra batteries and memory cards .
Smartphone or Tablet Apps
- There are several apps available for planning hyperlapses, like sun trackers to plan lighting or augmented reality apps to visualize shots.Here are five free hyperlapse apps:
Hyperlapse from Instagram iOS
Microsoft Hyperlapse Mobile Android
Lapse It iOS | Android
Time Spirit – Time Lapse Camera Android
Framelapse – Time Lapse Camera Android
While this list might seem extensive, you don’t need every item for every hyperlapse.
Depending on the complexity of your shoot, the environment, and your desired result, you might opt for a more minimal setup or go all out with advanced gear.
There are cameras on the market that come with built-in hyperlapse/time-lapse features, making it easier for users to capture these dynamic sequences without extensive post-production.
Here are a few noteworthy ones:
Insta360 Cameras
- This is a 360-degree camera that allows users to capture everything around them.
- The built-in hyperlapse feature, often termed “timelapse video” or “timeshift”, lets you record a scene and then speed it up.
- The advantage of the Insta360 cameras is the “FlowState” stabilization, which results in incredibly smooth hyperlapses, even when the camera is moved by hand.
GoPro HERO series
- Starting from the HERO7, GoPro introduced the “TimeWarp” video feature, which is essentially a stabilized hyperlapse mode.
- The camera captures stabilized time-lapse videos while in motion. Users can speed up or slow down the footage directly within the camera. See also: GoPro timelapse tips
DJI Osmo Action
- DJI’s answer to the GoPro series also has a built-in hyperlapse feature.
- Combined with its RockSteady stabilization, it produces smooth hyperlapse sequences.
DJI Mavic Drone series
- DJI’s drones, especially the Mavic series, have built-in hyperlapse modes that allow you to capture aerial hyperlapses with various trajectories.
- These drones automate the process, capturing consistent, stabilized footage as they move through the air.
- The quality and how smooth the hyperlapse is will depend on conditions such as wind and route of the drone.
Smartphones
- Many modern smartphones now include hyperlapse or time-lapse modes in their camera apps .
Planning Your Hyperlapse

Considering how much it takes to create a smooth hyperlapse, creating one requires a bit of planning, especially when selecting locations and visualizing how camera movements will impact the final shot.
Here’s how to plan a hyper lapse video:
Objective & Conceptualization
Start by asking yourself:
- What story do I want to tell?
- What emotion or theme am I aiming for? Understanding your objective will guide your scouting process and shot selection.
Scout for Dynamic Elements
Dynamic elements add life to your hyperlapse. While scouting a location , look for:
- Moving Clouds : These can add drama and indicate the passage of time.
- People or Vehicle Traffic : Movement of crowds or traffic creates a dynamic contrast against static buildings or landscapes.
- Lighting Changes : Sunrises, sunsets, or areas with shifting lights can enhance the time-passing effect.
Seek Visually Appealing Subjects

- Landmarks & Iconic Buildings : They’re recognizable and often provide a strong focal point.
- Natural Elements : Water bodies, trees, or mountains can offer contrasting textures and movements.
- Urban Landscapes : Skyscrapers, bridges, busy streets or intersections can provide depth and complexity.
Composition & Framing
- Rule of Thirds : Place key subjects or horizon lines along the thirds of your frame to create balance.
- Leading Lines : Roads, railways, bridges, or pathways can guide the viewer’s eye and enhance the sense of movement.
- Symmetry : Perfectly balanced compositions can be striking, especially with reflective surfaces like water or glass buildings.
- Foreground Interest : Adding elements in the foreground can create depth and a parallax effect during movement.
Visualize Camera Movement
- Path & Trajectory : Sketch out or mentally plan your camera’s path. Will it be a straight line, a curve, or perhaps a spiral around your subject?
- Effect on Final Shot : Visualize how your chosen movement will affect your composition over time. For instance, a dolly-in movement can make a subject more dominant in the frame, while a panning movement can reveal hidden elements in a scene.
Test Shots & Previews
Before committing, take a few test shots or short sequences to visualize the final result.
Making a video on your phone for the same trajectory of the hyperlapse will give you a rough idea of how it could feel.
Shooting the Hyperlapse

Setting Up Your Equipment
Camera & tripod setup :.
- Stability : Ensure your tripod is on even ground. Extend the legs and lock them securely. If it’s windy, weigh the tripod down with bags or weights.
- Camera Alignment : Attach your camera to the tripod head. Make sure it’s level, using either the camera’s built-in level or a bubble level on the tripod.
Exposure Settings :
- Manual Mode : Switch your camera to manual mode. This gives you control over all settings, ensuring consistency throughout the sequence.
- Shutter Speed : Aim for a slower shutter speed , like 1/50th of a second, to achieve a slight motion blur. This creates smoother transitions between frames. If it’s too bright, use an ND filter to cut down the light.
- Aperture : Set it according to your desired depth of field . A higher f-number (e.g., f/11 or f/16) will keep more of the scene in focus.
- ISO : Keep it as low as possible to reduce noise. Adjust only if lighting conditions require it.
Focus Settings :
- Switch to manual focus to prevent the camera from refocusing between shots.
- Frame your shot, focus on your subject, and then ensure the focus ring doesn’t move during the sequence.
Choosing Intervals and Frame Rates
Determine your subject :.
- Fast-Moving Subjects (e.g., bustling people, busy traffic): Shorter intervals like 1-3 seconds work well.
- Slow-Moving Subjects (e.g., cloud movement, sunsets): Longer intervals, possibly 5-30 seconds, can be appropriate.
Frame Rate for Playback :

- Most videos play at 24 or 30 frames per second (fps). If you take a photo every 2 seconds and play it at 30 fps, 1 second of hyperlapse footage will represent 60 seconds of real-time movement.
Executing Camera Movements
- Determine the start and end points of your pan.
- Between each shot, move the camera horizontally by a small, consistent angle.
- Use gridlines on your camera’s display or specific landmarks to ensure consistency.
- Decide on the vertical start and end points.
- After each shot, tilt the camera up or down by a consistent angle.
- A bubble level can help maintain a straight horizon.
Dolly Shots :
- Measure a set distance to move the tripod between each shot. This could be as small as a few inches.
- Use tape, chalk, or physical markers to ensure consistent spacing.
Handheld Techniques :
- While challenging, you can execute hyperlapses handheld.
- Use landmarks or gridlines on your camera’s display for consistent framing.
- Post-production stabilization will be necessary if aiming for a smooth result.
Ensuring Smooth and Visually Pleasing Hyperlapse Shots
Slow & steady movements :.
- Consistency is key. Each camera move should be methodical and uniform.
- Avoid rushing. Take your time to measure or eyeball distances and angles accurately.
Review Periodically :
- Periodically check your shots to ensure consistency and to detect any potential issues early.
Stay Patient :
- Hyperlapse photography is time-consuming. Embrace the process and stay patient to ensure the best results.
How to Edit Your Hyperlapse Video Sequence

Importing and Organizing Captured Frames
- Connect and Transfer : Transfer all the images or video frames to a dedicated folder in your computer.
- Chronological Order : When importing, ensure that the images are named sequentially (e.g., frame_1, frame_2, etc.) Most cameras do this automatically. Organizing them in chronological order will save you a lot of time in post.
Choosing Video Editing Software
There are various video editing software options available:
- Adobe Premiere Pro.
- Adobe After Effects.
- Final Cut Pro.
- DaVinci Resolve.
They all work well, so choose which one you feel more comfortable with.
Stabilizing Handheld Footage
- Adobe Premiere Pro and After Effects : Use the Warp Stabilizer effect. Simply drag and drop it onto your sequence for automatic stabilization. You will have to adjust settings as necessary.
- Final Cut Pro : Use the Stabilization feature found in the video inspector panel.
- DaVinci Resolve : Navigate to the “Color” workspace, select the clip, and click on the “Stabilizer” tab.
Note: Over-reliance on software stabilization can lead to unwanted warps on your footage. It’s always better to capture as steady footage as possible in the first place.
Adjusting Speed and Timing
- Timeline Assembly : Import and place your images or video frames on the timeline in sequential order.
- Set Frame Duration : For images, you’ll need to set a consistent duration for each frame. Depending on your desired speed, each image might represent 1/24th or 1/30th of a second for 24fps or 30fps playback.
- Playback Speeds : Most software allows you to adjust the playback speed of your sequence. Experiment with different speeds to achieve the desired effect. Speeding up will make the hyperlapse feel more frenetic, while slowing down can give a more relaxed feel.
Exporting the Final Hyperlapse Video
- Choosing a Format : The best formats for preserving quality are .mp4 or .mov with H.264 codec. These are widely accepted and provide good compression.
- YouTube or Vimeo : 4K (3840×2160) or 1080p (1920×1080)
- Instagram : 1080×1080 for square, 1080×1350 for portrait, or 1080×1920 for stories.
- Facebook : 1080p (1920×1080) for general videos.
- Frame Rate : Typically 24fps or 30fps.
3 Examples of Cool Hyperlapse Videos
Here are a few cool hyperlapses and tutorials to be inspired by:
Final Thoughts

Crafting a hyperlapse video involves a delicate fusion of meticulous planning, precise execution, and thoughtful post-processing.
From the initial stage of selecting a dynamic location to the final touches in video editing software, each step is a testament to the photographer’s dedication and vision.
The tools and techniques, from stabilization to speed adjustments, empower creators to transform raw captures into immersive visual stories.
As with any art form, mastering hyperlapse videos requires patience and practice, but the results—a seamless dance of time and motion—are undeniably worth the effort.

Check out these 8 essential tools to help you succeed as a professional photographer.
Includes limited-time discounts.
You'll Also Like These:

Hello, my name is Leo Cavazzana, I’m a professional photographer and film director. As a photographer, I’ve been photographing our natural world for the past 8 years and worked on assignments with NatGeo, BBC, and UN on all 5 continents. As a film director, I’ve been directing commercials and campaigns for brands for the past 4 years. I’m passionate about sharing about the world and photography with others.
Leave a Comment Cancel Reply
👋 WELCOME TO SHOTKIT!

🔥 Popular NOW:

Unlock the EXACT blueprint to capture breathtaking iPhone photos!
Shotkit may earn a commission on affiliate links. Learn more.
- International edition
- Australia edition
- Europe edition

Hyperlapse video: hiking the epic Grampians Peaks Trail in 5.5 minutes
The GPT is a new 13-day, 160km traverse of western Victoria’s Grampians (Gariwerd) national park. David Fanner survived the walk, but condensing his journey into a hyperlapse almost broke him
- On the new Grampians Peaks Trail: ‘I have the landscape to myself for days at a time’
- Get our free news app ; get our morning email briefing
Where/what are the Grampians?
The Grampians (Gariwerd) national park is a rugged wilderness of striking sandstone mountain ranges, expansive grasslands, windswept ridges and dense bush located in the highlands of western Victoria, three hours drive from Melbourne .
When I heard they were creating a new multi-day hike that would stretch the entire 160km length of the Grampians – the Grampians Peaks Trails (GPT) – I knew I wanted to experience it as soon as possible. Luckily for me, Parks Victoria had seen the Guardian’s previous hyperlapse video showcasing the Bondi-to-Manly walk , and were happy to see if it would be possible to create something similar on a larger scale.
How was the hike?
The entire GPT clocks in at a lengthy 160km from end-to-end, but I only had a week off in which to hike and capture the footage I needed. Hours poring over topographic maps and meetings with Parks Victoria were required to come up with a condensed itinerary that would hit all the major highlights of the trail.
Some days were dropped, some days were combined, but in the end we concocted an arduous 120km version of the trail I could complete over seven days.

I combined the first two days of the hike, two of the hardest days, into one gigantic, 10-hour, bulging blister of a day, arriving at Gar campsite in the pouring ran as it grew dark, and feeling like I had bitten off more than I could chew.
But after that baptism of fire, my hiking legs took hold. One of the best parts about a long hike like the GPT is how it affords you the opportunity to immerse yourself in a variety of ever-changing landscapes as you meander up and down the mountain ranges.

Ironically, the memory from my GPT experience that will stay with me forever didn’t make it into the hyperlapse due to the limitations of the camera in low-light. I woke up on the final morning to the most incredible cloud inversion I’ve ever seen. After a night of howling winds where I only slept a couple of hours, I awoke to absolute silence and the sun rising up over a sea of clouds.

By the final day of my condensed GPT, I felt like I could continue on for another week … although I was happy to finish off the hike with a beer back in Halls Gap.
Well, the hike sounds great … what’s a hyperlapse again?
A timelapse is a photographic technique by which the capture rate of a sequence of frames is much slower than the speed in which they are played back. You’re manipulating time to show – in only a few seconds – events that may take several minutes, days or even weeks.
Adding movement to the camera is the next step in the process, turning a stationary timelapse into a hyperlapse. Now we are not only speeding up time, we’re also changing the point of view.
In the case of a hiking hyperlapse, we’re now able to give a creative interpretation of our experience walking incredibly long distances.
How did you make it?
I utilised the same techniques for creating this hyperlapse as I did for the Bondi-to-Manly hyperlapse – that is, stick a 360º camera in a backpack and go walking. But that was where the similarities ended. Every aspect of the GPT hyperlapse was harder than the Bondi-to-Manly.

For starters, I didn’t have the two most iconic examples of Australian architecture – the Sydney Opera House and Harbour Bridge – to use as a crutch. To compensate for this I wanted to get more ambitious with camera movement, going so far as to tape the 360º camera to a drone so the hyperlapse would seamlessly take to the air over the orange rock of Taipan Wall.
The sheer length of the hike and remoteness of some sections meant batteries and memory cards were a constant concern. Disaster also struck when a rock scratched one of the two ultra-wide lenses on the third day. Luckily the damage didn’t affect the functioning of the camera, and I was able to continue recording. But for the rest of the hike I had to hold the selfie-stick and camera in front of me like a standard bearer in a marching parade.

What did you do with all the footage?
The longest part of this project is also the worst part – post-production.
Long gone is the excitement and joy of the hike … now is the time of sitting in front of a computer screen at ungodly hours, painstakingly moving keyframes around while you begin to question your choices in life.
The biggest difficulty arose when I started going through the footage. What I didn’t consider is that the majority of the Bondi-to-Manly is on paved footpaths, boardwalks or flat beaches – this allows for a consistency of footfall that I never appreciated.
That consistency creates a smoother passage when the footage is sped up. The majority of the Grampians Peaks Trail is on uneven, or even steep and difficult terrain. Of course, this ruggedness is one of the main attractions of the GPT, but when you’re trying to create a hyperlapse it can be a nightmare.
Not only do you need to smooth out spatial shakes and movements, but you need to think about stabilisation temporally as well. Little pauses to catch a breath, adjust a pack or climb over a steep rock all need to be smoothed out by making an edit and then adjusting the two new clips to match each other.
What’s next?
Making these hyperlapse videos is such a fun creative process … you don’t really know what you have until you have finished the trail. They’re much more rough around the edges than traditional content you might see promoting an outdoor experience.
I’ve got my eye on a few more possibilities in the year ahead: Tassie … I’m looking at you.
David Fanner is head of multimedia at Guardian Australia and worked with Parks Victoria to produce the hyperlapse.
- Australia holidays
- Walking holidays
- National parks
- Health & wellbeing
Comments (…)
Most viewed.
Drone technique: How to shoot 4K hyperlapse video on the DJI Air 2S
One of the many valuable features of the DJI Air 2S is its ability to capture 4K hyperlapse videos. For those unfamiliar with the term, a hyperlapse is essentially a time-lapse sequence with the added element of motion – which is achieved by moving the camera slightly between each frame.
The Air 2S has some features that make it particularly useful for shooting a hyperlapse: it can capture photos with exposure times up to eight seconds, which is ideal for low-light conditions, and the interval between shots can be as low as two seconds, allowing for smooth hyperlapse sequences.
However, shooting a hyperlapse clip requires more effort than simply taking off and hitting the record button. In this article, we'll walk you through the process of planning your first hyperlapse sequence, as well as the four different modes DJI provides for shooting hyperlapses with the Air 2S.
It's all about the timing
The first thing you'll need to consider is how long you want your hyperlapse sequence to last. Each photo in the sequence represents one frame of video. Depending on the mode you select, the number of waypoints you designate, and the interval between shots, it can take anywhere from a few minutes to a half-hour to record one hyperlapse. For example, if you want to record a ten-second sequence, and you plan to play the clip back at 30p, your drone will need to capture a total of 300 photos in the sequence.
Next, consider the time interval between each photo. A short interval, such as two seconds between shots, will generally result in a smoother sequence than a longer interval, such as six seconds. So, our hypothetical ten-second hyperlapse would take ten minutes to capture using a two-second interval but 30 minutes using a six-second interval.
Keep in mind that it's always easier to speed up your hyperlapse after it's been shot than to slow it down
So why wouldn't you initially select the shorter interval? It depends on what you're shooting. If your goal is to move the drone slowly down a beach while capturing a sunset over the course of 20 or 30 minutes, a longer interval might make sense. If you're not sure, keep in mind that it's always easier to speed up your hyperlapse after it's been shot than to slow it down.
It's important to consider battery life in your planning as well. The Air 2S has a maximum flight time of 30 minutes. By using a short interval between photos, you may be able to shoot two or three hyperlapse sequences on a single battery. If you choose a longer interval, it may limit you to a single hyperlapse sequence before it's time to land.
Planning your shot
It's helpful to pre-visualize what the final sequence will look like. Moving elements can make a hyperlapse video clip more dynamic. Boats, cars, waves, clouds and people moving about will add depth to an otherwise ordinary scene. Mountains and city skylines make for an interesting backdrop.
Wherever you shoot, always remember to abide by your country's respective drone laws. For example, in the United States, flying in restricted airspace or directly above moving vehicles or people is prohibited unless you have acquired the proper waiver beforehand.
Weather and timing
One challenge you may encounter when shooting hyperlapse videos is that weather factors, such as wind, can impact the quality of the results. Because hundreds of images are combined to make one video, the drone's exact position is crucial. If a gust of wind knocks your drone slightly off its course, you'll end up with choppy footage. When testing hyperlapse on the Air 2S, it captured higher-quality hyperlapse clips only when there was a moderate breeze at best.
Keep in mind that winds are often much lighter around dawn and dusk. Most photographers refer to these times of day as the golden hour(s) due to warm, dramatic light. They're often the ideal time to shoot a hyperlapse. The changing conditions and colors of the sky as the sun rises or sets are also fascinating to watch on a hyperlapse clip.
Camera settings
When the Air 2S was introduced, DJI emphasized that it didn't want users to think too much about camera settings and encouraged the use of Auto mode. However, we recommend shooting in Manual mode to yield the best results.
While shooting in Auto mode may seem convenient, it's too easy for areas of your image, especially during sunrise and sunset, to get overexposed. In contrast, shooting in Manual mode provides control over ISO and shutter speed. It also helps prevent any unexpected exposure changes.
To ensure that you're shooting hyperlapse clips in 4K, you'll need to take several steps. Above the shutter button in the DJI Fly app, select 'Video', then scroll down to 'Hyperlapse', where the settings will automatically default to 1080p. To change the resolution, click on the 'RES&FPS' icon on the lower right-hand side of the screen, then select '4K' for your resolution.
It's also a good idea to activate the Histogram and Overexposure warning so you can identify any areas that might be blown out when you're initially adjusting your settings.
Most importantly, you can create nice motion blur with objects in your video by throwing out the 180-degree shutter speed rule and slowing the speed down to anywhere between 1/8 second to 2 seconds. This is where ND filters come in handy by allowing you to use slow shutter speeds even in daylight.
We recommend purchasing the Air 2S Fly More Combo if you plan to shoot a lot of hyperlapses. In addition to two extra batteries, it includes a pack of four filters – ND4, ND8, ND16, and ND32.
The aperture on the Air 2S is fixed at F2.8, so you may need stronger ND filters to achieve slower shutter speeds in the brightest conditions. DJI offers another four-pack of ND filters, sold separately, including ND64, ND128, ND256, and ND512 filters. You'll probably want to invest in these filters for smooth motion blur shots, especially when it's bright and sunny.
The DJI Fly app, which powers the Air 2S, provides a scroll bar for dialing in the correct white balance. The closer you set it to 2000 K, the cooler the image. Shifting up toward 10000 K will make everything warmer. A range of 5000 K to 6600 K is ideal for most daylight conditions. Set the white balance so that it's correct for your scene.
File format
Although the Air2 S can capture 5.4K/30p video, the hyperlapse clips it generates are limited to 4K resolution. However, if you're willing to post-process the hyperlapse sequence yourself, you can take advantage of the drone's larger 1"-type sensor by also saving copies of each photo it takes in DNG Raw format.
Make sure to select Raw as your photo format and MOV as your video format. When you access the video clips created by the drone on the memory card or internal storage, you'll also find a folder containing all the Raw images. These files provide a lot more flexibility for making exposure adjustments and white balance corrections than out-of-camera JPEG images.
Raw images are helpful if you want to edit or color grade using Lightroom or After Effects. Always make sure you're shooting in Raw for maximum flexibility if you plan to edit your images. Drone Supremacy created an excellent tutorial covering post-processing techniques in Adobe Lightroom and After Effects.
Four hyperlapse modes to choose
Now that we've covered the steps for setting things up let's look at the four hyperlapse modes available on the Air 2S. Hyperlapse mode can be accessed by clicking on the button above the shutter, selecting the video icon, and scrolling down the menu to the hyperlapse option.
In each of the hyperlapse modes below, you have the option to set interval speed, total clip length, and the overall speed that the drone will travel while recording. The exception is Waypoint mode, which won't let you select the drone's speed since that will be determined by the plotted course and the duration of the sequence. DJI's latest update allows you to set up to 45 points in Waypoint mode.
Once you've dialed in your settings, the Air 2S will automatically calculate the time needed, go about its mission, and stitch the photos together once they're captured.
This mode gives you the flexibility to fly your drone in any direction, altering altitude, location, and speed, while tilting the camera at an angle you prefer whenever you choose. Let's say you want to follow a boat in motion. Having this level of flexibility makes sense.
While having complete control of the drone's movement at all times sounds appealing, it's much more difficult to capture smooth, cinematic footage as you have to be extremely precise and deliberate in every movement of the drone or camera.
Course lock
This mode is helpful for capturing cityscapes or scenery in a straight line. It is also useful for flying through tight spaces, like in between buildings. It's an automated mode: the drone flies in a straight line toward your target, or facing in another direction when unlocked, and doesn't deviate from that course.
Once you've determined your main parameters (intervals, clip length, and speed), designate your target by drawing a box around it with your finger, hit the record button, and let the drone fly. You can adjust the altitude while in flight, but you cannot alter the direction or camera angle while recording the hyperlapse. You also can't preselect distance, so it may require some trial-and-error with intervals and total clip time.
You can find an example of a Course Lock hyperlapse at the top of this article.
If you want to focus your hyperlapse on one subject in particular, like a cathedral, as illustrated above, Circle is an ideal mode. This is another automated mode that programs your Air 2S to fly in a circular path around your designated target. You can choose either a clockwise or counterclockwise direction. Once you hit record, the drone will fly for a few seconds, calculate how far away the subject is, and then begin its course.
After you've set the direction of rotation, you can't alter it once the hyperlapse is recording. You also can't change the altitude during flight. Depending on how far the drone is from the subject or how large that subject is, you may need to select a clip longer than 10 seconds if you wish to make a full rotation around it.
We saved the best mode for last. This one is especially useful for smooth, slow reveal shots, like when you want to surprise your viewers. What's wonderful about Waypoint is that, unlike Course Lock and Circle, you can determine the exact path you want the drone to fly, along with the camera orientation and angle at each waypoint. It will automatically fly the course once you hit record.
When viewing the Waypoint hyperlapse earlier in the article you can see this in action; both the drone and camera shift position during the hyperlapse.
When selecting waypoints, the drone will tell you if the angle and direction are too wide. This will ensure the footage doesn't look jerky as the drone changes its orientation.
To get started, manually fly to each waypoint and tap the plus sign in the waypoints box at the bottom of the menu. As mentioned above, you can select up to 45 different waypoints. Once you hit record, the drone will fly back to the starting point and fly the course you plotted out. If you're running low on battery, or want to start at the final point in the course, simply select 'Reverse' for a reverse sequence, and the drone will automatically start from that last location.
Final thoughts
Always make sure you have the latest firmware installed on your Air 2S. This will help prevent errors while using the DJI Fly app. One final tip: flying at a longer distance from your subject, in any mode, generally gives you more interesting footage. A Circle hyperlapse focusing on a subject close up, for example, isn't very interesting to watch. Make sure to include more skyline and other surrounding elements for the best possible outcome.
Did we miss anything? Let us know in the comments. If you've created any hyperlapse sequences with the Air 2S, share a link with us!
When you use DPReview links to buy products, the site may earn a commission.

Where is the reverse button? A screen grab would be helpful
The author has color temperature exactly backwards. Lower is warmer, higher is cooler.
Top!! Thx!!!
I thought air2s has an automatic hyperlapse mode, the manual method was what I did with the original mavic pro, doing it in dng was impractical because the drone would run out of juice before you get a few seconds in.
"Raw images are helpful if you want to edit or color grade using Lightroom or After Effects" Or....Luminar, On1 Photo RAW, Capture One Pro, etc.
I'm curious as to whether most drones will be grounded by the new FAA regulations coming out in 2023?
Unlikely. The FAA's purpose is to promote safe flying. There are already accommodations for older drones without direct reporting, and it's likely new regulations will allow firmware/software work-arounds.
For many hobbyist, it is something of a deterrent: https://www.theverge.com/2020/12/28/22203398/faa-remote-id-rules-location-night-over-people
It will definitely be interesting to see how it all shakes out. As far as I know, the FAA still have not actually certified any Remote ID solutions.
It's a good thing there are some good sub 250 gram aircraft available.
"It's a good thing there are some good sub 250 gram aircraft available."
Not so much for stills; although I'm hopeful for the Autel EVO Nano+.
I'm currently eyeing a Hubsan Zino Mini Pro that's 249grams and 48 mp. If you want a large sensor with 10 bit color, that may be a while.
@San2c- Videos and photos are stored on the Hubsan Zino Pro's internal eMMC 64/128GB memory. The files can be transferred via USB cable to your computer. The biggest problem with the built-in memory is that when it fails, it cannot be replaced, like a memory card.
Yeah, I was a little weirded out about that at first, but as with most low cost tech, there are always tradeoffs. I would think the lifespan of that storage media would far outlast the lifespan of the drone. I need a replacement for my Parrot Anafi since they decided to cease support.
One never knows how cheaply made that media might be, so in the event of a corrupt file, would that hinder further usage? I like that drone, but the media aspect put me off. I ended up buying the mini ii in spite of the lack of obstacle sensors.
Thanks for the heads up on the Hubsan Zino Mini. I'll definitely be checking that out.
Well, I'd check consumer feedback on the lifespan of the internal media before buying, but I haven't had issues with solid state media in years. I would really hope they'd have the sense to not put low grade storage in the drone because it'd open the door for costly warranty service and poor word of mouth.
I just looked up some still image samples from the Zino Mini Pro; pretty disappointing. Hopefully Autel can do better with the EVO Nano+.
https://onlyflyingmachines.com/hubsan-zino-mini-pro-aerial-filming-drone-still-shots/
Yeah, I saw those also but I suspect he may be using a cheapo ND filter which can degrade image quality noticeably. I'm a little sour on AR lately since my 4 EVO batteries all went South around the same time and AR was no help whatsoever. If they have a 3 year lifespan, they should tell us that.
You may also like
More about gear in this article.

Less than a year after the Mavic Air 2 hit the market, DJI released its successor, the Air 2S. Its build is almost identical but there are some notable differences. Which drone in this series is right for you?
Latest sample galleries

Latest in-depth reviews

The Panasonic Lumix S5II launched the second generation of Panasonic’s full-frame mirrorless camera system and was the first Panasonic to feature phase detect autofocus. As our review reveals, it’s a heck of an all-around camera for both still and video shooters.

The latest Lumix puts a Four Thirds sensor in a full-frame body with boosted AF and a wealth of stills and video capabilities to create a Swiss Army Knife of a Micro Four Thirds camera.

The fourth camera in Leica's SL series of full-frame mirrorless cameras sees the 60MP BSI sensor from the Q3 and M11 models arrive with a significant interface redesign.

The Fujifilm X100VI is the sixth iteration of Fujifilm's classically-styled large sensor compact. A 40MP X-Trans sensor, in-body stabilization and 6.2K video are among the updates.

The Nikon Zf is a 24MP full-frame mirrorless camera with classic looks that brings significant improvements to Nikon's mid-price cameras. We just shot a sample reel to get a better feel for its video features and have added our impressions to the review.
Latest buying guides

What’s the best camera for around $2000? This price point gives you access to some of the most all-round capable cameras available. Excellent image quality, powerful autofocus and great looking video are the least you can expect. We've picked the models that really stand out.

What's the best camera for travel? Good travel cameras should be small, versatile, and offer good image quality. In this buying guide we've rounded-up several great cameras for travel and recommended the best.

If you want a compact camera that produces great quality photos without the hassle of changing lenses, there are plenty of choices available for every budget. Read on to find out which portable enthusiast compacts are our favorites.

'What's the best mirrorless camera?' We're glad you asked.

Above $2500 cameras tend to become increasingly specialized, making it difficult to select a 'best' option. We case our eye over the options costing more than $2500 but less than $4000, to find the best all-rounder.

Peakto Search, a new plug-in for Lightroom Classic on macOS, uses AI tech to index your photos so you can perform searches across one or more catalogs using descriptive text prompts or visual similarity to other images.

In part two of his photography tour of Madagascar, landscape photographer Erez Marom introduces us to the visually stunning Red Tsingy.

The small, lightweight prime lens features internal focusing and EXIF communication with Nikon Z-mount cameras. (Includes sample gallery.)

7Artisans has revealed a full-frame autofocus 50mm F1.8 lens for Nikon's Z mount. It will be available soon at a price of $228.

7Artisans has announced a $130 27mm F2.8 autofocus lens for Sony APS-C E-mount cameras.

For our twenty-fifth anniversary, we asked camera and lens makers what they believe to be the most significant products of the past quarter century.

40MP sensor shows lots of detail, with its lens delivering good levels of sharpness at our standard F5.6 test aperture.

mood.camera is a new iOS camera app that aims to emulate film photography by offering 14 'film stock' filters, but which, like film, only shows you the results after you take a photo. We found it to be surprisingly fun.

Sigma has announced it will be offering six of its DC DN APS-C lenses for Canon's RF mount, making it one of the first third-party manufacturers to sell RF lenses under license.

Tamron has announced it's developing a version of its 11-20mm F2.8 Di III-A RXD fast wide-angle zoom for Canon RF mount APS-C cameras.

Moment's T-series lenses are well-built, offering the look and feel of a premium product. But with high-end smartphone cameras getting so good, can they still up your photo game? We decided to find out.
Popular photo sharing service Photobucket recently revealed that the 13 billion images it hosts online could be used to train AI models. We explain what changes made this possible and suggest some cloud storage alternatives to keep your data private.

A few weeks ago in Japan, we had the opportunity to interview the team at Ricoh behind the new Pentax film camera that's expected to arrive later this year. Find out why the designers settled on a half-frame design that favors a vertical format, what inspired the optics, and the added complexity of including a manual film-winding mechanism.

TTArtisan has released a 56mm F1.8 autofocus lens for Sony and Fujifilm APS-C cameras, targeting portrait photographers looking for a budget third-party option.

We're almost a third of the way through the year already! Here's a recap of the reviews and testing we've done this year so far, with more (and more and more) to come as the year goes on!

Sign up for our free weekly newsletter and discover a world of DPReview beyond the website.

7Artisans has released a new 50mm F1.4 Tilt lens, available for Sony and Fujifilm APS-C cameras, as well as Panasonic and Olympus Micro Four Thirds cameras.

Fujifilm US's free-to-enter raffle is now open, offering the chance to purchase a Limited Edition X100VI.

Blackmagic Designs has announced the Pyxis, a $3000, 6K full-frame (36 x 24mm) modular video camera. It will be available with PL, locking Canon EF or Leica L mounts.

Who wouldn't want to use the IS mechanism they've paid for to squeeze a bit more resolution our of their camera? People like Richard Butler, who question the effort/reward balance they offer.

We took the Sony FE 16-25mm F2.8 G to the streets of Seattle. And then to the library when the rain robbed us of sunshine.

Sony has announced the FE 16-25mm F2.8 G, a compact, fast wide-angle lens designed to complement its recent 24-50mm F2.8.

The Blackmagic Ursa Cine 12K is available now, starting at $14,995.

"We have not made any significant progress since last year, " says Sigma owner and CEO Kazuto Yamaki, when asked about the planned full-frame Foveon camera. But he still believes in the project and discussed with us what such a camera could still offer.

The Legacy Survey of Space and Time camera recently completed by the US Department of Energy's SLAC National Accelerator Laboratory risks making your camera setup seem inadequate.

In this first article of a new series, globetrotting landscape and nature photographer Erez Marom takes us to the island nation of Madagascar, sharing his experience photographing lemurs and chameleons.

With similar goals to its standalone Ninja monitors/recorders, the Phone Ninja connects a camera's HDMI out to a compatible iPhone for live view, recording, live streaming and file transfer.

The best of the best from the DPReview community, see our favorite photos you made from the North American eclipse.

The manual Lux Elf Retro uses a single-point hot shoe, making it compatible with most camera systems.

Trying to get your hands on the Fujifilm X100VI Limited Edition? The Conservation Alliance is auctioning one as a fundraiser, bundled with products and services from Peak Design, SmugMug and Flickr.
- Gear Patrol
- Work for us
- Advertise with us
- Feedback / Contact us
- Camera reviews
- Lens reviews
- Printer reviews
- Buying guides
- Sample images
- Editorial enquiries
- Camera search
- Camera comparison
- Lens search
- Product timeline
- Browse all products
- Community Guidelines
- My Settings
- My GearList
How to shoot hyperlapse [TUTORIAL]

In this article I’ll explain and give you some tips on hyperlapse shooting. You don’t have to buy expensive gear or motion control equipment to accomplish great effects with hyperlapse. So this article could be really interesting for low budget filmmakers. Patient low budget filmmakers.
Hyperlapse – what’s that?
I assume, that you’re familiar with timelapse photography. I consider hyperlapse as a special case of timelapse, where we add specific type of movement.
If you want to really dive into hyperlapse technique, try my video course!

Hyperlapse Course
There are a few ways of adding movement to your sequence. You can make a movable timelapse with a slider (even without motion control system). But what when you want longer movement than your for example 1,5m/5′ slider? Here comes the hyperlapse (you can’t just keep buying longer sliders 😉 ).
In the hyperlapse we add hyper-movement to the sequence. In different words – we move for much longer distance. The movement is accomplished without any tracks, just by moving your camera between shots. In this technique you replace gear like sliders etc with post production stabilization.
So is every movable timelapse a hyperlapse? You obviously can’t call ‘hyper’ something that moves only 60cm/2′ forward. That’s great technique, where you really can make ‘every frame a painting’, because you literally compose every frame separately.
What you need to make hyperlapse?
Basically, you need a camera. That’s your minimum equipment. In addition you need some patience. Maybe lots of patience. Like I mentioned earlier, you compose every frame separately, that takes a lot of time comparing to the simple video clip. I love hyperlapses, because you don’t need fancy & expensive gear to make great looking shots.
What else can be useful?
My favourite gear for the hyperlapse is a tripod with any kind of a video head. It doesn’t have to be smooth, it’s just better to adjust pan and tilt separately. I think you can work with a ball head, but it would be a little nightmare, unless you’ve got perfectly even ground.
Some people also use monopods, I probably will also try that when I buy one, for example for bike travel purposes where I’ve got to choose between handheld and monopod shooting due to limited luggage.
The advantages of using a tripod for me:
- steady shots
- better path control – follow any line with tripod legs
- control on motion blur (longer shutter speeds for blurring moving objects)
- night shooting on low ISO & long exposure – you don’t need A7S here 🙂
More steady shots with tripod doesn’t mean that you can’t shot perfect steady hyperlapse handheld. It’s just difficult 😉 More about smoothness later in this text.
I also use an intervalometer, provided with Magic Lantern. Differences between shooting with and without intervalometer in the next section.
Camera settings
Like in a classic timelapse, I highly recommend to set your camera to manual mode. Not only exposure, also white balance and focus. There are a few ways to deal with changing white balance during shot (especially shoot RAW), but when your focus jumps between objects it could ruin a few hours of your work.

Of course you can use autofocus for your shots, which sometimes I also do, but it should be done purposely. When you are constantly changing your distance to the object you’re shooting, it’s comfortable to use autofocus. If you want to avoid mistakes, you can choose only one autofocus point, because you know what you want to be in focus, camera electronics doesn’t have to choose for you 😉
If you’re a Canon guy, you may be interested in Magic Lantern firmware. I’m going to write an article, about how ML helps me accomplish some tricky shots. Don’t miss it, follow me on Facebook .
Fixed interval or shooting with your hands
Intervalometer is not necessary to shoot hyperlapse. You can release the shutter manually. But is it better? It depends on your shot. For example, when there are clouds in your frame, you probably want them to move smooth, not jump because of different intervals.
When you’re shooting only cars or people, they probably will get on 1-2 frames, because of the long interval between shots (when you make one photo of some car on the road, the car will probably leave your frame by the time you’ll be moving tripod). So if you can’t shoot their smooth movement anyway, you can shoot with your hands. Also, with the long exposure or telephoto shots I always use intervalometer or 2 sec self-timer. Nobody wants to touch camera during exposure 😉
How long my interval should be?
Making a hyperlapse can get you use longer intervals than you would probably choose for timelapse. You’ve got to have time to move your camera (and maybe tripod/monopod), then adjust position of your camera to match the last shot as closely as possible.
I use intervals between 5-12 seconds. It depends on the length of the movement, amount of bumps on the road, sometimes distance from your reference point in the hyperlapse (more about this point in the next section) and also your experience. In most of my hyperlapses I was shooting about 8-10 seconds intervals. It’s a good time for clouds movement (when they are moving with an average speed, not fast as hell 😉 ).
Do you have hyperlapses, you’d like to share? I would love to see that! Show that in the comments or share in my Facebook group: https://www.facebook.com/groups/timelapse.hyperlapse/
RAW or JPG?
That’s eternal struggle for some people on the internet. For me it’s not. I shot my first hyperlapses as JPGs. It’s very nice to have 4 times smaller files. But when I dig into RAW files I was impressed how much mistakes I can fix in post production 😉 Also, it provides better overall quality of your films.
When I’m shooting bigger project, where I know I’ll spend a few weeks or months to finish it, I always shoot RAW. When I spend so much time on something I want it to be as good as possible. Sometimes I shoot shorter timelapses in JPG, especially on better cameras (there is quite big difference in quality between 550D with kit lens and Sony A6000 with Carl Zeiss 24 f/1.8). RAW format is forgiving many mistakes, like incorrect white balance or exposure.
Movement – tips on smoothness
There are a few types of movement here. You can move straight (example in the gif below), parallel tracking an object or around the object. I would say, that the second type is the easiest. When you’re moving straight it’s hard to find one point to aim the camera, and when you’re shooting around the object it’s hard to keep fix distance from the object (unless there are some perfectly circle lines on the ground).
Most of my hyperlapses looks like this: I set my camera on a tripod, frame my shot finding a fixed point, plan the path and shoot. I think the best location is where you can find some lines on the ground. For example connection of the paving tiles, curb or any other available line. You can even draw the line by yourself using chalk if you’ve got enough time.
If it’s possible, I try to place two legs of my tripod on the line. It’s simple geometry, when a line passes through two points, third point will be on line parallel to the first one. That means third point will have fixed position too. Following line with only one leg can provides perspective changes which are hard to stabilize. After first shot I move a little following my path, reframe to find my fixed point and shoot again (or let intervalometer do that for me).
Reference point – how to find it?
First of all, you don’t need a fixed point to shoot a hyperlapse. There are conditions, where you can’t find any point, for example long shot (some road maybe) when you’re moving straight. It’s hard to shoot perfectly stable shot like this. If it’s possible, find a fixed point.
Fixed point is a point in the frame, where you aim your camera making each photo. It could be anything, a lamp, a window, a sign or a weird stain on a building. You need to be sure you won’t mislead this point with something similar nearby. When you choose this point, you’ve got to choose how you aim your camera.
When I shoot with a DSLR using optical viewfinder I like to aim one of the autofocus points to hit the reference point. It’s not the best solution, because you’re limited by amount of that points. On the other hand, in a DSLR the battery life is much longer using this method and strong sun wouldn’t disturb you composing your shot. In liveview mode you can use focus box, some kind of grid (for example rule of thirds, which even your phone should have) or Magic Lantern cropmarks.
I’ve also heard that some people just take a transparent tape, place it on the screen and make a dot with a marker. If you haven’t got any other ideas, you can try that 🙂
In my GH4 I found out that I can set my own ‘grid’, consisting of 2 lines and I think this is a great solution for a hyperlapse.
As you can see in the gif above, the reference point doesn’t have to be in the centre of the frame. You can choose whatever point you want. However, it’s easiest for stabilizer if the point is around middle of the frame.
Take a look at the upper right corner of that gif. There is some joggling in this shot. When the reference point is placed at the side of the frame, you should be incredibly accurate, because every single miss at the reference point causes the big change of perspective on the other side of the frame. In this shot, it’s caused by long distance from fixed point to the end of this building & the angle of camera in relation to the building.
How long should I move between shots?
Basically it’s up to you. I’m always trying to plan how long I want each sequence to be & how fast the end result should be. Then I can calculate how fast I’ve got to move. With smaller movement you should get more stable result. To let you imagine it better: first GIF in this tutorial was shot moving about 15cm / 0,5′ between each frame.
Many times, when I don’t have any lines or points on the ground for reference, I move my tripod for length of my foot, sometimes one, sometimes even a few steps. The second method is definitely less accurate, but it provides fast movement in the finished movie.
You don’t have to move equall distance every time. You can get it shorter or longer. That’s creating speed ramping effect. I suggest, instead of increasing distance from 10cm/4″ to 1m/3′ immediately, doing short increments that are actually ramping, for example such distances:
- 15cm / 6″
- 25cm / 10″
- 40cm / 16″
- 60cm / 24″
- 80cm / 32″
- 1m / 3′
You can get best results with small changes between each frame (but avoid repeating distances during ramping).
Final tip in this section: always think about your stabilization. For example, you should avoid any lens flares, cause after stabilization, they would jump through the screen like crazy.
Post production
That’s where you make your footage look fabulous. The main thing we do here is adding digital stabilization.
If you’re shooting RAW, first you should process your photos in your software of choice. Now, when you import your footage to editing software, it’ll probably look like crap. Don’t worry, most of the times it will be shaky as hell. But even if you did a great job shooting and your footage is kind of stable, you should digitally stabilize it. More stable input footage gives better end result.

Our work flow will be: import footage to sequence that’s set to resolution matching input pictures, for example 4608×3072 for GH4 16Mpix 3:2 photographs. You can slightly down scale the image before stabilizing if your computer isn’t fast enough to stabilize in reasonable amount of time, but always keep image bigger than your output movie resolution.
If you try to stabilize 1080p footage and export as 1080p film, you’ll loose some resolution and quality, because stabilizer increases size to do it’s job (you can use ‘synthesize edges’ option in warp stabilizer, but when your input footage is even 12Mpix picture, it’s pointless).

I recommend using Adobe Warp Stabilizer, available in After Effects and Premiere CC. The only difference between these two programs that I use is ‘Show track points’ checkbox, which I’ll explain later.
Now, there are a few other options to work with inside stabilizer. Firstly, it’s not always better to use ‘Detailed analisis’ (Advanced tab). Sometimes it helps, sometimes it makes footage look awfull. I always start with unchecked detailed analisis, and if the result is not satisfying then I check it. It could save you some time, cause if you pay attention to my tips in movement section, simple analisis should be enough.
In most hyperlapses you should stabilize position, rotation & perspective (sometimes also scale, but in most cases I’ve got checked ‘Preserve scale’), so I suggest to stay with default method: Subspace warp.
Smoothness option also depends on your footage. Stabilizing takes less time than analisis so you can try different values. With hyperlapse you can go further than with movie clip, due to lack of motion blur (you can perfectly stabilize your movie clip but you can’t get rid of motion blur recorded on it – that’s not always bad, Film Riot did a video about creative use of warp stabilizer with motion blur, you can watch it here ). I have never go with smoothness above 100%. I don’t think it’ll be ever necessary for me.

In the picture above you can see a clip with track points showed. It allows you to see points, which program found to stabilize & delete some of them. I use that option, when manipulating with other values doesn’t give me satisfying result. It’s a powerfull option, because After effects doesn’t always choose the same points we want to stabilize.
If there is something that moves in the frame (a car, a train, clouds etc.), it shouldn’t be chosen to be stabilized, because it can ruin all your stabilization. In the picture above you can see some points that could be deleted. First of all, three points on the stars. As we all know, stars are moving, so it could mislead stabilizer (unless you’re doing shot that tracks stars). Second, points on trees. It was a little windy out there and they are swaying between frames.
To be clear – it’s not necessary to delete this point, esspecially when the stabilization result is good. Algorythm always finds lots of points, but it ignores some of them. It’s a problem only when it ‘thinks’ it should stabilize wrong points.
For more advanced stabilization tutorial (where Warp Stabilizer fails), check out this post: Hyperlapse Stabilization Tutorial
If you read all of this tutorial you deserve congratulations! I hope you learn something 🙂 I’d love to see your work, you can show that on my facebook group . Also, I really appreciate every comment. That’s my first tutorial on this page, so your feedback is highly desirable.
You’ve probably noticed the little red bell in the bottom right corner. If you want to be nitified everytime I make a new interesting, timelapse related post, click that and sign up for notification 😉
So now go out and shoot! Experience is gold 😉
Want to learn more? Check out my hyperlapse tutorials here: Tutorials
You like this article? Sign up for my newsletter! Don’t worry, I don’t like spam either 😉 You’ll get only important stuff from my blog.
[newsletter]
Share this:
- Click to share on Twitter (Opens in new window)
- Click to share on Facebook (Opens in new window)

Hyperlapse Vertigo Effect [TUTORIAL]
Related posts.

5 Mistakes to Avoid in Hyperlapse

Seamless Hyperlapse Sequences – “Future is Bright” [MAKING OF]

[FREE WEBINAR] Top 10 Timelapse & Hyperlapse Tips for Better Shots
Pingback: Dolly Zoom (AKA Vertigo Effect) hyper-lapse tutorial — Time Lapse Network

Awesome tutorial man ! Can’t wait to get out there and try it out.
Thank you for sharing. I’m aware how valuable knowledge is 😉

I’m glad I help 🙂
Pingback: Sunrise Hyperlapse [37th of 52 Timelapse Project] - Beyond The Time - timelapse photography blog
Pingback: Day to Night Hyperlapse [42nd of 52 Timelapse Project] - Beyond The Time - timelapse photography blog
Pingback: Hyperlapse Comparison - Tripod vs. Gimbal Hyperlapse - Beyond The Time - timelapse photography blog

WOW MAN. this info for me is greater than any tutorial on youtube . thanks man.
Cookie banner
We use cookies and other tracking technologies to improve your browsing experience on our site, show personalized content and targeted ads, analyze site traffic, and understand where our audiences come from. To learn more or opt-out, read our Cookie Policy . Please also read our Privacy Notice and Terms of Use , which became effective December 20, 2019.
By choosing I Accept , you consent to our use of cookies and other tracking technologies.
- Cameras and Photography
25 of the most amazing Hyperlapse videos we've seen so far
By Sean O'Kane on August 28, 2014 02:02 pm 60 Comments

Hyperlapse is the newest standalone app from Instagram , and it's attracting plenty of praise for bringing easy time-lapse capabilities and unmatched image stabilization to the mobile world in a simple way. It's not only the newest way to make the mundane look cool, it's inspiring fresh takes on mobile videos — and it's only two days old.
The app has been replacing Ice Bucket Challenge videos on social feeds across the world with stabilized time-lapse videos of drives home, passing clouds, and — of course — cats. But while many people are still getting their feet wet, others are already coming up with wild and creative ideas that they're sharing to just about every platform. It's early, but Hyperlapse already looks like the next must-have tool for anyone creating mobile videos.
We've been collecting our favorites from all over the internet over the last two days and are showing off some of the best we've found from Instagram, Vine, YouTube and Vimeo below. Here are some of our favorites, starting with an excellent one from NBC News' Oliver Cox of Marine One touching down near the Washington Monument:
We know there are more out there, so post your favorites in the comments below!
How to get the best time-lapse video with Hyperlapse

Instagram's oft-overlooked companion apps are actually quite useful — not only do they feature easy integration with Instagram itself (duh), they're also good tools to use for image editing and video sharing.
- Layout from Instagram - Download Now
- Boomerang from Instagram - Download Now
- Hyperlapse from Instagram - Download Now
The Hyperlapse hype
Hyperlapse, in particular, is a useful standalone app for capturing and sharing time-lapse video. It also has some pretty powerful video stabilization tools to smooth out shaky, handheld shots.
As Instagram puts it:
Capture an entire sunrise in 10 seconds—even from the back of a moving motorcycle.
BRB, buying a motorcycle so I can capture some awesome sunrise footage.
A photo posted by on
The whole point of the app is to give you the ability to make good-looking time-lapse video without a super-fancy (super-expensive) setup. That said, there are some ways you can help Hyperlapse help you with your time-lapse video. But before we get to the tips, let's do a brief tutorial on using Hyperlapse.
Using Hyperlapse
Hyperlapse is a super-simple app by design. To take a time-lapse video, follow these steps:
- Launch Hyperlapse from your Home screen.
- Hit the record button (looks like a circle near the bottom of the screen).
- Hit the stop button (same button as before, but now shows a Stop symbol with video duration below it) when you're done recording your Hyperlapse video.

- You can choose between 1x, 2x, 4x, 6x, 8x, 10x, and 12x.
- Use this option to save your video for later or delete it entirely.
- This will automatically save the video to your camera roll.

- Tap Share to bring up the iOS share sheet.
- Tap an app icon to share your Hyperlapse video on that app or service.
- When you're all done, tap New Hyperlapse to get back to business.
Quick, simple, fun. I can dig it. Now here are a few tips to get the best time-lapse videos using Hyperlapse.
Master your iPhone in minutes
iMore offers spot-on advice and guidance from our team of experts, with decades of Apple device experience to lean on. Learn more with iMore!
1. Steady as she goes
Try to keep your iPhone device as steady as possible.
"Dude, you were just going on about how Hyperlapse stabilizes shaky video."
I know, I know. But look, video stabilization can only do so much — even in Hyperlapse. More importantly, stabilization typically works by cropping the edges of the video as it reduces shake and bounce. The more steady your camera, the more video makes it into the final product.
Here are a few ways to stabilize your iOS device while shooting with Hyperlapse:
- Use your elbows: If you're going handheld, rest your elbows against your torso to keep things steady.
- Weigh things down: Attach a monopod, tripod, or even a selfie stick to your device. By adding weight in a focused location, you can help keep the camera steady even if you're in motion.
- Skip the movement: Choose a fixed location for your camera and you'll all but eliminate jerky footage — especially if you use a tripod or monopod.
2. Light it up
Forgive me for stating the obvious, but cameras love light. The more illumination, the better your video's going to look. That applies to stabilization, too: Better quality video will almost always result in better stabilization as the app performs calculations on your bright, clear, doggone-shaky videos.
Here are some ideas for lighting up your scene while shooting with Hyperlapse:
- Go outside: I know — it makes me shudder just thinking about it, but the big, bright ball in the sky makes for some damn good videography.
- Bulbs on bulbs on bulbs: If you insist on shooting indoors (you and I could be friends), you should turn on a few more lights. Dig out that old desk lamp, plug it in, and turn it on. Then, repeat.
- Visit Jony Ive: The closer you can get to an Ive-like, white room the better — it's bright, it's neutral, it's great for video. Find a white sheet or head to that one white room in your house you were supposed to paint a couple years ago, but still haven't gotten around to it.
3. Make a plan
Computers love patterns almost as much as cameras love light — particularly when they're running calculations. You're going to get a smoother, better-looking time-lapse if your shot is more consistent.
If you're bouncing the camera around, panning between light and dark areas, and capturing incredibly random footage, the stabilization is going to have a harder time doing its job.
Luckily, time-lapse is a pretty specific style of video requiring a pretty specific scene; planning is inherent.
Here are a few thoughts on planning your time-lapse shot before shooting with Hyperlapse:
- Get inspired: Think about time-lapse videos you've seen that you've enjoyed. Try to find opportunities to replicate those videos.
- Plan your route: If you're going to do a walking scene, plan your route to the best of your ability. A last-minute reroute can be jarring in the final Hyperlapse video.
- Choosy is choice: Be choosy about your subject matter; not every subject is going to make for an enjoyable, cinematic Hyperlapse. A macro video of grass blowing in the wind might not be all that compelling in time-lapse — ants carrying blades of grass, however, would be pretty awesome.
4. Don't think about it too much
I know that sort of flies in the face of everything I've just told you, but let's be honest with ourselves: Taking a bunch of video footage, smoothing it out, and speeding it up is going to look pretty cool whether it has perfect lighting or not.
Your best bet for getting the best time-lapse video with Hyperlapse is to capture loads of video as you perfect your technique.
Have any tips you want to share? Did our tips help you capture some fan-friggin'-tastic Hyperlapses? Send 'em our way — either in the comments below, or on the social network of your choice.

Mikah Sargent is Senior Editor at Mobile Nations. When he's not bothering his chihuahuas , Mikah spends entirely too much time and money on HomeKit products. You can follow him on Twitter at @mikahsargent if you're so inclined.
New Apple Pencil report makes it sound like the PS5 controller - no, really
iPad Pro M3 (2024): Everything you need to know
Apple could be springing a big surprise with M4 chip debut on iPad Pro
Most Popular
- 2 iPad Pro M3 (2024): Everything you need to know
- 3 Apple could be springing a big surprise with M4 chip debut on iPad Pro
- 4 Apple has realized what the iPad's best feature is after 14 years — and its Let Loose event will make it clear
- 5 Mimestream, my favorite Mac email app, is getting an iOS version
Get $100 OFF The Ultimate Time Lapse Course
What is Hyperlapse? (+ Learn How to Make Amazing Ones)

What is a Hyperlapse and How to Make One Yourself
What is a hyperlapse.
What is a Hyperlapse Used For?
History of hyperlapse.
Subgenres of Hyperlapse
Clear Subjects
Good composition, create depth, choosing a direction, use grids to get smooth footage, best hyperlapse camera settings (for hand held), shoot in raw, turn off auto white balance, manual or semi manual modes, shooting mode – single photo, choose focal/anchor point, hyperlapse movement – photo step photo, how many photos to shoot, three methods to stabilize any hyperlapse.
Warp stabilizer. The easiest method is to just go ahead and run warp stabilizer on your footage. Or a warp stabilizer equivalent. It’s tempting to think you want to crank this up to 100, but ironically it works better in the 15-35% range.
Well that’s all I got on the topic, I have Youtube videos going into detail if you’d rather see what that looks like in real-time with visual examples that move. I’d greatly appreciate any feedback or checking out the youtube channel!
Frequently Asked Questions
No, hyperlapse does not record sound and that will need to be added in later if you want your audience to hear anything.
As far as I am aware there is no time limit, as long as you have enough battery or a power supply source and storage needed it should be able to run forever.
Simply open up the native camera app, tap timelapse, and move in a direction while keeping steady.
Open up instagram app, select hyperlapse feature and begin shooting and moving. However, it’s better to do it in your native camera app than in Instagram because of the image quality.
Simply launch the drone, navigate to the hyperlapse modes, and choose one of the options. Then select how long you want to shoot for and voila.
Hyperlapse app on your smartphone will speed up time and stabilize your footage to create a cool and engaging video.
Yes and now. A hyperlapse is a moving time lapse. A time lapse typically has little to no movement.
Yes on your smartphones the hyperlapse app is free. However, there are some paid apps that use hyperlapse as well.
Yes, hyperlapse is one word or it is also sometimes hyphenated as hyper-lapse.
It is a type of AI mode that speeds up video footage and stabilizes it at the same time to create smooth looking time lapse videos that move.
Sort of. The easiest way would be to speed it up by 1000X percent and then turn on frame blending. Another option is to export 1 out of every 24 frames and then reimport it as a jpeg sequence and you’d get a better result but it is more effort.
Great question, it’s best used when you want to create energy and excitement or show a process that we can’t see with out naked eye.
It works just like a time lapse except that we move between each photo. It then gets stabilized so it is smooth for the viewer.
Share This Story, Choose Your Platform!
About the author: scott herder.

Related Posts

The Best Tips For Hyperlapse On Android Right Now

Ultimate iPhone Hyperlapse Guide: 5 Simple Tips (WITH VIDEO)

Hyperlapse VS Time Lapse Explained

15 Easy Things to Know for Best Samsung Hyperlapse Results
© Copyright 2023|All Rights Reserved|Powered by Creativity and Effort
Privacy Overview

Here’s How to Shoot Amazing Hyperlapse Videos from Start to Finish
Producing astounding hyper-lapse videos can be extremely beneficial for any production, especially if you want to take your commercial work to the next level or just make your personal project stand out from the crowd. Shooting a hyper lapse can be a little bit daunting, though, so knowing the ins and outs of the process is a mandatory premise for success.
Rob and Jonas the creators of Rob & Jonas’ Filmmaking Tips have put together an excellent hyper lapse guide that covers everything one need to know about the process by revealing some of the basics of their personal workflow. In the video tutorial ahead the filmmakers not only show how they capture still images for the hyper-lapse sequences but also include a section revealing how to process these raw files in Lightroom and After Effects.
All in all, this technique is much like the moving time-lapse on a slider, except the camera moves over a much larger area, yet you need to follow a few simple rules to make this work for you. First, pick a solid, stable tripod. Flimsy tripods tend to shake slightly, even with a small amount of wind, causing a jitter in the final video so keep that in mind.
Set your camera settings accordingly and compose your shot. Use a Remote Trigger if required. Then by moving with one foot further try to maintain the framing of the shot roughly the same as the former one by using one or more of the focus points that you see in the camera’s viewfinder as a reference.
Make sure that you are using the manual settings on your camera and you’re shooting in Raw for greater control over the images later in post. Typically, you’ll want to lock the ISO, white balance, focus and exposure settings on the camera. Further, if you want to add motion blur to your hyper-lapse video to make the movement look more natural your shutter speed needs to be approximately double the number of frames per second of your final clip. Besides these recommendations, follow the conventional rules for shooting a time-lapse video.
Once you download the images to your computer you can open them in Lightroom for further processing. Pick a random image in the middle of the hyper-lapse sequence and adjust its settings accordingly. Set the correct White Balance, adjust the Clarity and contrast settings or add a Gradient filter if needed.
There are many directions you can go at this stage of the process so let your creative imagination be your guide. Once the colour correction of your image is completed, synchronize all the rest of the images in your sequence by copying and pasting the same effects.
Finally, export all colour graded stills as Jpeg files or choose any other format that is compatible with After Effects or the NLE that you tend to use. In case, you choose to process your sequence in After Effects, create a new sequence and after importing the files re-frame your shot. A mandatory step in the process is to apply some sort of image stabilization, so using the Warp Stabilizer is a great place to start.
Once the process is completed you can export the shot and continue further. Alternatively, if you still have jittering artefacts in your footage you can use the ReelSteady , a dedicated plugin for stabilization that should deliver even better results than the Warp Stabilizer. You can experiment with this technique and see what works best for smoothing out and polishing your footage.
[source: Rob & Jonas’ Filmmaking Tips ]
Disclaimer: As an Amazon Associate partner and participant in B&H and Adorama Affiliate programmes, we earn a small comission from each purchase made through the affiliate links listed above at no additional cost to you.
Claim your copy of DAVINCI RESOLVE - SIMPLIFIED COURSE with 50% off! Get Instant Access!

About The Author

Vlady Radev
Vlady is extremely passionate about the latest technology in the world of 4K cameras, 4K workflows, 4K delivery, and beyond. He is an independent filmmaker who shot his first micro-budget feature film back in 2010. Before contributing to 4K Shooters, he has also been working on a variety of creative projects in the niche.
Related Posts

Download Some Sony FS5 4K Raw Footage For Free

1.9.5 Firmware Upgrade Enables In-Camera Formatting in BMPC 4K & New Footage from the URSA

Setting Up the Chronos 2.1 High Speed Camera for Recording
Leave a reply cancel reply.
You must be logged in to post a comment.
This site uses Akismet to reduce spam. Learn how your comment data is processed .
Find the images you need to make standout work. If it’s in your head, it’s on our site.
- Images home
- Curated collections
- AI image generator
- Offset images
- Backgrounds/Textures
- Business/Finance
- Sports/Recreation
- Animals/Wildlife
- Beauty/Fashion
- Celebrities
- Food and Drink
- Illustrations/Clip-Art
- Miscellaneous
- Parks/Outdoor
- Buildings/Landmarks
- Healthcare/Medical
- Signs/Symbols
- Transportation
- All categories
- Editorial video
- Shutterstock Select
- Shutterstock Elements
- Health Care
- PremiumBeat
- Templates Home
- Instagram all
- Highlight covers
- Facebook all
- Carousel ads
- Cover photos
- Event covers
- Youtube all
- Channel Art
- Etsy big banner
- Etsy mini banner
- Etsy shop icon
- Pinterest all
- Pinterest pins
- Twitter all
- Twitter Banner
- Infographics
- Zoom backgrounds
- Announcements
- Certificates
- Gift Certificates
- Real Estate Flyer
- Travel Brochures
- Anniversary
- Baby Shower
- Mother’s Day
- Thanksgiving
- All Invitations
- Party invitations
- Wedding invitations
- Book Covers
- Editorial home
- Entertainment
- About Creative Flow
- Create editor
- Content calendar
- Photo editor
- Background remover
- Collage maker
- Resize image
- Color palettes
- Color palette generator
- Image converter
- Contributors
- PremiumBeat blog
- Invitations
- Design Inspiration
- Design Resources
- Design Elements & Principles
- Contributor Support
- Marketing Assets
- Cards and Invitations
- Social Media Designs
- Print Projects
- Organizational Tools
- Case Studies
- Platform Solutions
- Generative AI
- Computer Vision
- Free Downloads
- Create Fund

Hyperlapse Hints: 6 Tips for Making Your Videos Great
Instagram’s new Hyperlapse app allows users to capture impressive timelapse videos with the press of a single button. While traditional timelapse clips typically depend on a single still frame, Hyperlapse allows for fluid movement, with image-stabilization technology built right in.
In other words, what a professional videographer might have spent hundreds of dollars and hours of time setting up, Instagram has delivered in a simple, intuitive smartphone app. You don’t even need an Instagram account to start creating with Hyperlapse.
As a result, Instagram is already being flooded with timelapsed city tours, funny faces, and cats (lots of cats) moving at hyperspeed. However, despite the ease of use, it still takes some skill and thought to make a Hyperlapse video work well. To help guide you, we curated some of our favorite early examples that use the app to its full potential.
View this post on Instagram A post shared by National Aquarium (@nationalaquarium)
Show off unique and exclusive subject matter
For those who represent a business or organization, this is a perfect case of maximizing your subject matter. If what you do is already visually appealing and has motion, Hyperlapse it. (And of course, if you’re NASA, you already have some great ideas on how to make a great timelapse video .) Going to an aquarium can be a great time, but for those viewing remotely, it’s much more fun when all of the fish are swimming super-fast.
View this post on Instagram A post shared by Lucas Perlove (@lucasperlove)
Use different kinds of motion and panning
Shutterstock’s Lucas Perlove captured this fantastic Hyperlapse of the Brooklyn Bridge that shows off how the app’s algorithm stabilizes movement. What makes the clip work well is the combination of lateral movement across the bridge and images of the boats taking off. The constant panning and focus on moving subject matter maintains interest, and Lucas also expertly overlaid music to add another compelling dimension.
View this post on Instagram A post shared by Jake Hiller (@jmayerhiller)
Focus on composition
These fast-moving ants carrying things back and forth from their colony looks like something you might see on the National Geographic channel. This clip expertly pulls off a perfect macro shot and nails the composition with the way the ants move along “Z axis” of the frame (top-left corner to bottom-right corner). Make sure to think about composition when filming your own Hyperlapse, especially when the camera isn’t moving.
http://instagram.com/p/sfiw_xoFR9/
Stitch together and soundtrack your clips
When a professional gets their hands on Hyperlapse, stunning imagery is inevitable. These Hyperlapses have been stitched together to show both aerial and ground movements, with the slow movement of the camera in the opening shot adding depth that isn’t possible with a still shot. Add in some compelling music and NYC traffic has never seemed so appealing.
Take it on the road
In an amazing example of a simple idea executed perfectly, this photographer shot and cut together a series of Hyperlapses as he biked around Melbourne, Australia. The smoothness of each shot is what makes this video one of the best we’ve seen. Getting on a bike and shooting a Hyperlapse is a creative and inventive way to boost the stability the app gives the video. Note the shot around the cricket-player statue — magnificent!
View this post on Instagram A post shared by Rob (@arobservation)
Take advantage of filters
Once you’ve recorded a Hyperlapse clip, you can choose a playback speed between 1x and 12x, then just tap the green check mark to save it. An option also appears that enables sharing to Instagram or Facebook; Hyperlapse is best paired with its parent app, where users can edit their videos and add filters to enhance their appearance. Shutterstock’s Rob Checkal created the Hyperlapse shown above using the “Brooklyn” filter, which adds extra warmth to the beautiful mountains of Vermont.
For more inspiration, check out some of the professionally made timelapse clips in the Shutterstock in the clipbox below »

Top image: Brooklyn Bridge traffic at night by Peshkov Daniil
Have you experimented with Hyperlapse yet? Link to your favorite creations in the comments!
Recently viewed
Related Posts

How to Design Podcast Cover Art
Your podcast’s visual identity is just as important as its content. Try seven tips to make your podcast covers stand out from the crowd.

Movie Poster Design Ideas for 2024
It’s time to build some buzz, filmmaker! Check out these movie poster ideas for 10 popular genres and get must-know tips to make your own.

Serif vs Sans-Serif Fonts: What’s the Difference?
In this article, we’ll discover more about the charming nature…

8 Pro Tips for Font Pairing
Learn how to use serif, sans-serif, and display fonts in print and web design with these expert typography tips for font pairing.
© 2023 Shutterstock Inc. All rights reserved.
- Terms of use
- License agreement
- Privacy policy
- Social media guidelines
Blinken to travel to Saudi Arabia amid renewed push for a hostage deal
U.S. Secretary of State Antony Blinken will travel to Saudi Arabia this week for meetings with regional partners, including Palestinian, Egyptian and Qatari leaders, to discuss efforts for securing the release of Israeli hostages and a cease-fire in Gaza, the State Department said in a statement . After participating in meetings of the World Economic Forum and Gulf Cooperation Council in Riyadh, he will continue on to Jordan and Israel later in the week.
The foreign ministers of Britain, Germany and France are also expected at the WEF meeting, alongside the Saudi foreign minister, Prince Faisal bin Farhan al-Saud, WEF President Borge Brende said at a news conference . “There is some new momentum now in the talks around the hostages and also for a possible way out of the impasse that we are faced in Gaza,” he said.
Blinken traveled to the country in March to discuss a U.S. plan to normalize relations between Israel and Saudi Arabia, but leaders in Riyadh have said any such deal would require a pathway to a Palestinian state — a scenario rejected by Israeli Prime Minister Benjamin Netanyahu.
On this visit, National Security Council spokesman John Kirby said, “pushing for this temporary cease-fire” would be “right at the top of the list for Secretary Blinken.” Kirby told ABC’s “This Week” on Sunday that Blinken will “also be talking to the Israelis about their intentions and their thinking on Rafah military operations and where they are in the planning stages for that.” U.S. officials have repeatedly voiced opposition to a major military operation in Rafah, in southern Gaza, which Israel says is home to Hamas ’s last intact battalions but is also a refuge for more than a million displaced civilians.
Egyptian officials, who visited Israel on Friday for talks on a proposed cease-fire deal, are optimistic about the prospects of a truce being reached, according to a former Egyptian official with knowledge of the talks who spoke on the condition of anonymity to discuss a sensitive subject. The former official said Israeli cabinet members accepted “for the first time” the idea of a long-lasting halt to the fighting and expressed willingness to hold off on attacking Rafah if a deal can be reached. The proposal is now with Hamas, he said.
On Sunday, President Biden reaffirmed the United States’ “ironclad commitment to Israel’s security” in a call with Netanyahu. In a statement, Biden demanded that Hamas release its remaining hostages to “secure a ceasefire and relief for the people of Gaza.” The two leaders also discussed “increases in the delivery of humanitarian assistance into Gaza including through preparations to open new northern crossings starting this week.”
In Israel, concern is increasing about the possibility of arrest warrants being issued by the International Criminal Court against Netanyahu and Defense Minister Yoav Gallant for alleged war crimes in Gaza, Israeli media reported.
Netanyahu appeared to address the reports Friday, writing on social media that “Israel will never accept any attempt by the ICC to undermine its inherent right of self-defense.” Israel and the United States do not accept the jurisdiction of the ICC, but member states would be obliged to carry out arrests of anyone in their jurisdiction who faced a warrant. On Sunday, Foreign Minister Israel Katz instructed all Israeli embassies worldwide “to prepare immediately for a wave of severe antisemitism,” should the ICC issue warrants for senior Israeli officials.
Here’s what else to know
Blinken’s visit comes amid a renewed push for a deal with Hamas , which released videos of three hostages last week, including two Israeli Americans. The latest video, released Saturday, shows U.S.-born Keith Siegel, 64, and Omri Miran, 47, who were taken hostage on Oct. 7. The footage has added to pressure on Israel to negotiate a deal for their release.
Aid group World Central Kitchen said Sunday it would resume its operations in Gaza, following the deaths of seven staff members this month by an Israeli military strike. The D.C.-based nonprofit led by celebrity chef José Andrés said in a statement that a Palestinian team would begin delivering food Monday, including in the north of the enclave, where the hunger crisis is most acute. The group said it had 276 trucks with the equivalent of almost 8 million meals ready to enter through the Rafah crossing and will also send trucks into Gaza from Jordan.
Pro-Palestinian protests unfolded outside the White House correspondents’ dinner on Saturday night , with demonstrators posing as slain Gazan journalists outside the Washington Hilton. They laid out press vests to honor media workers who have been killed in the enclave and unfurled a Palestinian flag out of a window at the venue.
France’s foreign minister arrived in Lebanon on Sunday, in a bid to “pursue the objective of peace and stability in the region,” Stéphane Séjourné tweeted . Séjourné praised the United Nations’ peacekeeping force in southern Lebanon as he inspected troops. Reuters has reported that France is trying to ease tensions between Israel and Hezbollah, which have escalated their tit-for-tat border attacks in recent weeks.
At least 34,454 people have been killed and 77,575 injured in Gaza since the war began, according to the Gaza Health Ministry, which does not distinguish between civilians and combatants but says the majority of the dead are women and children. Israel estimates that about 1,200 people were killed in Hamas’s Oct. 7 attack, including more than 300 soldiers, and says 261 soldiers have been killed since the launch of its military operation in Gaza.
Claire Parker, Lior Soroka, Hannah Allam and Steve Hendrix contributed to this report.
Israel-Gaza war
The Israel-Gaza war has gone on for six months, and tensions have spilled into the surrounding region .
The war: On Oct. 7, Hamas militants launched an unprecedented cross-border attack on Israel that included the taking of civilian hostages at a music festival . (See photos and videos of how the deadly assault unfolded ). Israel declared war on Hamas in response, launching a ground invasion that fueled the biggest displacement in the region since Israel’s creation in 1948 .
Gaza crisis: In the Gaza Strip, Israel has waged one of this century’s most destructive wars , killing tens of thousands and plunging at least half of the population into “ famine-like conditions. ” For months, Israel has resisted pressure from Western allies to allow more humanitarian aid into the enclave .
U.S. involvement: Despite tensions between Israeli Prime Minister Benjamin Netanyahu and some U.S. politicians , including President Biden, the United States supports Israel with weapons , funds aid packages , and has vetoed or abstained from the United Nations’ cease-fire resolutions.
History: The roots of the Israeli-Palestinian conflict and mistrust are deep and complex, predating the establishment of the state of Israel in 1948 . Read more on the history of the Gaza Strip .
- After Israeli strike in Iran, both sides appear to downplay incident April 19, 2024 After Israeli strike in Iran, both sides appear to downplay incident April 19, 2024
- Homes burned, animals killed: Palestinians describe Israeli settler rampage April 16, 2024 Homes burned, animals killed: Palestinians describe Israeli settler rampage April 16, 2024
- Six months of the Israel-Gaza war: A timeline of key moments April 7, 2024 Six months of the Israel-Gaza war: A timeline of key moments April 7, 2024

IMAGES
VIDEO
COMMENTS
My Hyperlapse film around the world! Shot with the Sony A7iii and GH5.For three years i've been traveling around the world. I've been to some of the most bea...
2. Paris Day & Night By Teeter-Totter-Tam. "Paris Day & Night" by Teeter-Totter-Tam is a 5-minute timelapse journey through one of the prettiest cities in the world, Paris, from day to night. The timelapse/hyperlapse consists of several motion shots of well-known architectures all around the city.
This travel hyperlapse video (timelapse in movement) of Asia called "Share your dream" presents a selection of our best picks throughout our 6-month trip in ...
Timeline Assembly: Import and place your images or video frames on the timeline in sequential order. Set Frame Duration: For images, you'll need to set a consistent duration for each frame. Depending on your desired speed, each image might represent 1/24th or 1/30th of a second for 24fps or 30fps playback.
I have been wanting for a while to do a cinematic video dedicated to one of the best places in the world where I was lucky enough to live and work as a filmm...
Travel dreams. By Yi Shu Ng on March 2, 2017. ... Indonesia, Malaysia, Vietnam, China and Myanmar to make this hyperlapse video. Watch as these nine countries whiz by in a blur, and dream about ...
The GPT is a new 13-day, 160km traverse of western Victoria's Grampians (Gariwerd) national park. David Fanner survived the walk, but condensing his journey into a hyperlapse almost broke him
Hyperlapse mode can be accessed by clicking on the button above the shutter, selecting the video icon, and scrolling down the menu to the hyperlapse option. In each of the hyperlapse modes below, you have the option to set interval speed, total clip length, and the overall speed that the drone will travel while recording.
Creating timelapse videos can be expensive. To make a moving timelapse, many photographers use a motorized dolly system, which can set you back hundreds of dollars. Luckily, clever photographers have devised creative ways of making timelapse videos on a budget. In this tutorial, Morton Rustad shows us how to create a hyperlapse sequence with a camera […]
In the hyperlapse we add hyper-movement to the sequence. In different words - we move for much longer distance. The movement is accomplished without any tracks, just by moving your camera between shots. In this technique you replace gear like sliders etc with post production stabilization. Bielsko-Biała in motion.
25 of the most amazing Hyperlapse videos we've seen so far. By Sean O'Kane on August 28, 2014 02:02 pm 60 Comments. Hyperlapse is the newest standalone app from Instagram, and it's attracting ...
Hit the record button (looks like a circle near the bottom of the screen). Hit the stop button (same button as before, but now shows a Stop symbol with video duration below it) when you're done recording your Hyperlapse video. Use the slider along the bottom to change the speed of the video. You can choose between 1x, 2x, 4x, 6x, 8x, 10x, and ...
Share your dream : travel hyperlapse video through 9 countries of Asia. from Sylvain Botter. 6 years ago. ... 45 Karstic Peaks of Yanghsuo, Guilin, China (timelapse travel video ) 00: 45-00: 48 Bentre canals, Mekong Delta, Vietnam (timelapse travel video ) 00: 48-00: 50 Traditional Chinese House, Hoi An, Vietnam ( Hyperlapse )
What Is a Hyperlapse. There is so much confusion on the difference but simply put. A hyperlapse is a time lapse where the camera moves. That extra movement is what gives it the "hyper" added to it. All hyperlapses are technically time lapses. But not all time lapses are hyperlapses. Because they do not move, or move so little.
First, pick a solid, stable tripod. Flimsy tripods tend to shake slightly, even with a small amount of wind, causing a jitter in the final video so keep that in mind. Set your camera settings accordingly and compose your shot. Use a Remote Trigger if required. Then by moving with one foot further try to maintain the framing of the shot roughly ...
Who fancies a little Bondi surfing, whale watching and hipster overload? Journey through Sydney in our Expedia series of timelapse videos with aerial shots o...
Dial in your camera settings. Choose a focal point of your hyperlapse. Take a picture. Move a bit closer. Take another picture. Move a bit closer. Take another picture. Rinse and repeat till you're satisfied. Okay, so that's the basic process, but let's actually delve into that a little more.
A hyperlapse video filmed around Brisbane, Australia A hyperlapse video filmed circling around a single point of interest at Black Rock City, a temporary settlement in Nevada. Hyperlapse or moving time-lapse (also stop-motion time-lapse, walklapse, spacelapse) is a technique in time-lapse photography for creating motion shots. In its simplest form, a hyperlapse is achieved by moving the camera ...
Once you've recorded a Hyperlapse clip, you can choose a playback speed between 1x and 12x, then just tap the green check mark to save it. An option also appears that enables sharing to Instagram or Facebook; Hyperlapse is best paired with its parent app, where users can edit their videos and add filters to enhance their appearance.
Melbourne Travel Hyperlapse: Video breakdown below👇👇👇 … This video was mixture of types of videos/clips. One is the photo hyperlapse and the other one is the match cuts. These are two of my recent favorites in terms of shoot styles. Give it a try and let me know what you think🫰 …
Travel. Climate. Now Playing. Unbelievable Video: Tornado Hits Train 00:52. Next Up. Deadly Oklahoma Tornado Aftermath Seen From Above 00:36. Threat Of Severe Storms Will Start May 00:38.
A Lufthansa flight from Frankfurt landed hard, bounced off the runway at Los Angeles International Airport, and continued its flight. It successfully landed on a second attempt. CNN's John Vause ...
Travel. Climate. Now Playing. Threat Of Severe Storms Slides East On Sunday ... Town Underwater For 70 Years Resurfaces 00:31. Unbelievable Video: Tornado Hits Train 00:52. Storms, Tornadoes Shut ...
Travel. Climate. Now Playing. Dangerous Severe, Flood Risk Continues 00:34. Next Up. ... White-Knuckle Video Of Tornadoes In Texas 00:43. Tornadoes, Tropical Storms And Heat, Oh My! 00:34.
The NEW Filmora11 UPDATE is HERE! Download and Try Filmora 11 now: https://filmora.wondershare.com/Filmora 2022 Black Friday sale up to 60% off,check out f...
A Polish pilot proposed to his flight attendant girlfriend during a flight from Warsaw to Krakow, and she said yes.. The happy couple's employer, LOT Polish Airlines, posted a video on its ...
The video of hostages Omri Miran and Keith Siegel, who a U.S. citizen, comes amid renewed cease-fire talks between Israel and Hamas. ... Secretary of State Antony Blinken will travel Monday to the ...
Your local forecast, plus daily trivia, stunning photos and our meteorologists' top picks. All in one place, every weekday morning ...
The latest video, released Saturday, shows U.S.-born Keith Siegel, 64, and Omri Miran, 47, who were taken hostage on Oct. 7. The footage has added to pressure on Israel to negotiate a deal for ...
#adventure #travelvlog #travel Travel Beautiful trip Mountain side hyperlapse video shooting