- Editorial Process
- Why Trust Us?
- Affiliate Linking Policy
- Privacy Policy
- Terms of Service

Weekly Must-Reads View All
7 things to do if you spilled water on your macbook.
Quick steps to save your MacBook from water damage
How to Boot Your Mac Into Verbose Mode: 4 Best Ways
Boot your Mac into Verbose Mode with this step-by-step guide
How to Fix Your Mac Shutting Down Randomly: 16 Fixes to Try
Troubleshoot random shutdowns on Mac with effective solutions
How Much Space Does macOS Take On Your Mac?
Understand macOS size and analyze your Mac's storage usage
Popular Topics
- What to Do With Your Old MacBook? 13 Useful Ways to Reuse an Old Mac
- What Is the MacBook Flexgate Issue and How to Fix It
- What Is the MacBook Flexgate Issue
- Uninstall Java
- Safely Transfer Files from Mac to Mac
- Safari Bookmarks Disappeared on Mac: 10 Best Ways to Restore Them
- Repairing disk permissions
- Old MacBook
Trending Now View All

- Mac Security and Privacy
How to Go Incognito in Safari on Mac: 3 Quick Ways
Hashir Ibrahim
Reviewed by
Last updated: October 21, 2023
Expert verified
Online privacy is a growing concern and many of us want to browse the internet without leaving a digital footprint. Whether you’re researching sensitive material, shopping for a surprise gift, or simply prefer not to have your browsing history logged, going incognito is a useful tool for maintaining your privacy.
For Mac users, the Safari browser offers a convenient and robust way to go undercover while you surf the web. In this guide, I’ll walk you through the steps to go incognito in Safari on Mac, ensuring your browsing session remains your business and no one else’s.
Before We Begin
For enhanced online privacy, combine Safari’s private browsing feature with MacKeeper’s Private Connect VPN to conceal your IP address. Additionally, using MacKeeper’s Antivirus offers robust protection against spyware on your Mac.
What Is Safari Private Browsing Mode?
Safari’s Private Browsing Mode is a feature that allows you to browse the internet without saving your browsing history, search history, or form data. When you activate this mode, Safari won’t keep any cookies or temporary files that could be used to trace your online activities.
Private Browsing Mode aims to help you use the internet without leaving a record of your activities on your computer. So, in other words, this is the incognito mode on Safari.
What Happens When You Use Safari Private Browsing?
When you enable Private Browsing Mode in Safari, several changes occur to how the browser manages your data and online activity. Here are some key things that happen:
- 📜 No Browsing History : Safari won’t record the websites you visit, so you won’t see them in your history later.
- 🔍 Search History Cleared : Any search queries you enter will not be saved, so they won’t appear in the search bar’s dropdown suggestions in future sessions.
- 📝 No Form Data : Information entered into forms, like usernames, passwords, or search queries, is not stored.
- 🍪 Cookies and Site Data : Any cookies or site data obtained during your session are not saved, making it more difficult for websites to track you.
- 🗂️ Temporary Files : While temporary internet files like images may be stored to improve page load times during the session, they are deleted once you exit Private Browsing Mode.
- 🖥️ Open Tabs : Tabs opened in Private Browsing Mode won’t be stored in Safari’s Tabs feature for later retrieval.
- ⬇️ Downloads : Files you download will still be saved to your computer, but Safari won’t keep a record of these downloads within the browser.
- 🚫 Autofill Disabled : Features like Autofill for forms and passwords are disabled, meaning Safari won’t suggest information based on previous entries when you’re in Private Browsing Mode.
- 🔗 Extensions Limited : Some browser extensions may not work as expected in Private Browsing Mode to prevent them from tracking your activity.
- 🛡️ Isolated Session : Each Private Browsing window operates in isolation, meaning that if you open a new Private Browsing window, it won’t share cookies, history, or site data with the previous Private Browsing session.
While Safari’s Private Browsing Mode offers a good level of privacy, it is not entirely foolproof. Your Internet Service Provider (ISP), network administrators, and websites can still potentially identify you through your IP address.
How to Open a Private Window in Safari on Your Mac
Opening a private window in Safari on your Mac is a straightforward process that takes just a few seconds. Here are three ways to open a private window and go incognito in Safari on Mac:
Method 1: Using the Menu Bar
The most commonly used method for opening a private window in Safari is the menu bar. Follow these steps to go incognito in Safari on Mac via the menu bar:
- Open the Safari browser on your Mac.
- Click File in the menu bar.
- From the dropdown menu, choose New Private Window .

A new window should open with a dark search field, indicating you’re now in Private Browsing Mode.

Method 2: Using Keyboard Shortcuts
Mac keyboard shortcuts are an excellent way to streamline your browsing experience, especially if you prefer using the keyboard over navigating through menus. So, if you’re looking to swiftly open a private window without taking your hands off the keyboard, follow these steps:
- If you haven’t already, launch the Safari browser.
- Press Shift ⇧ + Command ⌘ + N simultaneously.

This will open a new private browsing window instantly.
Method 3: Right-Click Option
If you’re comfortable using contextual menus that appear with a right-click, this option offers a speedy way to go incognito in Safari on Mac. Follow these steps to right-click on a Mac and go incognito in Safari:
- Launch your Safari browser.
- Right-click (or control-click) the Safari icon in the Dock.
- From the contextual menu that appears, select New Private Window .
A new window with a dark search field should appear, indicating that Private Browsing Mode is enabled.
How to Open a Private Tab in Safari
If you’re already in a regular browsing window in Safari, you can’t add a private tab to that window. Your only option for private browsing in this case is to open a new Private Browsing window. Then, add as many private tabs to that window as you like.
Follow these steps to open a new private tab within an existing private window:
- Open a new Private Browsing window in Safari. You can do this by clicking File in the menu bar and selecting New Private Window , or by using the keyboard shortcut Shift ⇧ + Command ⌘ + N .
- Once you’re in a Private Browsing window, click the plus ( + ) button in Safari’s toolbar at the top of the screen.
- Alternatively, you can press Command ⌘ + T on your keyboard.

- A new tab will open within the existing Private Browsing window, indicated by a dark search field, confirming that it’s also in incognito mode.
You can have a regular browsing window and a private window open side by side. Just make sure you don’t mix them up to maintain the level of privacy you desire.
How to Always Browse Privately in Safari
Now that you know how to go incognito in Safari on Mac, can browse privately whenever you want. But if you want to set up Safari so that it always starts with a Private Browsing window, there’s a simple way to make that happen.
Following these steps will configure Safari to open in Private Browsing mode by default:
- Navigate to Safari in the menu bar at the top, and select Settings .

- In Safari Settings window, click the General tab.

- Locate the Safari opens with option, click the dropdown menu button next to it, and select A new private window .

By following these steps, you’ll set Safari to automatically open a new Private Browsing window each time you launch the application. However, this setting only applies to the initial window at startup, any subsequent windows you open will be regular, non-private windows.
How to Turn Off Private Browsing on a Mac
Turning off Private Browsing in Safari on a Mac is a straightforward process. If you’re using Private Browsing and want to switch back to the standard browsing mode, here’s how you can do it:
- A Private Browsing window in Safari is characterized by a dark search field at the top.
- Simply close the Private Browsing window by clicking the red x button at the top left corner of the window.

- Alternatively, use the keyboard shortcut Command ⌘ + W .

- If you don’t have any other Safari windows open, you’ll need to open a new one. You can do this by clicking File in the menu bar and selecting New Window .

- Alternatively, use the keyboard shortcut Command ⌘ + N .

Once you leave Private Browsing, Safari will retain your browsing history, cookies, and other data unless you delete them manually.
Can You View Private Browsing History in Safari on Mac?
A key feature of Private Browsing in Safari is that it doesn’t retain your browsing history, search queries, or cookies once you close the Private Browsing window. This means that, by design, you can’t view the browsing history of a Private Browsing session once it’s closed.
However, while Safari’s Private Browsing mode doesn’t store your browsing history like a regular browsing session, the Terminal archive on Macs operates independently of Safari’s privacy features.
The Terminal archive contains records of all websites visited, including those accessed through Private Browsing. So, you can view your private browsing history in Safari on Mac through the Terminal archive.
How to Check Private Browsing History in Safari on a Mac
- Open the Console application by going to Finder > Applications > Utilities > Console .

- In the sidebar, click your Mac.

- Type the following into the search box:

- Click the Start button in the toolbar to display console messages.

- Enter your admin username and password and click Continue .

- Head to Utilities and open the Terminal application.

- Type the following command and press Enter :

- You will be prompted to enter your admin password.
- Go back to the Console application as described in Step 1.
- Here, you’ll find entries that correspond to your Private Browsing history.

Note that the website names will be displayed as IP addresses instead of website addresses.
How to Delete Private Browsing History Stored in Terminal Archive
- Navigate to Finder > Applications > Utilities and open the Terminal application.

- You will be asked to provide your administrative password to proceed.
Executing this command will clear the DNS cache, effectively erasing stored private browsing history. Be cautious not to modify other settings in the Terminal.
Is Private Browsing Enough to Hide Your Online Activity?
While Safari’s Private Browsing feature enhances your privacy to some extent, it doesn’t make you completely anonymous online. For instance, it won’t hide your IP address, which means websites and online services can still potentially identify you.
Likewise, Private Browsing Mode won’t prevent external tracking by advertisers or third-party websites. For these reasons, you should pair Private Browsing with additional security measures such as a Virtual Private Network (VPN) and antivirus software to create a more comprehensive privacy solution.
Heres’ how to use MacKeeper’s Private Connect VPN to protect your online privacy:
- Download and install MacKeeper on your Mac.
- Open the MacKeeper app on your Mac and click the Private Connect feature under the Privacy section.

- Select a server location from the VPN server location list. You can choose a server in your country for faster browsing or another country to bypass geo-restrictions.

- Click Turn On to activate Private Connect VPN.

- Once connected, you should see a notification indicating your VPN connection is active. You can also check your IP address online to confirm the change.
- When you’re done browsing, disconnect the VPN by clicking the Turn Off button.
What Else Can MacKeeper Do?
Besides offering a foolproof VPN feature, MacKeeper can help scan your Mac for viruses , remove login items from your Mac , delete duplicate files , and remove cache files from your Mac . Check out my MacKeeper review to learn more about its features.
Go Incognito in Safari on Mac and Start Secure Browsing
Navigating the web securely and privately is important, and understanding how Safari’s Private Browsing feature functions on your Mac is a significant step toward that goal. Private Browsing offers a level of protection, but it is not a replacement for more robust security measures, such as using a VPN or specialized security software.
Here are some more tips to make your browsing experience more secure:
- Make sure you clear your browser cache on Mac regularly to avoid your browser from crashing and lagging.
- If you notice suspicious toolbars in your browser, you should immediately remove unwanted toolbars from your Mac browser to prevent viruses from infecting your system.
- Ads and trackers are also a threat to your online privacy. Learn how to block unwanted ads on your Mac and keep them from affecting your productivity.
Frequently Asked Questions
Are cookies saved in private browsing mode in safari.
Cookies are not saved in Private Browsing mode in Safari once you close the session. While the session is active, cookies may be stored temporarily to enable website functionality. However, these cookies are automatically deleted when you close the Private Browsing window, enhancing your privacy.
Does Safari private browsing hide your IP address?
No, Safari’s Private Browsing mode does not hide your IP address. While it prevents storing your browsing history, cookies, and form data, it doesn’t make you anonymous online. Your IP address is still visible to websites, your Internet Service Provider, and network administrators.
Is Safari the best option for privacy?
While Safari offers strong privacy features like Intelligent Tracking Prevention and built-in encryption, whether it’s the best option for privacy depends on your specific needs. Other browsers like Firefox focus extensively on privacy and offer advanced customization. It’s important to compare features and decide what best suits your privacy goals.
Why can’t I open a private tab on Safari?
You can’t open a private tab on Safari within a regular window due to design choices aimed at enhancing user privacy and ease of use. Instead, Safari segregates private browsing into separate windows to prevent you from mixing up private and regular tabs, reducing the risk of privacy breaches.

I'm Hashir, a tech journalist with a decade of experience. My work has been featured in some of the top tech publications like MakeUseOf and MakeTechEasier. I have a bachelor's degree in IT, a master's in cybersecurity, and extensive knowledge of Apple hardware, specifically MacBooks. As the senior writer at MacBook Journal, I write in depth guides that help you solve any issues you have with your mac and unbiased reviews that help you make the right buying decisions.

Hi there! I'm Ojash, a tech journalist with over a decade of experience in the industry. I've had the privilege of contributing to some of the world's largest tech publications, making my mark as a respected Mac expert. My passion lies in exploring, using, and writing about MacBooks, and I enjoy sharing my expertise to help others make informed decisions and get the most out of their MacBook experience. Join me as we delve into the fascinating world of MacBooks together!
You May Also Like

How to Reset Your Apple ID Password: 5 Tested Ways
Written by Hashir Ibrahim Reviewed by Ojash Last updated: November 28, 2023

How to Delete Browser Bookmarks on Mac: Safari, Chrome, and Firefox
Written by Hashir Ibrahim Reviewed by Ojash Last updated: September 13, 2023

How to Find Your Apple ID Password: 4 Tried and Tested Ways
Recover your Apple ID password quickly with easy methods

How to Delete Safari History on Your Mac
Written by Hashir Ibrahim Reviewed by Ojash Last updated: September 11, 2023
How to turn on private browsing on a Mac computer in Safari
- You can turn on private browsing on your Mac computer in a Safari browser to use the internet without having your activity catalogued by your browser.
- Private browsing is a good option to keep sensitive information from living in your web history or being saved to your iCloud account.
- Here's how to turn on private browsing on a Mac computer by opening a new private window or using a keyboard shortcut.
- Visit Business Insider's homepage for more stories .
A private browser is a useful way to navigate the internet with minimal tracking, although the exact functions may vary slightly depending on which browser you are using.
On Safari, private browsing means that websites won't be able to track your activity across sites, your visited websites aren't saved or stored on in iCloud, and your recent searches won't appear in the Smart Search field.
You also won't have access to any saved AutoFill information when you visit websites, so keep that in mind if you need to log into a site.
With that in mind, here's how to open a private window on a Mac using the Safari web browser:
Check out the products mentioned in this article:
Macbook pro (from $1,299.99 at best buy), how to turn on private browsing on a mac in safari.
1. Open your Safari browser.
2. In the top toolbar, click "File."
3. Select "New Private Window."
The smart search field will show up with a dark background, which will signal that you are in private browsing mode.
Alternatively, you could use the keyboard shortcut to open a private window in your Safari browser. To do that, you'd open a window in the browser, then press the shift, command and "N" keys.
Related coverage from How To Do Everything: Tech :
How to update the safari browser on your mac computer by installing the latest version of macos, how to enable adobe flash player on a mac computer using safari, how to block pop-ups on a mac computer's safari browser, and avoid fraudulent websites, how to add websites to your favorites list on a mac's safari browser, making them easily accessible at any moment, how to save and delete webpages on the reading list in your mac computer's safari browser.
Insider Inc. receives a commission when you buy through our links.
Watch: Apple just launched a $6,000 Mac Pro, available this fall
- Main content
Tips and tricks for using Private Browsing on Mac
Private Browsing is a useful mode on Mac with Safari. It means websites you visit aren’t saved in your history, with iCloud, Smart Search, and more. Follow along for a look at how to use Private Browsing, the keyboard shortcut to quickly open a new private Safari window, setting it as your launch default, and more.
Table of contents
Keyboard shortcut for private browsing on mac, set private browsing as your default safari startup page, going further.
Using a Private Browsing window includes a number of privacy features. In a support document , Apple details how a Private Browsing window works as of macOS Big Sur and Safari 14.
- Browsing initiated in one tab is isolated from browsing initiated in another tab, so websites you visit can’t track your browsing across multiple sessions.
- Webpages you visit and your AutoFill information aren’t saved.
- Your open webpages aren’t stored in iCloud, so they aren’t shown when you view all your open tabs from other devices.
- Your recent searches aren’t included in the results list when you use the Smart Search field.
- Items you download aren’t included in the downloads list. (The items do remain on your computer.)
- If you use Handoff , Private Browsing windows are not passed to your iPhone, iPad, iPod touch, or other Mac computers.
- Changes to your cookies and website data aren’t saved.
Below we’ll look at how to use Private Browsing on Mac but also a few extra tips and tricks to make it faster and easier to use.
- Mac: How to clear the cache, history, and cookies in Safari, Chrome, and Firefox
- Private Browsing on iPhone and iPad here .
How to use Private Browsing on Mac
- To open a new Private window, click Safari in the menu bar > New Private Window
- There’s also an alert near the top that you’ve enabled Private Browsing (disappears when you start browsing)
Here’s how it looks:

- You’re probably used to the command + N shortcut for a new Safari window
- Just add shift to that to get a new Private window – command + shift + N
- If you like to use Private Browsing regularly, you can make it your default when Safari launches
- Click Safari > Preferences in the menu bar
- Select the General tab at the top
- Next to Safari open with click the dropdown and choose A new private window
- If you want to tweak the default settings for normal Safari windows, check out the options at the bottom of the Safari > Preferences > General
- At the bottom of the window, you can adjust the settings for when history and downloads are removed and more
- Also, head to Safari > Preferences > Security or Privacy to tweak your fraudulent website warnings, and settings for cookies, website data, and more.
- To clear your Mac’s cache, history, and cookies head to Safari > Clear History (read more in our full guide on that here )
Read more 9to5Mac tutorials:
- How to make a WhatsApp audio/video call on the Mac
- How to use the Magic Keyboard shortcuts on the iPad Air and iPad Pro
- Mac: webp image downloads frustrating you? Here’s how to convert them to jpg, png, more
- M1 MacBook Air vs MacBook Pro, which should you buy?
FTC: We use income earning auto affiliate links. More.
Check out 9to5Mac on YouTube for more Apple news:

A collection of tutorials, tips, and tricks from…

Michael is an editor for 9to5Mac. Since joining in 2016 he has written more than 3,000 articles including breaking news, reviews, and detailed comparisons and tutorials.
Michael Potuck's favorite gear

Satechi USB-C Charger (4 ports)
Really useful USB-C + USB-A charger for home/work and travel.

Apple Leather MagSafe Wallet
My slim wallet of choice for iPhone 12
- GTA 5 Cheats
- What is Discord?
- Find a Lost Phone
- Upcoming Movies
- Nintendo Switch 2
- Best YouTube TV Alternatives
- How to Recall an Email in Outlook
How to go incognito in Safari on Mac

There may be times when you want complete privacy while browsing the web. Maybe you don’t want others to know which websites you visit or what items you download, or you may also just want to prevent sites from tracking you across browser tabs. The best way to achieve that is by learning how to go incognito in Safari on a Mac.
How to go incognito on Mac with private browsing in Safari
What happens when you use private browsing, how to exit private browsing in safari, how to always use private browsing in safari, what you need.
Mac computer
Safari browser
When you want to initiate a private browsing session in Safari on Mac, you have a few easy ways to do it.
- Use the Safari menu: With Safari open and active, select File from the menu bar and choose New Private Window .
- Use the Safari icon in the Dock: If you keep the Safari icon in your Dock, right-click it and select New Private Window .
- Use a keyboard shortcut: With Safari open and active, press Shift + Command + N on your keyboard.
Once you open a new private window, you’ll notice the appearance is slightly different. The Smart Search field (URL bar) has a dark background with white text.
You’ll also see a message letting you know that private browsing is enabled. Select the X on the right side to dismiss the message and then visit the websites you want.
Although you can browse the web as you normally would in Safari, there are some differences when you use private browsing.
- Any sites you visit, AutoFill details you use, or changes you make to cookies or website data are not saved.
- Your recent searches are unavailable in the Smart Search field.
- Items you download do not display in the Safari downloads list. However, they are still viewable in your Downloads folder.
- You cannot pass private windows using Handoff to your other devices.
- Any webpages you visit are not stored in iCloud and therefore unavailable when viewing Safari tabs on your other devices.
- Websites cannot track your browsing across tabs in Safari because each private browsing tab is isolated from the next.
When you finish using private browsing, you can simply close the Safari window. You can then select File > New Window or use the keyboard shortcut Command + N to initiate a non-private browsing session.
One additional way to go incognito on Mac is to always use private browsing in Safari. With a simple setting adjustment, you can have Safari open in a private window every single time.
Step 1: Open Safari and select Safari > Preferences from the menu bar.
Step 2: Go to the General tab.
- How to take a screenshot on a Mac
- How to connect a MacBook to a TV
- How to keep your MacBook from sleeping
Step 3: Pick the drop-down next to Safari opens with and choose A new private window .
Step 4: Close the Preferences using the X on the top left corner.
Once you change this setting, you’ll use private browsing each time you open Safari. If you change your mind later, you can follow the same steps and select a different option in the Safari opens with drop-down list.
It’s easy to go incognito on a Mac, whether you go once in a while or all the time. Will you?
Editors' Recommendations
- How to select multiple files on a Mac
- How to connect an iPhone to a Mac with or without a cable
- How to free up RAM on Mac and PC
- How to show the battery percentage of your Mac
- Forgot your Mac password? Here’s how to reset it
- How-To Guides

Apple products come loaded with software designed to work seamlessly with the macOS operating system. For example, Safari is the default software used to load websites, Preview is used to view pictures, and Pages will open documents. But if you're not a fan of the built-in software, Apple doesn't lock you into using it. However, you'll need to know exactly where to look if you want to change the default apps on a Mac.
Thankfully, the process is largely the same whether you're running macOS Sonoma 14, Ventura 13, or other macOS versions. It's also easy to reverse the process and go back to using default apps.
One of the main interface elements of the macOS experience is the Dock. Located at the bottom of the screen by default, the Dock is your Mac or MacBook’s nerve center. It’s where all of your most used apps are located, and having the ability to just click an icon to launch a program is quite the convenience. But how do you customize the Dock to display the apps you love?
Think about the words and phrases on our computers that we type over and over again, without even thinking about it. Emails and site logins are just a few of these frequently keyed fields, but there are plenty others. Now what if we told you there was a neat shortcut on macOS that lets you automatically input repeated words? It’s a feature called text replacements, and it’s also available on iPhones and iPads.
How to browse the web privately in Safari
Use Safari’s private browsing mode to surf the internet without having all of your information tracked and recorded. Private browsing prompts Safari to block websites from tracking your search behavior. The browser won’t remember any webpages you visit and your search history won’t get logged. Follow along with us to learn how to open Safari in private browsing mode on your iPhone, iPad and Mac.

How private browsing mode works
Browsing the internet in Safari’s private-browsing mode strengthens your online privacy. When surfing the web privately, website tracking is limited and none of your browsing history or login information is saved. This prevents others with have access to your device to view a list of websites you visited. Read: How to turn off Safari website tinting
Browsing certain websites privately in Safari ensures that those histories don’t pop up in everyone’s faces. For instance, you may want to perform a web search incognito or browse adult websites privately. As mentioned, private tabs don’t appear in Safari’s history. And to boost your privacy even further, private tabs also won’t show up in the list of synced tabs on your other devices.
- Private browsing : Private browsing won’t remember your search history, show the pages you visit or reveal any automatically filled passwords. Private browsing also blocks some websites from tracking your search behavior.
- Regular browsing : Public browsing isn’t private so it will in fact record your browsing and searching history, as well as your Autofill information like saved passwords.
Of course, Safari allows you to manually clear your browsing history and website data, including cookies, at any time. But with private browsing mode, you don’t need to do that because nothing gets remembered in the first place.
How to use private browsing in Safari for iPhone
To open a new private browsing tab on your iPhone or iPod touch, you must choose the Private tab group from the browser’s New Tab screen.
- Open Safari on your iPhone or iPod touch with iOS 15.0 or later.
- Touch the New Page icon in the bottom-right corner.
- Hit “ ⌄ ” in the center of the tab bar at the bottom of the screen, then choose Private.
- Touch Done to start browsing the web privately.
When in private browsing mode, Safari appears black or dark instead of white or gray. Specifically, the URL field turns gray and uses white text. You will also see a message near the top of the private window saying “Private Browsing Mode”.
When opening multiple private tabs, Safari nests them under a group titled “Private”.

To close a single private tab, hit the New Page icon to get thumbnails of all your private tabs, then swipe left each of the private tabs you wish to close. To exit private browsing mode, first touch the New Page button in the bottom-right corner, then choose Private . Now simply select a different, non-private tab group and then hit Done in order to switch to it.
How to use private browsing in Safari for iPad
Entering private browsing mode in Safari for iPad requires bringing the browser’s sidebar into view. The sidebar includes all the private tab options you need.
- Open Safari on your iPad with iPadOS 15.0 or later.
- Hit the sidebar icon near the top-left corner to open the Safari sidebar.
- From the Safari sidebar on the lefthand side, choose the option labeled Private .
Doing so creates a new tab in a group dubbed “Private”. You can open multiple private tabs in this tab group. Private tabs don’t leave traces in the Safari history nor do they appear in the list of tabs on your other devices.
To hide your private tabs and exit private browsing mode, switch to a different tab group from the Safari sidebar. Don’t worry, any open private tabs you have will reappear the next time you invoke the private browsing mode.
Forcing mobile Safari to always open in private mode
Unfortunately, Apple hasn’t provided a toggle in iOS/iPadOS to force Safari to always open in private browsing mode similar to macOS Monterey. Thankfully, there’s a simple trick that’ll let you do just that.
The trick is in creating a new private tab like you normally would and leaving it intact when you exit Safari. Doing so makes your private tabs persist across sessions, with Safari automatically showing your private tabs the next time you launch the browser.

If you exit private mode though, the next tab you open won’t be private. Safari will default to opening private windows each time you launch it.
How to use private browsing in Safari for Mac
You can open a new private browsing window in Safari on your Mac either by leveraging a dedicated menu option or invoking a special keyboard shortcut.
- Open Safari on your Mac
- Click Safari’s File menu, then choose New Private Window .
Doing so creates a new private window that has dark-colored borders, with the URL field set against the white text to distinguish it from regular Safari windows. You will also see a message near the top of the private window saying “Private Browsing Enabled”.

To open a private window faster, hit Shift (⇧) – Command (⌘) – N on the keyboard.
Forcing desktop Safari to always open with a private window
You can also force Safari for Mac to automatically launch in private browsing mode.
- Open Safari on your Mac.
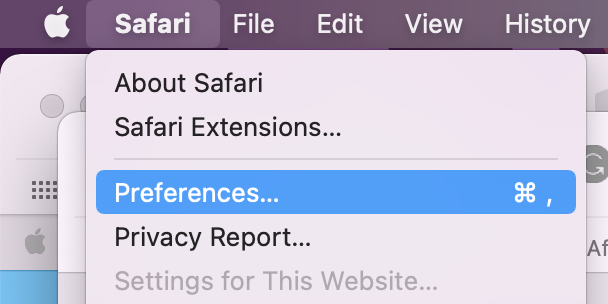
- Click the Safari menu, then choose Preferences .
- In the Safari preferences window, select the General tab.
- Click the menu next to Safari opens with , then choose A new private window .
Safari will default to opening in private browsing mode each time it’s launched.

A support document on the Apple website instructs people who don’t see this option to tick Close windows when quitting an app in System Preferences → General .
To close the current private window, simply close it. Switching to a non-private Safari window or opening one will also turn off private browsing temporarily until you click the private window again. Apple advises closing all private windows when you’re done using Safari’s private browsing mode in order to prevent other people from clicking Safari’s back and forward buttons to see pages you visited in the private windows.
What private browsing mode in Safari actually does
Wondering what all of the features of Safari’s private browsing mode are? Apple notes in support documents for Safari for iPhone , iPad and Mac that all of the following are true:
- All of your tabbed windows are isolated from one another, so none of the websites that are open in your private window can see what other websites you might have open in the same window.
- All of your login sessions and AutoFill information will be forgotten the next time the web browser is used.
- Any of the webpages that you have open are kept out of iCloud so that other devices won’t have access to any of the webpages you have open in the private browsing window. Also, your recent searches won’t appear as suggestions when typing a search phrase into the URL field.
- All of your search results from searches performed in a private browsing window are hidden and not stored.
- Anything you download while in the private browsing window is not saved in your download history (downloaded items still end up in your Downloads folder or designated download location).
- Private windows are not passed to other devices when Handoff is turned on.
- All websites you visit are asked not to track you and Safari won’t remember cookie information from your current private browsing window when you begin your next browsing session.
- Any plug-ins you have installed will also be limited to tracking your information from the private browsing window.
Use private browsing to surf the web anonymously
Your online privacy is important, and you should never give it up!
Most people won’t want to do all their web surfing privately. Browsing the internet publicly has its advantages, like better website personalization, the ability to view your browsing history and so forth. Read: How to reverse Safari’s polarizing redesign in iOS 15
Browsing certain websites privately in Safari ensures that those histories don’t pop up in everyone’s faces. Private browsing is useful even if you’re the only user of your device because you never know when you’ll be sharing a screen with someone in the future when you go surfing the web. For instance, you may wanna prevent others from knowing what you were looking up in the past such as when you were shopping for the holidays.
So whenever you feel like hiding all traces of your online activity in Safari, remember to switch to the private browsing mode before doing any web surfing.
How-To Geek
How to always start safari in private browsing mode on a mac.
Keep your Safari browsing history private on your Mac by opening a new Private Browsing window every time you launch. Here's how.
Quick Links
What is private browsing in safari, how to always launch safari with a new private browsing window.
If you use Safari on a Mac and would like for your browsing history to stay private but don't want to always think about having to turn it on, there's a way to open a new private browsing window every time you launch Safari. Here's how.
Private Browsing is a mode where Safari doesn't save your browsing history, AutoFill information, changes to cookies, recent searches, and download history between sessions. The mode also inclues Apple-centric privacy features, such as preventing sharing of browsing information through iCloud . And if you have Handoff enabled, browsing windows do not get passed to your other Apple devices.
Even with all those features, you should be aware that Private Browsing mode does not conceal your browsing history from websites on the internet that might use your IP address to track you across sites , hosts of your network (such as a school or business), or your ISP.
Related: The Many Ways Websites Track You Online
First, launch Safari. In the menu bar at the top of the screen, click "Safari" and select "Preferences."
In the Preferences pop-up window, make sure you're on the General tab. Look for the option called "Safari Opens With:" located beside a drop-down menu.
Click on the drop-down menu and select "A New Private Window" from the list of options.
Close the Preferences window, quit Safari, and launch Safari again. You should see a window with a "Private Browsing Enabled" notice along the top.
Now you're free to use the window as you typically would . Just make sure you close it when you're done.
Related: Five Worthwhile Uses for Private Browsing Mode (Besides Porn)
It's worth noting that the option we just set only works when you first open Safari. By default, new windows you open after that will not be private. If you want to open additional Private windows, you'll need to select File > New Private Window from the menu bar, or use the Shift+Command+N shortcut. Good luck, and happy browsing!
VPNoverview.com Privacy Anonymous Browsing Everything You Need to Know About Safari Private Browsing
Everything You Need to Know About Safari Private Browsing
Ever wondered what Safari Private Browsing does exactly? Chances are it might not be giving you the level of online privacy you expect. Safari Private Browsing does have some perks, including:
- Stopping Safari from remembering the websites you’ve visited
- Not storing any new usernames, passwords, payments cards, and other information you input into private browsing
- Forgetting any search engine queries you’ve run
- Allowing you to save money by avoiding marketing cookies that might inflate prices
However, this is pretty much all the privacy that you’ll get with Safari Private Browsing. This incognito mode won’t cloak your IP address, encrypt your internet traffic, or make you safe on public Wi-Fi . Private browsing still leaves you pretty exposed to a lot of the risks that come with connecting to the internet.
For true online anonymity, you’ll need to use a VPN to change your IP address . We’re big fans of ExpressVPN, one of the fastest VPNs in the industry.
Below, you’ll find more information on how to use Safari Private Browsing on all your Apple devices, as well as more details on how this incognito mode does and doesn’t protect your privacy.
If you use a Mac, iPhone, or iPad, then chances are you’ve encountered Safari Private Browsing before. Whether you’re shopping for a partner’s gift or want to snoop on a long-lost colleague’s LinkedIn, there are many reasons why you might want to use private mode in Safari.
In this article, we answer the question, what is Safari Private Browsing ? We’ll also tell you what this handy tool can’t do to save you any embarrassment or risk to your online security.
What is Safari Private Browsing?
There’s a little more to this method of browsing than meets the eye, but we’ll go into specifics further down in this article. The point is, for a more private experience, you can use Safari’s incognito mode . You’ll be logged out of all accounts, and Safari won’t autofill user logins, passwords, or payment information. When you turn on private browsing, Safari won’t remember :
- Your search engine history
- Webpages you’ve visited
- Browsing activity or history
You should, however, be aware of a major drawback of this tool on Macs: your browsing activity likely isn’t as hidden as you might think. Websites you visit can still see who you are and what you’re doing . You can read more about this in our general incognito mode article .
With Macs, Private Browsing information is logged in a different place, as well: your Terminal archive.
Beware the Mac Terminal archive
On Macs, there’s something called the Terminal archive , and it’s as scary as it sounds — well, for fans of privacy at least. It’s a treasure trove for snoops. The Terminal archive contains all of the websites you visit , whether you’re using Safari Private Browsing or not. This is because your Mac stores static images and other files when you visit a website for the first time. This makes future visits to these sites and page loading much faster, as your Mac pulls the relevant files from the Terminal archive.
This command-line function also lets you make systemic changes to your Mac . For most users, there’ll never be a need to make any changes in the Terminal archive, and you shouldn’t if you don’t know what you’re doing. You could end up breaking something critical in your computer’s operating system if you tinker with the Terminal.

However, it is good to know that, even when you’re using Safari’s Private Browsing mode, your online activity is logged here.
Make your Safari Private Browsing truly private
By now, you might be asking yourself: how do I clear the cache on my Mac? Well, today’s your lucky day. Below, you’ll find a brief, step-by-step guide to clearing the cache on a Mac . Just make sure not to do anything else while inside the Terminal.
- Open “ Finder ,” then search for “ Terminal ” in the search bar.
- Run the Terminal application.
- Paste the following text into the Terminal and hit enter: sudo killall -HUP mDNSResponder
You may have to enter your Admin password to proceed. This is going to flush the DNS cache.
Remember that you shouldn’t do anything else inside of the Terminal application unless you know what you’re doing. It only takes a short command to nuke files or entire directories in this app forever! So, tread carefully.
Why You Should Use Safari Private Browsing on Macs and iOS
We can hypothesize all we want, but you’ve probably got a good idea of why you use private browsing. According to a 2018 research study , the most common reason people use private browsing is so others that are using a shared device can’t see what they’re doing. This comes down to protecting two things from other users of your device:
- Their personal data
- Their browsing activity
Fortunately, these are two things that Safari Private Mode manages to do wonderfully. Below, you can read more about what else Safari Private Browsing does for you .
Online privacy
- Your browser won’t remember what websites you’ve visited. Anything you browse while you’re in private browsing mode won’t be remembered by Safari. So, if you start shopping online for gifts or a product that you find embarrassing, you won’t usually have to worry about your friends or family coming across your browsing history.
- Safari won’t suggest usernames, passwords, credit card numbers, and so on. You’ve probably noticed that Safari can remember usernames, passwords, credit cards, and other information when you use it for the first time. If you tell your Mac, smartphone, or tablet to remember those details, they’ll be automatically filled in the next time you visit the website. With Safari Private Mode enabled, these kinds of details won’t be stored: you won’t be prompted to save or autofill them at all.
- Your search engine queries won’t be remembered . If you’ve been shopping for gifts or trying to self-diagnose, you probably don’t want other users of the computer to see what you’ve searched for . Normally, you’ll see suggested searches popping up in search engines like Google. Based on your past searches and clicks, some links might be colored purple instead of blue, too. In private browsing mode, these won’t appear, nor will any new searches be stored.
How to pay less with Safari Private Browsing
There’s more to private mode options than just online security. You could also save money with Safari Private Browsing, as you won’t be quoted higher prices for products you’ve already viewed. When you visit a website, cookies (small text files) are stored on your computer by your browser.
These kinds of cookies aren’t delicious or rewarding at all. Instead, they allow the site to track you and figure out that you’re interested in, for example, a particular holiday destination. This can result in you seeing higher airfares, hotel booking fees, and more. Just turn on Safari’s Private Browsing to s top cookies from being stored on your browser and avoid hiked prices.
How to Go Incognito on Safari
Safari Private Browsing on a Mac
Using Safari Private Browsing on a Mac is simple. If you’re reading this on a Mac, you can skip step one in our step-by-step guide below:
- Open Safari on your Mac.
- Click on “ File ” in the menu bar at the top of the screen.
- Select “ New Private Window .” This will open a new private tab, but you can open as many private tabs in your tab bar as you need.

It’s that simple. Now, any new tab you open within this new private browsing window will be a private browsing tab. Give it a whirl by opening some new private tabs and navigating to a website you frequently log into. You’ll notice that your username and password aren’t suggested for autofill as they usually would be .
Also, you’ll know that you’re in private browsing, as the URL bar will have a gray background rather than the usual white. Just remember to ignore or close your existing browser window if you had any open. If in doubt, check the background color of the URL bar.
Finally, to turn off private browsing in Safari , simply click the red cross in the corner of the browser window as you usually would.
Safari Private Browsing on an iPhone
Using Safari’s private browsing mode on an iPhone or iPad is fairly straightforward and could increase your privacy on an iPhone . If you’re running iOS 14 or earlier , simply follow the steps below:
- Open Safari on your phone.
- Tap on the “ Tabs ” button. That’s the two small squares in the bottom-right corner of your Safari window on iPhone.
- A new option called “Private” should appear.
- Tap “ Private ” and you’ll be taken to a blank screen confirming that you’re using Private Browsing Mode . You’ll notice that it’s using the same gray color scheme as Safari for Mac.
- Lastly, click on the small “ + ” (plus) icon to launch a private browsing window.

If you’re using Apple’s latest iPhone update, iOS 15.1.1 , you’ll need to follow a slightly different (and hey, we’ll say it — more confusing) set of steps:
- Tap on the “ Tabs ” button.
- Tap where it says “ X Tab(s) ” – this number will reflect the number of windows you have open.
- Tap “ Private .”
- Now, you’re in Private Browsing mode and can click the small “ + ” (plus) icon to launch a new private window.

Again, turning off private browsing in Safari for iPhones or iPads is simple. Just press the same “ Private ” button that you used to enable the feature. Don’t forget, if you have multiple private tabs open, they won’t close automatically. Swipe each tab closed before you exit private mode if you want to leave no trace.
How to Set Safari Private Browsing as the Default
If you’d rather always browse privately, you can also set Safari Private Browsing as your default, so that it opens automatically whenever you open a new tab or window. Check out the step-by-step instructions below for a Mac :
- Make sure your active application is Safari, then select “ Safari ” from your Mac’s toolbar at the top of your screen. Click on “ Preferences ” next, which can also be accessed using the keyboard shortcut “ Command ” + “ , ” (that’s Command, plus a comma).
- Now, you should see the Privacy window for Safari. Click on the “ General ” tab.
- Next to “Safari opens with”, select “ A new private window ” from the drop-down list.
While you can’t automatically use Safari Private Browsing by default on mobile , there are some options for minimizing what’s remembered, stored, or recommended. Here’s how you get there:
- Open the “ Settings ” application.
- Scroll down until you see “ Safari ” and tap on that option.
Now, you’ll have the choice to use a number of features. You can:
- Disable search engine suggestions
- Disable Safari suggestions specifically
- Turn off autofill for Safari , either for personal information, payment information, or both
- Disable “ Favorites “, which you can save in your Safari app’s home screen
- Turn off “ Frequently Visited Sites “, which appear below your favorites
In this menu, you can also prevent cross-site tracking and block all cookies on the websites that you visit. In the event that you forget to launch Safari Private Browsing, these options should give you at least a little more privacy whenever you go online.
Is Safari Private Browsing Safe?
That last risk is surprisingly common on public Wi-Fi networks too. Bear in mind that private browsing doesn’t protect you against malware (malicious software) either, nor does it protect your payment information or other personal details . For true online anonymity and to improve your online security , you should give serious thought to using a VPN (Virtual Private Network) .
How to use a VPN with Safari Private Browsing
Using a VPN along with Safari Private Browsing should give you the online security you’re looking for. In addition to avoiding any logged browsing history or search history , you’ll be much harder to track and enjoy greater online anonymity. You can check out the many advantages of a VPN for more information. Want to get started right away? The following steps will only take a few minutes of your time:
- Choose a VPN provider and create an account. We recommend checking out our list of the best VPNs if this is new ground for you. Alternatively, ExpressVPN is a market-leading VPN provider that we’re always happy to recommend.
- Download and install the VPN software onto your Mac. You can also download ExpressVPN for mobile on your iPhone. Other premium providers like NordVPN, CyberGhost, and Surfshark all offer really slick mobile apps for iOS, too.
- Log into your account , either in the desktop software or the mobile app.
- Choose a VPN server in a country of your choice. If you’re purely interested in online security, then the location you choose isn’t too important (though some will be faster than others). However, if you want to save money on subscriptions , for example, you should give it some more thought.
- Connect to the VPN server . When you connect, you’ll be changing your IP address to mirror the VPN server’s IP. It’s safe, legal ( in most countries ), and best of all, it’ll give you far greater online security than simply using Safari Private Browsing alone.
Safari Private Browsing is perfect for hiding those Christmas or birthday purchases from your family before the big day. It’s also a great way to save money on flights, hotels , or other purchases. However, it won’t do much for your online security. If you want truly private browsing , then use a VPN along with Safari private mode.
Interested in exploring other private browsers? Check out these articles below:
- How Anonymous Is DuckDuckGo?
- Is Vivaldi Browser Safe?
- How to Set Up Firefox as an Anonymous Browser
Do you want to know how to enable private browsing on Safari? Are you wondering how much privacy Safari Private Browsing actually gives you? You’ll find these answers and more in our frequently asked questions below.
To turn on Private Browsing in Safari for Mac, follow these simple steps:
- Make sure Safari is the active application that you’re using.
- Click on File in the menu bar along the top of the screen.
- Click on New Private Window to switch to private browsing mode.
To turn on Private Browsing in Safari for iPhone or iPad, the process is much the same:
- Open the Safari application.
- Tap on the Tabs icon (the two small squares in the lower-right corner of your screen).
- Tap on Private to switch to private browsing.
- Click on the small + (plus) icon to open a new private browsing tab.
Check out our full article for more information on Safari Private Browsing.
No. Safari Private Browsing, like any browser’s private mode, won’t protect you against a lot of online threats. Your IP address will still be visible to many third-party individuals and organizations. For example, your ISP will know what websites you’ve visited, and hackers could determine your location using your IP (though some private modes do limit location tracking). For true online privacy and anonymity, you’re safer using a VPN like ExpressVPN .
With Private Browsing, it’s more difficult for websites to track you, since cookies are cleared the moment you close the browser — but it’s not impossible. Your ISP (Internet Service Provider), employer, school, or college could still see your internet history . That is, unless you use a VPN along with the incognito mode.
Yes. The owner of an internet connection can absolutely check up on your browsing session if they have the right technical knowledge. Some routers can be set up to remember all URLs a device accesses. So, if you’re trying to fly under your parents’ radar, for example, they could potentially bust you using the family router, even if you’re exclusively using private browsing modes.
For true anonymity , you’ll want to use a VPN. With a VPN connection, all of your internet traffic is encrypted, which gives you far better anonymity and privacy than using private browsing on its own.

Chris Bluvshtein Author
Senior journalist.
Chris is a tech journalist with many years’ experience covering online privacy and cybersecurity. He’s also a published author and works as a Product Manager for some of the most innovative software development companies.
Share this article
More articles from the anonymous browsing section.

Kanary Review (2024): A Cheap and Secure Data Removal Service

OneRep Review (2024): Can OneRep Protect Your Private Data?

The Best Data Removal Services (Personal Information Removal Made Easy)
Hi Chris , I’m finding while using private mode in safari my sound is being cut out and I have not been able to find a way to reconnect it. I use it on a iPad with a vpn and trend anti spam for protection as much as it can in private mode. I have not been able to find any reason as to why this is happening.
Hey Wayne, I've done a bit of digging, and I've found something that might be worth a try. It seems that recent versions of Safari have a built-in feature that can prevent audio from playing when you visit a website; it's enabled by default too. Give this a try and let me know if the issue goes away: 1. Open the Safari menu and click preferences 2. Click on the websites tab 3. Look for the setting: "When visiting other websites", which has a drop-down selection beside it 4. Change this setting so that it allows websites with media to play sound. You can alternatively add individual websites to this list if you'd rather have control over which ones can play sound by default.
Hi Chris Just tried your Terminal Commands, I am running macOS Monterey The Terminal Commands Below are not working dscacheutil -cachedump -entries Host dscacheutil -flushcache
You're right. Thank you for pointing it out to us! There is a new terminal command you'll now need instead: "sudo killall -HUP mDNSResponder". We've adjusted the article to reflect this. Hope this helps!
Looking for a VPN?
Take a look at our overview of the most trustworthy, fast, and safe VPN services. Extensively tested by our experts.

THE 5 BEST Moscow Safaris
Safaris in moscow.
- Adrenaline & Extreme Tours
- Gear Rentals
- Nature & Wildlife Tours
- 5.0 of 5 bubbles
- District Central (TsAO)
- 3rd Transport Ring (TTK)
- District North-Eastern (SVAO)
- District Eastern (VAO)
- District South-Western (YuZAO)
- Lomonosovskiy
- Ostankinskiy
- Meshchanskiy
- Krasnoselskiy
- Maryina Roshcha (Jewish Quarter)
- Good for Couples
- Good for Kids
- Good for Big Groups
- Adventurous
- Budget-friendly
- Good for a Rainy Day
- Hidden Gems
- Honeymoon spot
- Good for Adrenaline Seekers
- Things to do ranked using Tripadvisor data including reviews, ratings, photos, and popularity.

1. Rybokhotsoyuz

2. Easy Russia Tour Guide
3. UTS GROUP

4. 365AltaiMongolia

5. #1 Russia -Tanzania | Zanzibar, Serengeti Safari & Kilimanjaro Agency | BURIGI CHATO SAFARIS CO LTD

6. Aviashop.Ru

7. Transsib Moscow

8. BASK TOUR
- Easy Russia Tour Guide
- #1 Russia -Tanzania | Zanzibar, Serengeti Safari & Kilimanjaro Agency | BURIGI CHATO SAFARIS CO LTD
- 365AltaiMongolia
iPad User Guide
- iPad models compatible with iPadOS 17
- iPad mini (5th generation)
- iPad mini (6th generation)
- iPad (6th generation)
- iPad (7th generation)
- iPad (8th generation)
- iPad (9th generation)
- iPad (10th generation)
- iPad Air (3rd generation)
- iPad Air (4th generation)
- iPad Air (5th generation)
- iPad Pro 10.5-inch
- iPad Pro 11-inch (1st generation)
- iPad Pro 11-inch (2nd generation)
- iPad Pro 11-inch (3rd generation)
- iPad Pro 11-inch (4th generation)
- iPad Pro 12.9-inch (2nd generation)
- iPad Pro 12.9-inch (3rd generation)
- iPad Pro 12.9-inch (4th generation)
- iPad Pro 12.9-inch (5th generation)
- iPad Pro 12.9-inch (6th generation)
- Setup basics
- Make your iPad your own
- Keep in touch with friends and family
- Customize your workspace
- Do more with Apple Pencil
- Customize iPad for your child
- What’s new in iPadOS 17
- Turn on and set up iPad
- Wake and unlock
- Set up cellular service
- Connect to the internet
- Sign in with Apple ID
- Subscribe to iCloud+
- Find settings
- Set up mail, contacts, and calendar accounts
- Learn the meaning of the status icons
- Charge the battery
- Show the battery percentage
- Check battery usage
- Use Low Power Mode to save battery life
- Read and bookmark the user guide
- Learn basic gestures
- Learn advanced gestures
- Adjust the volume
- Find your apps in App Library
- Switch between apps
- Zoom an app to fill the screen
- Quit and reopen an app
- Drag and drop
- Open two items in Split View
- Switch an app window to Slide Over
- View an app’s windows and workspaces
- Multitask with Picture in Picture
- Move, resize, and organize windows
- Access features from the Lock Screen
- Perform quick actions
- Search on iPad
- Get information about your iPad
- View or change cellular data settings
- Travel with iPad
- Change or turn off sounds
- Create a custom Lock Screen
- Change the wallpaper
- Adjust the screen brightness and color balance
- Customize the text size and zoom setting
- Change the name of your iPad
- Change the date and time
- Change the language and region
- Organize your apps in folders
- Add, edit, and remove widgets
- Move apps and widgets on the Home Screen
- Remove apps
- Use and customize Control Center
- Change or lock the screen orientation
- View and respond to notifications
- Change notification settings
- Set up a focus
- Allow or silence notifications for a Focus
- Turn a Focus on or off
- Customize sharing options
- Type with the onscreen keyboard
- Dictate text
- Move the onscreen keyboard
- Select and edit text
- Use predictive text
- Use text replacements
- Add or change keyboards
- Add emoji and stickers
- Take a screenshot
- Take a screen recording
- Write and draw in documents
- Add text, shapes, signatures, and more
- Fill out forms and sign documents
- Use Live Text to interact with content in a photo or video
- Use Visual Look Up to identify objects in your photos and videos
- Lift a subject from the photo background
- Subscribe to Apple Arcade
- Play with friends in Game Center
- Connect a game controller
- Use App Clips
- Update apps
- View or cancel subscriptions
- Manage purchases, settings, and restrictions
- Install and manage fonts
- Buy books and audiobooks
- Annotate books
- Access books on other Apple devices
- Listen to audiobooks
- Set reading goals
- Organize books
- Create and edit events in Calendar
- Send invitations
- Reply to invitations
- Change how you view events
- Search for events
- Change calendar and event settings
- Schedule or display events in a different time zone
- Keep track of events
- Use multiple calendars
- Use the Holidays calendar
- Share iCloud calendars
- Take photos
- Take a selfie
- Take a Portrait mode selfie
- Take videos
- Change advanced camera settings
- Adjust HDR camera settings
- View, share, and print photos
- Use Live Text
- Scan a QR code
- See the world clock
- Set an alarm
- Use the stopwatch
- Use multiple timers
- Add and use contact information
- Edit contacts
- Add your contact info
- Send Contacts on iPad
- Use other contact accounts
- Hide duplicate contacts
- Export contacts
- Get started with FaceTime
- Make FaceTime calls
- Receive FaceTime calls
- Create a FaceTime link
- Take a Live Photo
- Turn on Live Captions
- Use other apps during a call
- Make a Group FaceTime call
- View participants in a grid
- Use SharePlay to watch, listen, and play together
- Share your screen in a FaceTime call
- Collaborate on a document in a FaceTime call
- Use video conferencing features
- Hand off a FaceTime call to another Apple device
- Change the FaceTime video settings
- Change the FaceTime audio settings
- Change your appearance
- Leave a call or switch to Messages
- Block unwanted callers
- Report a call as spam
- Connect external devices or servers
- Modify files, folders, and downloads
- Search for files and folders
- Organize files and folders
- Set up iCloud Drive
- Share files and folders in iCloud Drive
- Share your location
- Add or remove a friend
- Locate a friend
- Get notified when friends change their location
- Notify a friend when your location changes
- Add your iPad
- Get notified if you leave a device behind
- Locate a device
- Mark a device as lost
- Erase a device
- Remove a device
- Add an AirTag
- Share an AirTag or other item in Find My on iPad
- Add a third-party item
- Get notified if you leave an item behind
- Locate an item
- Mark an item as lost
- Remove an item
- Adjust map settings
- Get started with Freeform
- Create a Freeform board
- Draw or handwrite
- Apply consistent styles
- Position items on a board
- Search Freeform boards
- Share and collaborate
- Delete and recover boards
- Get started with Health
- Fill out your Health Details
- Intro to Health data
- View your health data
- Share your health data
- View health data shared by others
- Download health records
- View health records
- Log menstrual cycle information
- View menstrual cycle predictions and history
- Track your medications
- Learn more about your medications
- Log your state of mind
- Take a mental health assessment
- Customize your Sleep Focus
- Turn Sleep Focus on or off
- View your sleep history
- Check your headphone audio levels
- Use audiogram data
- Back up your Health data
- Intro to Home
- Upgrade to the new Home architecture
- Set up accessories
- Control accessories
- Control your home using Siri
- Use Grid Forecast to plan your energy usage
- Set up HomePod
- Control your home remotely
- Create and use scenes
- Use automations
- Set up security cameras
- Use Face Recognition
- Configure a router
- Invite others to control accessories
- Add more homes
- Get music, movies, and TV shows
- Get ringtones
- Manage purchases and settings
- Magnify nearby objects
- Change settings
- Detect people around you
- Detect doors around you
- Receive image descriptions of your surroundings
- Read aloud text and labels around you
- Set up shortcuts for Detection Mode
- Add and remove email accounts
- Set up a custom email domain
- Check your email
- Unsend email with Undo send
- Reply to and forward emails
- Save an email draft
- Add email attachments
- Download email attachments
- Annotate email attachments
- Set email notifications
- Search for email
- Organize your email in mailboxes
- Flag or block emails
- Filter emails
- Use Hide My Email
- Use Mail Privacy Protection
- Change email settings
- Delete and recover emails
- Add a Mail widget to your Home Screen
- Print emails
- Use keyboard shortcuts
- Get travel directions
- Select other route options
- Find stops along your route
- View a route overview or a list of turns
- Change settings for spoken directions
- Get driving directions
- Report traffic incidents
- Get cycling directions
- Get walking directions
- Get transit directions
- Delete recent directions
- Get traffic and weather info
- Predict travel time and ETA
- Download offline maps
- Search for places
- Find nearby attractions, restaurants, and services
- Get information about places
- Mark places
- Share places
- Rate places
- Save favorite places
- Explore new places with Guides
- Organize places in My Guides
- Delete significant locations
- Look around places
- Take Flyover tours
- Find your Maps settings
- Measure dimensions
- View and save measurements
- Measure a person’s height
- Set up Messages
- About iMessage
- Send and reply to messages
- Unsend and edit messages
- Keep track of messages
- Forward and share messages
- Group conversations
- Watch, listen, or play together using SharePlay
- Collaborate on projects
- Use iMessage apps
- Take and edit photos or videos
- Share photos, links, and more
- Send stickers
- Request, send, and receive payments
- Send and receive audio messages
- Animate messages
- Change notifications
- Block, filter, and report messages
- Delete messages and attachments
- Recover deleted messages
- View albums, playlists, and more
- Show song credits and lyrics
- Queue up your music
- Listen to broadcast radio
- Subscribe to Apple Music
- Listen to lossless music
- Listen to Dolby Atmos music
- Apple Music Sing
- Find new music
- Add music and listen offline
- Get personalized recommendations
- Listen to radio
- Search for music
- Create playlists
- See what your friends are listening to
- Use Siri to play music
- Change the way music sounds
- Get started with News
- Use News widgets
- See news stories chosen just for you
- Read stories
- Follow your favorite teams with My Sports
- Subscribe to Apple News+
- Browse and read Apple News+ stories and issues
- Download Apple News+ issues
- Solve crossword puzzles
- Search for news stories
- Save stories in News for later
- Subscribe to individual news channels
- Get started with Notes
- Add or remove accounts
- Create and format notes
- Draw or write
- Add photos, videos, and more
- Scan text and documents
- Work with PDFs
- Create Quick Notes
- Search notes
- Organize in folders
- Organize with tags
- Use Smart Folders
- Export or print notes
- Change Notes settings
- Delete, share, or copy a photo
- View and edit Photo Booth photos in the Photos app
- View photos and videos
- Play videos and slideshows
- Delete or hide photos and videos
- Edit photos and videos
- Trim video length and adjust slow motion
- Edit Live Photos
- Edit Cinematic videos
- Edit portraits
- Use photo albums
- Edit, share, and organize albums
- Filter and sort photos and videos in albums
- Make stickers from your photos
- Duplicate and copy photos and videos
- Merge duplicate photos
- Search for photos
- Identify people and pets
- Browse photos by location
- Share photos and videos
- Share long videos
- View photos and videos shared with you
- Watch memories
- Personalize your memories
- Manage memories and featured photos
- Use iCloud Photos
- Create shared albums
- Add and remove people in a shared album
- Add and delete photos and videos in a shared album
- Set up or join an iCloud Shared Photo Library
- Add content to an iCloud Shared Photo Library
- Use iCloud Shared Photo Library
- Import and export photos and videos
- Print photos
- Find podcasts
- Listen to podcasts
- Follow your favorite podcasts
- Use the Podcasts widget
- Organize your podcast library
- Download, save, and share podcasts
- Subscribe to podcasts
- Listen to subscriber-only content
- Change download settings
- Make a grocery list
- Add items to a list
- Edit and manage a list
- Search and organize lists
- Work with templates
- Use Smart Lists
- Print reminders
- Use the Reminders widget
- Change Reminders settings
- Browse the web
- Search for websites
- Customize your Safari settings
- Change the layout
- Use Safari profiles
- Open and close tabs
- Organize your tabs with Tab Groups
- View your tabs from another device
- Share Tab Groups
- Use Siri to listen to a webpage
- Bookmark a website
- Bookmark a website as a favorite
- Save pages to a Reading List
- Find links shared with you
- Annotate and save a webpage as a PDF
- Automatically fill in forms
- Get extensions
- Hide ads and distractions
- Clear your cache
- Browse the web privately
- Use passkeys in Safari
- Check stocks
- Manage multiple watchlists
- Read business news
- Add earnings reports to your calendar
- Use a Stocks widget
- Translate text, voice, and conversations
- Translate text in apps
- Translate with the camera view
- Subscribe to Apple TV+, MLS Season Pass, or an Apple TV channel
- Add your TV provider
- Get shows, movies, and more
- Watch sports
- Watch Major League Soccer with MLS Season Pass
- Watch multiple live sports streams
- Control playback
- Manage your library
- Change the settings
- Make a recording
- Play it back
- Edit or delete a recording
- Keep recordings up to date
- Organize recordings
- Search for or rename a recording
- Share a recording
- Duplicate a recording
- Check the weather
- Check the weather in other locations
- View weather maps
- Manage weather notifications
- Use Weather widgets
- Learn the weather icons
- Find out what Siri can do
- Tell Siri about yourself
- Have Siri announce calls and notifications
- Add Siri Shortcuts
- About Siri Suggestions
- Change Siri settings
- Set up Family Sharing
- Add Family Sharing members
- Remove Family Sharing members
- Share subscriptions
- Share purchases
- Share locations with family and locate lost devices
- Set up Apple Cash Family and Apple Card Family
- Set up parental controls
- Set up a child’s device
- Get started with Screen Time
- Protect your vision health with Screen Distance
- Set up Screen Time for yourself
- Set communication and safety limits and block inappropriate content
- Set up Screen Time for a family member
- Set up Apple Pay
- Use Apple Pay in apps and on the web
- Track your orders
- Use Apple Cash
- Use Apple Card
- Use Savings
- Manage payment cards and activity
- Power adapter and charge cable
- Use AirPods
- Use EarPods
- Use headphone audio-level features
- Apple Pencil compatibility
- Pair and charge Apple Pencil (1st generation)
- Pair and charge Apple Pencil (2nd generation)
- Pair and charge Apple Pencil (USB-C)
- Enter text with Scribble
- Draw with Apple Pencil
- Take and mark up a screenshot with Apple Pencil
- Quickly write notes
- Preview tools and controls with Apple Pencil hover
- Wirelessly stream videos and photos to Apple TV or a smart TV
- Connect to a display with a cable
- HomePod and other wireless speakers
- iPad keyboards
- Switch between keyboards
- Enter characters with diacritical marks
- Use shortcuts
- Choose an alternative keyboard layout
- Change typing assistance options
- Connect Magic Trackpad
- Trackpad gestures
- Change trackpad settings
- Connect a mouse
- Mouse actions and gestures
- Change mouse settings
- External storage devices
- Bluetooth accessories
- Apple Watch with Fitness+
- Share your internet connection
- Make and receive phone calls
- Use iPad as a second display for Mac
- Use iPad as a webcam
- Use a keyboard and mouse or trackpad across your Mac and iPad
- Hand off tasks between devices
- Cut, copy, and paste between iPad and other devices
- Stream video or mirror the screen of your iPad
- Use AirDrop to send items
- Connect iPad and your computer with a cable
- Transfer files between devices
- Transfer files with email, messages, or AirDrop
- Transfer files or sync content with the Finder or iTunes
- Automatically keep files up to date with iCloud
- Use an external storage device, a file server, or a cloud storage service
- Get started with accessibility features
- Turn on accessibility features for setup
- Change Siri accessibility settings
- Open features with Accessibility Shortcut
- Enlarge text by hovering
- Change color and brightness
- Make text easier to read
- Reduce onscreen motion
- Customize per-app visual settings
- Hear what’s on the screen or typed
- Hear audio descriptions
- Turn on and practice VoiceOver
- Change your VoiceOver settings
- Use VoiceOver gestures
- Operate iPad when VoiceOver is on
- Control VoiceOver using the rotor
- Use the onscreen keyboard
- Write with your finger
- Use VoiceOver with an Apple external keyboard
- Use a braille display
- Type braille on the screen
- Customize gestures and keyboard shortcuts
- Use VoiceOver with a pointer device
- Use VoiceOver for images and videos
- Use VoiceOver in apps
- Use AssistiveTouch
- Use an eye-tracking device
- Adjust how iPad responds to your touch
- Auto-answer calls
- Change Face ID and attention settings
- Use Voice Control
- Adjust the top or Home button
- Use Apple TV Remote buttons
- Adjust pointer settings
- Adjust keyboard settings
- Adjust AirPods settings
- Adjust Apple Pencil settings
- Control a nearby Apple device
- Intro to Switch Control
- Set up and turn on Switch Control
- Select items, perform actions, and more
- Control several devices with one switch
- Use hearing devices
- Use Live Listen
- Use sound recognition
- Set up and use RTT
- Flash the LED for alerts
- Adjust audio settings
- Play background sounds
- Display subtitles and captions
- Show transcriptions for Intercom messages
- Get Live Captions (beta)
- Type to speak
- Record a Personal Voice
- Use Guided Access
- Use built-in privacy and security protections
- Set a passcode
- Set up Face ID
- Set up Touch ID
- Control access to information on the Lock Screen
- Keep your Apple ID secure
- Use passkeys to sign in to apps and websites
- Sign in with Apple
- Share passwords
- Automatically fill in strong passwords
- Change weak or compromised passwords
- View your passwords and related information
- Share passkeys and passwords securely with AirDrop
- Make your passkeys and passwords available on all your devices
- Automatically fill in verification codes
- Sign in with fewer CAPTCHA challenges
- Two-factor authentication
- Use security keys
- Control app tracking permissions
- Control the location information you share
- Control access to information in apps
- Control how Apple delivers advertising to you
- Control access to hardware features
- Create and manage Hide My Email addresses
- Protect your web browsing with iCloud Private Relay
- Use a private network address
- Use Advanced Data Protection
- Use Lockdown Mode
- Receive warnings about sensitive content
- Use Contact Key Verification
- Turn iPad on or off
- Force restart iPad
- Update iPadOS
- Back up iPad
- Return iPad settings to their defaults
- Restore all content from a backup
- Restore purchased and deleted items
- Sell, give away, or trade in your iPad
- Install or remove configuration profiles
- Important safety information
- Important handling information
- Find more resources for software and service
- FCC compliance statement
- ISED Canada compliance statement
- Apple and the environment
- Class 1 Laser information
- Disposal and recycling information
- Unauthorized modification of iPadOS
- ENERGY STAR compliance statement
Browse privately in Safari on iPad
Visit sites privately
You can use Private Browsing to open tabs that don’t appear in History on iPad or in the list of tabs on your other devices. Tabs in Private Browsing aren’t shared with your other Apple devices, even if you’re signed in with the same Apple ID .
If you have a passcode set on your iPad, Private Browsing locks when it’s not in use. Private Browsing may not lock immediately.
Follow the directions onscreen to unlock Private Browsing.
Note: Any Safari extensions you have installed that have access to browsing data are automatically turned off in Private Browsing. To turn on an extension in Private Browsing, see Use extensions .
Choose a search engine for Private Browsing
Tap Private Search Engine, then choose a search engine.
View the Privacy Report
Safari helps prevent trackers from following you across websites and from seeing your IP address. You can review the Privacy Report to see a summary of trackers that have been encountered and prevented by Intelligent Tracking Prevention on the current webpage you’re visiting. You can also review and adjust Safari settings to keep your browsing activities private from others who use the same device, and help protect yourself from malicious websites.
Use iCloud Private Relay to browse the web with more privacy
When you subscribe to iCloud+ on iPad , you can use iCloud Private Relay to help prevent websites and network providers from creating a detailed profile about you. When iCloud Private Relay is turned on, the traffic leaving your iPad is encrypted and sent through two separate internet relays. This prevents websites from seeing your IP address and exact location while it prevents network providers from collecting your browsing activity in Safari. See Protect your web browsing with iCloud Private Relay on iPad .
See Protect your web browsing with iCloud Private Relay on iPad to learn how to:
Turn iCloud Private Relay completely on or off for your iPad.
Turn iCloud Private Relay on or off for a specific Wi-Fi or cellular network.
Turn iCloud Private Relay off temporarily.
Set the specificity of your IP address location.
Temporarily allow a website to see your IP address
If a website relies on IP filtering, monitoring, or rate-limiting, it might require your IP address to be visible. You can turn off iCloud Private Relay temporarily for that website only.
Note: iCloud Private Relay isn’t available in all countries or regions. See the iOS and iPadOS Feature Availability website .
Tap Show IP Address (if available).
Your IP address remains visible to that website until you leave the website or close its Safari tab. iCloud Private Relay remains on for other websites.
To turn off or pause iCloud Private Relay for all websites, see Protect your web browsing with iCloud Private Relay on iPad .
Control privacy and security settings for Safari
Prevent Cross-Site Tracking: Safari limits third-party cookies and data by default. Turn this option off to allow cross-site tracking.
Hide IP address: Safari automatically protects your IP address from known trackers. For eligible iCloud+ subscribers, your IP address is protected from trackers and websites as you browse in Safari. If this option is off, your IP address isn’t hidden.
Fraudulent Website Warning: Safari displays a warning if you’re visiting a suspected phishing website. Turn this option off if you don’t want to be warned about fraudulent websites.
Camera: Choose whether Safari websites can use your camera without asking you first. Tap Camera, then choose Ask, Deny, or Allow.
Microphone: Choose whether Safari websites can use your microphone without asking you first. Tap Microphone, then choose Ask, Deny, or Allow.
Location: Choose whether Safari websites can use your location without asking you first. Tap Location, then choose Ask, Deny, or Allow.
Explore the world with tourHQ
- Destinations
- I am a Guide
- I am a Traveller
- Online Experiences
- Currency (USD)
The epicenter of modern Russia, Moscow booms with shiny new skyscrapers, the bulbous onion domes of the tsars and politically-rich Red Square. Explore the metropolis with a tourHQ guide.
Search Cities in Russia
Moscow Tour Guides

Jorge De Reval
I am a happy, enthusiastic, amusing Spanish guy. Lively and hyperactive. Recently became qualified ...

Julia Koval
Hello!My name is Julia and I work as a guide last 4 years, but before together with my friends we ...

Ekaterina Smirnova
Please note: I'm away from Moscow June 11-26, 2021. I am a native Muscovite but traveled ...

Vasil Valiev
Occupation: Senior guide-translator. Guiding since 2012 in Altai mountains, North of Russia ...

Marina Spasskaya
Hi there! My name is Marina and I'm a licensed Moscow city guide.Moscow is like ...

Greetings from Saint Petersburg. This is your private tour guide Ali in Saint Petersburg. I was ...

Maria Deulina
Dear friends,My name is Maria, I am a licensed guide about Moscow. Being a native Muscovite I have ...

Ashraf Rabei
My name is Ashraf ...I'm graduated from faculty of tourism and hotel guidance department, in Egypt ...

Hengameh Ghanavati
My name is Hengameh Ghanavati. Im a licenced international tour guide since 2014 and I have ...

Todd Passey
We are a cooperative of highly experienced, certified, professional guides. Each guide takes ...

Tim Brinley
Young at heart, adventurous, organized, good people skills, a good speaker, entertaining, ...

Nikolay Borkovoy
Hace 32 años nací en la ciudad de Moscú. Tengo experiencia trabajando como guía turístico en ...

Anika Socotra-International
Our mission is to provide you with the kind of holiday you want: where you can relax in wonderful ...

Al'bina Andreeva
Moscow guide&photo! Feel Putin vibes and explore the enigmatic Russian soul through history ...
The sprawling, mind-boggling metropolis of Russian Moscow has long been one of the theatrical stages on which the great dramas of Europe and Asia have been played out in grand style. Burned by Napoleon in 1812, immortalised by Tolstoy, utilised by the Bolsheviks and championed as a bastion of heroic defiance by the post-war communists, it’s almost hard to believe just how defining the historical events that found their home on Moscow’s streets have been. Moscow tour guides will easily be able to mark the major must-see landmarks on the map, from the onion-domed orthodox Saint Basil's Cathedral, to the political powerhouse of Red Square just next door, while others will be quick to recommend a ride on Moscow’s famous subterranean metro system, or a visit to the UNESCO-attested Novodevichy Convent on the city’s southern side. But Moscow is a city also in the throes of a cultural wrangling between the old and the new. Creative energies abound here: Boho bars and pumping super clubs now occupy the iconic mega structures of the old USSR; high-fashion outlets, trendy shopping malls and luxurious residential districts stand as testimony to a city that’s now the undisputed playground of the world’s super-rich, while sprawling modern art museums dominate the cultural offering of the downtown districts north of the Moskva River.
Tell us your destination, date, and group size.
Our team of travel experts and guides will design a tailored itinerary just for you., enjoy your trip with peace of mind knowing everything is taken care of..
Say Goodbye to Travel Stress

Choose Currency Close modal
- USD US, dollar
- GBP British Pounds
Cookie icon We use cookies!
We, and third parties, use cookies for technical and analytical purposes, for marketing purposes and for integration with social media. For more information, refer to our Privacy Policy and Terms of Consent.
By clicking on 'I agree', you consent to the use of these cookies.
IMAGES
VIDEO
COMMENTS
In the Safari app on your Mac, close the private window, switch to a non-private Safari window, or choose File > New Window to open a non-private window. To further enhance privacy: Delete any items you downloaded while using private windows. Close any other private windows that are still open, to prevent other people from using the Back and Forward buttons to see pages you visited in them.
Open the Safari app on your iPhone. Tap . Swipe right on the tab bar at the bottom of the screen until Private Browsing opens, then tap Unlock. To exit Private Browsing, tap , then swipe left to open a Tab Group from the menu at the bottom of your screen. The websites you have open in Private Browsing stay open, and Private Browsing locks.
After launching Safari, go to File > New Private Window to open a private browsing window. Alternatively, use the keyboard shortcut Shift + Cmd + N. Open a private browsing window from the menu bar. A private browsing window in Safari says Private Browsing Enabled at the top of the start page. The Smart Search Bar also appears with a dark gray ...
Use the Pages Button on Safari's Toolbar. A quick way to open a private tab in Safari is to use the "Pages" button on the bottom toolbar on your iPhone. Fire up Safari. Long-press or hard-press the "Pages" button (cascading squares icon). Select the "New Private Tab" option with a hand icon next to it from the menu that pops up.
To activate Private Browsing, first launch Safari. If you don't see the toolbar at the top of the screen, tap anywhere once to reveal it. Then tap on the "New Window" button in the upper-right corner. On Safari's window management screen, tap the "Private" button in the upper-right corner. After Private Mode is enabled, tap the plus (+) button ...
Here are three ways to open a private window and go incognito in Safari on Mac: Method 1: Using the Menu Bar. The most commonly used method for opening a private window in Safari is the menu bar. Follow these steps to go incognito in Safari on Mac via the menu bar: Open the Safari browser on your Mac. Click File in the menu bar. From the ...
1. Open your Safari browser. 2. In the top toolbar, click "File." 3. Select "New Private Window." Click on New Private Window to turn on private browsing. Devon Delfino/Business Insider. The smart ...
Keyboard shortcut for Private Browsing on Mac. You're probably used to the command + N shortcut for a new Safari window. Just add shift to that to get a new Private window - command + shift + N.
Step 1: Open Safari and select Safari > Preferences from the menu bar. Step 2: Go to the General tab. Step 3: Pick the drop-down next to Safari opens with and choose A new private window. Step 4 ...
With your Safari Private Browsing Mode window open, tap the X to close it. With Safari still open, go to the Mac menu bar and click File. Click on New Window. iOS 17. To turn off Safari Private Browsing on your iPhone running iOS 17, follow these three simple steps: Open Safari on your iPhone. Tap and hold the Tabs button.
Open Safari on your iPad with iPadOS 15.0 or later. Hit the sidebar icon near the top-left corner to open the Safari sidebar. From the Safari sidebar on the lefthand side, choose the option labeled Private. Doing so creates a new tab in a group dubbed "Private". You can open multiple private tabs in this tab group.
First, launch Safari. In the menu bar at the top of the screen, click "Safari" and select "Preferences." In the Preferences pop-up window, make sure you're on the General tab. Look for the option called "Safari Opens With:" located beside a drop-down menu. Click on the drop-down menu and select "A New Private Window" from the list of options.
Open Safari on your phone. Tap on the " Tabs " button. That's the two small squares in the bottom-right corner of your Safari window on iPhone. A new option called "Private" should appear. Tap " Private " and you'll be taken to a blank screen confirming that you're using Private Browsing Mode.
From reloading pages to opening private browsing sessions, these keyboard shortcuts for Chrome, Edge, Firefox, and Safari can help you navigate the web faster - on Windows or macOS.
Friends, welcome to my channel Window to Moscow 🇷🇺Walk with me around MOSCOW, peering into the beautiful faces of passers-by and enjoying the surrounding s...
The fastest and most reliable way to see the best sights of Moscow. Red Square, St Basil's Cathedral, Sparrow Hills, the Bolshoi Theatre, Christ the Saviour Cathedral, Tverskaya Street, Kremlin and other popular attractions. BOOK NOW. For all. 3,5 - 4 h.
Safaris in Moscow. 1. Rybokhotsoyuz. 2. Easy Russia Tour Guide. An excellent and reliable service which made my trip mesmorizing with easy moscow. Especially Anna is a wonderful... 3. UTS GROUP.
Open the Safari app on your iPad. Tap , then tap Private. Follow the directions onscreen to unlock Private Browsing. To exit Private Browsing, tap , then tap a Tab Group. The websites you have open in Private Browsing stay open, and Private Browsing locks. To prevent Private Browsing from locking, go to Settings > Safari, then turn off Require ...
Tell us your destination, date, and group size. Our team of travel experts and guides will design a tailored itinerary just for you. Enjoy your trip with peace of mind knowing everything is taken care of. The epicenter of modern Russia, Moscow booms with shiny new skyscrapers, the bulbous onion domes of the tsars and politically-rich Red Square.