Ultimate RV Setup Checklist (Printable PDF)
Read this page without ads! Go Ad-Free
Our comprehensive RV setup checklist will guide you step-by-step, ensuring a seamless arrival and setup at your campground.
Tip : Download our Printable RV Arrival & Departure checklists and check off each of these steps as you complete them for a stress-free setup and teardown – no WIFI needed!

Arrival at Your Chosen Campground
Upon reaching your destination, follow these steps:
- Check-In and Get Your Campsite Number : Register at the campground office and get your assigned campsite number.
- Use Discount if Possible : If you have memberships with RV clubs like Good Sam, take advantage of these offered discounts.
- Confirm Campsite Has All Requested Amenities : Double-check that your site is equipped with the amenities you need for your stay, such as electricity, water, and sewage connections.
- Get a Map and Rules List for the Campground : Familiarize yourself with the campground layout and its regulations to ensure a smooth and respectful stay.
- Inquire About Points of Interest in the Area : Ask about local attractions, hikes, or events to make the most of your trip.
Arrival at Your Designated Campsite
Once at your site, run down this campsite setup checklist:
- Visually Confirm Site Has Needed Amenities : Do a quick visual survey of your campsite to ensure it’s equipped with all the necessary facilities, like power or sewage hookups.
- Plan Your Entry Path : Plan how you’ll maneuver your RV into position, be it pull-through or back-in.
- Inspect Campsite for Hazards or Obstructions : Check for potential obstacles like tree branches or rocks that could interfere with parking or setup.
- Park Your RV : Position your RV on the site, allowing enough room for slideouts and the awning. Be sure to keep kids and pets in your vehicle when you park, use a spotter to help guide you safely, and take it slow!
- Turn on Your Emergency Brakes if Driving a Motorhome : Secure your vehicle by engaging the emergency brakes.
- Check to Make Sure You Can Reach Hookups : Verify that your RV’s cords and hoses can comfortably reach the site’s water, electrical, and, if applicable, sewer hookups.
- Level RV : Use leveling blocks or your RV’s built-in leveling system to ensure a stable and even living area.
- Connect to Shore Power : Plug in your electrical cord to the site’s power supply to run your RV’s electrical systems.
- Connect Water Lines : Hook up your water lines to access fresh water.
- Connect Sewer Hose : Attach your sewer hose to properly manage waste.
- Turn on the Propane : Turn on your propane supply to power your gas-powered appliances.
- Roll Out Awning : Unroll your awning, taking care to secure it safely.
- Lower Handrails and Entry Steps : Ensure safe entry and exit by lowering the handrails and steps.
- Campsite Setup : Arrange your outdoor furniture and accessories to create your perfect outdoor living space.
Unhitching (If Applicable)
- Chock Tires : Secure your RV from moving unintentionally by placing chocks around the tires.
- Put Support Blocks Down & Lower Jacks : Establish further stability by using support blocks and lowering the RV’s jacks.
- Disconnect the Electrical Cord from the Tow Vehicle : Detach the electrical connection from the tow vehicle to the RV.
- Disconnect the Breakaway Cable from the Tow Vehicle : Unhook the safety breakaway cable from your tow vehicle.
- Unhitch RV : Detach the RV from the tow vehicle.
Now, let’s prepare the inside of your RV:
- Extend Slideouts : Extend any slideouts your RV has to increase living space.
- Turn on the RV Refrigerator : Start cooling your refrigerator to store food safely.
- Turn on A/C or Heater : Based on weather conditions, turn on either the A/C or heater to maintain a comfortable temperature.
- Open Roof Vents : Promote good air circulation by opening your roof vents.
- Light Pilot on the Oven : If your stove has a pilot light, make sure it’s lit and ready for cooking.
- Turn on the Water Heater : Activate your water heater for warm showers and dishwashing.
- Extend Antenna : Raise your antenna for better TV or radio reception.
- Test Water Lines : Turn on faucets to ensure all water lines function properly.
- Set up Furniture : Arrange interior furniture as desired for your comfort and convenience.
- Unpack Items : Remove items from storage and place them in their designated spots for easy access.
Using these steps as your guide, you can ensure that your arrival and setup at any campground go smoothly and efficiently. Combine this with our RV Departure Checklist , and you’ll have your entire camp setup and teardown process completely covered!
Better yet, we have put all of these steps into a simple-to-follow printable RV setup checklist that you can download, print, and reuse over and over as many times as you want!
These PDF checklists are easy to use and come with blank copies, so you can make them work for you and your RV. Get your RV Arrival & Departure Checklists today and take the hassle out of the setup and teardown process!
Common Setup Issues and Troubleshooting
No matter how well-prepared you are, unexpected issues can arise while setting up your RV.
Wrong Electrical Connection
In some instances, your RV’s electrical system might not match the site’s power source, which could lead to power issues. Always carry adapters for different types of electrical connections. Be aware of your RV’s power requirements to prevent damage to your RV’s electrical appliances and systems.
High-Pressure Water
An unexpectedly high water pressure can lead to damaged plumbing within your RV. To avoid this, always use a water pressure regulator when connecting your RV to a water source. This will ensure that the water pressure stays within a safe range.
Power Cord Doesn’t Reach the Pedestal
In certain situations, you might find that your power cord isn’t long enough to reach the campground’s power pedestal. Always carry an extension cord suitable for your RV’s power requirements to avoid such issues. Be aware that using extension cords can lead to power loss, so use them sparingly and only when necessary.
Uneven Leveling
An uneven RV can lead to unstable walking conditions inside and can even affect the functioning of some appliances. Always carry leveling blocks or consider investing in automatic leveling systems to deal with uneven terrain. Should your RV not appear level even after your initial setup, re-adjust and use your leveling system to correct this.
Water Leakage
Water leaks can cause significant damage to your RV. Always check your water system during the setup process to prevent leakage issues. Ensure all connections are tight and the seals are in good condition. If you detect a leak, turn off the water supply immediately, identify the source, and repair it. For securing the connections, consider using plumber’s tape for a more secure fit.
Slide-out Issues
Slide-out rooms in your RV can occasionally encounter problems. Whether they refuse to extend or retract, such issues can be caused by several factors, like low battery voltage, blown fuses, motor failure, etc. Understanding your slide-out mechanism and maintaining it properly can prevent such problems.
Leave a Comment Cancel reply
We highly encourage discussion on our posts and in our RV Community Forums . The most helpful comments are those that you can learn from or that help others out. Please refrain from insults, complaints, or promotional material. See our community guidelines for more information.
Save my name and email for the next time I comment.
Notify me of follow-up comments via e-mail.
- Books & Merch
- Gear We Use
- National & State Parks
- Best RV Campgrounds in New Hampshire
- Best RV Campgrounds in NC Mountains
- Best Florida Beach RV Campgrounds
- South Dakota
- The Great Lakes
- Campers Swear By This Portable Device That Keeps Dogs Safe -The Best Portable Dog Fence for Camping (2024)
- Mosquitos and bugs
- Camping Clothes
- Camping Gifts
- Camping Internet
- 5 Best RV Backup Cameras for RV & Trailer
- 7 Best Screen Tents for Camping (2024)
- Best RV Campgrounds in California
- 5 Best Key West RV Parks
- 9 Best RV Campgrounds in New Jersey
- Camping Reservations
- Campground Comparisons
- Cheap or FREE RV Camping Sites
- Best RV Campground Memberships & Clubs
- Boondocking 101
- Boondocking Adventures
- RV Internet
- What Do Flamingos and Upside Down Pineapples Mean?
- Where to Find FREE or Cheap RV Sites Camping
- RV Winter Camping
- RV Show List for 2024
- 17 Best Camper Vans 2024 (New Class B RVs Available!)
RV Breakdown Checklist: How to Tear Down Your RV Setup
An rv breakdown checklist is a must for new and experienced rvers alike. without one, you will forget to do an important task that can cost you time and money….
- 1 An RV breakdown checklist is a must for new and experienced RVers alike. Without one, you WILL forget to do an important task that can cost you time and money…
- 2 Also Need a Setup Checklist?
- 3.1.1 Exterior of Your RV
- 3.1.2 Interior of Your RV*
- 3.2 2. Water System
- 3.3.1 Exterior Items You Need to Disconnect, Shut Off, Lower, and Stow:
- 3.3.2 Interior Items You Need to Disconnect, Shut Off, Lower, and Stow:
- 3.4 4. Stabilizing & Towing
- 3.5 5. Miscellaneous
- 3.6 6. Maintenance & Safety Checks
Checklists aren't just for newbie RVers! Even the most experienced RVers will forget something at some point.
Don't believe me? Just ask any RVer and they'll have a story loaded and ready to share with you. Whether they forgot to put down their antenna, put up their steps, remove the chocks, or disconnect the stinky slinky, they'll say they should've followed a checklist.
So, if you're a new RVer or an experienced RVer that's learned the hard way, I'm here to help you avoid potential problems. I'm going to list out an RV departure checklist to help you drive away with confidence and without embarrassment.
If you buy something through our links, we may get a small commission at no extra cost to you. It helps keep our lights on so we can continue to provide helpful resources for RVers. Read our full affiliate disclosure here.
Also Need a Setup Checklist?
Like what you see in these videos? We'd appreciate it if you would Subscribe to our YouTube Channel ( easy to do right here ) and consider “ringing the bell icon” to be notified of any new video from us. 🙂 Thanks!
If you also need an RV setup checklist, watch the video or check out my other blog post 15 Tips on How to Setup Your RV . I walk you through the main tasks you need to do whenever you arrive at a campsite.
I also recommend you check out our Free RV Packing List & 3 Best RV Checklist Apps . That link will lead you to a printable checklist and resources if you prefer to make your own checklists.
RV Breakdown Checklist
Alrighty, back to breaking down your campsite! There are a lot of important steps you need to do, and some will vary depending on the type of RV you have and where you're camping. Boondockers, for instance, will have a different list than those connecting to full hook-ups.
So, I'm going to cover the most important things that most RVers need to do, organized by category. I suggest using this as a basis and then adding to it to create your own ultimate RV checklist specific to your setup.
In each list, I include helpful links to recommended products, useful tips, and more.

1. Store and Secure
The first thing you need to do is store and secure loose items both inside and out. These are big and small items, from securing dishes to BBQs.
This includes your awning! Most lists have you secure your awning first, because it's something you definitely don't want to forget! However, I suggest you put it the end of your “store and secure” category so you can benefit from its shade while you're loading up.
Here's a good starter list of items you need to include in this category on your checklist…
Exterior of Your RV
- Camping Chairs
- Foldable Tables and Table Accessories
- Portable Grill
- Portable Camping Fire Pit
- Campfire Accessories (Don't forget your s'more sticks!)
- Outdoor Yard Games
- Sports Equipment (i.e. kayak , bikes , balls, etc.)
- Pet Camping Accessories
- Outdoor Rugs and Mats
- Camping Lights & Lanterns
Interior of Your RV *
- Items on Kitchen Counter (i.e. coffee makers , ice maker , other kitchen gadgets )
- Items in Cabinets & Pantry (i.e. dishes, cans, pots)
- Items in Fridge (i.e. glass containers, cans, bottles)
- Items in Shower & Bathroom
- Close All Vents
- Shut All Windows
- Latch all cabinets
*Helpful Resource: How to Secure Small Items While RVing (9 Tips)

2. Water System
The tear-down for water tanks will depend on your system, the type of RV toilet you have, and what dumping stations you have access to. You may also need to clean tanks for storage if you're not moving to another campground.
So, here is a more comprehensive list that you can customize to your needs:
- Disconnect and drain the freshwater hose
- Store the freshwater hose
- Drain water filters and store them securely
- Disconnect and drain the utility water hose
- Empty freshwater tank unless needed at next campsite
- Prepare freshwater tank for storage* if needed
- Empty and flush blackwater tank at designated area
- Clean and prepare black water tank for storage
- Empty and flush gray water tank
- Clean and prepare the gray tank for storage
- Disconnect the sewer hose and clean it (Put this in BOLD !)
- Store the sewer hose
*Once a year, you should sanitize your fresh water tank .
Also, if you're not sure if you're going to have a water hookup at your next campsite, you may want to add refill your fresh water tank to your list. However, it's best to wait until you arrive to refill if you can because it will save you money on fuel (water is heavy!)
3. Power & Utilities
I can't tell you how many times I've seen or heard of campers driving away while still connected to the electricity port or with their antennas still up! Be very thorough with this list, because forgetting these items can be costly!
Exterior Items You Need to Disconnect, Shut Off, Lower, and Stow:
- Satellite Dish or TV Antenna
- Internet Setup (i.e. Starlilnk's dishy )
- Portable Solar Panels
- All Cables and Power Cords (Should list each one that you use on your checklist)
- Surge Protector and Adaptors
- Propane Tank
- Gas Water Heater
Interior Items You Need to Disconnect, Shut Off, Lower, and Stow:
- Electric Water Heater
- Refrigerator (follow instructions about use when in motion)
- Furnace or A/C
- Portable Heaters

4. Stabilizing & Towing
If you've ever seen the movie RV with Robin Williams, you'll know that wheel chocks are a consistent pain in RVer's necks. Removing them is just one of many necessary steps every RV owner needs to do to get road-ready. (By the way, RV is just one of the 13 Best Road Trip Movies I recommend.)
This category on your checklist clearly depends on whether you have a travel trailer or 5th wheel and tow vehicle or a motorhome. So, customize it as you need to…
- Stabilizing Jacks
- Wheel Chocks
- Leveling Blocks
- Hitch Trailer (double check it's closed and pinned)
- Breakaway Cable
- Trailer Safety Chains
- Trailer to Tow Vehicle Power Cord
- Raise Landing Gear
- Test Trailer Lights
5. Miscellaneous
You're not done yet, but you're getting close! Here are other miscellaneous items that are important to include on your customized checklist.
- Wipe Down & Remove Debris from Slide-Outs
- Close Slide-Outs (Double check they're closed tight and secure)
- Empty and dispose of trash cans in designated location
- Final Walk Through Interior (Double check for loose or “on” items)
- Final Walk All Around RV for Loose or Forgotten Items (Be sure to look at your RV roof for antenna, etc.)
- Lock Exterior Compartments & Doors
- Stow Folding Steps (Put this in BOLD! )

6. Maintenance & Safety Checks
Before you drive off, be sure you've checked off all of your safety and maintenance items. This can save you from getting stuck on the side of the road!
- Check RV, Tow Vehicle, and Trailer Lights
- Test Brakes
- Inspect Tires and Check Tire Pressure
- Check Fluid and Oil Levels
- Check Mirrors
- Release Emergency Brake
Helpful Resources:
- 5 Emergency Roadside Kit & Products for Your RV
- Why RVers Need RV Roadside Assistance Coverage (5 Reasons)
- RV Pro Tip: Preventative Maintenance Every RVer Should Do
- RV Tech Home Study Course
Hopefully, this RV teardown checklist has helped you customize a printable RV setup checklist you can take with you on every RV trip. It's a good idea to keep it in a place you have easy access to, like in your driver door.
Whether this is your first time RV camping or your thousandth, having a good checklist will save you a lot of money in the long run. So, I wish you safe camping and happy trails!
Get the Home Study Course today and worry about the road, not the repairs! Every time you move your RV it's like driving through a hurricane during an earthquake. Parts break and many items need to be maintained, this program will show you how you can save time and money by gaining the confidence to take on the majority of the issues you’ll come across. Don’t get caught with your RV in the shop! Learn how you can maintain and repair your RV at your own pace and at the most convenient time for you! This course is produced by the National RV Training Academy.
Published on 2022-09-30
Mike Wendland is a multiple Emmy-award-winning Journalist, Podcaster, YouTuber, and Blogger, who has traveled with his wife, Jennifer, all over North America in an RV, sharing adventures and reviewing RV, Camping, Outdoor, Travel and Tech Gear for the past 12 years. They are leading industry experts in RV living and have written 18 travel books.
Leave a Reply Cancel reply
Your email address will not be published. Required fields are marked *
Related Posts
 6")
Our Top 5 RV Frustrations (RVing Reality Check)

5 Space-Saving Tips for RV Closets & Drawers

RV Pro Tip: Save BIG with Reciprocal Memberships for Museums, Zoos & More
Adventure More
Content submission.
Please provide a detailed description of the type of content you would like us to consider publishing on the Adventure More Blog.
Make the Most of Your Weekend: RV Setup and Teardown Checklist

Whether you are just arriving at a campsite or about to leave one, there are a lot of steps to setting up and tearing down an RV - it can be easy to forget something.
Many seasoned RVers can set up or tear down a trailer in their sleep, while those with less experience often prefer a checklist to ensure that they are doing things properly. But we’ve found that many people, experienced and inexperienced alike, are simply looking for an RV setup checklist and an RV teardown checklist to make sure they don’t miss any important details.
No matter how much you use your RV, it’s still easy to make mistakes and let things slip, which is why a checklist for your RV can be so helpful
Beyond the fact that an RV checklist will help you properly set up and tear down your RV, there are many perks to using a checklist to set up and tear down your RV, such as safety, preparedness, and ability to pack up at a moment’s notice. Also, the more set up you do, the more easily you’ll be able to identify and detect issues, protecting your investment before problems get worse. And for newbies, it’s a great way to get acquainted with your new RV so you know when and how to make repairs.
To save you from tearing your hair out later, we’ve created an RV setup checklist and an RV teardown checklist so you can relax and make the most of your weekend getaway. (Remember to take your time.)

RV set up checklist
Before you chock your tires, there are three things you should check:
- Closeness to the water and electrical connections.
- Proximity of obstacles.
- Level of the RV side to side.
Once you ensure that the connections are close enough, you can slide out without hitting anything, and the RV is level, then you can chock the tires and move on:
- Chock your tires (we mentioned this again, because you can do serious damage if you don’t).
- Extend the stabilizing jacks to prevent bounce or sway. (These can be found on the front and the rear of the unit. Each jack should be touching the ground. If they aren’t touching, supporting blocks should be put in place.)
- Unhook RV from the tow vehicle.
- Manually level RV from front to back. (You may also engage the leveling system.)
- Connect to the electrical hookup using a surge protector and power cord.
- Connect to the water hookup using a water regulator and hose.
- Connect to the sewer hookup with a sewer hose.
- Deploy the safety step and slide out.
- Pull out the awning and outdoor furniture.
Once these steps are complete, you can set up the interior of your RV:
- Switch power source.
- Turn on the refrigerator.
- Turn on heat or air conditioning.
- Open the oven vent and light the oven pilot light.
- Unpack items that were secured for transport.
After you complete this checklist, go ahead and grab yourself a tasty beverage. You’ve earned it!

RV teardown checklist
Let’s begin with the interior and work our way out.
- A day or two before departure, close the gray tank valve .
- Turn off air conditioning (or heat), water heater, and pump.
- Empty black tank and Sani-flush several times.
- Clean and deodorize black tank using geo method (½ cup of Dawn dish soap, ½ cup of Borax, and 2 gallons of water.)
- Empty gray tank.
- Clean gray tank using geo method.
- Leave a small amount of water in the toilet (not enough to splash). The purpose is to create a seal.
- Turn off the refrigerator or switch the power source to in-transit.
- Secure fridge bars.
- Close propane tanks.
- Close roof vents.
- Lower antenna.
- Lock windows.
- Pack and secure items.
- Lock drawers and cabinets.
- Turn off oven pilot light.
- Close slide outs and awning.
- Turn off electronics and lights.
- Latch and lock door.
Phew! We know it’s a lot, but bear with us. Now we move onto the exterior:
- Disconnect, clean, and pack hoses.
- Unplug power cords and adapters.
- Raise or store the safety step.
- Retract stabilizers and store blocks if used.
- Connect to the tow vehicle.
- Remove and store chocks from tires.
- Ensure trailer lights work.
- Check tire pressure and wear.
- Do a final walkaround, making sure everything is disconnected, stored, and locked.
- Clean up the campsite and dispose of trash responsibly.
- Ensure any fires in the firepit have been completely doused.
- Pack any remaining items in the tow vehicle.
- Get in the vehicle and go.

This checklist will vary depending on your RV type and configuration. Feel free to add or eliminate items on the list as needed.
Related posts

- Skip to primary navigation
- Skip to main content
- Skip to primary sidebar
- Skip to footer
- KYD Insiders
- Tricia’s Cookbook
- KYD Magazine
Keep Your Daydream
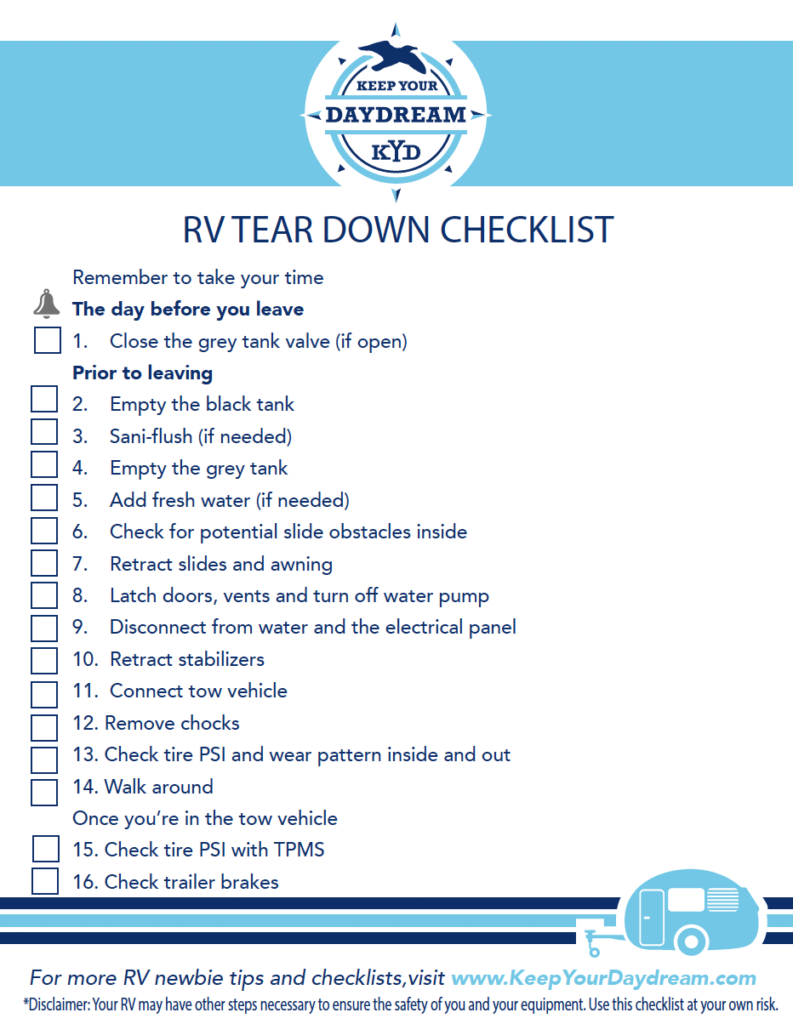
Rv newbie tear down checklist.
If you haven’t seen our RV newbie setup video and checklist, check it out now. In that video, we cover all the necessary steps to safely setup your towable RV in a new site. It wouldn’t be complete if we didn’t do the same thing for the tear down process. One would think it’s just a matter of reversing the steps, however, you might be surprised to learn that there are far more steps when tearing down than setting up.
To download the checklist, click the checklist below and it will open as a PDF for you to save. Don’t stop there! Make changes to the checklist and customize to your RV and process. Chances are good your RV has it’s own unique steps to ensure the safety of you and your equipment.
What we learn from the comments ????
In every video, there is always something missing, incorrect or something overlooked. The video has just been released and there are already trending comments. Below are the updates so far.
- Add checking our lights to your checklist. The checklist below will be updated in the next day or two.
- Lots of people mentioned bringing the antenna down. We don’t have one, which is why it wasn’t on our list, but be sure to update you list with that if you do!
Download the RV Tear Down Checklist
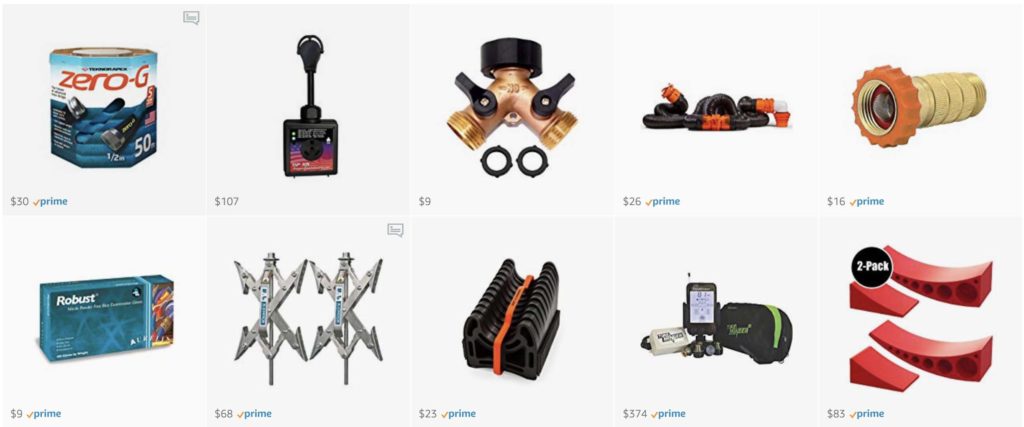
RV Newbie Essential Gear List
If you’re an RV Newbie, the amount of gear needed to get started can feel overwhelming. We’ve added all the essential gear to help you get started and a few non-essential items that will help make RV Life a little easier.
It’s best to first get everything you need for water, electrical and sewer hook-ups (those are truly the essentials) and then take a look at some of the items such as chairs and wagons that are “nice to have”.
When you shop and check-out (within 24 hrs of adding something to your cart) using KYD’s Amazon page, we do get some credit, but it doesn’t cost you anything more and everything is private. We use our Amazon earnings to reinvest in more gear that we can share on the channel.
Reader Interactions
December 7, 2018 at 1:12 am
I like you guys have done this I forget after 15 years of doing setup and tear down
December 9, 2018 at 1:19 am
Didn’t see anything about Propane (leave open or close?)
Love the idea of a smaller checklist
December 9, 2018 at 9:25 pm
Checking the trailer lights is also a wise thing to do.
December 14, 2018 at 7:05 pm
Hi guys. I enjoy watching your videos. I like your RV tear down checklist. I expect you have a propane tank. I have heard that you should shut off the propane tank during traveling. What are your thoughts and should it be added to your checklist.
You mention making sure you latch doors. This one is a big thing for us. I have lost an entire tool box of tools along side the road and another time a stabilizer jack because I forgot to latch the doors. Now the last thing I check before I take off is to not only check that they are latched, I make sure each on is locked and check the latch handle as I do the final walk around. I then report to my wife that I have completed that final check of the latches.. If I don’t she reminds me.
Thanks again. I think I learn something every time we go out. I appreciate your sharing your ideas. We can all learn from each other.
Thanks a lot… Dan
April 10, 2019 at 2:54 am
I was getting ready to take our TT out and for a refresher went back and watched this video again and noticed something about the breakaway cable. Isn’t it recommended to have the breakaway cable slack slightly less than the safety chain slack? I believe the reasoning behind this is that if the TT was to disconnect and only the chains were maintaining the connection to the vehicle that the TT brakes would engage (more so than with just the brake controller, at max???) and allow you so slow in a more controlled manner and without the TT potential running into the back of the truck.
Also lights not on checklist yet (just a nudge).
Awesome as always!
May 19, 2019 at 2:27 am
Thank you for the checklists! Lots to remember…lots to forget!
July 21, 2019 at 6:08 pm
I just watched the video and thought you did a nice job with it. Thanks.
One thing I’d like to point out. You had mentioned that you like to make sure that your fresh water tank is about 1/3 full because you don’t always have a city water hook up at the next stop. Having a liquid tank partially full can create a dynamic load while towing. If the trailer starts to sway, the liquid will slosh from side to side and accentuate the sway making it worse.
I was always told to have the tanks either empty of full. That prevents the liquid from sloshing and making a sway situation worse while towing.
October 18, 2019 at 7:03 pm
We are new to RVing. We have a 33ft 5th wheel. We were so thankful and informed by your videos. Now we’re determined to watch them all.
November 17, 2019 at 11:49 pm
Just wondering if your site will be a secured site, eventually. Love your videos and they have inspired me. I bought a small trailer, 14 feet, just for me. It has everything in it. This is my starter RV. I love it. I live in upstate NY, and have traveled to both Florida and South Carolina along with many trips more localized. I have only had it for 11 months and was sad when I had it winterized a couple of weeks ago.
I am a teacher and love that you are showing your kids the world. They are very respectful kids, and you have done a great job with them! They are learning so much more being able to touch history and geography, along with all the other life lessons. Keep your daydream, and know that we love you guys. (We, being your audience.)
I plan on downsizing eventually, and can’t wait until I’m on the road full time.
November 18, 2019 at 4:34 am
Yes, just add the s after http. I don’t know why it’s not automatically transferring it to the secure side. Thanks for the comment.
December 12, 2019 at 12:22 am
How about TV ant and booster
December 19, 2019 at 8:26 pm
That’s a good one. We don’t have one, so it slipped my mind!
June 15, 2020 at 1:36 am
Do you switch anything over with your refrigerator on the teardown or set-up? Example: Do you switch it over to gas or do you switch it to 12 volts when in teardown mode…etc?
March 29, 2021 at 8:22 pm
Never transport with any gas appliances running. The pilot light will blow out, and you run the risk of dispensing your entire lp tank contents along your route (not to mention the fire hazard). My old camper had a super small battery, so I always plugged it in to a running tow rig before switching to DC. Our new camper has a much larger battery, so I have a lot more leeway on when I switch to DC (Auto setting on mine) but I always switch before towing. And yes, always shut off the propane tanks before hitting the road!
September 4, 2020 at 1:20 pm
I was wondering about what to do with the Refrigerator during set up and tear down? When do I turn on and off the Propane? Also, in your tear down, you didn’t insert the part about the Anderson Levelers.. you need to pull forward and stow those, right? Great videos, thanks for the education.
November 2, 2022 at 12:59 am
This is mostly an ‘external’ or ‘outside’ checklist. You go over some of the teardown, stow and pack on the inside, I think it would be a cool idea to have an inside list. I know there is likely some variance but I think a list of how to ‘batten down the hatches’ would be awesome. Make sure your doors are shut, or latched. How to prep your bathroom for travel. Clear countertops. Etc… Just a thought!
Otherwise, these lists are awesome. Immediately printed, laminated, and we use on a clipboard with a dry erase marker so we can literally check them off. Plus it gives our 4-yo son a job while we setup and breakdown.
March 19, 2023 at 7:23 pm
Hey Guys! Me and my husband love watching you guys. We just bought our first Travel Trailer to start our adventures with. Your videos are so informational and you explain everything in detail.Thank you guys for all that you do.
Sincerely Lee & Alicia Whitehead
Leave a Reply Cancel reply
Your email address will not be published. Required fields are marked *
Where Are We Now?
Keepyourdaydream.

- KYD Partners
Popular Posts
- Season 4 Route & Plan
- Ep 100: How We Turned “Someday” Into Today!
- RV Newbie? Top 10 things a new RVer should know!
Looking for something?
Keep in touch, join the kyd community.
You’ll receive the once-per-month “KYD Drop” loaded with inspiration, ideas and stuff to make you smile 😀
- First Name *
- Email Address *
- Phone This field is for validation purposes and should be left unchanged.
- Find a Location
A Comprehensive RV Setup Checklist for Your Campsite

This checklist begins once you’ve checked into your campground and located your site. Here’s everything you need to think about to get your RV ready for daily living:
- Scout your site. Assess the space to determine whether you can pull through or have to back in. Determine how you want to position your RV to make it easier to level and ensure clearance on all sides (above as well) for your entry steps, slide-outs, and awnings.
- Disconnect your toad or dinghy (Only motorhomes towing a second vehicle).
- Use a spotter to pull in. Even if your RV has a backup camera , your travel companion should know how to guide an RV , be willing to help, and be easily seen by the driver.
- Position your RV within reach of hookups. The lengths of your sewer hose, electrical cord, and potable water hose determine this distance.
- Install leveling blocks as needed. Use leveling blocks under your wheels to raise your RV and level it from side-to-side (for towable RVs) or side-to-side and front-to-back (for motorhomes).
- Chock the wheels. Set these in place to ensure your RV doesn’t shift.
- Disconnect your tow vehicle ( Towable RVs only) . Remove the electrical connection, breakaway cable, safety chains, and any weight distribution hitch components before using the tongue jack to lift your trailer off your vehicle’s hitch ball.
- Pull your tow vehicle away ( Towable RVs only). Allow yourself space to easily unload items from your tow vehicle’s trunk.
- Raise or lower the tongue jack or landing legs to level the unit (Towable RVs only). Use a bubble level to check your work from front to back and side to side.
- Extend stabilizing jacks. Place jack pads or 2”x4” wooden blocks beneath and extend jacks until they make contact. DO NOT OVEREXTEND! Stabilizing jacks are meant for stabilizing your RV, not for lifting it. View our full tutorial on leveling and stabilizing your RV.
- Connect a surge protector and your electrical cord to shore power. Use the appropriate surge protector , electrical cord, and/or adapter for your RV’s electrical system . Check that the breaker on the power pedestal is turned on for your 30 or 50-amp outlet.
- Attach a potable drinking water hose, water pressure regulator, and water filter. Attach the pressure regulator to the water source. Attach the inline water filter to the regulator. Attach one end of your potable water hose to the filter and the other to your RV’s city water inlet. Skip the filter step if your RV has an onboard filtration system. You may consider using a 90° elbow to reduce strain on the hose’s connection to your city water inlet.
- Connect the sewer hose to the sewer drain outlet. Place the downstream end in the sewer drain outlet before attaching the bayonet fitting on the other end to your RV’s sewer outlet. Place a sewer hose support below your hose to create a slope from the RV to the drain outlet.
- Lower your entry steps. Adjust them to ensure safe entry and exit (if applicable). You may need wooden blocks to support your steps if they don’t come with adjustable legs.
- Turn on your refrigerator and switch it to AC power. Ensure your refrigerator is powered on and set to run on 120-volt AC power.
- Turn on your propane supply. Open the container valve(s) and set the position of your LP regulator .
- Unlock and extend slide-outs. Remove any slide-out locks or brace bars before fully extending your slide-outs .
- Turn on your water heater to fill the tank. Turn it off after 2-3 minutes until hot water is needed. Verify tank is full again before operating.
- Return all stowed items to their proper positions.
- Set up kitchen and interior.
- Set up the exterior.
Setting up the Inside of Your RV

Every floorplan is unique , meaning your exact process will differ depending on your RV’s make and model. Here’s a list of all the considerations you might account for when setting up your RV’s interior:
- Open the blinds.
- Plug in the electric kettle and/or coffee maker.
- Set out dish soap and sponge(s).
- Place shower essentials back in the shower from their stored locations.
- Raise the TV antenna. (Only applicable to RVs with a manual antenna).
- Turn on the TV and run a channel scan. Check that your signal booster is turned on if applicable.
- Place bedding/linens on any convertible sleeping areas you’ll use.
Setting up the Outside of Your RV

Some may not apply to your setup, but here’s a comprehensive list of everything you might set up for your RV’s outdoor living area:
- Secure your patio mat .
- Set up camping chairs .
- String up patio lights .
- Unfold your camp table .
- Extend RV awning(s) as desired.
- Find a spot for your portable firepit (if applicable).
- Set up your outdoor grill or griddle .
- Return stowed items in your outdoor kitchen to their proper position (if applicable).
- Turn on your exterior TV and run a channel scan (if applicable).
RV Teardown Checklist

Use this checklist to ensure you’re ready to head home or explore your next destination:
- Stow items in your outdoor kitchen.
- Stow all outdoor camp gear (chairs, patio mats, griddles, outdoor games, patio lights, etc.)
- Retract RV awnings.
- Lower TV antenna (if applicable).
- Stow all interior appliances that can shift during travel.
- Turn off all interior and exterior electronics and lights.
- Close the blinds/curtains.
- Turn off your water heater.
- Retract and secure slide-outs.
- Drain holding tanks and stow sewer hose and hose support.
- Turn off the propane supply.
- Turn off the refrigerator.
- Turn off city water and store the water hose, regulator, and filter. Take the time to blow any remaining water out of the hose and filter before stowing.
- Disconnect the surge protector, electrical cord, and any electrical adapters and stow away.
- Check to ensure all rooftop accessories are in the stowed position.
- Retract stabilizing jacks and entry step(s).
- Raise the tongue jack to prep for connecting your tow vehicle (Towable RVs only).
- Connect tow vehicle and weight distribution hitch (Towable RVs only).
- Remove wheel chocks and stow.
- Check tire pressures and condition.
- Pull forward off leveling blocks.
- Collect and store leveling blocks.
- Lock all compartment doors.
- Use a spotter to guide you out of your campsite.
- Connect your toad or dinghy (Motorhomes only).
- Conduct a final walkaround .
- Verify you have all camping partners. Don’t leave your furry companions either!
- Stop and re-check all hitch connections after moving a short distance.
Are there items on your RV setup or teardown checklist that we didn’t include? Share them in the comments below.
- Comment (17)

Always check for slide room clearance before unhooking tow vehicle.
Great addition!

Pretty good checklist, however, I would like to add one very important step to your departure list. At least it is an important step for us! “Ensure all doors and windows are closed and secured, and toilet seat is down.” We have a motorhome we like to take on extended trips. Even though we have our own checklist to use, we are constantly overlooking at least one drawer or door that has not been fully secured before we pull out. Fortunately, we generally notice/hear the oversite either as we are pulling out of our driveway or within a couple miles of our home.

Especially the shower door. A friend of ours forgot to secure the shower door and it shattered.
This is a great point! And a great addition to the list. Thanks for your insight!

One of us always goes behind the RV while the other turns on turn signals, flashers, taps brakes, turns on all lights—to make sure everything is working before we pull out on the road. If one has a towable, trailer/fifth wheel it’s wise to test the breakaway switch periodically.
Great recommendations Vicki!

One thing I’ve been told is to turn off the circuit breaker before plugging in and before unplugging the power. You don’t want to be doing this in case the A/C or furnace is on and drawing lots of power or you forgot to turn off the refrigerator.
When I turn off the propane I turn on the stove to purge the lines so no gas stays in the unit, then turn off the stove.
I apologize for the delayed reply, as I wanted to get insight from our technical service team on your comment. Here’s their reply:
It is very good advice to ensure that all 120VAC loads are off when changing power sources (none, generator, inverter, or shore power) so that they are not damaged by surges. However, circuit breakers are safety devices, not switches. Every time they are flipped it wears them out a little bit. The appliance switches/controls should be used for turning loads on and off. The furnace runs on 12VDC power, not 120VAC power and is unaffected by this issue.
Purging the LP gas from all lines when not in use will allow air into the system. The oxygen and humidity can cause brass, copper, and rubber to oxidize and fail prematurely. There will be little pressure or volume left behind in the lines when the LP containers are turned off and should not be dangerous. In addition, the chore of purging the air from the system later is inconvenient and may even result in a flame out with an open valve if the system were improperly purged.
Side note: many people turn off the battery disconnect for travel in the interest of safety, but the house battery is required for emergency braking!

This is great! So needed and we can customize it but it gives us a great start. Thank you!
Glad you found it Karen!

ALWAYS turn the electric breaker on the power pedestal OFF before plugging in or unplugging your RV’s electrical service. This prevents arching which damages both the contacts on your power cable and the pedestal outlet. Damaged contacts will cause overheating and eventually an electrical fire.
I was curious to get our technical service team’s thoughts on your comment, which is why my reply is delayed. Here’s their response:
If you’ve shut off all 120VAC loads in the RV when connecting and disconnecting, there will be little or no arcing, making this recommendation unnecessary. Most shore cord damage is actually done when users exceed the capacity of their system, of during a drop in voltage in the park at peak usage hours. A very effective practice to ensure that no damage is done to a shore cord is the use a QUALITY surge protector. The best of these eliminate arcing, prevent operating the RV on poor quality pedestal power, and will not let the user exceed the rated capacity.
Here’s our guide to choosing the proper surge protector for your RV: https://blog.campingworld.com/learn-to-rv/how-to-choose-an-rv-surge-protector/

Tucker You have done a very good job with these check list. I have been raving for 40 years and this is the best I have seen. Thanks for all the newbies who will need this.
Thanks so much Dan!

My Arctic Fox camper model 1150 has a kill switch. I have no idea when I should put the switch in the on or off position. I could sure use some help with this problem.
Sorry for the delayed response, but I wanted to get our technical service team’s thoughts. Here’s their reply:
Although most will refer to this as a Battery Disconnect Switch, Arctic Fox actually does refer to it as a Battery Kill Switch. It is usually located under the bunk step. This company has used 2 different switches, a fixed round rotary switch and a smaller black switch with a removable red plastic key. The switch must be on at all times when the camper is in use or the battery will not be in the system. When plugged in to 120VAC shore power, the converter will be on to provide 12VDC power and charge the battery. The converter does not have adequate output power to satisfy high demand loads, and the battery is there to back it up. The user can know if the switch is on or off by looking at it: the large, round, fixed red knob points an arrow towards the on or off labels. The key style is only removable in the off position, and cannot be removed while in the on position.
I hope this helps, but please let us know if you have any follow up questions!
Leave Your Comment Cancel Reply
Save my name, email, and website in this browser for the next time I comment.
Shop By RV Type

Your Adventure Awaits
Copyright © 2023 cwi, llc all rights reserved.
- RV Glossary |
- Privacy Policy |
- California Privacy Rights |
- Do Not Sell or Share My Personal Information |
- Targeted Advertising Opt Out |
- Terms of Use
Connect with Us
Let us know what you'd like to hear more of! Remember to sign up for our newsletter for our great finds and recipes!
RV Setup and Teardown Checklist Part 1
Aug 28, 2023 | Affiliate Products , Blog , RV Tips , Sandy's News & Reviews , Shop , Travel | 0 comments
For those of you who are new to RVing, I thought it would be helpful for you to have an RV Setup and Teardown Checklist, because it’s so detailed I’ve divided it into Parts 1 and 2. Steve and I know first hand just how important it is to learn proper procedures.

Ladybug all set up at our campsite at John Prince Park Campground in Lake Worth Florida
While we were in New Orleans this winter, we actually saw someone pull out of his campsite, who had forgotten to unhook his electric!!! He was so lucky that no damage was done to his gorgeous big Class A. But that is not always the case.
An RV setup and teardown is NOT something that you should only do by memory. Often our memories fail us. And even forgetting one little step can lead to disaster. There have been a couple of times, when Steve didn’t use this physical checklist, that he forgot to turn the water on. There was even once recently that he forgot to remove one of our very expensive tire covers. Fortunately he saw it as he was getting into the RV after hooking up the Blue Ox to our Jeep. So please, for your sanity and safety, use these RV Setup and Teardown Checklists.
With some practice and these helpful checklists, you’ll be camping like a pro in no time.
Benefits of an RV Setup and Teardown Checklist
A setup and teardown checklist is so helpful in keeping you organized and ready for adventure at a moment’s notice. Are you looking to get away this weekend? No worries. Packing up quickly to avoid an approaching storm is easy if you have a good checklist.
Checklists are also valuable in helping you keep your camper in great condition, so you don’t get stuck handling unexpected repairs or issues while you’re on the road. If you see anything that’s just not quite right, you should make a note of it so you can check it out the next time you’re able. If only Steve had had our brakes checked as soon as he heard them screeching and grinding, we wouldn’t have needed to be towed to the repair shop for new brakes!
Obviously the setup and teardown steps you take will depend to a certain extent, on which type of camper you have. Motorhome owners wouldn’t need to unhook their trailer, but they would need to unhook the car they’re towing.
Take a gander at the lists and pull out what applies to your particular type of RV and let the camping begin.
Step 1: Assess Your Campsite
When you arrive at your campground you should begin by looking around your campsite before you begin setting up. Be sure to locate the electrical, water, and sewer hookups before you park your RV. This will help you determine exactly where to park based on the length of your water hose, electrical cord, and sewer hose. Make sure to look for potential obstructions, including low-hanging tree limbs and anything that can interfere with your slide-outs being able to extend safely. Assess the grade or slope of your site. First priority should be your sewer connection, since it’s usually your shortest connection.
Then follow the next steps:
Step 2: Parking Your RV
After you’ve determined the ideal spot within your campsite for your camper, it’s time to park your RV. The exact procedure for parking will depend on whether you have a back-in or pull-through site, as well as whether you have a towable or motorized RV. If you are driving a motorhome and are parking in a back-in site, you will need to unhook your tow car first. If you are parking your motorhome in a pull-through site, you have the option of leaving your car hooked up or not.
Once you are parked it’s important to level your RV left to right only first. You should not try to level from front to back at this point because you might need to use stackable or rolling leveling blocks to properly level your camper. You should not underestimate the importance of this step because your refrigerator, slide outs, plumbing and additional components won’t work properly on a tilt!
Next, you should chock the tires on both sides if your camper is a towable trailer. This is a vital safety precaution that insures that your RV won’t move. NEVER UNHITCH A TOWABLE TRAILER OR 5TH WHEEL WITHOUT PROPERLY CHOCKING THE TIRES FIRST. If you’re using the type of chocks that go behind the tires, place them on the front and back tires.

Behind the tire chocks

There are 2 types of chocks and they can each be purchased by clicking the links for Behind-the-tire chocks which are self explanatory and X-shaped chocks which put pressure between the tires and let you lock down tires that are up on leveling blocks, a situation when normal behind-the-tire chocks wouldn’t work.
Step 3: Unhitching Your Trailer
Now that your rig is parked, it’s time to unhitch your trailer. If you drive a motorized rig, you can skip this step. Unhitching is the process of disconnecting your trailer from your tow vehicle. Before you begin make sure you understand the different parts of your towing gear.

Trailer jack block
To unhitch your trailer, lower your tongue jack. This is where you can either use a big block of wood or a Trailer Jack Block . Next, unhook your chains and breakaway cable. If your rig is equipped with an electric tongue jack you can leave the electrical wire hooked up for now.
Remove the sway bar and the weight distribution bars and just set them somewhere out of your way. Then flip the locking lever and raise the tongue jack off of the tow vehicle’s hitch receiver. Sometimes this may give you a little trouble. If that happens, try to carefully rock the tow vehicle or step on the bumper to give you more leverage.
Next step is to pull your tow vehicle up a few inches. Be sure not to go to far or else you will break the electrical connection.
Then adjust the tongue jack to enable properly leveling your RV from front to back. When this step is completed you can now move your tow vehicle.
Step 4: Stabilize Your RV
The exact method that you use to stabilize your RV will depend on your RV type and stabilizing gear. The main goal is to reduce rocking and bouncing inside the trailer.

Manual scissor jack adaptor

Leveler Jack Pads
Now is the time to lower your stabilizing jacks. If your trailer has manual scissor jacks, you should consider buying a special adapter that would allow you to use your power drill to turn the mechanism. Jack pads would also be beneficial to prevent the stabilizers from sinking on gravel or dirt campsites.
ONCE YOUR JACKS ARE DOWN, DON’T RAISE OR LOWER YOUR TONGUE JACK OR YOU CAN BREAK YOUR STABILIZERS OR TONGUE HITCH!
Step 5: Handle Your Hookups
Once you are parked and your rig is stablized it’s time to hook up your power, water, and sewer connections (depending on what amenities your campsite offers).

Power cord adaptor
Before connecting the electrical cord to the power box, check the amperage that is available at your campsite. You may need to use and adapter if your rig has a 50-amp connection and your site only has a 30-amp outlet. In this case you will need a plug adapter .

RV Surge Protector
It’s important to use a surge protector so plug that in! Surge protectors are expensive but will certainly save you money in the long run. Bad electrical connections can damage your entire system and appliances. Beside to plug in all cables BEFORE turning on the electrical breaker.

Potable Water Hose

In line water filter for RVs
Now you can connect your potable water hose – DO NOT USE A GARDEN HOSE!!! – to the spigot and the hose to your RV;s city water inlet. If you’re using an exterior water filter , attached to your hose.

Water pressure gauge

Y diverter for water hookup
Another important item to connect is a water pressure regulator which will prevent damage to your rig from excessive water pressure. And if you want to access water at the spigot along with the inside your rig, you will need to use a Y-shaped splitter .

Box full of assorted O rings and washers
It’s also a great idea to have some extra washers and O-rings on hand to prevent leaks. Some campground actually have a No Drip policies, so you might need to use those.

RV Sewer Hose

Sewer Hose Support
Finally, use your sewer hose or hoses to connect your tank drain or drains to the campsite’s sewage receptacle. If your site happens to be on a slope, you will need to use a sewer hose support so that your sewer hose is properly angled toward the drain.

Sewer hose elbow fitting

Donut Ring for sewer
I highly recommend that you invest in an elbow fitting and a donut ring so that you can be sure you have a proper seal on your sewer connection. A clear elbow fitting gives you the advantage of being able to keep an eye on things.
Something we have learned in our years on the road is that if you’re staying at your campsite for a few days or more, you might want to open up your gray tank water valve to allow sink and shower water to freely drain out. But it’s also important to note that you should be sure to close this valve before dumping your black tank. That way the gray water can be used to rinse out the sewer hose.
To be sure that you won’t have bad odors in your camper, NEVER leave the black tank valve open. It also helps avoid the dreaded “poop pyramid” that can build up in your black water tank!

Happy Camper black tank toilet treatment
It is very important to use a black tank treatment in any toilets!!! We use Happy Camper to assure that we keep on being happy campers .
Release the black tank valve when your black tank sensor shows you the the tank is full, or when you are leaving the campsite. After the black tank has completely emptied, release the gray water valve. You can finish by running fresh water through the sinks for extra flushing of your water lines and hoses. Then be sure to close both valves when the lines are empty.
Step 6: Finalize Your Setup
Now you are ready for the final steps to setting up your campsite:
Open your slide outs using your power controllers. Check once more for obstacles both inside and outside of your camper.
If you plan to use your awning, put that out. But it’s quite important to note two things. First you need to keep your eye on the weather, because wind and rain can damage your awning. And second, it’s wise to put the awning in when ever you are leaving the campsite unattended. Sudden storms can wreak havoc on awnings. We have seen more than one camper lose their awning in an unexpected storm.
Lastly, set up your campsite with your favorite items like, chairs, tables, outdoor rug, grill, decorative lighting, campfire supplies and so on. Make your campsite cozy and comfortable to make your camping experience as awesome as it can be!
Breaking down your campsite is essentially performing the setup tasks but in reverse. In RV Setup and Teardown Checklist Part 2 , which I will publish on Thursday, I will guide you through the process of tearing down and departure.
ARRIVAL AND SETUP CHECKLIST
Check level
If needed, level side to side
Chock your tires
Place support blocks under the stabilizing jack
Unhitch your trailer
Level your trailer front to back either manually or with an electronic leveling system
Connect surge protector and power cord
Connect water regulator and potable water hose as well as Y and garden hose (optional)
Connect sewer hose if campsite has sewer available
Put out your awning and outdoor furnishings
Extend any slide-outs
Turn on the refrigerator or switch the power source
Turn on the propane
Turn on the heat/air if needed
Light pilot for the oven
Turn on the water heater
Unpack secured items
Set up your furniture if needed
Disclaimer: This post includes affiliate links, and I will earn a commission if you purchase through these links. Please note that I’ve linked to these products purely because I recommend them from first hand use and they are from companies I trust. There is no extra cost to you when you purchase through my links.
These checklists were inspired by and article from Campendium.com.
Submit a Comment Cancel reply
Your email address will not be published. Required fields are marked *
Notify me of follow-up comments by email.
Notify me of new posts by email.
This site uses Akismet to reduce spam. Learn how your comment data is processed .
Are you a Savvi girl?

Want to receive our news?
We very occasionally send out information on specials or news we think you’ll be very interested to hear! Don’t miss out. [ctct form=”7872″ show_title=”false”]
Tasting Alabama

- Affiliate Products
- Announcements & Press
- Breakfast & Brunch
- Condiments & Sides
- Cookbook Reviews
- Product Reviews
- Restaurant Reviews
- Salad & Dressing
- Sandy's News & Reviews
- Small Bites
- Home Build your food story
- Food Stories Submit your story
- Get the Word Out The Entrees
- Keep Getting the Word Out The Side Dishes
- Food Challenges
RV Setup Checklist: How To Easily Set Up Your RV
Sharing is caring!
Looking for an easy to follow RV setup checklist? Then keep on reading.
After almost 3 years of living in an RV full-time , our family has adjusted enough to commit fewer mistakes in our travels — be it staying in campsites or going on road trips.
We’ve moved past the beginner phase and we’re excited to give more tips to you guys.
Honestly, it took a while to adjust to the RV lifestyle, and recently we began RVing part-time as we found a home in Idaho. Yet we still love to get out and do some RV camping.
The important tip for RV beginners is mastering the basics. Basics are often overlooked but they are SO essential that you should need to prioritize them.
One of the basics that every RVer should master is setting up the RV campsite.
For this, we recommend that you make an RV camping checklist to guide you and make setting up an easier task. I’m going to share with you our top tips.
Read on to learn how to get a copy of our free RV camping checklist.
THIS ARTICLE MAY CONTAIN COMPENSATED LINKS. PLEASE READ OUR DISCLAIMER FOR MORE INFO. THIS POST WAS WRITTEN BY JILL GREISING-MURSCHEL , A FAMILY TRAVEL AND RV LIVING EXPERT .
Don’t have time to read a bunch of RV travel posts and reviews? Here are some of our top picks for RV living:
Our Favorite RV Resources:
- Ultimate RV Living eBook
- Harvest Hosts : (save 15% off your first year and stay overnight at one of the many farms, breweries, and wineries across the country)
- Romely Insurance – (sign up for full timer’s RV insurance and save big)
- Rent An RV With Outdoorsy – (the Airbnb of RVs)
- CampScanner – (Snag reservations at sold-out campgrounds!)
- RV Sheets – (Camping World Queen Short sheets made just for RV mattresses)
- Best Sewer Hose – (popular sewer hose for RVs)
- Best RV Vacuum – (small but mighty vacuum)
- Berkey Water Filters – (the travel Berkey is used by so many RV owners to get clean drinking water)

RV Setup Checklist FAQ
Setting up your new camper is an exciting adventure! You’ll want to start with the basics like leveling blocks, wheel chocks, and a water hose for hooking up to campground utilities. Consider investing in a surge protector to safeguard your water and electrical connections from unexpected power surges.
Regular maintenance is key to keeping your RV in tip-top shape for all your adventures. This includes routine checks on your tires, brakes, and seals to ensure everything is in working order. Don’t overlook the importance of keeping your RV’s interior and exterior items such as the trailer lights, checking tire pressure, and safety chains.
Preparing your RV for use is all about ensuring it’s safe, comfortable, and ready for the road. Start by thoroughly inspecting your RV for any signs of wear and tear, and address any issues before hitting the highway. Creating a RV teardown checklist is definitely the most effective way to plan your RV.
Packing your RV kitchen is all about convenience and efficiency. Essentials include pots and pans, utensils, plates, and cups, as well as cooking appliances like a stovetop or microwave. Don’t forget to stock up on non-perishable pantry items like spices, oils, and canned goods, and consider investing in space-saving storage solutions to make the most of your kitchen space on the road.
RV Setup Checklist: Tips on setting up your RV
Sometimes we feel like we already have everything we need and we have the routine down. Then we realize that we’re missing something once we’re already setting up, or we missed a step in the process.
Setting up your RV is much more technical can finding a great camper name for your RV. So don’t miss these simple steps.
1. Disconnect towed cars
Campgrounds can be full when you arrive. It is much easier to enter and drive around the campground without a tow vehicle connected to the back of your motorhome (if you have one). Besides, there’s no need to tow one once at the campground.
2. Survey your camp’s surroundings

Check the tree branches and potholes in the campground to avoid damaging your vehicles. Consider the space for your awnings (if you have one and want to use it) and slideouts.
Also, remember where the electric, water, and sewer hook-ups are if you have them available to you at your campsite.
We really recommend that you arrive at your campsite during daylight so that it’s easier to do this.
3. Position the RV depending on hookup placement

When you arrived to your assigned campsite, you’ll have to determine whether you’ll drive through or back up. Some campsites are pull-throughs and others you are required to back up.
To do this, check the placement of the hookups. Your RV setup will depend on the placement of the hookups – water, sewer, and electric.
4. Emergency brakes: ON
Before you step out of the Motorhome or your truck, remember to turn on the emergency brakes. Don’t forget this step. It’s not only essential for everyone’s safety at the campsite, if you’re driving a motorhome it may not even allow you to put the jacks down if you don’t have the emergency break on.
5. Leveling

Not every campsite is flat and level. You will most likely have to make adjustments like leveling to make the RV stable.
There are different types of levels for RVs depending on if you have a travel trailer, fifth wheel, or motorhome. Be sure to at least have leveling blocks to place under your jacks or stabilizers. Then, if you have towable RV (a trailer that needs a tow vehicle) you’ll need chocks to hold the tires and RV in place.
If you want to know more about which leveling block is the best for your RV, check out our Best RV Leveling Blocks blog post !
6. Electric Hookups

When you are finished leveling your RV, now you’ll need to take out your surge protector and hook it up before ‘plugging in’ your RV. Please don’t go without a surge protector, it will save your RV’s entire electrical system in so many cases. Click here to learn which surge protector to buy for your RV .
It’s one of the most important, in my opinion, RV necessities.
Grab Your FREE RV Setup Checklist.
Click below to receive the checklist that will make RV travel days so much easier.
7. Water Hookups
Hook up to the fresh water supply with the freshwater hose that you use ONLY for potable/fresh water. If you want to connect to a water filter or a water heater, this is the time to do so. Check for leaks right after.
Check out our list of RV essentials including the basics such as the fresh water hose and leveling blocks.
8. Sewer Hookups
Now, if you have a campsite with ‘full hook-ups’ that means you can connect your sewer hose at this point. I’d recommend hooking up the sewer hose and opening up your grey tank valve (shower and sink waste water), but keep your black tank closed. Only open the black tank valve when it’s at least half way full, so that gravity can do the job.
9. Let Out your awnings (or not)

There are times when you don’t want to let out your awnings, or can’t. Bad weather with high winds or lack of space may prevent you from doing so.
In the case that you can let it out, do it after setting up and leveling. Remember to take the awnings back IN before you leave again. This is one of the most common RV safety mistakes that you have to avoid .
10. Mat, Tables, and Chairs

Once you’re done with the technicalities, you can set out the outside mat, tables, and chairs for a great camping experience!
Set up your favorite camping table and get ready to grill for dinner!
Take it slow
Be calm. Your mindset is very important in setting up your RV checklist, especially if it’s your first time.
We know that it can be stressful to have several campers watching your back during this process but it’s okay. You’re doing fine and if you ever need help, ask an experienced camper near you.
Remember that things go better with practice!
Leave a Comment Cancel reply
This site uses Akismet to reduce spam. Learn how your comment data is processed .

Stress-Free Travel Trailer Setup Checklist
This travel trailer campsite setup checklist is provided by Randi at Randi’s Adventures on YouTube.

Travel Trailer Campsite Setup Steps
1. preview your campsite before you back in.
You want to find the most level spot.
2. Make sure hoses will reach the hookup pedestals
Make sure your electric cords can reach the electric hookup pedestal, water hoses will reach the water spigot and your sewer hose will reach the dump if you are at a campsite with these hookups.
If you have slide-outs or awnings make sure there is enough room to open them. You do not want to unhitch and realize you are not close enough to the hookups or there is not enough room for your slide-out or awning. If they do not reach move the trailer so they do reach.
3. Level the trailer from side to side
Place a level inside your trailer so the ends are pointing to the sides of your trailer. You want the bubble centered in between the lines. If you are not leveled side to side, place the levelers behind the wheel or wheels on the side you need to raise and slowly back up your tow vehicle until the trailer wheel is on the level.
Then recheck the level inside your trailer and if it is now level move unto the next step. If it is still not level pull your tow vehicle forward and add another level.
4. Chock the wheels
Put wheel chocks in place to ensure your trailer does not move or roll away.
5. Place a block under the jack
6. remove weight distribution bars.
Tip: Raising your tongue jack up will take pressure off of the bars making them easier to remove. Lowering the jack will take pressure off the hitch.
7. Lower the jack to take pressure off the hitch
8. disconnect the chains, 9. disconnect the 7-way power cord, 10. disconnect the break-away cable, 11. remove the ball coupler safety pin, 12. lift the ball coupler off the ball hitch, 13. raise the tongue jack until the hitch clears the vehicle ball, 13. move the tow vehicle out of the way, once trailer is disconnected from tow vehicle steps, 14. level the trailer from front to back using your tongue jack, 15. put a block of wood or use leveling blocks under each stabilizer to support them, 16. lower the stabilizers unto the wood or levels, 17. connect to hookups, 18. turn on rv battery and propane, ✅ travel trailer setup items on amazon.
If you need to purchase any of the items necessary to set up your travel trailer on Amazon here are the items I use or recommend:
- Weight distribution bar with sway control: https://amzn.to/2U4bzfJ
- Level bubble bar: https://amzn.to/3xDLXEQ
- RV Levelers: https://amzn.to/3hzi82L
- Jack block: https://amzn.to/3k8PR4G
- Stabilization blocks: https://amzn.to/3e9cXEO
- Wheel chocks: https://amzn.to/2T9kMTA
- Drill (cordless): https://amzn.to/3wAVzz4
- Slotted rod for drill: https://amzn.to/3xDRxqM
Want to learn how to hitch your travel trailer? Click here.
DISCLAIMER: I am not a travel trailer or a travel trailer hitch expert – this is what works for me and your tow vehicle, trailer, weight distribution system, etc. may be different than mine – you are responsible to do your own research and read your owner manuals!
Terms and Conditions - Privacy Policy
Travel Trailer Setup Checklist: Setting Up an RV Campsite for Beginners

As an Amazon Associate, we earn from qualifying purchases. We also earn from other affiliate websites. See our full disclaimer .

When setting up your RV travel trailer as a beginner, it’s essential to take your time and do it correctly. You don’t want to rush through the setup procedure and wind up with an RV that isn’t set up safely or prepared for an enjoyable camping experience.
We’ll cover everything you need to know – from unhitching the trailer to RV hookups, and give some helpful tips that took us a while to learn!
Below we’ll take you through a step-by-step travel trailer setup, so you are fully prepared to take your RV to a campsite. You can also download our travel trailer setup checklist below.
Arriving at Your Campsite
The first thing you want to do before pulling into a site is to inspect it. If you can choose your spot, drive around until you find one that suits you and ask yourself these three questions.

- Is it level?
- Does it have any obstructions for backing in, putting out the awning or slide outs, or using the solar panels?
- Where are the hookups?
You can usually inspect the site from the driver’s seat on a flat, pull-through, concrete pad campsite. However, getting out and surveying the area on foot is best for anything more complicated. We still follow this process at almost every site. It doesn’t pay to be in a rush.
Let’s break down what to look for when answering the above questions.
Is the Campsite Level?
Picture where your RV camper will be in your mind. Take note of sloping and where you might need leveling blocks. Look for bumps and dips to avoid. If a campsite is too crooked, it may be best to drive on or ask the campground if you can be reassigned to a different spot.
Obstructions
Trees, large rocks, camping tables, hookup pedestals, or any other obstructions make it hard to get into a site and can damage slide-outs and awnings. Trees cast shade that can help keep an RV cool but also significantly reduce the output of solar panels and dirty the RV’s roof.
Hookup Locations
Ideally, a campsite will have water, electrical, and sewer hookups on the driver’s side of the RV centrally located where you will park. The passenger’s side is left with room to set up camping gear.
In reality, there isn’t consistency with hookup layouts between campgrounds or even campsites within some campgrounds. Sometimes the hookups can be spread out so far that extra hoses or electrical extensions are needed. We have experienced campgrounds with water and electricity on the driver’s side and the sewer right in the living space on the passenger side.
Try to line up the RV’s sewer connection with the campsite’s. Sewer hoses tend to be the shortest hookups and the most cumbersome to set up. Bends in sewer hoses accumulate particulates and make them harder to keep clean.
RV Leveling and Unhitching
Once you’ve pulled or backed into your campsite, it is time to continue the RV checklist by leveling.
A device like the Levelmate Pro can speed up the leveling process by telling you exactly how many inches one side needs to be raised in real-time, but an RV level or a level from your toolkit can do the job with some patience.
Leveling Side to Side
If you have a towable RV such as a fifth wheel or travel trailer, it is crucial to level the rig side to side across the wheelbase before unhitching.

Looking at your leveling device, determine which side needs to be lifted, and place a lifting device such as Lynx Levelers or an Anderson Leveler under the downhill wheels.
Pulling the RV onto Levelers in 3 Steps
- Ensure your vehicle has its parking brake on before getting under the tires.
- Pull forward or reverse onto the leveler slowly. (This is where a spotter comes in handy to let you know when you are on the blocks.)
- Check your level and add or remove blocks until level.
Chock Wheels
Before unhitching, it is imperative to place wheel chocks under the RV wheels. The potential of an accident from a moving RV is not worth skipping this step that only takes a few seconds.

The heavy-duty rubber chocks are more sturdy and grip well. Two sets are recommended on extreme slopes or wet/soft ground conditions.
Unhitch RV and Level Front to Back
Now that your RV is level side to side, it is OK to unhitch the RV from the tow vehicle. Follow these five steps to unhitch and finish leveling your travel trailer.

- Extend the tongue jack until pressure begins to be taken off the hitch ball. (Use a tongue jack stand or support block to protect the pad of your jack and reduce the amount of extension required.)
- Unplug the 7-pin electrical connector.
- Remove all equipped weight distribution or sway stopping devices, emergency breakaway brakes, and safety chains.
- Release the hitch ball lever and extend the tongue jack until the tow vehicle can be safely pulled forward.
- Using your leveler again, extend or retract the tongue jack until the RV is level front to back.
Put Down Stabilizers
When level, the stabilizer jacks (sometimes called scissor jacks) are extended to reduce the rocking that occurs in RVs from walking, wind, and other shaking. Stabilizers minimize strain on the frame of an RV when a slide out is moved in or out. Always put the stabilizers down before putting the slide out.

It is important to note that these are not the same as the automatic leveling systems in some motorhomes. If the stabilizer jacks are lifting the RV, you risk damaging the jacks and the RV. Stabilizing jacks support the RV by being pressed firmly to the ground, and no more.
Many RVs come with electric stabilizers that can be raised or extended with a switch. Manual jacks use a turn handle, but this drill adapter makes it less strenuous and speeds up the process. Jack pads are recommended to keep jacks from sinking and reduce exposure to dirt and moisture.
Connect Power
The electrical power cord is usually the first on the list to get attached. Often the slide needs to go out, or the air conditioning needs to come on. Plugging into electrical keeps those bigger loads from hitting the batteries.

Your RV will require 30 or 50 amp service, but the campground may not have a site with your particular circuit. The good news is that an adapter easily connects a 30 amp plug to a 50 amp outlet or a 50 amp to a 30 amp , allowing you to stay in any available electrical spots.
Using a Surge Protector
You also will want to protect your RV from electrical disturbances with an RV surge protector. There are several types of surge protectors. A basic model surge protector plugs into the power pedestal and is the most affordable. Other versions of surge protectors are installed permanently in the RV , so you don’t need to set up anything at camp.
The pedestal’s breaker should be off until the RV is plugged in securely. Once the breaker is on, the surge protector will take a few seconds to examine the incoming power for problems like bad wiring before allowing electricity to flow. If there is a problem, the surge protector will display an error code and block the electricity.
Connect Water
If your site has a water spicket, a hose can plug directly into the RVs city water inlet or fill up the water tank. Use a hose rated for drinking water . Green water hoses have dangerous chemicals like lead, so skip those.
High water pressure can burst an RVs plumbing. Protect your RV with a water pressure regulator . A basic one does the job but can leave you with poor water flow. An adjustable water regulator set around 45 PSI protects most RVs and keeps the shower flowing nicely.
PRO TIP: Adding a Y-adapter at the spicket is a good tip for several reasons. One, it gives you a place to quickly wash your hands or hook up a black tank flush hose. Second, the lever is much more convenient to turn off and on when filling the water tank.
Water filtration.
Water filtration is a big topic and can be approached in many different ways. At a minimum, protect yourself with an inline one-micron water filter to reduce harmful contaminants, reduce odor and improve the taste. Add a pre-filter for two-stage filtration to reduce sediment, rust, and other particulates.
Advanced Water Filtering
It is debated if water passed through only inline filters is suitable for drinking. There are more advanced and expensive water purification systems if you plan to regularly drink from the RV water tap.

- If you have the countertop space, many people swear by the Berkey system .
- Advanced water filtration systems that can be installed in storage areas are available from companies like Clearsource .
- Acuva systems use UV light to kill bacteria and viruses and are more compact and mount under the sink.
Connect Sewer Hose
Connecting the sewer at arrival can be a convenient way to dump as needed. If your sewer connection significantly intrudes on another camping spot, try to be courteous and wait until you’re not disturbing your neighbor. A pair of waterproof gloves is recommended to use while setting up your sewer connection.

Setting Up the Sewer Hose Support
Use a sewer hose support to slope away from the RV to keep things moving and prevent build-up in the sewer hose. Lay out the support evenly, avoiding low spots and turns in the hose to make things clean when it comes time to disconnect.
Connecting the Hose
Attach the hose to the RV first, then lay the hose across the support. Remove the cap from the ground drain, quickly screw a clear elbow adapter into the threads that held the cap, and connect your hose to the adapter.
You’re ready to dump your tanks!
READ NEXT: For a complete list of travel trailer equipment to outfit your RV for travel, check out this list of travel trailer must-haves .
Finish setting up your camper trailer.
There may be items specific to your RV to complete your setup. You may have a slide that needs to come out, a satellite TV to set up, or an internet antenna.
Make your RV campsite setup feel like home with tables, chairs, lights, etc.
If you use your RV’s stove, you’ll also need to open the exhaust vent cover outside the RV.
We hope this guide and checklist will help you feel confident setting up your site. Now, sit back, relax, and enjoy your campsite, knowing it is ready to go!
Want more beginner tips on RVing and how to get started?
Check out our guide to preparing for full-time RV living, including info on choosing an RV, pros and cons of the lifestyle, RV gear lists, downsizing for RV life, and more.
Like this post? Save it on Pinterest for later.

Morgan, the founder of The Home That Roams, has been living nomadically for over five years. She began her journey traveling across the U.S. in a motorhome and cruising on a liveaboard sailing catamaran. Currently, she lives full-time in a travel trailer, sharing resources on RV living and boat life to help others downsize their lives and thrive in an alternative lifestyle.
Leave a Reply Cancel reply
Your email address will not be published. Required fields are marked *
Sign Me Up!
Learn how to live in an rv.
Get weekly tips on how to start traveling full-time in an RV.
View our privacy policy .
Privacy Overview
404 Not found
RV Departure Checklist: Tear Down Before Hitting The Road
by Glynn Willard | May 17, 2023 | Boondocking , Fulltime RV Living , RV Fulltime Prep | 0 comments

Last Updated on 03/02/2024 by Glynn Willard
There’s more to your RV moving day than just a checklist before hitting the road. Especially if it’s your first time RV camping!
There are also considerations during your drive that can make for a fun day or a difficult day.
Let’s first go over an RV checklist for moving and then some tips for a fun road trip.
Watch our video 8 RV CROSS COUNTRY ROAD TRIP TIPS for more tips.
RV Moving Day Checklist
This RV checklist is based on our full time RV life experience moving a travel trailer around the country approximately every 7-10 days for two years.
If you have a motorhome or a van, most items on the RV checklist will still be applicable.
Preparing to move your RV is best broken into teamwork. One person inside and the other outside.
Here’s our tear-down process checklist when boondocking since we boondocked most of the time.
- Begin the day before by plotting your course for your RV trip.
- Prepare any food that you want with you while you’re driving.
- First thing, secure your belongings inside the rig. Anything that could fall should be secured, even the shower door.
- Sweep, shake out rugs and dust surfaces as you secure items. It takes less than 5 minutes and means arriving to a clean rig.
- Secure the contents of your refrigerator and shelves.
- Place any loose items on the counter (utensil caddy, towels, cups, plants, etc.) into the kitchen sink and make sure all the cabinet doors are latched shut.
- Once everything inside is secure, pull your slides in if you have any.
- Check tire pressure and lug nut torque in both the trailer and the tow vehicle or motorhome. Correct it if necessary.
- Walk around your rig and check fasteners, basement doors, the propane tank and plumbing valves. Make sure the gray tanks, black tank and fresh water tank are all securely closed.
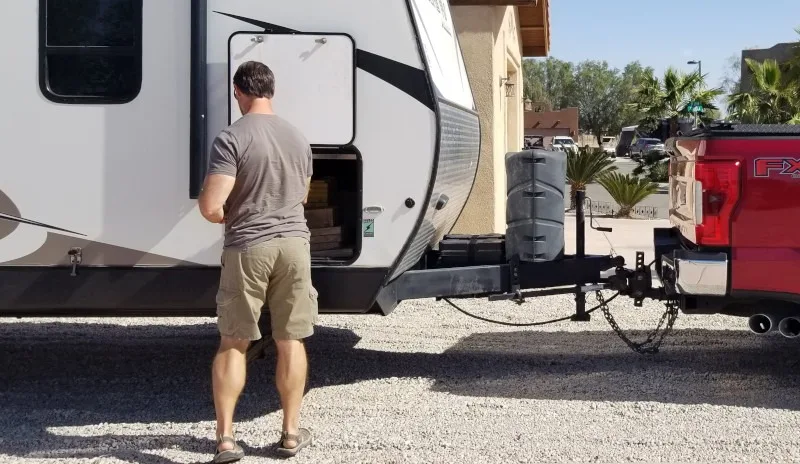
- While you’re checking the exterior, if you’re in an RV park, disconnect the sewer hose, water lines, water pressure regulator, surge protector and power cords. Again, make sure the sewer valve is closed before unhooking the sewer connection. Store cables and hoses securely.
- If they were on, turn the water pump and water heater off. It’s easy for something to bump a faucet and start pouring water during the drive. Let’s avoid that potential debacle.
- If you haven’t already, chock your wheels. Although wheel chocks should already be in place from setting up.
- If you use a weight distribution system on your bumper tow, check all bolts to make sure they’re torqued. This can be done anytime.
- Pull up each stabilizer jack.
- Lower the tongue jack to position the trailer or fifth wheel’s hitch above the tow vehicle’s hitch.
- Pull the tow vehicle into position and set the emergency brakes.
- Connect your tow vehicle and secure the hitch. Also, the weight distribution system if applicable.
- Make sure the safety chains, breakaway cable and electrical connection are all securely fastened to the tow vehicle.
- Raise your tongue jack and make sure it’s secure.
- Set your tow vehicle in tow mode.
- Remove your chocks and levelers. We always use Anderson Levelers because they’re simple and they work great!
- Place your leveling blocks , tongue jack blocks and levelers in storage.
- It’s a good idea to do one final walk around of the trailer/tow vehicle or motorhome and double check everything.
- You’re not done. One last thing: police the surrounding area for any trash and clean up after yourself. Leave only tire tracks and footprints.
- As you pull out of your spot, test the brakes on the trailer before hitting the open road.
- Even if you have a tire pressure monitoring system, check your hub temperature (by touch) and tire aesthetics every stop.

RV Moving Tips
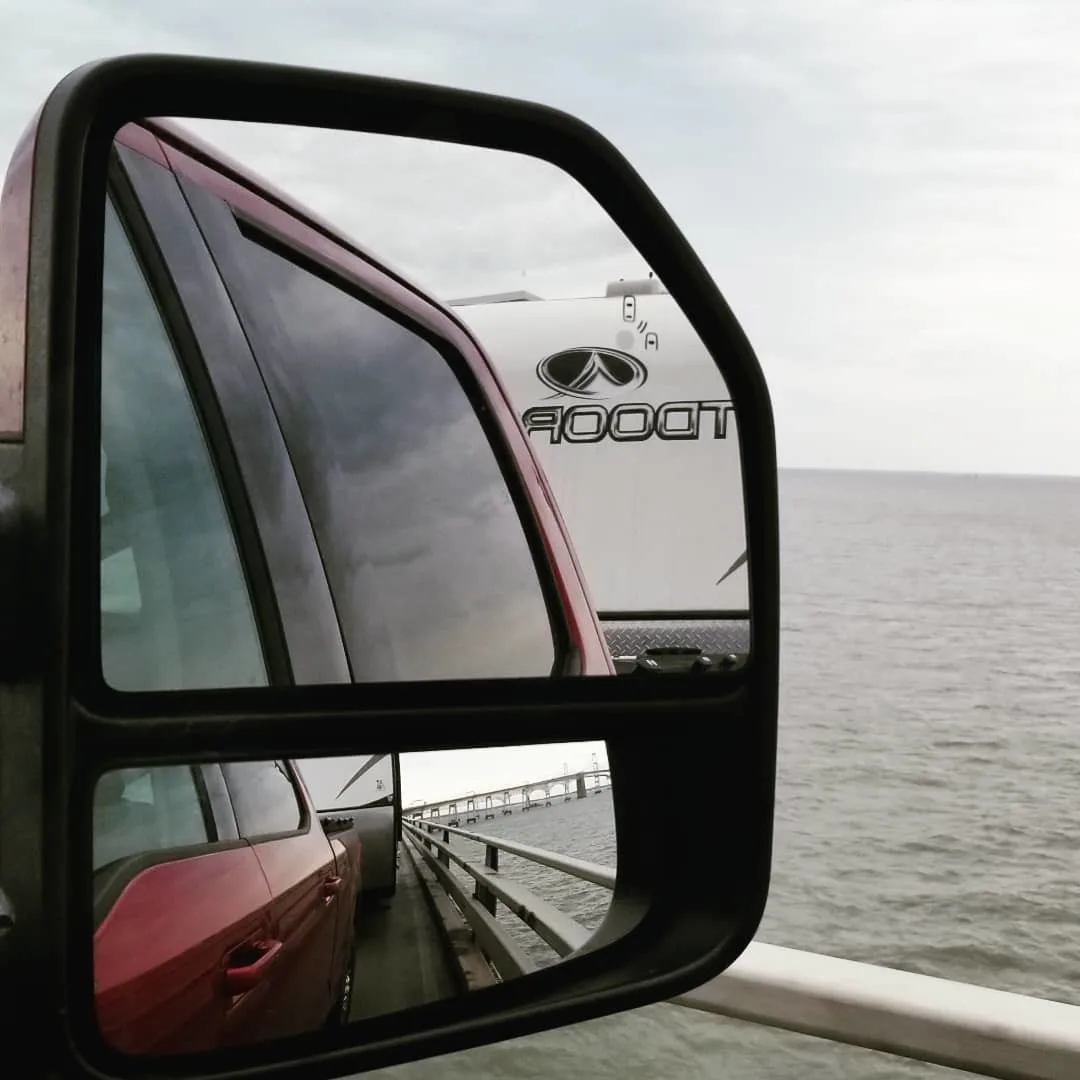
Travel Less Than 300 Miles
When we first began, it was all about devouring miles and doing big moves.
Yeah, it was draining!
We learned quickly to shorten the distance and take our time. Besides, what’s the rush!
Try To Arrive To Your Destination By 3PM
This is easy if you’re not pushing too many miles. Why arrive early?
It gives you time to set up before dinner and time to make dinner.
If your plan A or plan B for a boondocking location doesn’t pan out, you still have time to move onto plan C.
Also, arriving earlier opens up more options for boondocking spots.
Check The Weather Along The Route
We do this the day before and will abstain from moving if the weather is uncooperative.
What’s uncooperative? Strong storms, high wind or heavy rain. All of which are too dangerous to risk moving when you don’t have to.
This may not be possible if you’re in a campground rather than boondocking. Another great benefit of boondocking!
We like to use the Windy App along our route and adjust our route based on wind gusts.
Use Multiple GPS Systems
There are times when the truck’s GPS disagrees with our phone’s GPS on our camper moving day.
By having two systems routing us simultaneously, we can evaluate the options in real time as we make our way.
The satellite feature on Google maps is also helpful to check surrounding infrastructure.
Better yet, the topographic feature on Google Maps allows us to check the elevation gain around potential boondocking sites.
If it’s too steep and we’re not making it into our potential boondocking site.
Check Your Departure Time Against Arrival Time On Beltways/Busy Highways
If you know you’re going to hit a beltway, avoid arriving there during any phase of rush hour.
It only took us a few mistakes to learn our lesson.
Allow More Time For Travel Than You Think You Need
We generally averaged 45-50 MPH on any moving day.
This is because we stopped briefly every hour to stretch, use the rest room, dump our tanks, fill water and patron a grocery store.
Knowing and accepting this in advance is a great way to diminish any anxiety.
Begin Looking For Fuel At Half Tank
There are a lot of times when we would go a really long way between fuel stations that we could fit in. Filling at half tank offers a buffer.
It offers peace of mind and prevents any unnecessary anxiety.
It also allows you an opportunity to be thrifty if you’re using an app like Gas Buddy .
“Hey, 30 miles ahead, it’s fifty cents cheaper and the satellite shows we can fit.” That always sounds nice when we hit half tank!
To Save Money, Use Fuel Stations Further From The Interstate
Technology makes this easy. Some of the fuel stations require a little more skill with a large vehicle, but it can really be worth the effort.
Most fuel stations next to the interstate charge more than those one or two miles off the interstate.
A lot of the time, the smaller fuel station’s prices are better than big-name fuel discount memberships.
No doubt, you already possess this knowledge.
Plan On Stopping Along The Way to Enjoy A Meal Using Your Kitchen
Plan Your Grocery Trips Along Your Route On Moving Day
We like to hit a Walmart along the route and top off our groceries.
This is also when we usually eat lunch. It allows us to throw our trash away and use Walmart’s bathrooms.
Refreshed, recharged and ready to roll!
Dump Your Tanks And Fill Fresh Water At A Dump Station Along Your Route
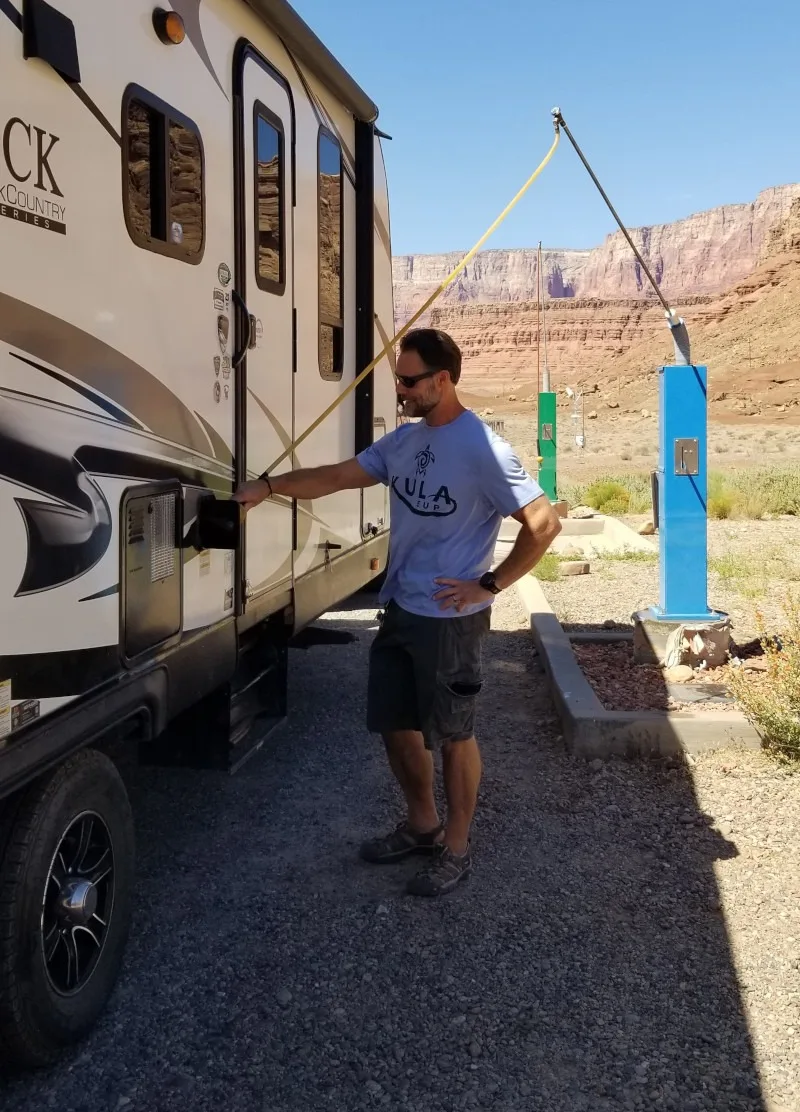
We hit the first one on our list. That way, if it’s not suitable, we have more options along the route.
Make Sure Your Kids Are Entertained
I’m not going to lie, RV moving day is Minecraft day for the boys.
The hotspot travels in the truck with us, so then can play online.
Sure, conversation, reading a book or looking out the window is nice, but admit it, we would have loved to have the tablet option when we were kids!
Empty Your Bladder Shortly Before Arriving To Your Camp Site
About a half hour before arriving to our plan A destination, we always pulled over to pee.
It makes looking for the perfect boondocking spot upon arrival A LOT more enjoyable.
If you’re staying in an RV park, it makes maneuvering your rig into the spot easier.
Have A Snack Shortly Before Arriving
Wrapping Up Moving While Fulltime RV Living
Some of these tips are obvious. But it takes some “seasoning” and experience to work all of these camper moving day tips into your plan.
It’s important to follow the necessary steps in this RV departure checklist to keep you and everyone else on the road safe.
It can really make the difference between a fun road trip and a miserable ride.

Submit a Comment Cancel reply
Your email address will not be published. Required fields are marked *
Save my name, email, and website in this browser for the next time I comment.
Recent Posts
- Choosing The Best Fridge For Campervan Life | Considerations
- Outdoors RV Manufacturing Owners Review | Full-Time ORV
- 5 Benefits To Roadschooling Kids | RV Living & Homeschooling
- Best Mattress Solutions For Campervan RV (2024)
- Roadtrek Zion | Our Personal RV Camper Van Review | Best RV?
IMAGES
VIDEO
COMMENTS
Step 1: Survey Your Campsite. When you arrive at the campground, start by surveying your campsite before you begin setting up camp. These should be your first steps: Locate the electrical, water, and sewer hookups before you park your RV. This will help you decide exactly where to park based on the length of your water hose, electrical cord ...
Our comprehensive RV setup checklist will guide you step-by-step, ensuring a seamless arrival and setup at your campground.. Tip: Download our Printable RV Arrival & Departure checklists and check off each of these steps as you complete them for a stress-free setup and teardown - no WIFI needed!. Arrival at Your Chosen Campground. Upon reaching your destination, follow these steps:
Empty and dispose of trash cans in designated location. Final Walk Through Interior (Double check for loose or "on" items) Final Walk All Around RV for Loose or Forgotten Items (Be sure to look at your RV roof for antenna, etc.) Lock Exterior Compartments & Doors. Stow Folding Steps (Put this in BOLD!) 6.
Here is the step-by-step RV Setup Checklist to setup your RV travel trailer in a new site safely. With over 100,000 miles of RV experience, this is the order we've learned works best for us. ... I figured out to search using "tear down". Thanks! Reply. Marc says. September 30, 2019 at 2:21 pm. I'm pretty sure you can download it on the ...
Pull out the awning and outdoor furniture. Once these steps are complete, you can set up the interior of your RV: Switch power source. Turn on the refrigerator. Turn on heat or air conditioning. Open the oven vent and light the oven pilot light. Unpack items that were secured for transport.
Boat Steering Systems. With so many things to remember upon arrival or departure from your campsite, it can be easy to miss crucial steps during setup or tear down. That's why we created this printable RV setup checklist.
RV Newbie Tear Down Checklist. If you haven't seen our RV newbie setup video and checklist, check it out now. In that video, we cover all the necessary steps to safely setup your towable RV in a new site. It wouldn't be complete if we didn't do the same thing for the tear down process. One would think it's just a matter of reversing the ...
Install leveling blocks as needed. Use leveling blocks under your wheels to raise your RV and level it from side-to-side (for towable RVs) or side-to-side and front-to-back (for motorhomes). Chock the wheels. Set these in place to ensure your RV doesn't shift. Disconnect your tow vehicle (Towable RVs only).
A comprehensive set up and tear-down list makes for better organization and improved safety. While the steps will vary whether you own or are renting a motorhome/camper versus a trailer, many guidelines are the same. Of course, hitching and unhitching a trailer comes with certain safety rules to follow. Set Up
Setting up your RV or travel trailer is the easy part! When it's time to break camp and hit the road again, it's easy to forget critical steps. Something as ...
Here are just a few of the items on our checklist: Plug Surge Protector into pedestal watch for E-0 code. Wait for RV level. Turn pedestal breaker on. Plug in the power cord. Verify jacks are down. Observe opening slides. Check slide seals are not tucked in slide. Disconnecting the Sewer Hose during Break Down.
This easy-to-follow RV newbie teardown checklist shows you how to hitch up your travel trailer at your campsite ️ Get YOUR FREE checklist here: https://rand...
Step 4: Stabilize Your RV. The exact method that you use to stabilize your RV will depend on your RV type and stabilizing gear. The main goal is to reduce rocking and bouncing inside the trailer. Manual scissor jack adaptor. Leveler Jack Pads. Now is the time to lower your stabilizing jacks.
To do this, check the placement of the hookups. Your RV setup will depend on the placement of the hookups - water, sewer, and electric. 4. Emergency brakes: ON. Before you step out of the Motorhome or your truck, remember to turn on the emergency brakes. Don't forget this step.
Chock the wheels. Put wheel chocks in place to ensure your trailer does not move or roll away. 5. Place a block under the jack. 6. Remove weight distribution bars. Tip: Raising your tongue jack up will take pressure off of the bars making them easier to remove. Lowering the jack will take pressure off the hitch. 7.
Follow these five steps to unhitch and finish leveling your travel trailer. Extend the tongue jack until pressure begins to be taken off the hitch ball. (Use a tongue jack stand or support block to protect the pad of your jack and reduce the amount of extension required.) Unplug the 7-pin electrical connector.
With so many things to remember upon dates or departure from your campsite, it can be easy up miss mission steps during setup or tear down. That's how we created this ready RV setup checklist. The RV Setup & Tear Down Checklist You'll Want to Keep Handy - Ultimate RV Packing List for a First Time Camper
Join the most supportive RV Community by becoming a KYD Insider and get monthly livestreams, meet-ups, discounts, and a KYD welcome package! https://patreon....
Set up furniture Unpack any secured items See next page for departure from your campsite checklist! PLEASE NOTE: These recommendations may not be fully comprehensive for your RV. Always consult the manufacturer's owner's manual before operating any equipment on your RV to ensure safety. RV SETUP & TEAR DOWN CHECKLIST
RV Moving Day Checklist This RV checklist is based on our full time RV life experience moving a travel trailer around the country approximately every 7-10 days for two years. If you have a motorhome or a van, most items on the RV checklist will still be applicable. Preparing to move your RV is best broken into teamwork.
RV setup and tear down Checklists. June 1, 2018. I'm a list kinda gal. I like a list that I can check off and make darn sure I didn't forget anything. Set-Up Checklist. Tear-Down Checklist. Just click on the link and print out the pdf.
Never stress about travel trailer tear down at your campsite again! WATCH NOW to download your FREE travel trailer setup checklist! It's an RV newbie LIFESAV...
This video goes through an RV Tear Down Checklist. It is a guide to help make sure that you have your travel trailer ready for the trip home.