
How to Plan a Backpacking Trip in 12 Simple Steps
Learn how to plan a backpacking trip! From how to pick a trail to what gear to pack, this guide covers all the important planning steps.

Whether you are a beginner backpacker or have been tramping around the woods for years, there are a number of questions to ask when you are planning an overnight backpacking trip. Where should I go? Do I need a permit? What should I eat? What do I need to pack? I’ve been there. When I first started hiking and spending time outdoors, I had no idea how to plan a backpacking trip. Now, years later, planning a backpacking trip is one of my favorite parts of the whole process. If you’re new to it though, it can feel a little overwhelming, but we’ve got you covered.
In this blog post, we break down how to plan a backpacking trip into 12 simple steps so you can feel more organized and confident (and less overwhelmed) as you get ready for your adventure. By following this step-by-step backpacking guide, you will be able to easily plan your backpacking trip from start to finish, knowing that you aren’t forgetting any important details.
Ready to plan your next adventure? Here’s our guide to planning a backpacking trip so you can get out and enjoy the great outdoors with confidence
1) Pick dates for your backpacking trip
Figuring out when you want to go on your overnight adventure is the first step in how to plan a backpacking trip. Your dates will dictate where you can go due to the weather (unless you want to snow camp). If you want to go in January, then you’ll be limited to warmer places like Southern California, Arizona, and Florida for example. If it’s summer, then you’ll want to hit the mountains where the temperatures are cooler.
If you are a newbie, 1-2 nights is a good length of time for you to get a trip under your belt. You’ll be able to answer a lot of questions after that first hike. What gear worked, what gear didn’t. What you really need to bring vs what you can leave at home to shave off some weight. Whether you brought the right amount of food. What pace you like to hike at, etc. If you are more seasoned and have the time off, then consider going for a longer trip. The longer you’re out there, the more time you have to decompress and reap all the benefits of being in the wilderness.
2) Pick a trail for your backpacking trip
When you plan a backpacking trip, picking a trail can be a little challenging with so many awesome trails and destinations to choose from. Ask yourself:
- How far do you want to hike? If you are new to backpacking, 5-7 miles a day is a good target. Remember, if you aren’t used to carrying a lot of weight, then backpacking will be more challenging than a regular day hike. The average confident backpacker can usually cover somewhere in the range of 8-12 miles or more depending on how much elevation gain there is.
- How difficult of a trail do you want?
- What major features are you looking for? Big mountain landscapes? A lake? Hiking along a river? Waterfalls?
- Is solitude a must? If you’re looking to get out into the Wilderness, be sure to read through our Backpacking 101 Guide for Planning a Wilderness Trip .
Get an idea in your head of what kind of experience you want to have. Then start checking out trail descriptions and plan a backpacking trip that aligns with your requirements.
Not sure where to start? Here are a few good beginner backpacking trips:
- West Rim Trail in Zion National Park
- Havasu Falls in Arizona
- Red Pine Lake in Salt Lake City
- Cutler Coast Trail in Maine
- San Jacinto Peak in California
- Trans Catalina Trail

3) Check permit requirements & get a permit if you need one
So you found a trail that looks awesome for the time of year you want to hike. Before you get too excited and start making plans, check to see if a permit is required. Many trails, especially popular trails in National Parks, require wilderness permits that need to be reserved months in advance. Many of the more popular backpacking trails (like in the Grand Canyon or Yosemite) are allocated by lottery up to 4 or 5 months in advance. If you google the trail, you can usually find permit requirements on the federal or state agency’s website.
Depending on where you are backpacking, your permit may have additional requirements. For instance, if you are traveling in bear country such as the Eastern Sierras, Montana, or Wyoming, it’s likely that you’ll be required to carry your food and scented items in a bear-proof container or bag .
4) Invite your friends (or commit to going solo)
If you want company, try to round-up a few friends who want to join you. Give them a call or put a note out on Facebook. If that doesn’t work and you are unable to find anyone you know to go with, you have a couple of options.
Check to see if there are any Facebook groups in your area for hikers or outdoor enthusiasts. In Utah, there is a Utah Outdoor Women’s Alliance group and there are always folks looking to link up for a hike. MeetUp can also be a great website as well for finding like-minded friends who love outdoor adventures and trips. Are you part of a yoga studio or climbing gym? Those are also great places to meet active people and maybe you can make a new friend who might be interested in your trip.
If you can’t find anyone, don’t let that discourage you. Backpacking alone is an empowering experience and is worth trying at least once. Check out my tips for hiking alone here .

5) Make your transportation plan
The next step in how to plan a backpacking trip is to make plans for getting to and from the trailhead. If your trail is a loop, you can typically leave your car at the trailhead parking area (check to see if there is an overnight fee or parking permit required). If you’re doing a one-way hike, you have a few options. If you’re hiking with friends, you can set up your own shuttle by leaving a car at the end and driving a second car to the start. If two cars aren’t an option, you can ask a friend or family member to drop you off or reserve transportation with a taxi service or shuttle company. Many hotels and outfitters in popular hiking destinations will offer shuttle services, so do a quick google search to see what’s available if you go this route.
6) Get the necessary gear for your first backpacking trip
Maybe you already have your backpacking gear dialed. If so, great! If not, a good place to start is with my 3-day backpacking checklist . In addition to that detailed post, we’ve also got several more outdoor gear guides here on Bearfoot Theory including:
- What to Wear Hiking
- The Best Backpacking Packs
- The Best Tents for Ba ckpacking
- The Best Sle eping Pads for Backpacking
- The Be st Sleeping Bags for Backpacking
- The Best Water Filters for Backpacking
- The Best Lightweight Bear Canisters
- The Best Backpacking Stoves
- The Best Cheap Backpacking Gear
Ok, so what if this gear is way too expensive? Don’t let that deter you from planning a backpacking trip. Ask your friends if anyone has gear you can borrow. But be sure to check that a borrowed backpacking pack fits comfortably before you set out and that the gear you’re bringing along isn’t super heavy or else you may not enjoy your trip.
REI offers gear rentals, and if you’re an REI member you get a discounted rate. If there’s not an REI in your area, check your local university recreation center and local outdoor stores to see if they rent backpacking gear. If you want to buy your own gear, but are looking for discounted prices, check out our post on the Best Places To Buy Discounted Outdoor Gear . Buying gently used outdoor gear is another great way to save money, and it’s better for the planet too!

7) Test your gear
Not testing your gear is a common beginner backpacking mistake that’s easy to avoid. Make sure you know how to use all of your gear before you set out.
Set up your tent in your living room and take your backpack and hiking boots for a spin up your local hill before setting out on an overnight trip. If something doesn’t feel right, it’s probably not and you want to catch it before heading out into the wilderness.
If your pack is the right size but it is still giving you trouble (it’s weighing down on your shoulders or seriously hurting your back), you probably need to make some simple adjustments to the straps. Or perhaps you need to make some adjustments to the way you pack it. Check out this guide on how to pack a backpacking pack for more on this topic.
As far as your hiking boots , unless you choose a heavy-duty leather pair that are suited for mountaineering, most standard trail hiking boots should be fairly comfortable right out of the box, but you still want to take them on a few hikes before your backpacking trip to make sure. If you take them for a short hike and come home with blisters, they might not be a good fit. The point of testing your gear all out beforehand is to get everything dialed so faulty gear doesn’t ruin the epic backpacking trip you’ve been planning.
Testing your gear beforehand also offers the opportunity to train before the big hike .

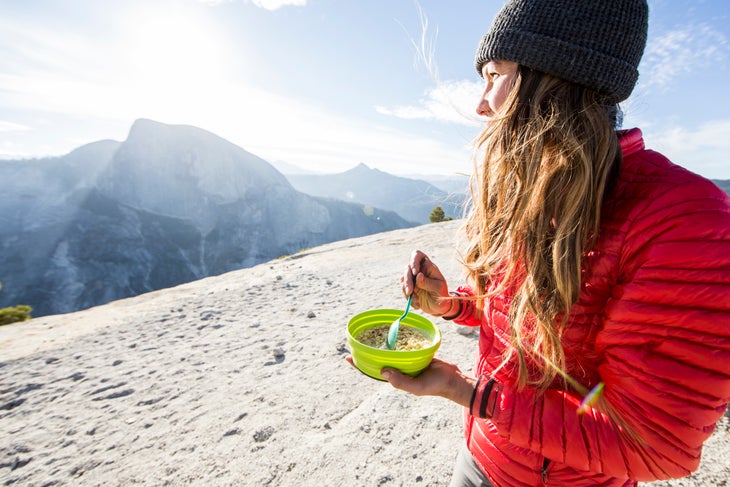
8) Shop for Food
Planning food is a big part of planning a successful backpacking trip. You want to eat well, but you also want it to be easy and lightweight. I’ve written a detailed post on some of my favorite lightweight backpacking food options and I also especially love Good To-Go’s backpacking meals . Their Mexican Quinoa Bowl is one of the best dehydrated backpacking meals I’ve ever tried! It’s filling, yet vegan and gluten-free, and it has half the sodium of most backpacker food brands.
Also, be sure to check the requirements for food storage for the trail. If you are in bear country, you’ll need to pack your food in a bear-proof canister.

9) Brush up on Leave No Trace Principles
Leave No Trace is a set of guiding principles to help you reduce your impact when you are spending time outdoors. It covers everything from pooping outdoors to how to safely enjoy campfires and even where to set up your tent . If you are not familiar with Leave No Trace, make sure you brush up on how to be a good camper before you hit the trail so we can all do our part to keep the places we recreate in as pristine as possible.

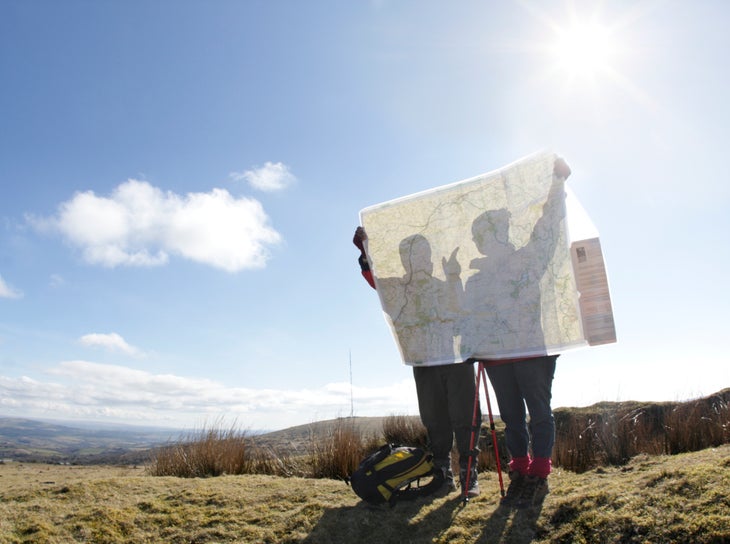
10) Get a Map & Check Water Availability
Don’t want to get lost? ALWAYS bring a paper map with you and check out these navigation tips while you’re at it . Even if you think the trail is going to be straightforward and well-marked, a paper map should be non-negotiable. While you can download hiking and navigation apps you always want a backup in case your phone dies. I am a huge fan of the National Geographic Maps which exist for most National Parks and other popular hiking areas. If you can’t find a map to purchase online or at your local REI, stop by the nearest rangers station on the way to the trail and see if they have a map.
11) Tell a friend or your family your plans
It’s important for safety to share your plans with a friend or family member. Ensure they know the date and general time you plan to check in with them at the end of your trip and make sure they know the details of the trail you will be hiking.
I also like to carry some sort of backcountry communication device if I’m hiking solo or going somewhere really remote. The SPOT Gen4 and the Garmin InReach Mini are the top satellite communication devices for sending texts to family back home and calling emergency responders if you get into trouble.
12) Check the weather
It’s important to always check the weather starting at least a few days before your start state. Bearfoot Theory community member Kim once drove 10 hours to hike the Lost Coast only to learn there was a large storm front rolling in that closed the trail. Checking the weather ahead of time will help you adjust your plans as needed and prepare by packing the correct clothing and gear like a rain jacket and even rain pants. In case there’s the possibility of wet weather in the forecast, here are some of our tips for hiking in the rain .

AND FINALLY, GO!
The last and final step is to hit the road and have a good time! Know that most people experience a couple of minor mishaps on their first backpacking trip. On my first backpacking trip, I forgot my hiking boots and ended up hiking 20 miles in Chacos (with a lot of blisters to boot) and I didn’t pack nearly enough food. It also made me realize I was a little more out of shape than I thought.
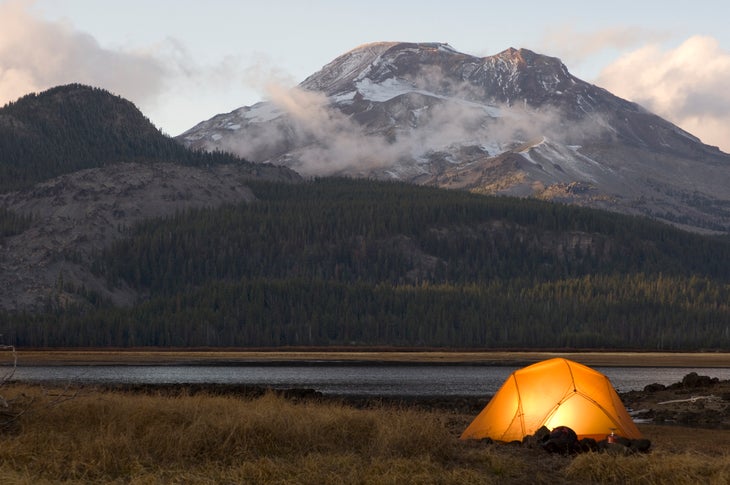
But watching the sunset over that lake where I camped was a turning point in my life. That first backpacking trip changed my whole relationship with the outdoors….so get ready 😉

Where was your first backpacking trip? What other advice do you have on how to plan a backpacking trip? Share your comments, questions, and experiences below!

With two decades of hiking and seven years of van life under her belt, Kristen has dedicated her life to helping people experience the positive effects of nature. As a pioneer in the outdoor blogging space, she founded Bearfoot Theory in 2014 and has since authored more than 350 blog posts about outdoor travel, hiking, camping, and van life. Her work has been featured in National Geographic, Outside Magazine, and Backpacker, and when she’s not on the road, she lives in Park City, Utah with her partner Ryan, their son, and two adventure pups.
Leave a Reply Cancel reply
Your email address will not be published. Required fields are marked *
Save my name, email, and website in this browser for the next time I comment.
Tip #11 is clutch, and so easy to forget. Thanks for the reminder. Great post!
Thanks for this awesome guide! I’ve always wanted to go on a camping trip but it always feels intimidating, so I’ve only done short hiking trips. This list somehow makes proper camping trips feel much more manageable with some simple steps, saving it and hoping to be able to use it soon!
Awesome Aaron! Good luck on your first backpacking trip and come back and tell us how it goes!
Hi! I love your site, so many great articles and pieces of advice. I have one question I have searched for an answer on your site and elsewhere and can’t seem to find… when you plan for an overnight backpacking trip 4+ days, what is you advice on parking? Where and safety. Thank you!
Hi Ally – it really depends on what trail you’re doing. Some trailheads are safe and secure enough to leave your car for a few days (just make sure you take out all valuables). If you don’t feel comfortable leaving your car, you could ask a friend to drop you off or take public transportation to the trailhead if available. Many cities will have short or long-term parking lots that you can leave your car at for a fee. For Kristen’s 22-day JMT hike, she left her car at the Ranger Station in Tuolumne Meadows.
Thank you. Even though this will not be my first time hiking, you advice just made me double check my check/packing list.
This is very empowering! I’ve wanted to go backpacking for years and have felt intimidated and didn’t know where to start. We just completed our first backpacking adventure last weekend and had a blast. You break things down and help me feel like I can do this!!!!
That’s awesome Dana, congrats!
OUTSIDE FESTIVAL JUNE 1-2
Don't miss Thundercat + Fleet Foxes, adventure films, experiences, and more!
GET TICKETS
Powered by Outside
Level Up From Scenic Dayhikes to Awe-Inspiring Overnight Adventures
Ready to spend your first night out but don’t know where to start we've got you covered..
Heading out the door? Read this article on the new Outside+ app available now on iOS devices for members! >","name":"in-content-cta","type":"link"}}'>Download the app .
Backpacker wants to be your guide to the wilderness: Join Outside+ today and get access to all of our skills stories, gear reviews, hike reports, and much more.
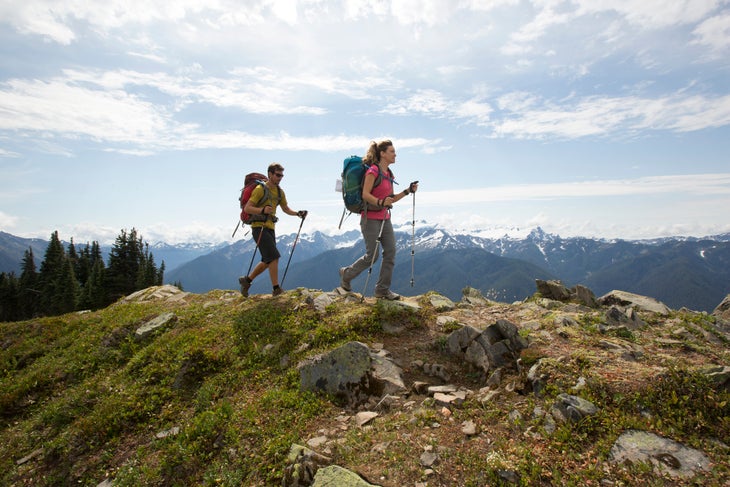
Dayhiking is a marvelous way to experience nature; it’s approachable, a low time commitment, and easy to get into with little gear or experience. If you’re an avid dayhiker, you may be curious about taking the next step into overnight hikes. You should: Backpacking takes all the joys of dayhiking to the next level. You can go further, see more, and test your limits while connecting with yourself and your hiking partners off the grid.
Spending your first night in the backcountry can be intimidating. If you’re nervous, try car camping first—you’ll be able to practice using all of your gear, but can easily bail if you become uncomfortable. Then, level up to a short overnight, starting with just a couple of miles. Backpacking requires more planning than a dayhike, but fear not—here’s everything you need to know to make the leap.
A lot of your dayhiking gear will be useful for backpacking, too: your boots, navigation tools, hiking clothes, first aid kit, and more. You will need additional equipment for sleeping and feeding yourself in the backcountry. But you don’t have to shell out: First-timers should consider renting overnight gear such as a tent, backpack, and sleeping bag before making big purchases, or borrowing from a friend. For hikers who only backpack a few times a year, rented gear can be more economical than owning gear, and doesn’t require storage space. In addition to your regular hiking kit, here’s what you’ll need:
You’ll be carrying more gear than usual, so you need an appropriately sized pack. For one-night trips, look for a 40 to 60 liter pack, and make sure it’s sized for you. If you’re just starting out, prioritize comfort and support over weight. Sales associates at rental or retail stores can help fit a pack to your body. Ready to buy your own? Here’s how to choose the right one.
Your shelter is your home away from home when you’re on the trail. Keep in mind that tents made for car camping are often too heavy and bulky to carry on longer backpacking trips: you may be able to press your car camping gear into service for short overnights, but if you’re buying a tent, spend the extra money to get one that’s light enough to carry, preferably no more than 3 lbs. per person. Consider how many people will sleep inside the tent, and what kind of weather you might encounter. Purchasing your first tent can be overwhelming; we broke it down for you .
Sleep System
Your sleeping bag and pad are essential to your comfort and safety while backpacking. No matter what, you won’t have a good time if you don’t have a good night’s sleep. Just like tents, sleeping bags designed for frontcountry use (think the one you used to take to middle school sleepovers) aren’t always suitable for backcountry camping. You’ll need a bag whose temperature rating matches the kind of weather you’ll encounter. Take a 40° summer-weight bag for a 30° night, and you’ll be miserable. Unless you get claustrophobic easily, your best bet is probably a mummy bag—the narrow cut will help trap heat and keep you toasty all night long, and takes up less pack space. There are many other considerations when it comes to choosing a bag: synthetic fill versus down, packability, and more. Read more about choosing the right sleeping bag here .
Your sleeping pad is just as important for keeping you warm and comfortable, but is a lot more straightforward. Inflatable pads are comfortable and packable (look for an insulated model for three-season use); foam pads work great for budget-conscious beginners and those wishing to cut pack weight.
Extra Clothes
In addition to the layers you normally take hiking, you’ll want extra clothing for around camp or in case of an emergency. Pack a set of baselayers to sleep in, extra socks, and warm layers for hanging around camp at night and in the cool morning. Unless you’re in a hot climate, hat and gloves are never a bad idea, even in summer. On a dayhike, you may be able to get away with mild discomfort, but on an overnight, it’s imperative to be prepared for any weather scenario you may encounter.
Stove and Food
Nothing satisfies like a hot meal at the end of a long day of hiking. You have a couple options here: Freeze-dried backpacking meals are lightweight and only require boiling water to prepare. Alternatively, try cheffing it up . For cooking, a canister stove is your best, cheapest bet: You can grab a decent, direct-from-manufacturer model for less than $30 on Amazon. Practice operating your stove at home before bringing it into the backcountry, and make sure you have plenty of fuel.
The number of calories you need to consume each day of your trip depends on a number of factors: pack weight, bodyweight, altitude, how strenuous the hiking is, temperature and more. For a hard day of hiking, use this as a general rule of thumb: 25 to 30 calories per pound of bodyweight. It’s also never a bad idea to pack extra food for an overnight trip. Don’t forget the spork!
Water Treatment
If you’re experienced with long dayhikes in hot weather, you may already have your water filtration system dialed. Instead of chemical treatments or UV light, most beginner backpackers will be best off with a lightweight filter like a Sawyer Squeeze or Katadyn BeFree. Any of these can take care of bacteria and other common backcountry contaminants; purifiers, which also filter out viruses and heavy metals, will be overkill for most hikers in North America. Need to learn more? Read up on what type of water purification is right for you .
Additional Gear
A headlamp, trowel and TP or WAG bags, bear canister or bear bag, toiletries, and a repair kit should also be in your overnight kit. Make sure you always carry the ten essentials on a backpacking trip. Some additional items might help you enjoy your time in the backcountry. Consider packing a camping pillow, book or journal, deck of cards, camp chair, and comfy shoes to wear around camp.
Now that you’ve assembled all of your gear, it’s time to get it all on your back. Packing your backpack might seem straightforward, but a proper pack job can make the difference between a comfortable hike and a sore back, misplaced gear, and a general bad time. When packing your backpack, think about keeping your essential gear, like your sleeping bag, dry; filling dead space; prioritizing balance and access to items you’ll need while hiking; and weight distribution. Read our comprehensive guide to packing your bag here.
Trip Planning
For your first overnight, choose an easy route with low mileage and manageable elevation gain. Remember, you’ll hike slower with a full pack than you might on a regular dayhike. Apps like Gaia GPS are useful for finding route suggestions, trail info, and maps. Scope out camping spots ahead of time by talking to friends or rangers, reading online, or making a campsite reservation. Check before setting out that camping is permitted in the area you’re going to, and secure any necessary permits through the appropriate land management office.
Always leave a copy of your itinerary with a friend or family member at home, along with your expected return time. Let that person know when they should call for help if you haven’t come home.
On The Trail
Pace yourself.
When you’re carrying your entire home, wardrobe, and pantry on your back, you’re going to get tired. Take lots of breaks, and remember to refuel with plenty of water and snacks (200 calories per hour is a good baseline).
You may have been able to get away with minimal navigation on well-marked, shorter dayhikes, but staying on route is all the more important the further you hike. Keep in mind that as you progress deeper in to the backcountry, it will take longer for help to reach you in case of an emergency. Brush up on your map and compass and GPS skills before setting out, and carry a map of the area where you’ll be hiking. For your first overnight, it’s a good idea to choose a well-established trail where other hikers may be present.
Finding Water
You’ll need about a gallon of water per person per day, more in extremely hot weather. It’s unrealistic to assume you’ll carry all of the water you need for an overnight or multiday trip. Most backpackers carry one to three liters and refill throughout the day. For beginners, picking a trail that goes alongside a river or encounters lakes makes refilling water a cinch. In areas where water is more scarce, scope out sources on a map beforehand, and check in with local rangers or guiding services to ensure they’re currently available (some water sources are seasonal). It’s a good idea to choose a campsite with easy access to water.
Campsite Selection
As noted before, scoping out campsites ahead of time helps make for a stress-free experience your first time on the trail. If you’re looking out for campsites as you hike, keep the following in mind: An ideal campsite is sheltered from the wind and elements. Look for a stand of trees or a flat spot in the lee of a hill or some boulders. Easy access to water is useful, but make sure to pitch your tent at least 200 feet from the shore. Good campsites are well off the trail, both for your own privacy and for the experience of other hikers. Look for a flat spot where water won’t pool in case of a rainstorm. Before pitching your tent, always look up for dead branches that could crash down on your shelter during the night.
It’s always best to camp in impacted campsites—that is, where someone else has camped before. Look out for packed dirt, areas where the vegetation is visibly cleared, and established fire rings. Only camp where permitted, and avoid trampling plants (see Leave No Trace, below).
Backcountry Bathroom
If you’re spending a night or two outdoors, you’re gonna have to go at some point. With a little practice, pooping in the woods can be quite pleasant. Read up on the area you’re visiting—some wilderness zones require you to pack out all waste in WAG bags , while others allow you to bury it in a cathole . If you’re using toilet paper, you’ll either need to bury it or carry it out, depending on how dry the climate is; alternatively, leave it at home and use leaves (check to make sure they’re not poison ivy), smooth sticks, rocks, or snowballs instead.
Always go to the bathroom at least 200 feet from water sources and away from the trail. Many backpackers carry a pee cloth to stay clean on the trail.
Food Storage
When it’s time to rest your head, you’ll want to protect your food from hungry critters who might sniff out your extra trail mix. Some areas, like Yellowstone National Park, require you to store food overnight in bear canisters . In others, where trees are abundant, you can hang your food . It’s a good idea to practice this skill ahead of time and determine which food storage method is best for you and your destination.
Leave No Trace
When traveling in the backcountry, it’s important to minimize impact on the land. Read up on the 7 principles of Leave No Trace and make a plan for packing out trash, reducing your footprint, and being a good steward of the trail.
Remember that a lot of learning will occur on the trail. The more you get out, the more comfortable you’ll become with your overnight gear and systems, your individual backpacking style, and enjoying life in the backcountry. You’re likely to make some mistakes on your first overnight; consider your own safety, always have a bailout plan, and remember that it only gets more fun with practice. There’s nothing more satisfying than becoming self-sufficient in the outdoors for extended periods of time.
Want to learn more about getting into backpacking? Sign up for our Backpacking 101 online course, where you’ll learn everything from navigation to backcountry cooking.
Popular on Backpacker
Related content from the outside network, what’s it like to go on a 200-person hike better than you think., how to pack for backcountry skiing, the original yosemite firefall, hiker charges mountain lion.
A Beginner’s Guide to Planning a Backpacking Trip
The question of how to plan a backpacking trip is one you should never be afraid to ask! Even the most seasoned Everest climber started somewhere!

The question of how to plan a backpacking trip is one you should never be afraid to ask! Planning your first backpacking trip can be very overwhelming. From deciding on how much to take with you on your hike, to deciding which route to take, there’s a lot to think about. Before you get too overwhelmed, just remember that even the most experienced backcountry hikers and campers all started somewhere and have likely felt the same way that you do now.
We know how daunting the prospect of planning your first trip can be so we’ve put together this handy guide that will tell you everything you need to know about heading out into the backcountry for the first time so that your backpacking trip will be a success!
Every adventure starts with a plan!
Heading out into the great outdoors can be daunting. But don’t worry, we’ve got your back! Our world-renowned scavenger hunts include more than 400 different activities in hundreds of cities around the globe. Every hunt is hand-crafted and includes trivia and challenging games to entice you along. Whether you’re in the mood for cheeky bar crawls , creepy ghost tours , or classy art walks , our Let’s Roam app has an adventure that will help introduce you to your new location!
How to Plan a Backpacking Trip
Below you’ll find a step-by-step guide to planning a backpacking trip. You can do these in order or jump around a little bit based on what works for you. The most important thing is that you cover all the steps and are adequately prepared for your big adventure. Not bringing the right gear or enough food and water can make even the easiest trail significantly harder and it can even make the trip dangerous.
Decide where you want to go.
This should be your very first step as it can have a big impact on everything else. For example, planning a backpacking trip high into the Rockies where you’ll be staying at rustic campsites is going to be very different from trekking in Patagonia where you have plenty of hostels and refugios to choose from. These will both be different from hiking through waterfalls in the Amazon jungle or going down into the Grand Canyon and the gear that you’ll need will be drastically different for all of these adventures.
If this is your first hike you must do as much research as possible on a destination before deciding that this is where you want to go. We highly recommend starting with an easy destination. Short, two to three-day trips that are close to home are ideal to start with and as you become more comfortable, you can start doing longer trips a bit further away. You may also want to start by doing fewer miles each day than you would normally do on a day hike. It’s very different hiking with a heavy backpack than it’s a light daypack and it’s better to cover shorter distances so that you don’t overdo it
Also, think about how far off the beaten track you want to go. While it may seem dreamy to be completely away from the hustle and bustle of daily life, surrounded by breathtaking nature, and feeling like it’s just you against the elements, this can quickly turn into a nightmare if anything goes wrong. And when you’re backpacking, something can always go wrong. If you truly want to go off-grid, you need to be both mentally and physically prepared for the experience.
Research the logistics.
Once you have decided roughly where you want to go, you now need to figure out the logistics (I.e. how you’ll make it work). Some questions that you should ask yourself at this point include:
- What will the weather be like?
- Is this the right time of year to go to this destination?
- How many hours of daylight can you plan for?
- Are there any dangerous wild animals that I need to be aware of?
- Do you need permits? If so, how long do they take to acquire?
- Is there potable water available?
- What is the terrain like?
- How do you get to the trailhead?
- What will the elevation gain be?
- Are there any mosquito-born diseases prevalent in the area such as malaria or dengue?
- Are you going into bear country?
All of the answers to these questions will have a big impact on how long you can hike, what you need to take with you, and where you can go. You can use guidebooks, backpacking websites, social media, backpacking, and thru-hiking forums, etc to find information as well as navigation websites like Gaia which will help you get more familiar with the terrain of your destination and help you find both free camping spots and established campsites.
When you’re compiling the answers to these questions, make sure that you jot down where you found particular information. During your research, you may run into contradictory information, and knowing where you found things can help you decide which one is more accurate.
During this phase, don’t forget to reach out to your fellow adventurers to ask for their advice. There are also many Facebook groups that you can join where people share general advice on backpacking as well as location-specific information. Read as many trip reports as you can about a particular area and have a list of questions ready that will cover anything that seems questionable. Remember, there are no dumb questions and it’s important to get clarification on anything that you’re confused about or want to get clarification on to have the safest and most enjoyable backpacking trip possible.
Also, do not forget to check the website of the park that you’re going to for weather updates, trail updates, and other useful information. There’s no point in planning an entire trip around a particular section of a national park and then finding out it’s closed.
Invite some friends along.
Once you have a rough idea of where you’re going and how difficult it will be, it’s time to invite some friends to join you! If you know people who love backpacking, they are an obvious first choice. Having a few people with you has many benefits. Not only is it safer and more fun to hike in a group but it can also help you divide the weight of the gear that you’ll be carrying. For example, a two-person tent weighs significantly less than two one-person tents and you can easily divide up things like cooking equipment, food, and so on.
Just a warning, be careful who you invite and consider whether or not they will be able to handle the hike that you’re expecting to do. Having someone with you that is not physically able to do the hike can slow you down and cause some major logistical issues, especially if it’s a multi-day hike. If you do invite someone who is a bit of a newbie, make sure to check with them what their longest hike has been, whether they enjoy camping, etc. Although it may feel a little like you’re vetting your friends, this can save you a huge amount of hassle and stress in the long run. Even better, you can even do a few practice hikes together before you go on your big adventure. This will give you an idea of whether or not you’re compatible and what you need to look out for if you decide to go together.
Choose your gear.
Once you have an idea of where you’re going and what the weather will be like, you can start choosing suitable gear and creating your “gear list”. This includes things like tents, sleeping bags, a sleeping pad, cooking equipment, water bottles and water filters, food and snacks, clothing, jacket, sunhat, shoes, rain gear, headlamps, bear canisters, power banks, first aid kit, hygiene products, etc as well as odds and ends like duct tape, a knife, and medical tape. Don’t ignore the importance of having a headlamp. It may seem like your cell phone flashlight will work just as well when you’re at a campsite but when you’re out on the trail hiking in the dark, you want to have both of your hands-free. This will come in handy (pun intended) in case you stumble and need to catch yourself or if you find yourself on rough terrain and have to rely on walking sticks.
If you’re a beginner backpacker, don’t panic. There are plenty of backpacking checklists and gear guides that you can find online that can serve as useful guides when you’re putting together your gear. Before you go crazy trying to check every item off the packing list, think carefully about what you’ll actually need. It’s easy to go overboard when you’re at home worrying about every possible predicament but keep in mind that you’re likely to be carrying all of this equipment on your back at some point so make every pound of it count.
If you aren’t sure what is “too” heavy, a good rule of thumb is that your pack shouldn’t be more than 20% of your body weight. Anything heavier than that is going to be very challenging even for the strongest of hikers. Don’t forget that most hikes and campsites follow a leave-no-trace policy which means that anything you bring with you, you need to take with you. This includes human waste, used toilet paper, and feminine hygiene products. You’ll need to consider this when it comes to your gear and what you’ll use to carry your trash and waste out with you.
When you have picked out all of your gear, make sure to try packing it all into your backpack. Make sure that there’s plenty of space for water, especially if you may be covering long distances between water sources. Practice walking around with the full pack on your back to make sure that it’s sitting correctly on your back and hips and that it’s comfortable. If you’re unsure of how a backpack is supposed to fit, there are plenty of online guides available. Alternatively, you can take your bag to an outdoor shop like REI and ask one of the staff members to check for you. (if you go this route, try to buy something while you’re there.)
You should also make sure to break in your hiking boots if you bought new ones. Ideally, this would be done through a series of shorter hikes that allow you to identify any trouble spots where blisters are forming and either find a way to fix them (insoles, pads, etc) or buy a new pair of boots that work better for you. Never, ever rely simply on reviews when choosing boots. Everyone’s feet are shaped differently as your height and weight can also play a role in how your boots fit.
Figure out how you’ll get back home.
When it comes to planning your trip, it’s easy to get lost in the details of the hike itself and forget that at some point it will come to an end! This means that you’ll need to figure out a way to get home afterward. If you’re starting and ending at the same spot, this should be relatively easy. However, if you’re hiking from point to point, things are likely to get way more complicated.
This is the time when you need to figure out exactly how you’ll get to the starting point and back to your car or another form of transport that you may be using. Keep in mind that some national parks do not allow private vehicles and offer shuttle services instead as a way to ease traffic congestion. If this is the case, you’ll need to figure out how frequently the shuttles run and what time the last shuttle of the day is. The last thing you want is to finish a long day of hiking and find out that you have no way to get back to your car.
Plan your food.
When it comes to planning your food, it’s very easy to overdo it. Many people are worried about being hungry so they find themselves packing too much food and then regretting it when they are carrying around excess weight in their bag (or their stomach!).
One of the best ways to plan what food to pack is to base it on a certain amount of calories per day. The average consumption level is around 2,250 to 2,750 calories per day depending on the intensity of your hike as well as the size of your body. Sadly, hiking doesn’t burn off nearly as many calories as we often think it does so you probably won’t need as much food as you think you will.
When putting together your “meal plan”, you can choose from either DIY meals and snacks or fancy store-bought backpacking meals . These tend to be very expensive so if you’re looking for ways to cut down costs, this is definitely one of them! This can also be helpful if you’re vegetarian since although it seems like more and more pre-packaged backpacker meals are coming onto the market, very few of them are actually vegetarian-friendly.
Get your mind and body shape.
Hiking is great for our physical and mental health but you certainly don’t want to injure yourself at the beginning of your trip (or anytime during your trip to be fair) or not be able to finish the trip because it’s too tough. It’s important to make sure that you’re up to the task physically and mentally before setting out on your backpacking trip. This can greatly help increase your chances of being able to complete it.
One good way to do this is to go on a few tough day hikes or some overnight weekend trips. You can also try car camping with a few long hikes mixed in. This will give you an idea of what equipment you need and what you may be able to leave behind. If this isn’t possible, try to hit the gym as often as you can and focus on working muscle groups that you would normally use during a hike. This will usually be very different from yoga classes or running on a treadmill. While those are both great for you, they don’t help strengthen the muscles that you need them to.
While you’re building up your strength and stamina physically, it’s just as important to build yourself up mentally. Unless you’re doing a technical hike, you’re probably more likely to run into a mental block than a physical one. To “practice”, try to hike when you’re really tired. Throw in some early morning hikes and a few nighttime hikes to see how it goes. You may be surprised at how much this can help when you set out for your backpacking trip.
Check and recheck everything.
Before you set out on your backpacking adventure, make sure that you check and recheck everything. This includes your backpacking gear list, your food, the weather, and everything and anything else you can think of. Reread trip reports, double-check the website of the park you’re visiting, and log onto their Facebook page for any additional updates. This is your final chance to make sure that you have everything ready and that the weather will cooperate with you. If you learn something that can impact your trip, this is your time to try and resolve it before it becomes a bigger issue. This step is just as important as when you did your initial research so make sure that you tie up any loose ends before they begin to unravel!
Don’t leave anything until the last minute.
There are always jokes about people who pack last minute for a vacation. You know the ones, someone is running around two hours before their flight throwing stuff into a suitcase. This is what you definitely don’t want to do when backpacking. Packing last minute makes it easy to forget something and this can mean the difference between life and death. Instead, try packing everything into your backpack at least a week before the trip. This will give you time to change anything (take stuff out, put stuff in) and still be able to repack in plenty of time for your departure.
Share your itinerary.
Before you head out, make sure that you share your itinerary with someone that you trust. Ideally, this would be someone who has also backpacked before and understands some of the issues that could arise, and, most importantly, knows how to help if anything goes wrong. Leave their contact details and your itinerary stashed somewhere in your car near the trailhead or campsite as well so that in the event you don’t return at your intended time, someone near the trail may be able to help. You can also stop by any ranger station and inform them of your route and how long you expect it to take.
Ready for the world?
We hope that this guide has left you ready to pack your backpack and set off into the wilderness on your next adventure. As always, we would love to have your feedback and please let us know if there’s anything that we may have missed. This will help our readers be as prepared as possible!
If you need any additional information about destinations around the world, don’t forget to check out our travel guides . These were written by our own in-house travel experts who have roamed around the globe from Acadia to Yosemite and everywhere in between! You can also download the Let’s Roam app which is full of great user-generated content for destinations all around the world as well as our fun-filled scavenger hunts. They’re a great way to learn more about a destination and have a wonderful time doing it.
Frequently Asked Questions
The first thing you need to do when planning a backpacking trip is deciding where to go! This will impact the gear you take and how you will start and end the trip.
If this is your first backpacking trip , it is a good idea to do a short trip close to home. Once you feel comfortable, you can start going on longer trips.
If you are looking for more info on towns near your destination, download the Let’s Roam app . This app is full of useful, user-generated content that will help you find the best restaurants and hotels.
Featured Products & Activities
How to Plan a Backpacking Trip: the Ultimate Guide (2023)
Camotrek is reader-supported. When you buy through links on our site, we may earn an affiliate commission. See the disclosure page for more information.
No matter if you’re heading out for a quick overnighter or embarking on a multi-week expedition, the most fulfilling experiences await those who understand the art of planning a backpacking trip and getting ready for their adventure. Sure, adventures are unpredictable by definition. However, “ careful planning ” is the key to having a safer, and more enjoyable hiking trip.
Experienced hikers are well aware of the undeniable truth behind the adage, “Failing to plan is planning to fail.” Planning, in its essence, involves more than just gathering your gear and embarking on a journey without a predetermined route or objective. While this approach may be suitable for familiar territories, particularly when weather conditions can alter initial route plans, it can also be embraced in unexplored areas, especially for those who thrive on embracing the unpredictable.
A “reasonable backpacker” prefers to plan his hike. This entails considering and reviewing various aspects such as:
- Route selection and timing : Using a backpacking trip planner can be invaluable in determining the most suitable route and estimating the time needed to complete each section of the hike.
- Weather forecast : Relying solely on historical temperature data can lead to inaccurate predictions, so it’s essential to check the latest weather forecast for more reliable information.
- Water availability and sources : Assessing the availability of water along the route and identifying potential sources ensures you can stay properly hydrated during your journey.
- Terrain features, vegetation, and wildlife : Familiarizing yourself with the terrain, plant life, and wildlife in the area helps you anticipate any potential challenges or dangers you might encounter.
- Proper and tested equipment : Ensuring you have the right gear, including comfortable hiking footwear, clothing suitable for the weather conditions, and properly functioning equipment, is crucial for a safe and enjoyable backpacking trip.
- Potential hazards and attention to detail: Consider all potential hazards along the trail, including steep slopes, slippery surfaces, river crossings, or potential encounters with wildlife. Paying attention to even the smallest details can prevent an adventure from turning into a disaster.
There are three main questions you need to answer during the planning stage of your hiking adventure. They are the following:
- Who will be joining you?
- Where will you go?
- When will you go?
Answering these questions will allow you to fine-tune your gear and food selection, develop a realistic timeline, and anticipate potential problems.
How do I start planning a backpacking trip? What should my main considerations be? Do I need a permit to go backpacking? We’ll answer these and many other questions. We will also give you practical tips as well as a blueprint for planning your next hiking trip.
Let’s jump in.

Table of Contents
Evaluate your experience, skills, and knowledge. What are your goals?
Pick realistic goals, and save the ambitious projects for when you have the necessary experience and fitness level. Especially before doing a long hiking trip , it is wise to do a couple of shorter trips such as day hikes or two-day trips. These shorter trips serve as valuable opportunities to assess your overall fitness, evaluate the functionality of your hiking boots, test your gear (especially essential items like your rain jacket, sleeping bag, sleeping pad, and shelter), and even consider the compatibility of your hiking partners if you have any. A big trip may quickly be cut short by a pair of ill-fitting boots or bad physical condition.
Many backpackers have the dream of conquering a long-distance trail in one continuous journey, which is an ambitious endeavor. While some set off with a vague route in mind and still manage to complete the entire trail, a significant number give up within the first few days or weeks, even with some planning. Failure can be attributed to various reasons such as heavy packs, sore feet, exhaustion, unexpected weather, rugged terrain, and trail conditions. For a long-distance hike, especially one lasting several weeks, detailed planning is highly recommended. It’s advisable to gradually progress by starting with shorter yet challenging trails. As you gain comfort and experience, you’ll acquire the necessary knowledge and determination to finish a long walk.
Preparing for a long trek involves managing logistics, selecting appropriate footwear and gear, and understanding the potential hazards of the chosen trail. This preparation phase can be quite demanding, often proving to be one of the most challenging aspects of the entire hiking experience. However, it is crucial to not only prepare for your trip but to do so effectively. It is essential to be realistic about how the requirements of your planned journey align with your physical capabilities.
The first step in planning ahead is choosing a trip that is appropriate for your skill level. Too often people get into trouble because they underestimate the challenge of their route or overestimate their individual capabilities. It’s important to note that men and women differ in various aspects, including perception and communication, which may contribute to differences in how they handle hardships. However, the capacity to overcome challenging situations is often closely tied to experience and, to some extent, certain biological traits and genetics.
Once you evaluate your experience, skills, and knowledge, it’s time to decide about the group size.
Group size. Solo or with others?
Hiking experiences can vary greatly depending on whether you choose to hike alone or with a group. The size of your group can also have a significant impact on various aspects of your journey. Additionally, carefully selecting the right partner or partners can greatly enhance the efficiency and enjoyment of your travel. We discussed the pros, cons, and dangers of backpacking solo in a separate article so we won’t expand on hiking alone here. We’ll focus on walking with others instead.
Hiking with a group involves certain considerations. Let’s begin with the most important one – your attitude toward others. Be cheerful, helpful, and mind the person behind you especially when grabbing branches. It’s really important to be someone you would want to hike with. Be courteous with others and not only with those from your group but also with the people you meet on the trail. Furthermore, set a pace that makes the other members of your group feel comfortable and always stay close to the group to keep it together.
If you decide to travel with a single partner, it’s a good idea to select a partner who’s a more experienced backpacker than you. This will help you become more proficient in route finding and avoid common mistakes. Partnering up is easy if your soul mate enjoys backpacking and has a similar to your level of fitness. But it gets more complicated if your physical preparation level isn’t similar or you have different goals.
Be critical and don’t make any compromises if something in your partner’s attitude or manners really irritates you. Try to discuss any problems and woes you might have and solve them in a timely manner. You need to sort out potential issues in advance and relinquish unrealistic expectations.
Select an area
You can do that with some help from the Internet, guidebooks, maps, magazine articles, outdoor websites, hiking blogs, trekking agencies, local outing clubs, and guides and outfitters. First, of course, you have to decide where you want to start and finish. Most people have their own preferences based on the nature of the terrain, great stories they’ve read or heard, even on some stunning pictures and photos.
Once you have chosen your partner(s) or decided to solo hike, pull out the guidebooks and pick a trail. In addition to trail descriptions, better guidebooks will include time estimates, elevation gain and loss, and warnings about less-obvious hazards. This way you’ll get some valuable preliminary information. If you are going into less-traveled areas, you may have to glean this information from Internet blogs or topographic maps. A Web search with Google is a good place to start. Once you’ve selected an area, you can obtain up-to-date information from the land managers, fellow hikers, Internet or state/local agencies and institutions.

Photo by Andrew Gosine
Obtain up-to-date information
Try to obtain information that could be of use when planning your hike. The information you’d need is primarily about several important things such as:
Weather and average temperatures
Part of your research should include prevailing weather patterns for your destination. As mentioned above, you can first examine historical temperature data and base your decisions on it. As your departure date gets closer, start following the weather on the Internet. Try to get the most reliable and comprehensive weather forecasts. Nowadays, forecasts can be extremely punctual especially for 4-5 days ahead (specialists reliably predict the weather up to seven days in advance, though keep in mind that this might not be relevant for the mountain weather) and getting caught unprepared is foolish.
How many hours of daylight do you expect? If there will be night hiking, you’ll need lighting (a headlamp or a flashlight) and warmer clothes. On summer trips, there is enough daylight for up to 14-16 hours of hiking per day. This means that you need only a low-powered headlamp/flashlight for camp chores unless you decide to go on a night hike. Additionally, you don’t need warm clothing to have a good sleep. In contrast, you need a high-powered light for hiking after dark and warmer equipment for your winter hikes.
Sun exposure
Sunburn is easier to prevent than treat. Keep in mind that direct solar radiation can be very dangerous, especially between 10 am and 2 pm. The amount of sun exposure is a function of various factors such as cloud cover, vegetation, elevation, surface reflectivity, and the strength of the sun. These details can be obtained from different sources.
Terrain (including elevation gain and loss)
The terrain is among the most important factors when choosing proper footwear for your trip. For rough and rocky terrain (especially if you go uphill) you can play it safe and pick up hard-wearing hiking or backpacking boots. They offer better ankle support, more control, and stability in comparison with light low-cut shoes such as trail-running shoes or standard hiking shoes. However, they’re too heavy and need to be broken in before your hike; otherwise, they can ruin your trip. Additionally, trail-running shoes today are lightweight, more durable, and more reliable than before and provide enough comfort on most kinds of surfaces.
Your clothing also depends very much on the terrain you choose for your hiking trip. If trail quality, signage, and maintenance are poor, you should bring better navigational aids and more protective clothing. You can get familiar with your planned route by looking at pictures and reading descriptions of it.

Time estimates
If you don’t have experience with mountain trekking, you will be surprised that going uphill can take so much more time than hiking on even terrain. But it’s true as it is true that walking in snow is harder and more time-consuming than summer hiking. You need to take details like these into consideration when planning and estimating your timing. Having an idea of how much to lower your time and distance expectations is important, and – in case you’re wondering – your personal experience is a huge factor in determining this.
Hiking hazards
Do your research and make sure you know what kind of hazards you may encounter during your trip. Remember that preparing for a disaster does not mean that you can always avoid it; however, you’ll have a much better chance at dealing with almost any extreme situation you encounter on the trail. If you are a complete novice to the outdoors start with learning the essentials for beginning backpackers . The outdoors is not as dangerous as typically portrayed by sensationalist media stoking fear of the unknown. Nonetheless, people do get sick and injured out there, sometimes fatally. Natural hazards include unpredictable mountain weather, technical rock faces, rockfalls, crevasses, contaminated backcountry water sources, river crossings, flash floods, wildfires, and avalanches.
It can be among the last things most backpackers check out when planning their trip. However, don’t be fooled by that fact – it’s not the same to hike in an arid area with a few cactuses and crossing thick forests (with thorn bushes) or fields lush with grass. For information about vegetation density and types, check topo maps, analyze satellite imagery, find pictures and descriptions posted online.
Wildlife and insects
Use blogs and forums to find relevant information about wildlife and insects that can be a concern. The possible presence of dangerous animals (mice, raccoons, bears, snakes, etc.) affects how and whether you store and protect your food, where you cook and camp, where and when you walk (avoid night hiking in snake country), and whether you need to carry anything for self-defense ( bear spray works well against all kinds of big animals). Relentless swarms of mosquitoes, black flies, and no-see-ums can completely ruin a trip. To maximize protection from them, you can use either long-lasting insect-repellent or insect-repellent for your clothing and gear . There are so many potentially dangerous animals for a hiker so you need to be well-informed in advance about the dangers related to wildlife on a particular hiking trail.
Depending on the location, you need to carry one or more of the following: a mobile phone in a shock and waterproof case, GPS , and personal locator beacon (PLB). If something unexpected happens or if something goes wrong you may need to self-rescue, await an assisted rescue, or apply medical treatment.
Water availability
On any walk, you need to know where water sources are and what the condition of the water is likely to be. Water supply is among the most important things you want to know about a region you’ll be hiking in. Having access to enough drinking water should be one of the major considerations in planning your hiking trip. There are some places where water sources are generally reliable and others where many water sources dry up during the arid summer months. Also, sometimes you don’t have access to clean drinking water in the wilderness. Then, having a portable water filter is essential to kill all pathogens to have clean water. Before relying on a water source marked on a map, consult someone who has personal familiarity with the landscape or check guidebooks and online trip reports for past observations.
Precipitation
Your footwear, clothing, shelter, the types of materials you use, and water availability will all be affected by the amount and frequency of precipitation you can expect during a trip. In prolonged rainy weather, lightweight trail-running shoes like the Altra Lone Peak 7 are preferable to heavier, waterproof boots like the Salomon Quest 4 GTX because 1) boots won’t protect your feet from getting wet and 2) running shoes are breathable and will get dry much faster than a pair of boots.

Sorting the obtained information – what’s useful and what’s irrelevant?
It doesn’t matter how much information you have. It’s important to have enough relevant information. The Internet can overwhelm you with a massive amount of information, so you will need to sort out what’s useful from what’s irrelevant. Many trekking websites are updated regularly and provide a ton of (both relevant and irrelevant) information for your hiking expedition. Filtering out irrelevant information is critical to helping your brain process the most important information out of everything presented to you. Your experience, as well as the ability to think critically, is the key to extract what matters from what’s irrelevant.
Be critical of everything you read or hear, try to find at least two different sources about a particular topic you have an interest in, and carefully evaluate the quality and consistency of the information you get. This will help you allow yourself to reflect thoughtfully, objectively, on the data.
Plan routes
We recommend beginners to stick to trails or established routes and limit the amount of off-trail hiking into the wilderness. They should also focus their efforts on easy to medium trails. Once they have enough experience, they can always do more difficult hikes. More experienced backpackers have more options regarding the difficulty of their backpacking trips. They should plan their route taking into account factors such as the weather and environmental conditions as well as their own preferences.

Photo by Matthew Henry
OK, how to plan your route? First, pinpoint your starting location. Look carefully at the map before you set off and identify some landmarks to keep track of your progress. Then, trace your planned route carefully making note of key features you will pass on the way. It is a good idea to hike with a map in an easily accessible pocket to consult it if necessary.
Nowadays, there are also plenty of excellent backpacking route planner apps that would aid you in planning your hike. Many of them are free to use. Let’s have a look at two of the most popular apps you can use to find your next trail and plan your route – AllTrails and Hiking Project.
AllTrails is an excellent app that can be of benefit to both those who don’t know where they want to go and those who know where they want to go but need more information about a particular trail. You can find solid information, maps, photos, and reviews with accurate details for destinations from around the world. If you’re lucky, you can even find great local trails and parks you’ve never known about. In addition, AllTrails offers useful filters for refined research to help you find your perfect trail.
The community of registered backpackers, trail runners, and mountain bikers exceeds 10 million. As you can imagine, there’s never a shortage of in-depth reviews. Hence, you have so much information about some trails that you could plan your journey down to the smallest detail. What’s even better – the app is easy to use and offers real-time tracking so that you don’t get lost when hiking in unfamiliar places .
Hiking Project is a fantastic free hike route planner app that’s full of valuable information, accurate data, and a great user interface. It has many features that are useful before, during, and after a backpacking trip. For example, you can download detailed trail maps that work offline (before you hit the trail), use the maps to navigate comfortably and record your trail (during your hike), and catalog and analyze the routes that you’ve done (after your trip).
A great way to find backpacking gems and save time, this invaluable hiking tool provides specific technical and cultural information about various trails (including descriptions, elevations, history, etc.), in the US and more than 100 countries from all over the world.
Though backpacking route planner apps provide insights into the different trails, locals can also be an invaluable source of up-to-date knowledge and information, especially in remote areas. They can give you advice or guidance for route planning. Their experience can be especially helpful when you’re looking for more information about particular local sections or obscure trails that aren’t popular or well-recommended. Moreover, they can help you with any transportation-related questions as well as with finding online guides about the area you will be heading to as well as with finding valuable local forums. Perusing these forums can help you find some hidden gems.
Main problems to solve for long hiking trips
Resupplying/logistics.
You need to organize an effective supply of enough food for your entire hiking trip. Planning and successfully executing a strategy for resupply is a must for long-distance hikers. You should also know in advance where grocery stores and post offices are located on the trail. Additionally, there are companies that ship resupply packages to hikers on some of the most popular trails (valid for the US).
Many national parks throughout the world require permits. There are places where you need to apply for a permit long before your trip – especially if the place is popular among backpackers and the number of permits is restricted. Thus, it’s best to check whether permits are needed before making firm plans for an area.
Hiking footwear, clothing, and gear
Proper equipment is critical to navigating through and living comfortably in the outdoors. Many backcountry emergencies result from people being poorly equipped to meet conditions. You will need appropriate and comfortable hiking footwear that’s durable, fits well, provides excellent traction and control. Trail runners are fantastic for most 3-season hikes in various conditions and environments.
See Men’s Ultra Raptor on Amazon See Women’s Ultra Raptor on Amazon
For higher temperatures, pick up a pair of lightweight and breathable hiking shoes or trail-running shoes. For lower temperatures and rough terrain, choose high-cut boots that provide ankle support and give you more control and stability. To learn more about the different types of boots, their features, and best use, see our article where we discuss how to choose the right footwear for backpacking .
As far as clothing is concerned, “layering” is essential, especially when hiking in the mountains. Pick up a pair of proper hiking shorts or trousers depending on the weather, your preferences, and last but not least – the presence or absence of mosquitos, black flies, and other insects. Pretty much the same is valid when choosing a shirt for hiking. In general, you should know what type of hiking clothing you might need.
Know your gear
It doesn’t help to have all the right gear in your backpack if you can’t operate it. Take time to learn how to use your equipment before you leave home. Avoid going out on long trips to isolated places with untried backpacking gear. If you are using old gear, pull it out of storage and check to make sure it is in good repair before leaving. Carry a repair kit to fix your gear if something breaks down.
Specific problems related to the trail you’ve chosen
Anything that can be of interest from natural hazards to dangerous wildlife and fierce bugs such as mosquitos, flies, and gnats. In general, you want to have as much information as possible prior to your expedition as this might help you avoid risky situations.
Hiking around the world
Hiking around the world (especially if you want to do some long-distance trekking) makes planning even more complicated because, in addition to applying for a permit, you should have a valid passport, go to the embassy and apply for a visa (if you decide to go hiking in Asia, for example), buy a plane ticket, take a couple of passport photos, arrange travel insurance, and be vaccinated against tropical diseases such as malaria, leishmaniasis, Trypanosoma, etc. (if you go to a tropical country).
You may also want to scan all the documents for your trip abroad (you may wish to put everything in PDF format because it’s universal, plus there are a lot of PDF reader programs) including your personal documents, visas, driver’s license, health insurance cards, passport photos, etc. Store them online as a safety precaution. This way, you’ll have easy access to all your documents. It’s essential in case something goes wrong and you lose an important document. Sure, scanned documents cannot replace your official documents, however, they might come in handy for getting a provisional identity document as well as for getting a permit.

Photo by Dan Gold
There’s a wide range of destinations and types of journeys for everyone who’s interested in backpacking around the world .
There’s usually some seasonality and it might be more convenient to visit a place popular for winter trekking, for example, off-season when there aren’t so much buzz and hiking enthusiasts around. This way you’ll avoid the huge crowds of tourists on the trail giving you a chance to focus on exploring the area at your own pace and enjoy your excursion in solitude. Of course, this means that you must be experienced in backpacking, camping, navigation, and first aid in case something goes wrong. Safety is one of the most important things on the trail and thus the ability to govern your actions accordingly and deal with problems and injuries is especially valuable.
Emergency planning
Emergency planning ensures that you are prepared for the unexpected, that people know where and when to look for you, and that your actions are rational and predictable in spite of the emotional trauma associated with any kind of emergency situation. A contingency plan should lessen the risks involved and increase the probability of being found in case of an emergency situation. Creating an emergency plan and leaving it with friends or family means a safer hiking trip for you, fewer headaches, and less unnecessary panic for your family and friends.
Carry a first aid kit in an outer container made of durable nylon to protect the contents. Among the essentials in your first aid kit, you should include some analgesics/antibiotics/anaphylaxis (Ibuprofen, Aspirin or Acetaminophen, Sting relief pad , etc.), bandages, antiseptic towelettes, blister care pads, gauze sponges, safety whistle, water-purifying tablets , extra shoelaces, fire starter, duct tape, multi-purpose tool . The exact content of your first aid kit depends on the features of the place you will be hiking in, the chronic diseases you have, and your previous experience.
Meal planning
Planning meals is an essential part of planning a backpacking trip. You need to eat (and drink enough fluids) regularly throughout your hike, especially when hiking at altitude. Having three solid meals a day with a snack or two in between is recommended. Food plays a large part in how much you enjoy the outdoors. You’ll need lightweight, non-perishable, high in calories foods that taste good. Exhaustion after a long day on the trail can make you think about skipping your dinner which isn’t good for your health and fitness; however, knowing that you have some tasty food in your pack can make you change your mind. A warm and delicious dinner can not only make you feel better but also boost your morale.
A 90 kg person burns around 550 calories per hour of hiking (this number usually varies between 450 and 650 depending on factors like the terrain, weather conditions, the density of the air, your fitness level, your individual basal metabolism, etc.). Thus, you’ll need a lot of energy on the trail. So when planning your meals, look for foods rich in carbs, fats, and sugar – such kinds of foods will provide you enough energy for a long hiking day.
Some people bring their favorite high-carbohydrate foods such as dried fruits, chocolate, granola bars, pop tarts, snickers, energy bars, energy gels, etc., while others prefer eating fatty foods like nuts, jerky, cheese, chips, olive oil, almond or peanut butter as well as any other kind of nut butter available. Eating healthy during long hiking trips is much less important than eating regularly so the choice of foods is not really that important – as long as you take enough calories everything will be all right.

There are numerous examples of people having a pack full of all the “right stuff” and not eating it. Frankly, doing this is much worse than eating junk food on the trail. It can actually be a huge motivation for moving forward to your final destination.
Planning and packing your backpack
When packing your hiking backpack before hitting the trail, the little things can add up to make a big difference later. If you start out with a good organization system, life in the backcountry will be simpler and more pleasant. Plan carefully the contents of your pack considering the duration of your trip, the expected weather and temperatures, the features of the terrain, the potential dangers on the trail, and your specific needs.
Do the packing the day(s) before the hike when you are not in a rush. Lots of beginners try to pack in the morning of the hike and as a result forget some important things like a flashlight , toilet paper, raincoat, fire starter , etc. It can be daunting to pack for your first wilderness adventure and you don’t want to exacerbate things further by doing it in a rush.
Make detailed lists with all the backpacking gear you’ll need. Also, note what you do and do not use so that on future trips you can fine-tune the packing. Eliminate redundancy when pack planning. When deciding what to cut, think twice about eliminating insulation and food. Fleece or a sweater doesn’t weigh a lot and won’t slow you down significantly but can be very useful on the trail.
It helps to have things you will need during the day near the top of your pack. Keep things like spare clothes and food there for easy access without having to unpack other gear. Carry snacks in hip belt pockets and have your water bottle located so you can reach it without removing your pack. You can check out our posts about packing for a day hike and packing for a multi-day hike. There, you’ll find some further recommendations on packing as well as lists with basic and extra stuff essential for hiking.

Planning a hike, whether it’s a weekend getaway or an extended summer adventure, requires time and effort. It’s easy to get lost in a whirlwind of lists, logistics, maps, and meal plans. Detailed planning is crucial for any hike, particularly for long-distance journeys that span weeks or even months. However, the planning process can sometimes feel overwhelming, even more so than the actual hiking itself. It’s important to keep in mind that gathering information takes time, and there may always be gaps that you can’t completely avoid. However, don’t let this discourage you. Once you take that first step into the wilderness, all the organization and planning fade into the background. Then it’s just you and nature.
Backpacking, like any other activity, tends to yield better results when participants are prepared and have a general idea of what to expect. So be ready to face the challenges that may arise, maintain a flexible mindset, and make the most out of any circumstances encountered along the way. And most importantly – enjoy your hiking adventure!
Do you have a successful strategy you follow? How much time do you spend on planning your hikes? Drop us a line in the comments section below.
Related Articles
How to Pack for Day Trips
How to Pack for Multi-Day Trips
Hiking Backpacks
Like this post? PIN ME!!

10 thoughts on “How to Plan a Backpacking Trip: the Ultimate Guide (2023)”
Highly descriptive post, I liked that a lot. Will there be a part 2?
We are glad that you liked it. Yes, how to plan a hiking/backpacking trip is a huge topic so we could expand on our post (but there probably won’t be part 2).
I really like the tips you have given about hiking. I was planning to go on a hiking trip but wasn’t sure where to go but your article has helped me to star off planning my first hiking trip. I must say I really learnt a lot from your article. Thank you for sharing this amazing article with us.
Thanks, Monica! Glad you liked our guide on how to plan a backpacking trip.
Great article! Hiking tours help me to lower my stress level and improve control over a healthy weight. I am enjoying it together with my friends, especially during the holidays.
Thanks! Glad that you liked our guide. Yes, backpacking is fun, especially when the experience is shared with others.
Great Article , It Helped Me Alot . A Big Thanks To Autor
You’re very welcome!
Way cool! Some very valid points! I appreciate you writing this post plus the rest of the site is also very good.
Thanks, Flossie Medlock for camotrek.com
Leave a Comment Cancel reply
Save my name, email, and website in this browser for the next time I comment.
OUTSIDE FESTIVAL JUNE 1-2
Don't miss Thundercat + Fleet Foxes, adventure films, experiences, and more!
GET TICKETS

How to Plan a Successful Backpacking Trip in 7 Steps
Follow these steps to spend less time stressing over the details and more time on the trail

Heading out the door? Read this article on the Outside app available now on iOS devices for members! >","name":"in-content-cta","type":"link"}}'>Download the app .
This year I’m planning 29 guided backpacking trips. They are scheduled through October, run three to seven days, and are scattered throughout North America in the high desert, eastern woodlands, Mountain West, and Alaska. I will also ready my company’s more than 240 clients, who are of mixed ages, genders, fitness levels, and experience.
To pull this off efficiently and minimize mistakes, over the years I’ve developed a planning process that works for any trip and can be used by any backpacker.

1. Define Your Trip’s Parameters
General questions are a good starting point for trip planning. You don’t need definitive answers to every question right away, but you’ll want to begin narrowing your options.
Start by asking where you want to go, when, and what kind of trip it will be. Why hiking rather than car camping?
Then add more specifics. What length of time will you be traveling? What specific trails, routes, landmarks, or campsites do you want to visit? How many miles or how much vertical distance do you intend to cover? Who else do you want to join you, if anyone?
Finally, consider the logistics. Do you need permits? If so, how, when, and where will you get them? How will you get to the trailhead and back? Are there unique or notable land-use regulations or requirements you need to be aware of?
I suggest taking all these details and dropping them into a document that can be shared with emergency contacts before you leave.
2. Research Conditions

Once you have a reasonably defined trip plan, research the conditions you will likely encounter, so that you can prepare properly, mitigate risks, and rule out baseless what-if scenarios.
I’m only interested in conditions that will influence my selection of gear and supplies or demand particular skills. I recommend looking into climate, sun exposure and hours of daylight, footing (the most common types of walking surfaces), vegetation, wildlife and insects, navigational aids (signage, blazes, cairns, and posts), water availability, remoteness, and potential natural hazards like avalanches and lingering snowfields, river fords, possible flash floods or tides, or lightning.
Compile the findings of your research in a separate document, and cite your sources, so you can easily compare any contradictory information you later find elsewhere.
3. Select Gear

For a beginner backpacker, the task of gear selection is usually the most time-consuming, certainly the most expensive, and unfortunately also the most frustrating—it’s very easy to go down the rabbit hole here. A good backpacking checklist and run-down of gear is a great place to start.
To make this process easier for my clients, I give them a time-tested gear-list template that I designed, along with examples of completed gear lists for trips similar to the one they’re going to take and a copy of The Ultimate Hiker’s Gear Guide . These resources should help cut through the noise.
Clients also have email access to their guides and their group, so that they can get trip-specific advice. If you don’t have an immediate contact who really knows their stuff, I suggest a community forum like Reddit’s r/Ultralight . Make sure to tailor your gear to your itinerary and expected conditions.
4. Plan Your Food

We’re vulnerable to packing our fears. If we fear being cold at night, we bring a sleeping bag that’s excessively warm. If we fear bears, we sleep in a full-sided tent (which won’t help but may make us feel better). And if we fear being hungry, we pack too much food.
I’ve given in-depth meal-planning recommendations before, so here I’ll just go over some basic pointers. First, plan to consume 2,250 to 2,750 calories per day. (I generally assume an average caloric density of 125 calories per ounce, which means about 18 to 22 ounces daily.) If you’re older, female, petite, or on a low-intensity trip, go with the low end of this range. If any of the opposites are true, go with the high end. Variety is the spice of life, so pack foods with varying tastes (spicy, sweet, salty, sour) and textures (chewy, crunchy). Early in a trip, treat yourself with real food, like a ham sandwich, an avocado, or an apple. This will also delay the onset of culinary boredom.
For breakfasts and dinners, try these field-tested options instead of spending your hard-earned cash on exorbitantly priced freeze-dried meals or punishing yourself with thru-hiker fare like ramen noodles or Lipton Sides.
5. Create or Collect Navigational Resources

For my first hikes, I utilized whichever resources were conveniently available and seemed sufficient. Before thru-hiking the Appalachian Trail in 2002, for example, I purchased the Appalachian Trail Data Book and downloaded the Appalachian Long Distance Hikers Association’s Thru-Hikers’ Companion . To explore Colorado’s Front Range the following summer, I bought a few National Geographic Trails Illustrated maps that covered the area.
But when I started adventuring off the beaten path, I had to create some or all of these materials from scratch. Through this process, I developed what I believe to be an optimal system of maps and resources that includes large- and small-scale paper topographic maps, digital maps downloaded to a GPS app , route descriptions and tips, and a data sheet (a list of key landmarks and distances along a trail or route).
6. Gain Fitness and Skills

There’s no better way to improve your hiking fitness than by hiking, and there’s no better way to develop backpacking skills than by backpacking.
But who has the time and ability to do that? Not me, and likely not you.
The next-best option is to work out more intensely to maximize the potential of the time you do have available. Personally, I do this by running 60 to 70 miles per week. Ultralight backpacking pro Alan Dixon has a training plan that’s more hiking oriented (and more realistic). You can also read and watch skill tutorials, such as my series on navigation , pooping in the woods , finding great campsites , packing your backpack , and tying knots .
A test hike is also very valuable. This systems check is meant to be done in a relatively low-risk environment, and the goal is to get you better prepared for your actual trip. It can be done locally, like in a nearby park or even your backyard, and will give you an opportunity to use your gear, practice some skills, and identify room for improvement before you undertake a more committed itinerary. Focus on replicating the elements of a real trip: hike with a loaded pack, refill your water bottles, change layers, set up your shelter, cook a meal, etc.
7. Conduct a Final Check
In the days before your trip, complete any remaining housekeeping. Using your checklist, pack up all your gear, including your maps, resources, and permits. Buy any necessary perishable foods, like cheese, butter, and tortillas. (This trip-planning checklist has more details.) Look at a five-day weather forecast, and adjust your gear accordingly. Finally, proofread your trip-planner document, and leave it with your emergency contacts.
Want to learn more about backpacking for beginners? Check out our Backpacking 101 online course on Outside Learn , where Outside+ members get full access to our library of more than 50 courses on adventure, sports, health, and nutrition.
- Appalachian Trail
- Backcountry Camping
- Hiking and Backpacking
- Outside Learn
Popular on Outside Online
Enjoy coverage of racing, history, food, culture, travel, and tech with access to unlimited digital content from Outside Network's iconic brands.
Healthy Living
- Clean Eating
- Vegetarian Times
- Yoga Journal
- Fly Fishing Film Tour
- National Park Trips
- Warren Miller
- Fastest Known Time
- Trail Runner
- Women's Running
- Bicycle Retailer & Industry News
- FinisherPix
- Outside Events Cycling Series
- Outside Shop
© 2024 Outside Interactive, Inc
How to Plan Your First Backpacking Trip
By Josh Laskin

All products featured on Condé Nast Traveler are independently selected by our editors. However, when you buy something through our retail links, we may earn an affiliate commission.
Lying in my warm-weather sleeping bag , I watched frost slowly build on the outside of my tent for hours before realizing I wouldn’t be able to sleep that night. I tried to control my chattering teeth, and thought back to just hours earlier when sunshine and 70-degree temperatures welcomed me and my brother to the summit of Algonquin Peak, just outside of Lake Placid , New York. It was our first time backpacking—carrying our gear to camp over a multi-day hiking trip —and it was obvious we had a lot to learn.
And learn I would: In the following years I came to love backpacking, while working as an occasional weekend guide for New York City-based Destination Backcountry Adventures . I backpacked in national parks across the U.S. , became a wilderness-therapy guide in Maine , and eventually relocated to a small town in New Hampshire’s White Mountains. Over the years, I collected knowledge I was missing on that first night at the base of Algonquin Peak—the importance of using a sleeping pad (not just that sleeping bag) for insulation, how to dress properly, and what to bring and leave behind. With a little more research ahead of time, though, I could have avoided learning the hard way.
From a novice-turned-pro, here are a few things to consider before spending your first night in the backcountry—for a much better first try than mine.
All products featured in this story are independently selected by our editors. However, when you buy something through our retail links, we may earn an affiliate commission.

A lightweight, durable tent is a must-have for your first backpacking experience.
Bring the appropriate gear
These days, there’s no shortage of gadgets designed to make your time outdoors as comfortable as possible. But when you’re halfway up the side of a mountain with a 65-liter backpack full of stuff, you’ll likely realize you would’ve been more comfortable if you had left some at home.
There are a number of companies, such as Outdoor Research , MSR , and Big Agnes , to name a few, that make lightweight, backpacking-specific gear. While you might shell out a little more for it, you’ll be much happier than if you choose to haul around that heavy Coleman tent and sleeping bag you've had in the attic for years.
Basic things you’ll need are a lightweight backpacking tent and sleeping bag , which come rated for specific temperatures—pick one that’s designed for 15 to 20 degrees lower than the weather you expect to encounter—a camp stove with fuel and something to cook in . You’ll also need a sleeping pad to provide insulation from the ground, a headlamp with extra batteries, storm-proof matches , water treatment filter , iodine tablets or a small dropper of bleach , and a backpack to carry it all in.

The right outerwear is just as important as solid base layers.
Dress accordingly
Showing up to the trail in jeans and a cotton T-shirt might not be huge a problem on a three-mile day hike, but it can quickly become dangerous for overnight backpacking when you spend the day sweating and evening temperatures drop significantly. Cotton is heavy, absorbs water, and doesn’t dry easily, which can lead to hypothermia in extreme cases. In general, avoid cotton for backpacking: Companies like Arc’teryx and Patagonia make synthetic, lightweight, and packable clothing better designed for the task at hand.
It’s also a good idea to bring even more layers than you think you’ll need, especially to mountainous regions. Nights tend to get significantly colder than days—and a fleece or puffy jacket with a rain shell goes a long way during cool nights on windy summits. You’ll also never regret having an extra pair of socks to change into at camp.

Jesse Ashlock

Lane Nieset

Kaylee Harter
Footwear is a matter of preference. Some prefer the support and durability of full-grain leather hiking boots when carrying a heavy pack, while others prefer lightweight synthetic boots or even trail-running shoes . Regardless of what you prefer for hikes, also bring a pair of lightweight camp shoes to change into at the end of a long day—your feet will thank you.
Plan ahead for every step
“Plan ahead and prepare” is the first of the seven Leave No Trace principles, which every backpacker should follow. These principles are designed to keep users of natural spaces safe, while also minimizing human impact in the outdoors, with guidelines on respecting wildlife, traveling and camping on durable surfaces, and disposing of waste properly, to list a few. In addition to learning the “LNT’s,” familiarize yourself with reading a topographic map to determine your mileage, spot water sources, decide where to set up camp, and map your overall route and evacuation routes for each day on paper. Gaia GPS is a helpful interactive map tool for plotting out your course, and can offers insights about elevation, water sources, and the length of a route so you can plan rest stops. The app also has the ability to download maps for offline use, if your phone GPS will work during the journey—but it's crucial to plot out the route on a paper topographic map in case you lose service.

Map out your journey, step by step.

Don't forget to bring (and know how to use) a compass.
It’s also helpful to make a meal plan so you don’t over- or underpack. The simplest way to go is to bring dehydrated meals, like the ones by Good To-Go , which are lightweight and require nothing more than hot water. Eventually, as your comfortability with backpacking increases, you can start getting creative with different campsite recipes you can make yourself.
Ensure you have emergency essentials, as well. The quickest and easiest option is to purchase a prepared first-aid kit designed for backpacking, although you can put one together yourself. In addition to the map you used to plan the trip, bring a compass (and know how to use it), whistle, an emergency bivy or mylar thermal blanket , a knife, gear-repair kit or simple duct tape, and extra clothes and food. A satellite phone or personal locator beacon (PLB) can also be useful in remote areas where cell reception is hard to find.

Going with an expert can be a worthwhile investment for your very first trip.
Hire a guide
While research is helpful, no amount of preparation can equate to actual experience. Backpacking with a guide isn’t a necessity, but it can help you avoid some of the discomfort that is inevitably going to occur during your first few trips. An experienced backpacker knows how to properly dispose of waste, where (and where not) to set up camp, how to choose a backpacking route based on available water sources and fitness level, and other skills that can only be sharpened by spending time in the field.

REI Adventures offers a number of group and private backpacking trips in the U.S. and beyond perfect for learning the ropes. In fact, they’ve recently added 17 new domestic itineraries, including a five-day backpacking trip in Yosemite that incorporates an ascent of the famous Half Dome. And 57 Hours , an online platform that connects outdoor enthusiasts with certified guides, also offers a number of backpacking itineraries.
No matter when you start backpacking, know that the learning continues, and that's part of the adventure. Every time I venture into the backcountry, I find a new skill or trick to make the experience more fun and comfortable. For example, in recent years, I replaced my water filtration pump and iodine tablets with a bleach dropper—an easier method than pumping that provides better tasting results than iodine tablets. Those lessons come with experience. But you don’t need to be a pro with perfected methods and systems to hit the trail; you just need to be prepared, so you can safely get that crucial firsthand experience of your own.
By signing up you agree to our User Agreement (including the class action waiver and arbitration provisions ), our Privacy Policy & Cookie Statement and to receive marketing and account-related emails from Traveller. You can unsubscribe at any time. This site is protected by reCAPTCHA and the Google Privacy Policy and Terms of Service apply.
Invalid email or password. Please try again.
You've shopped with us before!
Please set your password using the link below.
Create your Account
Already have an account?
Please correct the errors.
Passwords are case-sensitive, must be at least 8 characters in length, and must contain at least one special character.
- Include 8 or more characters.
- Include at least 1 special character.
For your free birthday gift!
Start your Expedition
Sign up with your email and start earning rewards with our exclusive loyalty program.
Explore More, Score More
Elevate your outdoor experience with Expedition Perks, where you earn points on purchases, get a bonus on your birthday, and more–it’s free to join!
Points On Purchases
Member Exclusives
Birthday Discount
Backpacking 101 – How to Plan and Outfit a Trip
How to plan and outfit a trip.
Hike & Camp
We are all drawn to the open trail, our gear on our back and map in hand, searching for some solitude next to a campfire far beyond the lights of the city.
When you decide to leave the campground behind and make the leap to the backcountry, there is a lot to consider. My first backpack was a hand-me-down Gregory and it took me years to accumulate the necessary gear to support me in the wilderness as a bona fide backpacker.
Loading up your pack, leaving the car far behind, and carrying everything you need on your back combine to raise the stakes from your standard day hike or car camping overnight. But with a little planning and preparation, you’ll be set for some of the most memorable outdoor experiences of your life.
Where to Go
Pick a place that matches your skill set and abilities, fits within your budget and time constraints and most of all is motivating for your group—for example, if you love fishing for trout or want the chance to see a mountain goat and are looking for a moderate three-day trip, the Sawtooth Mountains of Central Idaho are an ideal choice. Outdoor magazines, regional guidebooks, and online backpacking forums can be great resources for choosing a destination and selecting a trail route.
Consider the terrain, realistic abilities of your group, and the goals of your trip. Will your route be a loop? Out and back to a scenic lake for fishing? Point-to-point, including a mountain summit along the way? Will you need to shuttle a car? Depending on where you’re going, budget anywhere from three to ten miles a day. Be sure to check local regulations and restrictions before you go. Can you have campfires? Are bearproof canisters required? What permits do you need to hike or camp there?
What to Bring
What you carry in your pack will be determined by where you go, what activities you plan to do and what kind of weather you’ll likely encounter. We’ve broken down your necessities by type of backpacking you’ll be doing.
Downloadable Backpacking Checklists
Thru-Hiking / Ultralight Backpacking
Who needs this list? Backpackers spending weeks or months on the trail, often on a major thru-hike like the Appalachian Trail or the Pacific Crest Trail. They’re covering 20+ miles a day, carrying a smaller pack weighing around 20 pounds.
Planning tip: While some nights are spent outdoors, shelter, meals, and opportunities to restock are sometimes found at hostels, shelters, or towns that the trail passes through. Planning is critical to identify and schedule these opportunities.
2-10 Day Adventure Backpacking
Who needs this list? Backpackers planning backpacking adventures of two to ten days, often to remote destinations. They’re covering 6 to 12 miles a day, carrying a packs weighing up to 40 pounds.
Planning Tip: Planning all meals is generally needed; if traveling in a group, some items like stoves can be assigned and food and/or tent parts can be divided between packs for maximum efficiency.
Weekend / Overnight Backpacking
Who needs this list? Backpackers planning quick getaways and camping locations beyond the reach of car campers. They’re covering short distances to reach a campsite of choice, carrying heavier packs than long-distance backpackers.
Planning Tip: Since your campsite may not be too deep in the backcountry, there’s a chance it may have amenities like fire rings, grills, or even bathrooms. Some research or even a recon hike could pay off if it means you don’t have to carry as much gear for your weekend.
No matter what the variables, you’re almost certain to be carrying/wearing the following items. Here are some considerations to help you make your selections.
Choose an internal frame backpacking pack , preferably from a company with a lifetime warranty. For overnight trips, 35-50 liters should be sufficient; multi-day trips will require 50-75 liters. Consider the gear requirements of the activities you plan to do on your trip (fishing, climbing etc.). It is crucial to size your pack based on your torso size, not your height, but most backpacking packs come with some range of adjustability. Expert Tip: Strap your sleeping pad, fishing pole or climbing gear to the outside of your pack if you run out of room inside.
Read more about choosing a backpack
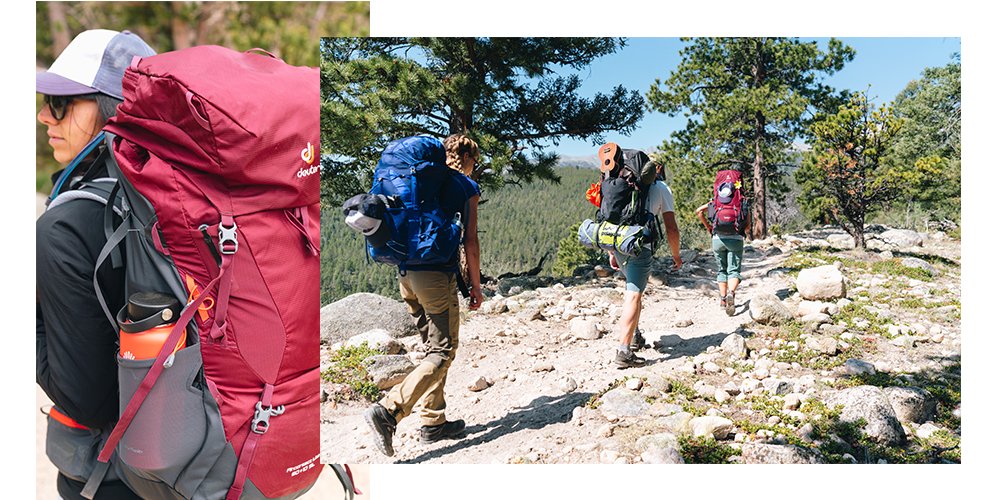
Full or mid-height hiking/backpacking boots with a Vibram sole are the backpacker standard, although you may prefer to use hiking shoes or even trail running shoes . Conventional wisdom states that the longer your trip and the heavier your pack, the more durable and burlier boot you will need to provide the proper support. On the other hand, many long-distance through-hikers will go with running shoes, keeping in mind the adage that one pound of weight on your feet is the equivalent of five pounds of weight in your pack! The breathability, waterproofing and weight of the boots or shoes are all important factors to consider. Expert Tip: Bring extra shoelaces; they are useful in a variety of situations.
Read more about selecting hiking shoes and boots
- Synthetic hiking pants and/or shorts: I tend to bring both, or convertible pants with zip-off legs. Synthetics are preferred because they dry quickly.
- Long underwear : I prefer natural fibers like wool over synthetics. Wool is more odor-resistant.
- Synthetic or merino shirt: Long sleeves help lessen your sun exposure and protects from insects.
- Midlayer fleece/hoodie: Lightweight, packable
- Waterproof jacket and pants : Gore-Tex Paclite is a good breathable, lightweight material
- Lightweight puffy jacket: Packability is key. Down is more packable, but won’t work as well as synthetic insulation when wet.
- Socks (at least two pairs): Consider the height of your boots or shoes. I prefer a mid-length wool sock . Expert Tip: Avoid cotton since it tends to cause blisters.
- Beanie and lightweight gloves : Temperatures drop quickly in the mountains and desert at night.
- Sandals or slip-on camp shoes: Your feet will thank you.
- Hat and sunglasses: The higher the elevation, the more intense the sun exposure so keep your face and eyes protected.
- Lightweight backpacking stove and fuel : Make sure to bring more than enough fuel for all your meals and to boil water. Read more about backpacking stoves
- Pot set : Remember to consider your group size and look for a cookset that packs small.
- Cooking utensils
- Bowl, cup, and spork: One for each hiker so you can have a proper toast around the fire.
- Sponge and bio-degradable soap: Expert Tip: A small pine bough works great to scrub dirty dishes.
- Water filter : Gravity filters are the easiest to use, especially for larger groups.

Sleep System and Tent/Shelter
- Sleeping bag : Down insulation has a better weight/warmth ratio than synthetic , but unless you get one filled with water-resistant down, it won’t work well if exposed to moisture. Learn more
- Inflatable or closed-cell foam pad : Choose an insulated pad since some will actually keep you cooler when flipped over.
- 3-Season tent with rainfly: If you have a dog or want comfort then go with a slightly larger tent. I use a 3-person tent for two people.
Read more about choosing a backpacking tent
Emergency / Essentials
- Headlamp : Varying modes with at least 100 lumens on the highest setting. Learn more about how to choose a headlamp
- First aid kit : Try to include pressure bandages, moleskin, medications, and emergency blanket.
- Lighter/fire starter : Turn on Caveman TV and relax.
- Map and compass or GPS : I am old-school and just bring a local map and compass.
- Accessory cord : Uses are endless, but I use mine typically to hang a Bear Bag.
- Toiletries: Sunscreen, lip balm and toothpaste are a must.
- Insect repellent : Can make or break a trip. You might want to consider insect-repellent clothing in addition/instead.
- Duct tape/repair kit
- Knife or multi-tool
- Camera /journal: To prove you were there and how amazing it was.
- Trekking poles: To reduce the strain on your knees and improve your balance with a heavy pack, consider one or two trekking poles. Expert Tip: Your trekking poles can also be used as your tent poles for certain tent setups.
- Whistle or signaling device: You won’t need it until you really need it.
- Solar charger : If your phone runs out of battery you will never get a picture of that wolverine or be able to call for help (assuming you’re in range).
- Backpacking saw : Make sure you are allowed to cut wood and have a fire. Expert Tip: Look for fallen trees, which tend to burn better.
- Binoculars : Mountain goats will not let you get too close, so if you want to see more than just small white dots, bring one along.
- Bear Spray: A requirement in Alaska but not completely necessary if you take the right precautions with your food. However, it can never hurt. Read more about bear safety in the backcountry
What to Eat
Planning & shopping.
Planning the meals for your trip is all about packing enough calories to fuel your high-output days without toting a ton of extra weight in your pack. Whether you choose to purchase pre-made dehydrated meals that come in a bag or assemble your own, create a meal plan for each day of your trip.
A gallon of water weighs more than eight pounds, so one of the easiest ways to cut a good chunk of weight from your pack is to dehydrate your food. Pasta sauces, vegetables, chunks of fruit, and mushrooms can all be dried in a home dehydrator and reconstituted in camp. Choose meals with dry base ingredients such as oatmeal, couscous, or rice. But even as you’re trying to save weight, don’t sacrifice the little extras (like a block of cheese, hot sauce, a few fresh veggies, or a chocolate bar) that will help elevate the standard camp meal.
Once you’ve assembled your food, remove any ingredients from bulky packaging and separate them out for each meal in a zip-top bag. Label them Breakfast #2, Dinner #4, etc. This will help avoid a yard sale once you’re in camp and will help keep your food bag or bear canister organized.
Carry at least two liters per person per day, and more in hot weather. Bring a water filter or purification tablets with you and check your maps ahead of time for water sources along your route so you’re not carrying more water than necessary. Check with the local ranger station on the status of natural springs, which can dry up in certain locations or times of year.
Learn more about water filtration and sterilization systems
Protection for Your Food
Whether it’s chipmunks or grizzly bears, you’ll likely need to protect your food from animals. At the very least, store your food in a durable, secure stuff sack, and when traveling in bear country, either hang your food from a tree as high as possible or carry a bearproof canister .
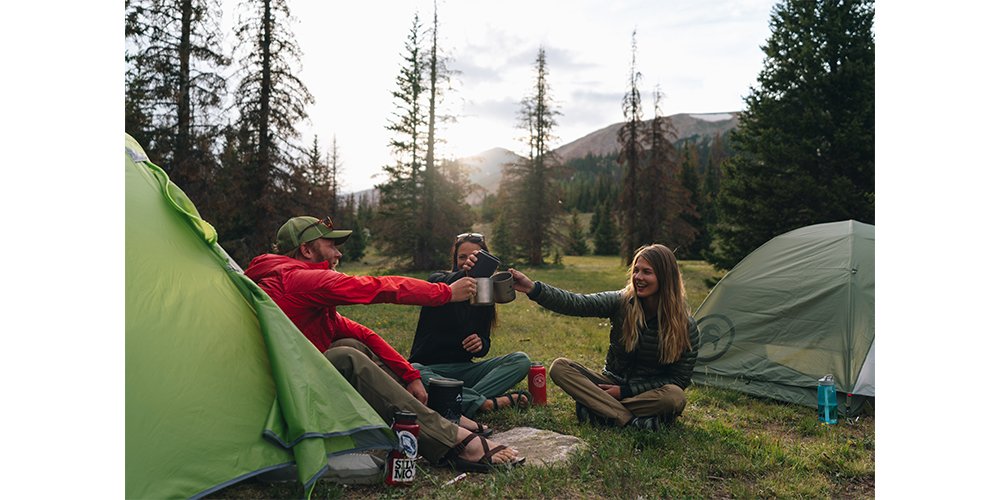
How to Pack
Packing a backpack properly isn’t just about making sure everything fits—where you put things will largely affect how comfortable your pack is to carry. A general rule of thumb is to put water, cooking gear, and other heavy items close to the center of your back and pack lighter weight items around them. This will help you maintain balance by keeping the bulk of the load close to your center of gravity. Keep snacks, maps, and other small items you might need throughout the day in the hip-belt pockets, side pockets, or lid of your pack for easy access.
In sum, pack your pack as follows:
- Lid: Map, snacks, and other essentials
- Sides & Top: Clothing, tent components, other light/compressible items
- Center: Water, food, and cooking gear
- Bottom: Sleeping bag
- Outside: Sleeping pad
Expert Tip: Split the weight of communal items by divvying up things like the tent and cooking gear among the group. Nobody wants to be the packhorse.
In Case of Emergency
Stay on the radar.
The idea of backpacking is to get away from it all, but that being said, always leave your trail itinerary, including where you plan on camping each night, with a friend or relative and give them contact info for local authorities in case you don’t return on time. In very remote or challenging terrain, it can be worth carrying a Personal Locator Beacon (PLB), which can track your progress via GPS and when activated will send a distress signal to local authorities and Search and Rescue teams.
Embark with Proper Skills and Gear
Hitting the trail equipped with a good first aid kit, fire-starting materials, and some basic first aid knowledge will safeguard you from most minor mishaps. Know how to start a fire, where to collect water, and how to build a basic shelter.
Expert Tip: Take a basic first aid course or, even better, become a Wilderness First Responder (WFR).
Getting Ready to Go
Take a car camping trip, short overnight trip, or even just camp out in your backyard for a night with the gear you plan to use. Becoming familiar with your gear and making sure it works properly before you leave can save you big problems on the trail.
Strapping on a 50-pound pack and walking eight miles in a brand new pair of hiking boots can turn into a blistery nightmare. Wear your hiking shoes or boots on short day hikes or even to work to help break them in. Your feet will thank you later. Make sure to address ‘hot spots’ immediately to prevent blisters from forming .
- Learn about Leave No Trace principles . This essential concept helps preserve the wilderness for everyone to enjoy. Read about it and practice it religiously.
- Make a Checklist . Print out one of the lists above and keep it with your gear.
- Fit your backpack properly before setting out. A good fit helps prevent sore spots and back pain.
- Take toilet paper off the roll, fold it into small accordions, and give each hiker his or her own TP in a re-sealable baggie. This is more convenient and saves packing space.
- In some areas, the BLM or Forest Service requires hikers to pack out their waste , including human waste. Find out before you go, and purchase waste bags if necessary.
- Check the weather and be prepared for some down time. Consider bringing a deck of cards—it’s small, light, and versatile—and a small book.
Prepping for your first backcountry backpacking trip takes some work, but if you do the research and assemble the right gear, it can open the gates to endless travels and a lifetime of epic trips.
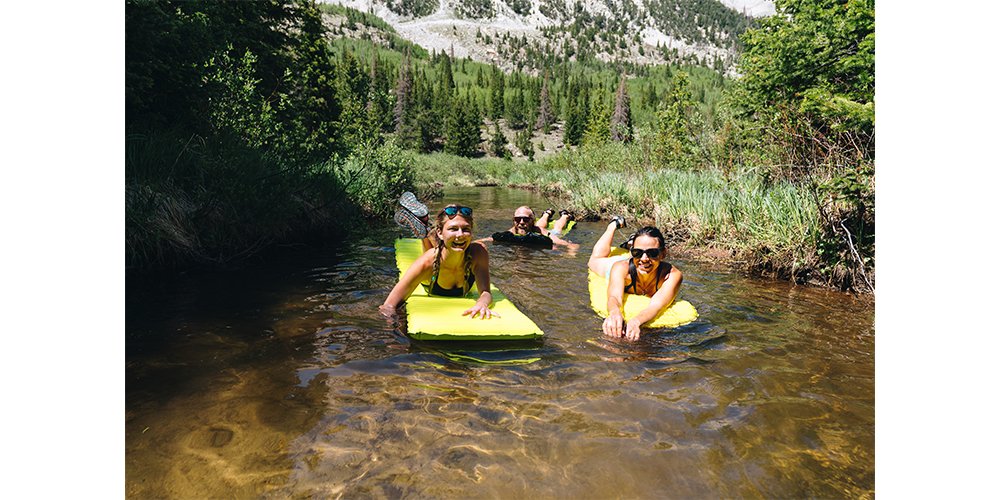
- How to Choose a Backpacking Tent
- How to Choose the Right Camping Sleep System
- Tips for Choosing a Campsite
- Low-Impact Camping Principles
- Backpacking Stove Systems: Canister or Liquid Gas

Built by Backpackers, for Backpackers
Backpack Map is the ultimate backpacking resource -- a comprehensive, curated site that covers over 500 trip destinations across the United States. With site links, maps, restrictions, estimated trip durations, and more, you'll find a multitude of new places to explore. And the best part? It's absolutely free.
Search the Map


The Hungry Hiker
Tips & Tricks on How to Plan Your Next Outdoor Adventure
How to Plan Your First (Or Next) Overnight Backpacking Trip
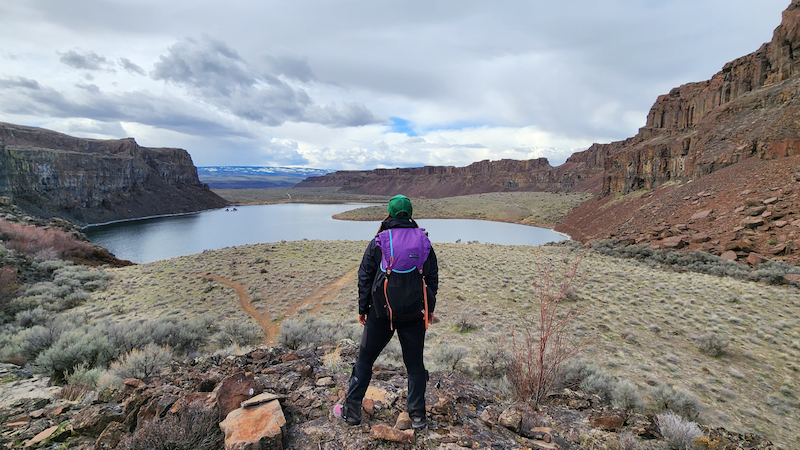
Want to go on an overnight backpacking trip and have no idea where to start with planning a trip like this? Trip planning for an overnight backpacking trip can be overwhelming and intimidating for a lot of people, especially if you’re new to backpacking.
I’m going to share with you some of my favorite tools I use to plan overnight backpacking trips, in hopes of helping you learn how to plan either your first or next overnight backpacking trip of your own.
I recently took a group of my students from my online backpacking program for women, The Confident Solo Female Backpacker System out for an early season overnight backpacking trip to Ancient Lakes , here in Washington State. This turned out to be a very fun, successful and amazing trip!
In this blog post, I’ll walk you through my entire process of how I planned this trip for my students including how I decided where to go, why I chose this specific location and some of my favorite resources I used to plan our trip. Then I’ll share with you a special online tool I created that will help you start planning your first or next overnight backpacking trip.
If you’re feeling a little overwhelmed with the trip planning process, it’s okay. Trip planning for any trip, no matter where you’re going and how long you plan on being out there can be overwhelming for a lot of backpackers, AND not just beginner backpackers, but also experienced backpackers as well.
Here’s how I planned our recent overnight backpacking trip to Ancient Lakes . Starting with how I decided where to go for our group overnight backpacking trip.
How I Decided Where To Go Overnight Backpacking
When planning a group trip for my students, I always start by taking the trip objective and the experience level of my students into consideration when deciding where to go.
My objective for this group trip was to give my students a chance to practice using their gear in a low risk setting while having fun. I knew for most of the students in the group, this would be their first overnight backpacking trip this year. This would also be considered an early season trip, a first for a majority of the group. I wanted to pick a place where they could safely and comfortably ease back into the backpacking season, apply what they’ve been learning in my program out on trail and have fun while they’re out there.
The time of year is another consideration I kept in mind when deciding where to go. We would be going on our overnight backpacking trip in March, which is still considered winter/early season here in Washington. When most places, especially at a higher elevation are still covered in snow, I knew Ancient Lakes over in Eastern Washington would be a good option, terrain and weather-wise. This time of year, the temperatures can be milder than most areas in Western Washington. There’s very little elevation gain and there’s no snow on the ground. Ancient Lakes is also a great option for this time of year because during the warmer months, the snakes and ticks come out, the area is exposed with very little shade and the water sources are extremely limited.
I also wanted to keep the total trip mileage and daily mileage in mind for my students. Since I knew this would be the first overnight backpacking trip of the year for most of the group, I didn’t want to pick a place where we’d have to hike a lot of miles just to get to camp.
Ancient Lakes has a number of different trails with multiple trailheads to access the area. I could make this trip – the hike to camp, water and our day hikes throughout the trip – as long or as short of a hike as I needed to, while keeping my students in mind.
I also didn’t want to have to deal with needing to secure a permit for this trip. There’s no permit needed to camp anywhere at Ancient Lakes. All of the tentsites are first come, first served and free. The only permit required is the Discover Pass at the trailhead.
Something else I wanted to take into consideration when choosing a place to take my students backpacking was picking an area that I was already familiar with. Since I would be leading the group, I wanted to pick a place where I felt comfortable and had been before.
I’ve day hiked the Ancient Lakes area multiple times before. I was familiar with the drive to get to the trailhead, the different trailheads we could start our trip from, the tentsites in the area, the terrain we’d be hiking through, and all of the day hike options we’d have while we were out there. I also knew that this area would be well-traveled and that we wouldn’t be the only group out there.
Part of my research for this trip included previous day hikes I’ve been on out in this area. I was familiar with the drive to get to the trailhead, the different trailheads we could start our trip from, the tentsites in the area, the terrain we’d be hiking through, and all of the day hiking options we’d have while we were out there.
I also read current trip reports for the area on both the WTA website and AllTrails , to get a feel for the current trail conditions.
Then, I looked at a map and created a route using Gaia GPS to determine our total trip and daily mileage, possible places to camp, water sources and day hiking options in the area.
While doing my research, I also learned that there would be limited water sources in the area. Even though there were lakes nearby, they wouldn’t be safe to drink out of, even if we filtered the water because all of the water in the lakes were irrigation runoff.
For this trip, we’d have to carry in a large amount of water on Day 1 and then plan to hike down to the river, which would be a 6-mile hike roundtrip from camp and back, to collect and filter safe drinking water to bring back to camp.
Also, while doing my research, I learned that since it was still considered early season (meaning that the area would be cooler days and even colder nights), local wildlife like ticks and snakes wouldn’t be an issue yet.
Checking The Conditions
Once I’ve completed my research for the Ancient Lakes area, I started checking the trail conditions, road conditions and weather forecast to get an idea of what we could expect while being out there.
Each day up until leaving for trip, I would look for any new trip reports on both the WTA website and AllTrails .
Since I knew I’d have to travel over a mountain pass to get to Eastern Washington, I also kept an eye on the road conditions for Snoqualmie Pass through the Washington State Department of Transportation (WSDOT) website .
And for weather, I checked the current weather forecast through the National Weather Service or NOAA website for the Ancient Lakes area a week prior to leaving for the trip, a couple of days before the trip and then again, the night before and morning of leaving for the trip, just to see if anything had changed.
Planning The Trip
Then for the actual planning for the trip, I used the routes I created on Gaia GPS to note total trip and daily mileage, elevation gain/loss, nearby trailheads and parking lots, possible tentsites, potential water sources and multiple day hiking options in case we wanted to make our hikes during the day shorter or longer.
Once I put together a plan for the whole trip and plotted out a route for each day we’d be out on trail, I put together my meal plan for the trip based on the number of days we were planning on being out on trail. Then I packed up my food and moved on to deciding what backpacking gear to bring for the trip.
Backpacking Gear To Bring
If you’re interested in seeing the backpacking gear I brought with me for this trip, check out my LighterPack.com list for this trip.
Keep in mind when deciding on what backpacking gear to bring for your trip, you’ll need to consider how long you plan on being out there, how many miles you plan on hiking during your trip, both daily mileage and overall trip mileage, the time of year, the forecasted weather for the area, the type of terrain you’ll be traveling through and camping on and nearby water sources..
There’s a lot of information out there about backpacking gear, but how do you sort through all of the information trying to figure out what gear is going to work for you, the type of trip you want to go on and the area and/or climate you’ll be hiking in?
I’ve put together a free Backpacking Gear Packing List you can download and print out to use when planning your trip. This packing list will help give you an idea on what gear you’ll need to bring with you for an overnight backpacking trip.
READY TO START PLANNING YOUR OVERNIGHT BACKPACKING TRIP?
Now that you’ve seen how I planned my recent overnight backpacking trip with my students using some of my favorite trip planning resources, you’re probably excited about planning your own trip, but maybe you’re still feeling overwhelmed about the whole process. This is why I created a special online tool that will help you start planning your first or next overnight backpacking trip.
Introducing The Hungry Hiker Backpacking Trip Planning Masterclass , a step-by-step guide on how to plan your first or next overnight backpacking trip.
The Hungry Hiker Backpacking Trip Planning Masterclass will cover everything (in detail) from how to prepare, research and plan for your trip to the backpacking gear you’ll need.
This masterclass also includes navigation and trip planning video tutorials and digital and printable trip planning resources along with tips and tricks for first time solo backpackers.
This online class is self-paced so you can work through all of the material at your own pace and easily fit it into you own schedule and time zone whenever you’re ready to start planning your trip. Once enrolled, you’ll have lifetime access to the class so you can refer back to it whenever you’re planning future overnight backpacking trips.
If you’re ready to finally start planning your overnight backpacking trip this year, then this masterclass will help you get to the trailhead.
CLICK HERE to learn more and sign up for The Hungry Hiker Backpacking Trip Planning Masterclass.
Disclaimer: The-Hungry-Hiker.com is a participant in the Amazon Affiliate Links and AvantlInks Program, affiliate advertising programs designed to provide a means for sites to earn advertising fees by advertising and linking to Amazon.com and other affiliated sites at no cost to you. Please note, I only link to products and services I personally use and trust.
Inspired? Pin It!

1 Comment on How to Plan Your First (Or Next) Overnight Backpacking Trip
- Pingback: I Got Tired of Waiting for Someone Else to Go Backpacking With Me - The Hungry Hiker
Leave a Reply Cancel reply
Your email address will not be published. Required fields are marked *
Save my name, email, and website in this browser for the next time I comment.
Notify me of follow-up comments by email.
Notify me of new posts by email.
How to pack like a pro for a backpacking trip in 2022

May 12, 2022 • 7 min read

Your shoes and day bag can make or break your trip © Peter Amend / Getty Images / Image Source
So you’re taking the leap. The big trip is booked. There’s nothing standing between you and the unforgettable adventure that’s about to unfold…except, you still have to pack.
Wondering where to start? Avoid backache, ripped zips and other packing nightmares with our essential backpacking packing list.

How to pick the right backpack
Before you decide what to take, you need to determine what to take it in. Choosing a backpack can be confusing, and the web is rife with advice from people who insist you can travel for six months with nothing but a postage-stamp-sized carry-on, while others woefully recall their experience of lugging a 90-liter bag around the world. Newbie travelers are often tempted to take everything but the kitchen sink, but limiting your backpack space is the best way to avoid this common pitfall.
The sweet spot lies somewhere in the middle: a backpack between 40-70L is fine for a long-term trip – the trick is not to stuff it full.
Try the Kelty Redwing 50 for men or women. It has an internal frame, fits carry-on requirements for most major and regional airlines, is extremely durable and performs well whether you're out on the trails or jumping from hostel to hostel.
Remember to also take a good-quality day bag that can be kept inside your backpack or used as hand luggage. We like the Osprey ultralight stuff pack . It only weighs three ounces and feels full-featured despite its packable design.
How to pack for a big trip - tips from experienced travelers

Packing cubes and compression sacks
Stuffing socks in shoes will only get you so far. Believe me – compression sacks are your new best friends. Besides saving considerable space, they can protect clothing from grime and spillages, as well as separate dirty laundry from the holy grail of backpacker apparel: clean underwear. Use packing cubes to store individual outfits if you’re going somewhere where it will be difficult to sift through the contents of your backpack – this can be particularly useful when camping or staying in cramped conditions such as a sailboat or camper van.
For the ultimate in packing cubes try Shake Pak . These cubes are built to last through weeks on the road.
Keep toiletries in a good quality transparent waterproof bag to contain shampoo explosions and allow for easy access. Like these TSA-approved toiletry bags .

Always pack versatile clothing
We know this sounds like jargon, but truly the best way to look half decent on the road is to pack a “capsule wardrobe”. Sticking to a neutral color scheme and packing plenty of layers means you can mix and match outfits easily, conjuring seemingly countless looks for a variety of climates out of a few tops and some cleverly chosen accessories.
A large statement scarf or sarong is a great multipurpose item: it keeps you cozy, doubles as a cushion for long bus journeys and can cover your shoulders when visiting sacred temples. The Mer Sea travel wrap comes with its own bag and is so versatile it can be cozy or fancy whenever you need it to be.
Travel gear reviews: clothing to take on the elements

Health essentials, COVID-19 and creature comforts
You know you need a first-aid kit. But be strategic: unless you’re going somewhere so remote that you’ll have no access to key medicines or supplies, you probably don’t need 12 packs of painkillers and a liter of liquid skin glue. A pack of high-quality face masks, bandaids and blister patches, (a reasonable amount of) painkillers, antiseptic cream, antihistamine, travel sickness tablets and prescription medications/contraceptives should suffice, along with your soon-to-be-treasured anti-diarrhea pills and laxatives. For the sake of your mental health, pack earplugs, an eye mask and if you know you struggle to nod off, a calming lavender essential oil roll-on.
Even though you're likely going to be outside a lot, you still will need to know the local advisories and regulations regarding COVID-19 safety. What vaccines will you need? Do you need test results and if so, what kind of tests qualify and in what time window? Will you have to quarantine upon arrival? With regulations changing daily, start at Lonely Planet's Health Hub for up-to-the-minute pandemic travel advisories.
These earplugs are reusable and moldable so they work great in lots of different ears.
This silk eye mask from Slip helps fight fine lines and wrinkles all while ensuring proper sleep on long-haul flights.
And for non-GMO-verified essential oil, try NOW organic Lavender calming blend and rest easy.
8 tips to stay healthy on vacation from celebrity trainer Harley Pasternak

Tech and entertainment
Digital nomad or not, chances are you’ll be taking some tech. Even if you’re flying by the seat of your smartphone, you’ll need a charger, a global adaptor and a portable battery (a life-saver if you’re dependent on mapping apps). Throw in a laptop, camera, GoPro, drone and Kindle and your inventory suddenly got a whole lot more valuable and heavier. Keep tech in hand luggage wherever possible and, to echo the station announcements you’ll soon be hearing everywhere, never leave your bag unattended.
Do some digital packing too: download crucial apps before you leave home to avoid flaky wifi or expensive roaming charges. If you’re a paperback fan (or love a good guidebook) don’t take more than one or two – you can switch them at book swaps as you go.
Lonely Planet's ultimate digital nomad packing list

Eco-friendly kit
It’s 2022. The “take only pictures, leave only footprints” backpacker mantra is no longer enough. Pack a reusable water bottle (with an in-built filter if necessary) like the LifeStraw Go . Look for packaging-free or refillable toiletries. Bring lightweight bamboo straws and cutlery like this travel cutlery set that comes in a neat roll with a brush for cleaning. Finally, don't forget environmentally-friendly sunscreen like Thinksport SPF 50+ which is safe for coral reefs and top-rated by the EWG.
As refreshing as they are, even biodegradable wet wipes can clog sewage systems, particularly in less developed countries; take a flannel or muslin cloth for thorough face washing. Zero-waste sanitary products (reusable towels, menstrual cups or period-friendly underwear) will minimize costs and use less backpack space too.
Into the green: eight destinations for an eco-friendly escape
Padlocks and backup documents
A mini padlock on your backpack zippers will help deter anyone from pinching whatever you last stuffed into the top of your bag, while larger ones are handy for hostel lockers (they usually sell them at an inflated price if you’re stuck). It’s worth taking hard photocopies of your passport, driving license and insurance documents, or at least a USB stick with the digital versions, in case any get lost or stolen.
Still not sure what to pack? Read our ultimate guide to packing like a pro before you go as well!
What not to pack
- Sleeping bag : most hostels ban them anyway due to their bedbug spreading properties, providing clean sheets instead. If you’re fussy about bedding, bring a silk sleeping bag liner – but this is totally optional
- Hairdryer and high heels: embrace the laid back look – you can always pop to a salon or buy a cheap pair of snazzy shoes if you have an impromptu glamorous night out
- Neck pillow: unless it’s inflatable (others add too much bulk). And even then, is it really worth it?
- Anything of true sentimental value: because insurance can’t replace the irreplaceable
- A standard towel: or so say... most travelers. Four months of carting around a smelly, useless microfiber towel taught me to always take one just in case – which takes us to this article’s caveat: everyone’s different. If you really want to take something, just take it. You’ll soon find out if it was the right decision!
You might also like: The expert's ultimate backpacking bucket list These destinations are the world's top backpacking hotspots What is backpacking? The eternal travel debate
This article was first published Oct 10, 2019 and updated May 12, 2022.
Explore related stories

Destination Practicalities
May 17, 2024 • 7 min read
Hikers, birders and 'berg hunters will find abundant adventures in Newfoundland. Make the most of a trip to this wild and rugged isle with these top tips.

May 16, 2024 • 12 min read

May 18, 2024 • 11 min read

May 18, 2024 • 10 min read

May 18, 2024 • 7 min read

May 17, 2024 • 6 min read

May 17, 2024 • 4 min read

May 17, 2024 • 14 min read
Travel Europe on a Budget
The Savvy Backpacker
Backpacking Europe | Our Epic Step-by-Step Travel Planning Guide
An easy guide to budget travel in Europe.
City Guides .\33 a132798-3f3b-4585-954d-7e70cf863447{fill:#231f20}
I created this step-by-step travel guide to prove that planning budget travel doesn’t have to be daunting — whether you’re backpacking through Europe or just a budget-minded independent traveler.
This guide is broken down into different phases of the planning process:
- Initial Trip Planning
- Budgeting and Money
- Packing Lists and Advice
- Accommodation
- Transportation
- Travel Gear and Travel Services Recommendations
- More Helpful Travel Tips
Under each phase, you will find links to our most important travel articles — I suggest reading through each one. If you follow these steps you’ll be prepared to have an amazing trip to Europe.
Note: You can find even more information on this website’s the top menu.
PHASE ONE: Initial Trip Planning

These are the first steps to take when planning your trip to backpack Europe. Here you’ll start planning what cities and countries to visit, create a travel itinerary, estimate your travel costs, book your flight, and a range of other things.
You’ll probably spend a large amount of time on this phase — especially the itinerary planning.
Europe Itinerary Planning and Travel Logistics
How To Create a Europe Travel Itinerary that fits your travel style, travel goals, and budget.
I’ve also put together some sample itineraries to help give some ideas of places you might want to visit:
- Best Of Europe Mega Trip Itinerary (Travel Time: 8-10+ weeks)
- Eastern Europe MegaTrip Itinerary (Travel Time: 6-10 Weeks)
- Gateway to Eastern Europe Travel Itinerary (Travel Time: 2-4 Weeks)
- Our Most Important Tip for First-Time Travelers: Slow Down
- The Most Visited Cities in Europe
Choosing Travel Insurance
I recommend buying travel insurance for your trip to protect against any unforeseen travel mishaps. Here are some Tips For Choosing Travel Insurance .
The Savvy Backpacker’s City Travel Guides
Discover practical travel information, must-see sights, where to eat, how much to budget, public transportation tips, where to stay, and more about more than 20 of Europe’s Most Iconic Cities :
- Amsterdam Travel Guide
- Barcelona Travel Guide
- Berlin Travel Guide
- Florence Travel Guide
- London Travel Guide
- Paris Travel Guide
- Rome Travel Guide
- Seville Travel Guide
- SEE TRAVEL GUIDES FOR MULTIPLE OTHER CITIES
Related: The Best Party Cities in Europe
Finding Cheap Airfare to Europe
Your plane ticket to Europe is one of your greatest expenses. Here’s our Guide To Finding Cheap Flights To Europe .
Best Travel Guidebooks and Online Resources
From Lonely Planet and Rick Steves’ guidebooks to Wikitravel and TripAdvisor, there is a wealth of information to help you choose what to do and see. I review My Favorite Online Travel Resources .
Choosing Travel Seasons
The summer might be the busiest travel season but Europe is a great place to visit year-round. We’ve listed the positives and negatives of traveling during each season .
Pre-Departure Travel Advice
Before you head off to Europe be sure to check out this Pre-Departure Travel Checklist so you don’t overlook any small, but important, details.
Get an Affordable High-Speed Mobile Data Plan For Your Phone
Having fast and reliable mobile data for your smartphone is a requirement these days. Check out my guide on how to use your phone in Europe and our guide to the best SIM Cards and Data Plans for Europe .
If you have a newer phone, check out our guide to the best Prepaid eSIM Data Plans for Europe .
Frequently Asked Travel Questions
I get sent a lot of questions about traveling in Europe that don’t warrant their own article — so I made a Mega-List Of Random Travel Questions .
Phase Two: Budgeting and Money

Let’s dive into the million-dollar question… how much does it cost to travel through Europe? Below are some helpful articles to help you estimate how much money you’ll need to backpack Europe on a budget.
I also cover various topics like using ATMs and credit cards, exchanging currency, and other money-related issues.
Estimating Your Travel Costs
Here’s a high-level guide to estimating How Much It Costs To Backpack Europe on a budget. I break down the average cost of food, alcohol, accommodation, sightseeing, transportation, pre-trip travel expenses, and other common expenses.
City Price Guides
I’ve created In-Depth City Price Guides that cover travel costs for 30+ cities in Europe. Each city guide includes average prices for food, accommodation, sightseeing, and more.
Using Your Money in Europe
Everything you need to know about exchange rates, using ATMs, using debit/credit cards, avoiding/minimizing foreign transaction fees, and more. Check out our Guide To Using Money While Traveling In Europe and our Guide To Using Credit Cards and Debit Cards in Europe .
Daily Money-Saving Strategies
Here are some Simple Money-Saving Europe Travel Tips you can do every day to save money while traveling. Here’s our Guide To Eating On A Budget While Traveling Europe for more money-saving tips.
Phase Three: Packing Advice & Travel Gear

Packing for travel in Europe can be confusing and frustrating — especially if you’re backpacking across Europe or just trying to pack light. These guides will help you choose what clothes and travel accessories to pack and have advice on packing light.
Europe Travel Packing Lists
I’ve written numerous packing lists for multiple travel styles. Each article covers functional and fashionable clothes for traveling through Europe, helpful travel accessories, toiletries, electronics, and what items you should leave behind. Check them out!
- Backpacking Europe Packing List (for Men)
- Backpacking Europe Packing List (for Women)
- Europe Packing List (general packing list that’s not solely “backpacking” focused)
- Ultralight Travel Packing List (taking traveling light to the next level)
- Winter Europe Packing List
- Skincare, Makeup, and Beauty Essentials For Travel
The Best Travel Backpacks
I love travel backpacks and we’ve personally tested well over a dozen of the most popular backpacks. Here’s a list of the Best Travel Backpacks (Updated For 2022). Be sure to check out our Best Travel Backpacks for Women as well.
I’ve also compiled a list of the Best Carry-On Backpacks if you’re traveling light (which is highly recommended).
Related Article: Things to look for when buying a travel backpack & best travel backpacks for Europe (slightly old but still solid information).
Travel Gear Buyers Guides
I’ve reviewed a lot of travel products over the years. Here are a few of our most popular travel gear guides:
Travel Footwear
- Best Travel Shoes For Women
- Best Travel Shoes for Men
- Waterproof Boots for Women
- Waterproof Boots for Men
Travel Clothing
- Best Travel Underwear
- Best Travel Socks
- Guide To Finding Fashionable Travel Clothes
Travel Electronics
- Using Prepaid Data Plans and Smart Phones in Europe
- How To Buy A SIM Card In Europe
- Guide to Using Your Electronics in Europe
- The Best Travel Apps
Travel Aids
- Best Daypacks for Travel
- Best Packing Cubes
How To Not Look Like A Tourist
It’s not always easy to stay fashionable while also living out of a backpack or suitcase. Here are some tips for not looking like a tourist.
- Female Travel Fashion Advice
- Male Travel Fashion Advice
Travel Packing and Organization Strategies
Living out of a suitcase or backpack does pose a few challenges. Here are some Travel Packing Strategies to help you efficiently organize your travel gear and prevent wrinkles in your clothing.
Related: Tips for using Packing Cubes .
Backpack Vs Suitcase
Do you need a backpack for traveling around Europe? Of course not. Plenty of people use suitcases. Here are some Tips For Determining Your Luggage Style .
Winter Travel Packing Tips
Winter travel is great but you need to know how to dress properly for the cold. Check out our Guide To Dressing For Winter In Europe for tips on dressing in layers to keep you warm and dry without wearing a lot of bulky clothes. Also, see our Winter Europe Packing List for some of our favorite winter gear.
Phase Four: Hostels, Hotels, Rental Apartments & Other Accommodation
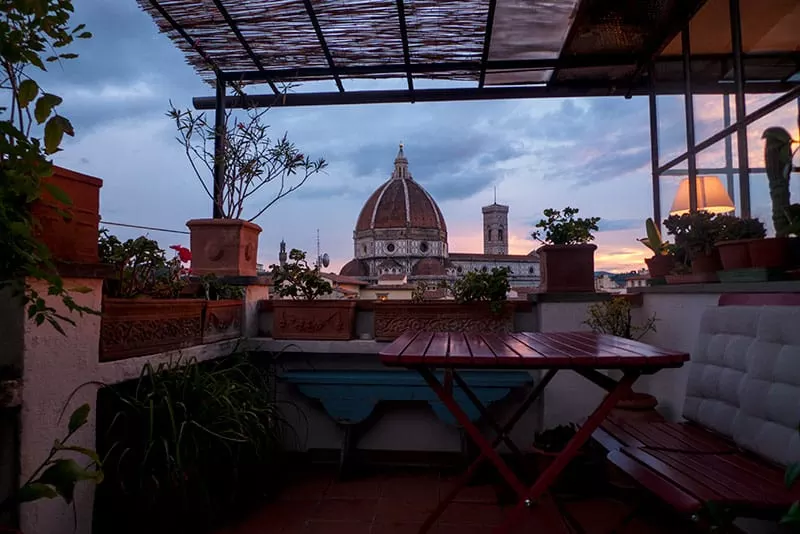
Accommodation is one of your biggest expenses. In this section, I’ll focus on hostels, rental apartments, and Couchsurfing.
Guide to European Hostels
Curious about staying in hostels while traveling in Europe? Check out our Guide To Hostels In Europe — it covers everything you’ve ever wanted to know about staying in hostels and how to pick the perfect hostel for your travel style.
Also, check out this handy Guide To Hostel Etiquette .
Europe’s Best Hostels
Europe has a ton of amazing hostels. We’ve listed a few of the best hostels in Europe’s most popular cities.
- Amsterdam’s Best Hostels
- Barcelona’s Best Hostels
- Berlin’s Best Hostels
- Budapest’s Best Hostels
- Dublin’s Best Hostels
- Edinburgh’s Best Hostels
- Florence’s Best Hostels
- London’s Best Hostels
- Madrid’s Best Hostels
- Milan’s Best Hostels
- Paris’ Best Hostels
- Prague’s Best Hostels
- Rome’s Best Hostels
See The Full List Of Europe’s Best Hostels By City
Couchsurfing in Europe
Couchsurfing is a super popular way to experience Europe, save money on accommodation, and meet friendly locals. Here’s our Guide to Couchsurfing in Europe .
Short-Term Apartment Rentals & Airbnb
Short-term apartment rentals — especially Airbnb — have exploded in Europe and it’s one of my favorite ways to experience Europe’s cities. But picking the perfect apartment can be a little tricky. Here’s my Guide To Renting Airbnb & Vacation Apartments In Europe .
Related: Airbnb Review: Why It’s Our Top Choice for Rental Apartments
Phase Five: Trains, Flights, and Other Transportation in Europe
Planes, Trains, and Automobiles!
Europe has a great transportation network, making it incredibly easy to zip from city to city and country to country. The hardest part is choosing which method is right for your travel style and budget.
In this section, I cover each major transportation option system and give tips on finding the best deals.
Complete Guide to Train Travel in Europe
Traveling by train is the best way to get around Europe. Check out my Guide To Train Travel in Europe to learn the ins and outs of European rail travel.
We’ve also written in-depth guides about country-specific train travel and how to score the cheapest tickets:
- Belgium Train Guide
- England Train Guide
- France Train Guide
- Germany Train Guide
- Italy Train Guide
- Netherlands Train Guide
- Portugal Train Guide
- Spain Train Guide
- Switzerland Train Guide
How To Purchase Train Tickets
There are a number of ways to purchase train tickets — from at the station to online. Read our Guide to Buying European Train Tickets to learn about the different kinds of train tickets and ways to get the best price.
Eurail Pass Explained
Many travelers purchase a Eurail Pass to explore Europe. However, with so many different passes available it can be tough to decide which, if any, rail pass is worth the price. Read my Guide To Eurail Passes to see if a rail pass is right for you.
Budget Air Travel in Europe
Europe is home to multiple budget airlines so it’s not uncommon to find flights within Europe for less than $50. My Guide To Budget Air Travel In Europe will cover how to find the cheapest tickets and help you decide if air travel is right for your trip.
Related: Our Ryanair Survival Guide will help you navigate one of Europe’s most notorious ultra-low-budget air carriers.
Traveling Europe by Car
Exploring Europe by car is a great way to discover smaller towns and villages, but it is a nightmare if you plan on only visiting large cities. My Guide To Traveling Europe By Car will cover what to look for when renting a car and tips for navigating Europe’s roads.
What’s Cheaper? Comparing Train vs Plane vs Car
I did a little comparison to find the cheapest way to travel around Europe — check out my findings . By the way, this isn’t a perfect comparison but it’s a good overview.
Bus/Coach Travel in Europe
One of the cheapest methods of travel is via long-distance coach service but it’s also the slowest. Check out our Guide To Long-Distance Coach Travel In Europe to learn more about this option for cash-strapped travelers.
Phase Six: Travel Service Reviews

There are many amazing travel products and services that will make traveling more enjoyable and less stressful — but the choices can be overwhelming. In this section read our reviews on everything from our favorite socks and underwear to backpacks and other travel services.
Airbnb Rental Strategies
Want to live like a local? Try Airbnb. Read our Airbnb Review to see why Airbnb is one of our top choices for finding great places to stay and see our top tips for finding the perfect rental.
Contiki Tour Review
Contiki tours are a popular travel option that thousands of people take each year. Read my Contiki Tour Review to see the good and bad of Contiki Tours and determine if this is a good option for you.
Hostelworld Review
See why Hostelworld is my top choice for finding and booking hostels in Europe. Read my Hostelworld Review and learn the strategies I use to find the best hostels.
Phase Seven: More Helpful Advice For Traveling Europe On A Budget

This section features general travel tips for everything from spotting tourist scams and fashion advice to solo travel pointers and group travel tips.
Avoiding Tourist Scams and Pickpockets
Don’t be one of the many tourists who get ripped off while traveling through Europe. Read our Guide To Pickpockets in Europe and our Guide to Avoiding Common Tourist Scams .
How To Use Data Plans and Smartphones in Europe
Using your smartphone and data plan in Europe can be costly. Read our Guide To Using Smartphones and Data Plans in Europe , How To Buy A SIM Card in Europe , and Guide to the Best eSIMs for Europe to make sure you don’t rack up a huge phone bill.
Solo and Group Travel in Europe
How are you going to travel around Europe — with friends, with your significant other, or maybe you want to travel solo? Check out these articles to help you make the most of your travels.
- How To Travel Solo in Europe
- Advice for Solo Female Travel
- How To Travel Europe with Friends (And Survive)
Using Electronics Abroad
Worried about using your electronics in Europe? Read our Guide To Using Your Electronics in Europe to see what kinds of electronics you can (and can’t) use in Europe.
Travel Styles and Sightseeing Strategies
Here are a few helpful articles to help you get the most out of your day-to-day travels.
- Day-To-Day Sightseeing Strategies
- Simple Money-Saving Tips While Traveling in Europe
- Avoiding Common Travel Mistakes That Are Super Easy To Make
- Why Slow Travel Is The Best Travel
Our Favorite Online Travel Resources
The websites I use to book and plan our travels .
Start Your Own Travel Blog (And How To Make Money)
Learn How To Start A Travel Blog — My 100% free guide to making your own travel blog and tips for making money to help fund your travels.
PIN THIS ARTICLE:

Budget Travel Newsletter
The best budget travel tips sent straight to your inbox.
Join My Journey
Europe travel tips, advertising & privacy policies.
TheSavvyBackpacker.com is a participant in the Amazon Services LLC Associates Program, an affiliate advertising program designed to provide a means for sites to earn advertising fees by advertising and linking to amazon.com.
© 2010 - 2024 The Savvy Backpacker
Website Design by FHOKE
Backpacker Trip Planner
Plan your next backpacker trip.
Use PlanYourTrip to prepare for you next Adventure. With this page you can try out this application to find out about it's advantages. After registration your Trip can be saved. Have fun planning your next Backpacker Trip with the PlanYourTrip Planner.
You still need some inspiration for your personal travel planning? Just take a look at our sample trips!

GO-BACKPACKING .COM

Planning Resources
Please feel free to download and use any of the planning resources below. it is ultimately your responsibility to ensure you are prepared for your adventures, but we hope that these resources will save you some time and effort in organizing your planning process. if you have any questions or comments, please feel free to contact us ..

Backpacking Gear Checklist
This is the backpacking gear checklist Mark and Katie use for 3+ Season trips (most summer, spring, and fall conditions and locations). For winter trips, or for more extreme conditions, they change the items on this list. This list is considered “Light” but not “Ultralight”.

Backpacking Preparation Checklist
Use this checklist to make sure you are prepared for your backpacking trip. Remember, it is YOUR responsibility to ensure you have, know, and do everything you need to have a safe and enjoyable trip.

First Aid Kit Checklist
Use this checklist to make sure you have everything you need in your backpacking first aid kit. NEVER go backpacking without a first aid kit and make sure you know how to use the items inside. See our Emergencies in the Backcountry section on the "Learn" page for more information.

Mark's Gear List
This is Mark's personal backpacking gear list. He does not take every item on this list on every trip, and some trips require additional items that are not on this list. Take a look.

Sample Topographic Map
This topographic map depicts a route through Sage Creek Wilderness Area in Badlands National Park in South Dakota. Use it as an example for your creation of personalized topographic maps using online or downloadable software.

Sample Waypoints
This is an example of a waypoints list you would print on waterproof paper and take with you on your backpacking trip. This particular list is a 22-mile, 3-day loop through Badlands National Park in South Dakota.

Backpacking Itinerary Template
Microsoft Word Document
Fill out this itinerary template for your next backpacking trip. Leave a copy in your car, and give a copy to someone who will be responsible for calling the authorities if you do not return by the expected date and time.

How to Pack a Backpack
Another great REI resource: Packing a backpack is pretty simple, but there are some tips to make the process easier and to get you better results. Check out this video to learn how to load your pack properly.

REI Backpacking Checklist
This is a comprehensive backpacking checklist from REI, which is one of Katie and Mark's top choices for outdoor equipment and information. Their backpacking checklist is "your tried-and-true guide to packing smart. The list is intentionally comprehensive so you don’t forget anything important."
REI Ultralight Backpacking Checklist
Ready to take the next step in backpacking comfort? Try going ultralight. This checklist from REI will help you get started with this new and innovative style of backcountry travel.

Wilderness Medicine
Amazon Book
Katie and Mark have the privilege of calling Dr. William Forgey, MD a personal friend. He has been called the Father of Wilderness Medicine, and rightfully so. With more backcountry experience than anyone we have ever met, Dr. Forgey (or “Doc” to his friends) is the authority on wilderness medicine. His book, Wilderness Medicine: Beyond First Aid, now in it’s 6th edition, is an invaluable resource for the backcountry traveller.Katie and Mark have the priv
- Meet the Team
- Work with Us
- Czech Republic
- Netherlands
- Switzerland
- Scandinavia
- Philippines
- South Korea
- New Zealand
- South Africa
- Budget Travel
- Work & Travel
- The Broke Backpacker Manifesto
- Travel Resources
- How to Travel on $10/day
Home » Europe » Backpacking Travel Guide
The COMPLETE Backpacking Europe Travel Guide | 2024
Where in the world can you comfortably pass 3 countries and 3 different languages in a day? That’s the wonder that travelling Europe offers you. This continent has cultural variety, wild parties, mind-boggling history, world-class hostels, and new friends in spades.
I was born in Europe, so my travels here go back as far as my memories do. I’ve basked on the glorious Spanish beaches, skied in the Italian Alps, and dived into the depth of Roman history.
And yet, my crazy adventures in Europe are still only just beginning. I’m ALWAYS craving more.
Whether you’re thinking of a quick beginners’ trip or a full-blown, life-changing interrailing affair, you’re bound to fall in love. Maybe it’ll be a place, or a person or two. 😉
Although, if you don’t already know, backpacking Europe is no cheap thrill. Especially in the likes of Paris, Barcelona, and Amsterdam, even a hostel dorm can set you back and send you home with your tail between your legs if you’re not careful. I’ve heard one too many backpackers calling home asking mummy to pay their return ticket.
But you don’t need to be like them. Because you’ve got this backpacking Europe travel guide!
I’m here to dish it all. I’ll give you the low down on costs, the best travel itineraries, and all the tips and tricks you’ll ever need on on how to backpack through Europe .
It’s so beautiful I’m going to cry.

The Broke Backpacker is supported by you . Clicking through our links may earn us a small affiliate commission, and that's what allows us to keep producing free content 🙂 Learn more .
Why Go Backpacking in Europe?
Best travel itineraries for backpacking europe, best places to visit in europe – country breakdowns, 10 top things to do in europe, backpacker accommodation in europe, europe backpacking costs, best time to visit europe, sim cards in europe – unlimited internet, staying safe in europe, how to get into europe, how to get around europe, working in europe, european culture, some unique experiences in europe, faqs about backpacking in europe, final advice before visiting europe.
Backpacking Europe has no equal. There is no region on earth with such a diverse range of landscapes, cultures and languages contained within such a small(ish) space. Everywhere else is frankly boring when pitted against the technicoloured dream coat of Europe.
From alcoholic Bavarian breakfasts, ancient ruins and train rides so pretty they could briefly render a local politician speechless, the breadth and scope of Europe is enormous. Not forgetting we can make a mess in Eastern Europe and Scandinavia too, you’re basically screwed unless you have about a year.

For many people, backpacking Europe is about ticking off a list of the famous and well-known cities . Let me tell you now. GET THIS SILLY IDEA OUT OF YOUR HEAD. You’re not hitchhiking with the Jehovah’s Witnesses or conquering Triglav, Olympus or Korab from a Starbucks/Costa/Pret a Manger are ya?!?
Find the balance. Visit some awesome cities, but make time to head out into the sticks and see the side of Europe you didn’t expect. There is an impeccable backpacking vibe in Europe, and you are bound to take some truly questionable stories home with you…
…If only you knew where to look… 😉
How to backpack through Europe
Right children, as a native European with more travel experience than Leonardo di Caprio’s wandering eyes, I have some juicy advice for you. First things first: Europe is expensive. Learn how to mooch through Europe on a budget !
Staying at a hostel in a well-known city (e.g. London, Rome, Paris, Barcelona) can set you back around $70. If you’re trying to make your trip last, it is worth knowing which are the cheap countries , and how to get some sleep in the ones that aren’t.

It’s also worth remembering which countries aren’t in the Schengen zone. Not only might you need to make additional travel adjustments, but it is worth knowing if you want to extend your stay in Europe . Basically, this is just the UK, a large swathe of Eastern Europe, and Turkey. Good for long stays!
You may want to grab an interrailing ticket if you’re travelling far and wide. These can work out much cheaper than paying for each individual train, which is another great boost for the budget. Taking a tent can also save you some serious bank whilst backpacking Europe.
Europe is fucking huge and it packs a punch too. This means that even on a (hypothetical) lifetime Europe backpacking trip, just accept it: you’re never going to see it all.
Backpacking Europe is best when you can travel it slowly . But don’t stress it because there’s plenty of ground you can cover even on a shorter trip to Western Europe.
If you only have a week or so, I recommend that you focus your Europe trip on either A) just one country or B) a few close-together cities. Luckily, the travel infrastructure is really good: train travel is a dream and buses are frequent. Plus, thanks to the European Union and its open borders, once you’re in one country, you can basically keep crossing borders as often as you’d like.
Here are a few ideas for an awesome backpacking trip to Europe.
2-Week Travel Itinerary for Europe – The Big Bois of Backpacking Europe

Start your travels from Berlin . Germany’s capital is like its own little islet – nothing like the rest of the country. Explore its history and party at world-famous clubs before heading out to Hamburg – you know, to get a taste of “normal Germany”. I highly recommend staying in St. Pauli which is the coolest area in Hamburg!
From Germany, cross over to Holland’s boozy, breezy, fun capital Amsterdam . From there, it’s easy to take a train or a bus to Brussels, in Belgium. (You could also stay in Ghent which is much prettier. Do take a day trip to Bruges, though!)
The next stop is dazzling Paris , undoubtedly the capital of romance in Europe. From Paris, take the Eurostar train to visit London .
This is the last stop in your itinerary. Wherever you’re headed next, London is one of the biggest transportation hubs in Europe.
1-Month Travel Itinerary for Europe: Southern Europe Gems

One month is the ideal Europe backpacking trip for first-timers. You’ll have time to explore a few countries and stay an extra few days in the places you fall in love with. In this itinerary, we’re diving into Southern Europe.
Start your trip in Lisbon , Portugal’s capital and one of the liveliest cities in Europe. Take trips to Sintra and Porto . Sintra can be done as a day trip whereas visiting Porto warrants at least a night’s stay.
Next, cross the border to Spain to explore Madrid . From the Spanish capital, finding onwards transportation to Barcelona is super easy. (Barcelona is also a long-time backpacker favourite!)
From Barcelona, cross over to France and spend a couple of days on the French Riviera. You could also do a lil’ side trip to Monaco to gawk at the rich&richer. But just a warning – this area is expensive as hell!
Next up, we head to Italy where you’ll spend the rest of your trip. First, explore Milan ; the fashion capital.
Then head to the floating city Venice, then the ultra-beautiful Florence . Lastly, end your trip in a highlight with a stay in Rome .
3-Month Travel Itinerary for Europe: Holy Shit, It’s the Grand Tour of Europe

Having 3 months or more for backpacking through Europe is an awesome experience. Make the most of the 90-day Schengen Zone liberty (plus the UK). You can move at your own pace and take the time to enjoy the places you love.
Still – need I remind you? – Europe is fucking massive. 3 months is a great trip but you’ll still struggle to cover everything possible. Sometimes it might even be the best option’s better to take a cheap plane ride between destinations rather than waste a day on a bus.
Stop first in Greece . Staying in Athens is really epic and it is a great gateway to the famous Greek Islands. ( Mamma Mia , anyone?)
Next up – Italy . Explore Naples for the origins of that pizza in Naples. See the remnants of a super-influential ancient culture in Rome, and hike along the coast in Cinque Terre.
From Italy, visit Switzerland , AKA ‘the pit of doom’ when it comes to backpacking Europe on a budget. However, the Swiss Alps are some of the most beautiful parts of Europe so it’s worth a splurge.
Continue on to Vienna, Austria . It may look fancy but it has a punk rock heart and there are some great places to stay in Vienna too.
Then, we move on to Germany . Munich is your gateway to experiences in Southern Germany and it has great connections to other awesome cities in Germany: Nuremberg, Frankfurt, Cologne, Dresden, and eventually, Berlin.
Travel through the Netherlands and Belgium to Paris, France . From there, you can easily get to London and further explore the UK . I highly recommend making a stop in Edinburgh to get a taste of Scottish life.
From the UK, you can fly down to Barcelona and conclude your trip by adventuring around Spain and Portugal .
If you are going to be spending a whole month in Europe bouncing between different countries, then we recommend downloading the HolaFly Europe eSim package before your trip begins. Packages start at just $1.20 per day and can offer data access and internet connectivity all over Europe for the entire duration of your trip.
Wherever you decide to go on your Euro backpacking trip, the magic will surely blow your mind. Each country in Europe is unique, full of surprises, and requires its own individual approach and strategy with regard to your travel budget in Europe.
Uh, just one thing: Europe, as a whole, has dozens of countries. (44 or 51, depending on what kind of geographical allowances we’re making…)
As I’m writing a blog and not a book, this Europe travel guide is focused on Western and Southern Europe . Meaning I’m only covering 11 countries and a bit today. Boo.
But don’t despair! There’s plenty more to explore in Europe.
- Backpacking Scandinavia travel guide
- Backpacking Turkey travel guide
- Backpacking the Balkans
- Backpacking the Caucasus
Backpacking Italy
Italy has been a popular vacation destination for a looooonggg time. Tourists have been coming here for years to see the likes of the Colosseum, drink wine in Tuscany , tour the canals of Venice – all that touristy stuff.
Consequently, few people stray far from the main backpacking route in Italy and, unsurprisingly, many say that tourism here has become a bit calcified. Some might say that Italy can offer nothing else besides the same postcard views and disgruntled baristas.
But there’s a lot more to see in Italy besides the usual attractions because, let’s be honest, everything in Italy is beautiful . Pound for pound, Italy might be one of the most beautiful countries in the world and you’d be hard-pressed to find a single ugly stone here.

The beaches of Puglia and Sardinia are among the most brilliant in Europe (they don’t compare the former to “The Maldives” for no reason). The Dolomites are truly one of a kind and few other mountains can really compete.
Rome … Rome is amazing . Where else can you find masterpieces from almost every era of western civilization?
Italian food, which has received a similar treatment, should be explored with equal enthusiasm. Sicily with its miles of coastline produces some of the finest seafood in the country, not to mention amazing desserts. The tagliere (deli meats) of Toscana are the best you’ll find.
So give Italy a chance! Don’t let the jaded, bitter tourists tell you there’s nothing new to see or do here; you just need to get off the beaten path a bit. Visit Florence , see the Almafi Coast but set aside some time for exploring the lesser-visited regions, like Marche, Umbria, Calabria, and so on.
But also – what’s wrong with seeing the same stuff as everyone else? There’s a reason Rome is popular. A gorgeous reason…
Backpacking Europe can never be completed without dipping a toe into Italy.
What to Know Before Visiting Italy

- Don’t miss out on … staying in Bologna . It evades most people’s radar even though it’s arguably the coolest city in Italy. Amazing food, beautiful architecture, and a nightlife that doesn’t quit.
- You know what’s overrated… the Leaning Tower of Pisa. Soooo many horrible selfies and awkward poses. Take a moment to actually appreciate the nearby duomo and baptistry guys.
- The coolest hostel is… The RomeHello Hostel . Offering some top-tier communal spaces, many activities for the guests, comfy beds, a great location, and good vibes atmosphere.
- The best food is found… everywhere! Really – you’re in Italy – you can’t go wrong here. Genoa, Bologna, Naples, and Sicily all take top honors.
Backpacking France
France might just be one of the most diverse countries you’ll set your foot in whilst backpacking through Europe. In addition to two coasts and two mountain ranges, France has a wide variety of cultures, landscapes, and food packed into one country.
Paris is amazing and seriously one of the most exciting cities in the world. It’s a city of romance, famous art, morbid history, and grand architecture. But don’t stop your exploration at the capital!
The Mediterranean coast, so-called French Riviera , is something straight out of your dreams. Trekking or skiing in the Alps is an unforgettable experience.
Bordeaux is one of the coolest cities I’ve ever visited, and staying in Lyon and Marseille are just as pretty. Let alone all the tiny little towns that are straight out of a postcard…

There are so many places to stay in France . Wherever you turn, you will find different kinds of wine, cheese, and even variations of the French language. If you love food, culture, and outdoor playgrounds, a stopover in France is an obvious choice for backpacking Europe.
Forget about the old stereotypes about the French being rude and uptight. The French can be like soft-boiled eggs: they have a shell on the outside but with it removed they are softies at heart. France is full of lovely soft-boiled eggs, uhm I mean humans…
Since France is quite a large country in European terms, there are so many hidden gems that I have lost track. From stunning medieval castles to picturesque villages and cities, backpacking in France is truly an unforgettable experience.
What to Know Before Visiting France

- Don’t miss out on… Staying a night at a mountain refuge in the Alps. Le Refuge de la Charpoua is particularly epic.
- You know what’s overrated… paying to go up the Eiffel Tower. Paris is expensive . Save money and see it from below.
- The coolest hostel is… The People – Paris Nation . Excellent location. It has beds with curtains (I love privacy), a cozy cafe/bar where to chill and work, and a great terrace to see the sunset.
- The best food is found in… Can’t go wrong with a bit of Brie and a bottle of Bourdeaux. But that’s just the beginning; as they say there, is a different wine and cheese to try every day of the year…
Backpacking Portugal
Portugal is a grand paradise of sorts. The pace is slower than other European countries (and compared to other offenders on this list, cheaper, too).
The country is packed with friendly locals, charming villages, fun parties, and one of the most chill vibes you will come across anywhere on earth.
Backpacking in Portugal is very easy and Portugal is my favourite country to solo travel in Europe too. Ultimately it’s a great place to begin your international adventure, solo or not.
Spot the famous blue tiles in Porto. Feel like a royal at the castles in Sintra.
Eat seafood in Lisbon. Drink ice-cold beer and smile like a fool whilst taking in an epic sunset over the ocean in Algarve.
Most backpackers start their trip in Lisbon as it appeals to just about everyone. There’s amazing food, good weather, great parties in Bairo Alto, and lots of places to see nearby. Definitely don’t skip Sintra ; the epic village full of fairytale castles is one the top places to see in Portugal.

The south of Portugal, also known as the Algarve , is the more Mediterranean part of the country. It resembles more southern Spain not only in the scenery but in vibes.
Expect a lot of tourists and more than a few drunken, wandering Aussies. But hey – the coastline is gorgeous and stays warm all year round. You can also find some of the best surf in the Northern Hemisphere off Portugal’s many beaches .
In Northern Portugal, Porto is a popular student city. It’s also bustling, busy, fun, and beautiful. Some backpackers even prefer it to Lisbon!
Portugal also has two semi-autonomous island regions: the Azores and Madeira. Both are very different from the mainland and absolutely magical.
Hiking in Madeira is uniquely epic! But visiting Azores is like backpacking a mini-New Zealand.
What to Know Before Visiting Portugal

- Don’t miss out on… Porto. Backpackers love Lisbon , but its northern neighbour is just as cool. Keep an eye out for its famous blue tiles.
- Keep an eye out for… drunken backpackers in Lagos. It’s not widely advertised but this place is a SHITSHOW at night. If you’d like to be one of them, stay in one of the party hostels.
- The coolest hostel is… Home Lisbon Hostel – The people’s favourite: mama’s cooked dinner, free walking tours, and a super homey feeling. You feel so welcome here.
- The best food is found in… the Mercado da Ribeira in Lisbon. This is the Mecca of all food markets, the cream of the crop.
Backpacking Spain
Many backpackers claim Spain as their favourite country. Are they right?
I think so. You do not have to look too far to see why this country, in addition to producing some lovely human beings, is a magical land for backpackers.
Like to sleep? You came to the wrong country. The Spanish have breakfast at 10, lunch at 4, and dinner at midnight.
Spain is a country that truly never sleeps. It’s in the culture to practice sleep deprivation in style. Maybe all those midday siestas help?
Spain just has a certain charm to it. Small plates of delicious tapas , cool, cold wine served with sweet orange and melon…
Is it those fine beaches? Old olive groves running through tiny villages? Or the church in Barcelona that is a perpetual construction project?

My suspicion is that my love of Spain is deeply rooted in all of the little nuances you experience daily whilst travelling here. Many backpackers just roll through Barcelona and maybe go visit Madrid . Whilst those cities are not to be missed, backpacking through Spain without exploring its other regions is a mistake.
In the north, you can hike majestic mountains in Asturias and eat awesome seafood in San Sebastian . Track down the origins of paella when staying in Valencia .
Explore Andalucia in the south with its Islamic architecture, free tapas, and the cheapest prices in Spain. (Seriously – Granada, Seville, and Cordoba are AWESOME.) Go to a football game. Find some flamenco.
Doesn’t that sound like fun? This is Spain.
What to Know Before Visiting Spain

- Don’t miss out on… the Basque region. It’s like a completely different country, with epic landscapes and an extremely fascinating history. San Sebastian is the best place to stay.
- You know what’s overrated … bull fights. The Spanish hardly go to them – it’s cruelty set up for tourists’s entertainment. Opt for a flamenco show or tapas tour instead.
- The coolest hostel is… The Central House Madrid Lavapiés . Everything a hostel should have. Relaxation, work and social areas. A pool, a bar, a terrace, lockers, and curtains on comfortable beds.
- The best food is found in… Granada. Andalucia has some of the only totally free tapas in Spain, and Granada has the best tapas restos. Asian fusion or Moroccan tapas? You’ll find it here.
Backpacking Switzerland
If you are planning on spending time in the Alps, a hiking trip to Switzerland is an obvious choice. Switzerland is a land full of the Alps, quaint villages, and hip cities.
Heard of the Matterhorn mountain? (That’s the Toblerone mountain.) It lives in Switzerland.
In addition to its powdery peaks, Switzerland is also home to gorgeous alpine lakes. Take in some of the ancient castle fortifications lakeside by day and sip the legendary Swiss hot chocolate by night.
Zurich may be the financial heart of Europe but it’s still surprisingly cool. Lausanne is small but gorgeous, and the capital Bern is equally so. Don’t skip Luzerne since it just might be the most beautiful city in Switzerland. But these are just a few ideas of where to stay in Switzerland – numerous hidden gems await.

You do have to pay for the pleasure in Switzerland . For better or worse, the Swiss people have this whole thriving economy thing down to a T.
As a country long resistant to changing over to the Euro, the Swiss Franc is as strong as ever before. For backpackers, this translates into a scenario of high cost, high reward.
That said, Switzerland will certainly do anything but disappoint. It’s worth the splurge even if you are backpacking Europe on a budget.
What to Know Before Visiting Switzerland

- Don’t miss out on… the Bernese Oberland. This region features probably the most famous and stunning hikes in Switzerland . Check out the trails around Eiger and the Lauterbrunnen Valley.
- Keep an eye out for… the prices; the pure, unadulterated, merciless, eye-gouging, seemingly unreal prices. You’ll need to employ every trick in the book to keep costs down.
- The coolest hostel is… Backpackers Villa Sonnenhof Interlaken. It offers a ton of freebies!
- The best food is found in… the grocery stores. Swiss food is just ok; certainly not worth the prices at the restaurants!
Backpacking Germany
After gaining a (justified) terrible reputation on the world stage in the first half of the 20th century, Germany has emerged over the last 50 years as an economic powerhouse and centre of culture in Europe. Modern-day Germany is an awesome place to go backpacking through Europe – and a fan favourite among many gap year kids and older travellers alike. You won’t be hard-pressed to find a great hostel in Germany .
As a lover of cool cities and good beer, I am totally enamored with Germany. While famous for its fast cars and pretzels, there is so much more to see whilst backpacking Germany: historic towns, medieval monasteries and fantastical castles , culture-filled cities, fairy-tale forests, and majestic mountains.
To top it off, Germany has one of the strongest economies in the EU, yet traveling here is surprisingly affordable in comparison to the rest of Western Europe. (Pro tip: Eastern Germany is even cheaper than Western Germany.) Backpacking Germany is a great addition to any European travel itinerary!

Most backpackers gravitate towards Berlin , and for good reason: its nightlife is unbeatable and there is a wealth of culture to keep people interested. But the capital is its own thing – it doesn’t resemble the rest of Germany at all. For European backpackers, there are tons more awesome spots to uncover.
Dresden , beaten to shit during WWII, has been wonderfully restored. Hamburg is one of the coolest cities in the country, at least if you’re staying in the St Pauli neighbourhood.
Bavaria in the South is known for the Black Forest area (one of Germany’s National Parks ), an unintelligible dialect of German, and beautiful scenery. Finally, Regensburg may be the prettiest town in the country. But there are SO MANY others – some completely micro-sized.
What to Know Before Visiting Germany

- Don’t miss out on… visiting a beer hall. No one can drink like the Germans and by that, I mean with such control and enjoyment at the same time.
- You know what’s overrated… Munich. The city itself, whilst pretty, doesn’t offer a lot in the way of attractions. The locals can be pretty arrogant too.
- The coolest hostel is… Hostel die Wohngemeinschaft . A cozy social vibe. A bohemian retro-style hostel with a cafe that becomes a bar at night. And a common area open 24 hours with free coffee and tea.
- The best food is found in… Berlin. The gastronomic scene is incredibly diverse, unlike many other German cities where food tends to be homogenous. Vegetarianism is alive and thriving here!
Backpacking The Netherlands
Coffee. Canals. Cannabis. Windmills. Those are some of the things that come to mind when thinking about The Netherlands.
Visiting Amsterdam has long been a favourite backpacker haunt and is well worthy of exploration. It is THE place in Europe to (legally) rock into a coffeeshop, order a joint, and sit down to smoke it.
If you like riding bicycles long-distance, The Netherlands is a perfect country in which to feed that urge: The Netherlands is almost entirely flat. If you have had long challenging days trekking or biking in the Alps, the flatness here will be a welcomed change.

You will find that Dutch people often speak perfect English which is impressive as Dutch sounds nor looks anything like English. Because the country is relatively small, you can travel around here with ease whilst taking in a majority of it.
Most backpackers make a stop in Amsterdam and leave the rest of the country be. Don’t get stuck in the capital city – at least take a day trip from Amsterdam .
What to Know Before Visiting The Netherlands

- Don’t miss out on … partaking in some magic mushrooms while visiting Amsterdam. Seriously, those Van Gogh paintings are mental when you’re frying.
- You know what’s overrated… staying in the HEART of Amsterdam – it’s overly expensive and crowded. One could stay outside the city, save a bundle, and then take the train in. I suggest finding a hostel in Utrecht instead.
- The coolest hostel is… Stayokay Hostel Amsterdam Vondelpark . All the services that you need as a backpacker. Nice areas to chill, work, and hang out. Great atmosphere to meet other travellers. Probably the best location in Amsterdam. The park and Museumplein right next to you.
- The best food is found … while staying in Amsterdam , only because of the stroopwafels! These are one of the greatest treats ever.
Backpacking Belgium
Let’s be honest: Belgium doesn’t offer much in way of stand-out attractions. There is no Colosseum, no Montmartre, no legalized drugs, or raging Berghains. Just a lot of charming houses, calories, and dreary weather.
And for these reasons, I LOVE Belgium. How amazing is it that Belgium places beer in such high and hallowed regard? Bless the Belgians who seem to have no problem smothering their fried potatoes in aioli and mussels with heavy cream. I love that you can go backpacking in Belgium with zero expectations and still be impressed.
It’s almost as if Belgium is a guilty pleasure of sorts. The whole country is just one big bar where you can eat and drink to your heart’s content and no one gives a shit.

If you’re traveling between France and the Netherlands, it is absolutely worth stopping over in Belgium for a little while. Antwerp would be the best place to base yourself although Ghent and Bruges are worth seeing . Bruges gets absolutely zombified with tourists, though – prepare yourself.
And you shouldn’t skip the nation’s capital Brussels . It’s also the capital of the European Union but in addition to stiff people in suits, there are also many cool things to see in Brussels .
If you wanted a really enjoyable backpacking Europe experience, consider sleeping at a brewery for a few days! Most have guesthouses attached. In particular, Het Anker is great. Otherwise, Brussels’ hostels are the best place to stay on a budget.
What to Know Before Visiting Belgium

- Don’t miss out on… staying in Ghent , the prettiest medieval town in Belgium. It’s mostly known for its canal houses and local mustard. Gruut, a precursor to today’s beer, is also made in Ghent.
- Keep an eye out… when you’re in Brussels. Whilst certainly “edgier” than most European cities, Brussels can be a little too rough at times.
- The coolest hostel is… Hostel Uppelink Ghent . Though the building may be a bit old, the location is unbeatable. It’s literally next to the city’s famous Sint-Michielsbrug bridge.
- The best food is found in… the “brown bars”, where they serve the fried potatoes and mussels in excess.
Backpacking the UK
The UK is just one of those places that I have fallen in love with over the years. If you are in the mood for a wonderful campervan and trekking adventure, backpacking in the UK is the journey you have been waiting for.
Note to my geographically challenged friends – the UK is a country comprised of 4 countries: England, Wales, Scotland, and Northern Ireland. And the Brits WILL get mad at you if you refer to the whole area as “England” ( Ed: Sounds about right).
England and Wales have large sections of coast that are far off the beaten path and offer up excellent hiking/camping possibilities. The Highlands in Scotland have some of the last true wilderness areas in Western Europe. The Scottish Islands look like something out of a fairytale book.
Along with stunning natural landscapes, the UK is home to major centres of culture in Europe. In England, the ineffable London is an icon for obvious reasons. I also highly suggest chasing down ghosts in Canterbury , getting smart in Oxford , and basking on the beach in Brighton . And the Lake District in Northern England is incredible!

Scotland is a world of its own. The Scottish capital city of Edinburgh is full of awesome things to do. This region has landscapes so green that the hills seem to have been spray-painted in every sense of the word.
It has remote islands dotted with whiskey distilleries, lochs, and cascades. One could easily spend all their time backpacking in Scotland and could totally forget about “the south”.
The hiking trails and huts in the Highlands offer up an endless supply of hiking opportunities in a breathtaking environment. Throw in the vast cultural richness of the big cities and small villages and you have yourself one great place to go traveling.
Backpackers don’t go to Wales as often but for no good reason. It also offers awesome hiking opportunities, and Cardiff is a small-ish but cool, cultural city.
What to Know Before Visiting the UK

- Don’t miss out on… going off the beaten path in the Scottish Highlands. If you really want a unique experience, try island hopping in the Hebrides.
- You know what’s overrated… Buckingham Palace. Just skip it.
- The coolest hostel is… Onefam Notting Hill . This award-winning hostel is one of the best locations in the capital. It’s perfect for solo travellers to make friends for life.
- The best food is found in… The Indian food in the North (Manchester and Yorkshire). For that matter, the vegan scene nationwide is thriving and varied.
Backpacking Ireland
The lush, green, enchanted, and enchanting island of Ireland perches serenely at the furthest boundary of Europe. Beyond it, there is nothing but the Atlantic until it reaches the New World.
Somehow, Ireland’s location and geography are encapsulated in its culture. It is European but only just; civilized, yet it’s wild and rugged. It rains a lot but remains perpetually pleasant and inviting.

Sometimes crudely dismissed as the UK’s little cousin, backpacking Ireland offers visitors the chance to explore the most plucky nation in the world and get a glimpse of a simpler world that has sadly vanished forever elsewhere. That is not to patronize though, Dublin is every bit the cosmopolitan ( and expensive ) EU capital, and the once-troubled Belfast wears its gritty history with pride.
But head out to the Burren , or the lanes of Cork , and you will find warm taverns ringing with the sound of the fiddle and a way of life where time still takes its own time.
The headline draw in Ireland is the capital Dublin where you can visit Kilmainham Gaol and pull a pint at the Guinness brewery. But not to be missed are the Cliffs of Moher, the ancient streets of Galway , and the colored houses of Cork in the capital of “authentic Ireland”.
For the edgier side of the Emerald Isle, cross the (porous & invisible) border to the North and check out the murals of Belfast. From here you can easily visit Game of Thrones locations or check out the geologically wondrous Giants Causeway .
What to Know Before Visiting Ireland

- Don’t miss out on… Watching an Irish sport (hurling or Gaelic football) game in a pub.
- You know what’s overrated… kissing the Blarney Stone. You’ll wait sometimes hours in line just to share spit with other people over a hole in the wall. Yes, it’s as unnecessary as it sounds.
- The coolest hostel is… Jacobs Inn . Offering a super cool bar area and rooftop terrace, the pod sleepers will make sure your ready for a top day tomorrow.
- The best food is found… at the Galway Seafood Festival. If you happen to be staying in Galway in September and October, don’t miss out on this.
Backpacking Greece
Getting to know Greece is one of the most rewarding backpacking trips to be had in Europe. Those blue and white houses and perfect Mediterranean landscapes you have seen on postcards live up to their hype in real life.
Greece is a charming, laid-back country. Backpacking the Greek Islands has been one of my favourite travel experiences. This is due not just to the beautiful views, but to the food, beaches, wonderful people, and plethora of history.
Island hop the Cyclades. Pop over to Crete . Experience life with no cars on Hydra. Whatever you get up to in the Greek islands, a Europe backpacking trip that makes it here is hell of a good time.

But wait! Greece may be best known for its islands but there is a whole mainland of INCREDIBLE stuff to explore, too! (Also, it’s way cheaper than the tourist-crowded islands.)
Visit Athens , the capital full of ancient history and cool graffiti. I know the city gets a bad rap but it’s actually pretty cool. For one thing, the nightlife here is fantastic – rebellious, wild, and absolute fun. Another draw is the Acropolis.
Close to Athens, you’ll find Delphi , an adorable little town with the ruins of a once-famed oracle’s home. Meteora is known for its unique monasteries built on top of stone pillars. Thessaloniki , Greece’s second city, is full of good vibes and great food.
If you’re a history and/or mythology geek, backpacking Greece is gonna get your socks spinning out of excitement.
What to Know Before Visiting Greece

- Don’t miss out on… the Ionian Islands. This part of Greek islands receives a fraction of tourists yet hosts some of the most beautiful places in the country. Zakynthos has good places to stay .
- You know what’s overrated … Santorini. It’s overcrowded, expensive, and on the verge of being spoiled.
- The coolest hostel is… Athens Quinta . Travelling is all about finding those magic places that make you feel at home. This hostel takes that idea and runs with it. Including, free breakfast!
- The best food is found in… Crete. It’s well-known for its culinary culture. It’s far enough away from the mainland that the food is quite different as well.
Off the Beaten Path Adventures in Europe
Europe gets BUSY. Hundreds of millions of people, both from Europe and elsewhere, travel around it every year.
And you know what? 80% of those people do one of two things. Either they just visit a few cities or they go on cookie-cutter tours where they are shuffled around from one famous attraction to another, plowing through a sea of baguettes, gelato, and, tapas along the way.
(Actually – that doesn’t sound half bad…)
It’s easy to get off the beaten path by visiting Europe’s hidden gems . In the Netherlands, go anywhere that’s not Amsterdam; in the UK, anywhere that’s not London ( Ed: not quite sure about that, but close).
But there are also a few countries that have not been included in this guide yet, and I’d like to give them a little shout-out. They are not traditionally on the backpacker trail but they are awesome, plus they’re right on your route so it’s very easy to visit them!
For starters, Vienna in Austria is easily amongst the most beautiful cities in Europe. While visiting Vienna , everywhere you look there is some regal remnant of the Hapsburgs: a palace here, a monument there, and plenty of museums to go along with them.

Checking out Luxembourg can also be nice since it’s easy to get to and fro from the Netherlands or Germany. It’s expensive as fuck and the eponymous city doesn’t offer much to see but there are some awesome Luxembourg Airbnbs including enchanting countryside castles.
Check out some of the micro-nations, too. Vatican City is super easy to include since it’s literally smack-bang in the middle of Rome – the world’s smallest country measures less than a square kilometre. Visiting Monaco is an easy day trip from the French Riviera, and San Marino from Bologna, Italy.
Staying in Andorra , on the border between Spain and France, is a great idea. It’s particularly gorgeous in the autumn. Liechtenstein is one of the weirdest places in Europe. Full of cool stuff, most tourists visit the town Vaduz for a day but the Liechtensteinian Alps are worth a couple of days of hiking!
Other than that, explore small villages. Go on multi-day treks. Climb the mountains that aren’t the Alps (though they are stunning). You could also just fuck off to Georgia for a bit to extend your stay (who cares if it is actually in Europe or not).
Couchsurf with locals. Spend a few extra days getting to know a popular city. Do things that aren’t on the “must-see sights” in backpacking Europe travel blogs.

We’ve tested countless backpacks over the years, but there’s one that has always been the best and remains the best buy for adventurers: the broke backpacker-approved Osprey Aether and Ariel series.
Want more deetz on why these packs are so damn perfect? Then read our comprehensive review for the inside scoop!
Well, with dozens of countries and countless cities in Europe to visit , it’s a bit hard to pinpoint the BEST things to do in Europe.
But you gotta start from somewhere. So here are some of the top things to do whilst backpacking Europe on a budget.
1. Go to a one-of-a-kind festival
Europe loves to celebrate every little occasion they can, be it the death of a saint, a harvest, or even just a long weekend. Between the cultural holidays – of which there are MANY – the seasonal festivals, and the more modern musical festivals, you’ll have many opportunities to just let loose. And let loose is what you should do.
You could check out the Carnival at Venice, get wasted in Dublin on St. Patrick’s Day, and get tomatoe’d at La Tomatina in Valencia. Let alone some of the world’s best music festivals like Boom Festival (psytrance), Glastonbury (pop-adjacent), and Roskilde (also pop-adjacent).

2. Go island hopping in Greece
Greece is composed of over 227 islands – which means there are over 227 places to go on an adventure. Live out your mythical fantasies on the islands of Ithaca or Crete, escape the hecticness of life on Sikinos, or join the hordes of partiers on Ios and Mykonos. Your choice.
2. Eat all the tapas in Spain
In Spain, tapas are not just a plate of food; they’re a way of life. They require time, attention, company, and most of all, love, to truly appreciate.
When visiting Spain, it is absolutely mandatory to sit down to a tapas meal with friends and to converse over them, preferably for an entire night. The best tapas are found in Andalucia, especially in Granada .

3. Hike in the Alps
Of all the great mountain chains in the world, the Alps are probably the most accessible. Over the years, it has been tamed and crisscrossed with so many trails that just about anyone can visit here. Tours around the 3 highest mountains in the range, Mont Blanc, Monte Rosa, and the Grand Combin, as well as the otherworldly Dolomites, are all exhilarating experiences and among the best hikes in the world .

5. Get cultured in Italy
The most historically significant and consequently most popular cities to visit in Italy are Rome, Venice, and Florence. These “museum cities” deemed culturally significant by the government are preserved as best as possible.
They are like interactive history lessons that you can walk amongst or even get lost in for days at a time. I highly recommend you make time for the Colosseum, the work of Di Vinci, and the Vatican museums.

6. Dance like no one’s watching
The party cities in Europe are on a different scale than the rest of the world. I’m talking about Berlin, Amsterdam, and Manchester. The stories from the clubs are the stuff of legends.
The level of freedom and debauchery is enough to make even the most open-minded do a double-take. Even if you aren’t able to get into the infamous Berghain, you can take your nights (or days) whichever way you please.
7. Change your plans
It’s always good to have an idea of itineraries while you’re backpacking Europe. But there’s nothing more heartbreaking than falling in love with a place (or person? ) and having to leave for your next destination. So leave a bit of wiggle room in your route for surprises.
Extend your stay at the cheap hostel with the cute bartender. Buy the last-minute plane ticket to meet that travel buddy again. Let the universe take control a bit too.

8. Take the scenic route
Europe has one of the most developed train travel networks in the world. You can get just about everywhere by rail, which is fantastic news when Backpacking through Europe!
These insane views and comfy carriages make some of the best train journeys in the world . It’s a classic; characters in The Murder on the Orient Express and Dracula have traversed the same rails. It’s damn romantic too, so settle down.
Granted, it’s more expensive than the bus so it’s not the best way to save money. But with high-speed trains, you can really make the most of your time on a Euro backpacking trip. So sometimes it’s worth the extra Euro.
9. Get High in Amsterdam
Would this really be The Broke Backpacker if I didn’t encourage you to sample some grade-A Dutch weed? The Dutch are very progressive when it comes to mind-altering substances so if you’re looking for a place to do some drugs safely and legally, Amsterdam might be to your tastes!
Just be respectful about it – residents of Amsterdam are not big fans of the hordes of drug tourists wandering the streets of the city.

10. Deep dive into London
London is one of those amazing cities that you could spend a lifetime exploring. It has a reputation for being expensive – and there’s good reason for that.
But there are so many museums and attractions to visit – many of which are absolutely free! With cheap flights, free walking tours, and a London Pass , it can actually be a surprisingly budget-friendly destination. The British Museum, Buckingham Palace, and the London Eye are all worth putting on your Europe itinerary.

Wanna know how to pack like a pro? Well for a start you need the right gear….
These are packing cubes for the globetrotters and compression sacks for the real adventurers – these babies are a traveller’s best kept secret. They organise yo’ packing and minimise volume too so you can pack MORE.
Or, y’know… you can stick to just chucking it all in your backpack…
Hostels are the most affordable accommodation option for backpacking Europe on a budget. Well, aside from dreamy mountain huts, your awesome tent, and a stranger’s couch. Lucky for you, Europe is THE place for living da hostel life in all its glory.
This continent might hide some of the best hostels in the world – but arguably also the worst…
These incredible hostels in Europe come in all shapes and sizes. But remember, a cheap hostel isn’t necessarily a perfect hostel. In fact, it rarely is (but, yes, you can occasionally hit the jackpot).

But not all of them are dedicated to parties. You’ll also find loads of boutique hostels for flashbackers, quiet rooms for families, and even some female-only hostels for solo female travellers .
Well, back to the good stuff. When you’re backpacking Europe, you find accommodation is generally very safe, clean, and fun. Pub crawls and get-togethers are a staple in almost any hostel.
But if you’re wanting to plan a trip to Europe on a budget… well, you’ll have to make do with sharing the bigger dorms. Even hostels can sometimes be a bit pricey in Europe, especially in France or Switzerland. Still, they’re way cheaper than Airbnbs or hotels.
Airbnb is a great option if you want some space away from travellers and a more authentic experience. Though they’re not always the cheapest way. If you’re in a group, the prices can be more reasonable.
- Where to Stay in Spain
- Where to Stay in Portugal
- Where to Stay in France
- Where to Stay in Italy
- Where to Stay in Scotland
- Where to Stay in Ireland
- Where to Stay in Switzerland
- Where to stay in Greece
Backpacking Europe does not have a reputation as a budget-friendly place for travellers . The prices in the popular tourist destinations have sky-rocketed in recent years, and it doesn’t look like they’re slowing down any time soon.
It’s pretty cunning actually. The cheap flights entice you in and BOOM: you’re stuck paying the price for it – literally.
For most travellers, booking hostels is your cheapest option. Cheap hostels range from around $25 – $50+ a night for a bed. If you’re in a group, Airbnbs can (but not always) be cheaper.
Though, where there’s a will, there’s a way. There is, and always have been, savvy travellers making their way around Europe with clever tricks to save money.
I recommend both of these options over hotels mainly because you usually get a kitchen to prepare your own food. Doing this can bring your food bill down to around $10 – $15 a day. You could easily spend more than this on one meal of you eat out. You can find street food for around $6 but it’s not always the best quality.
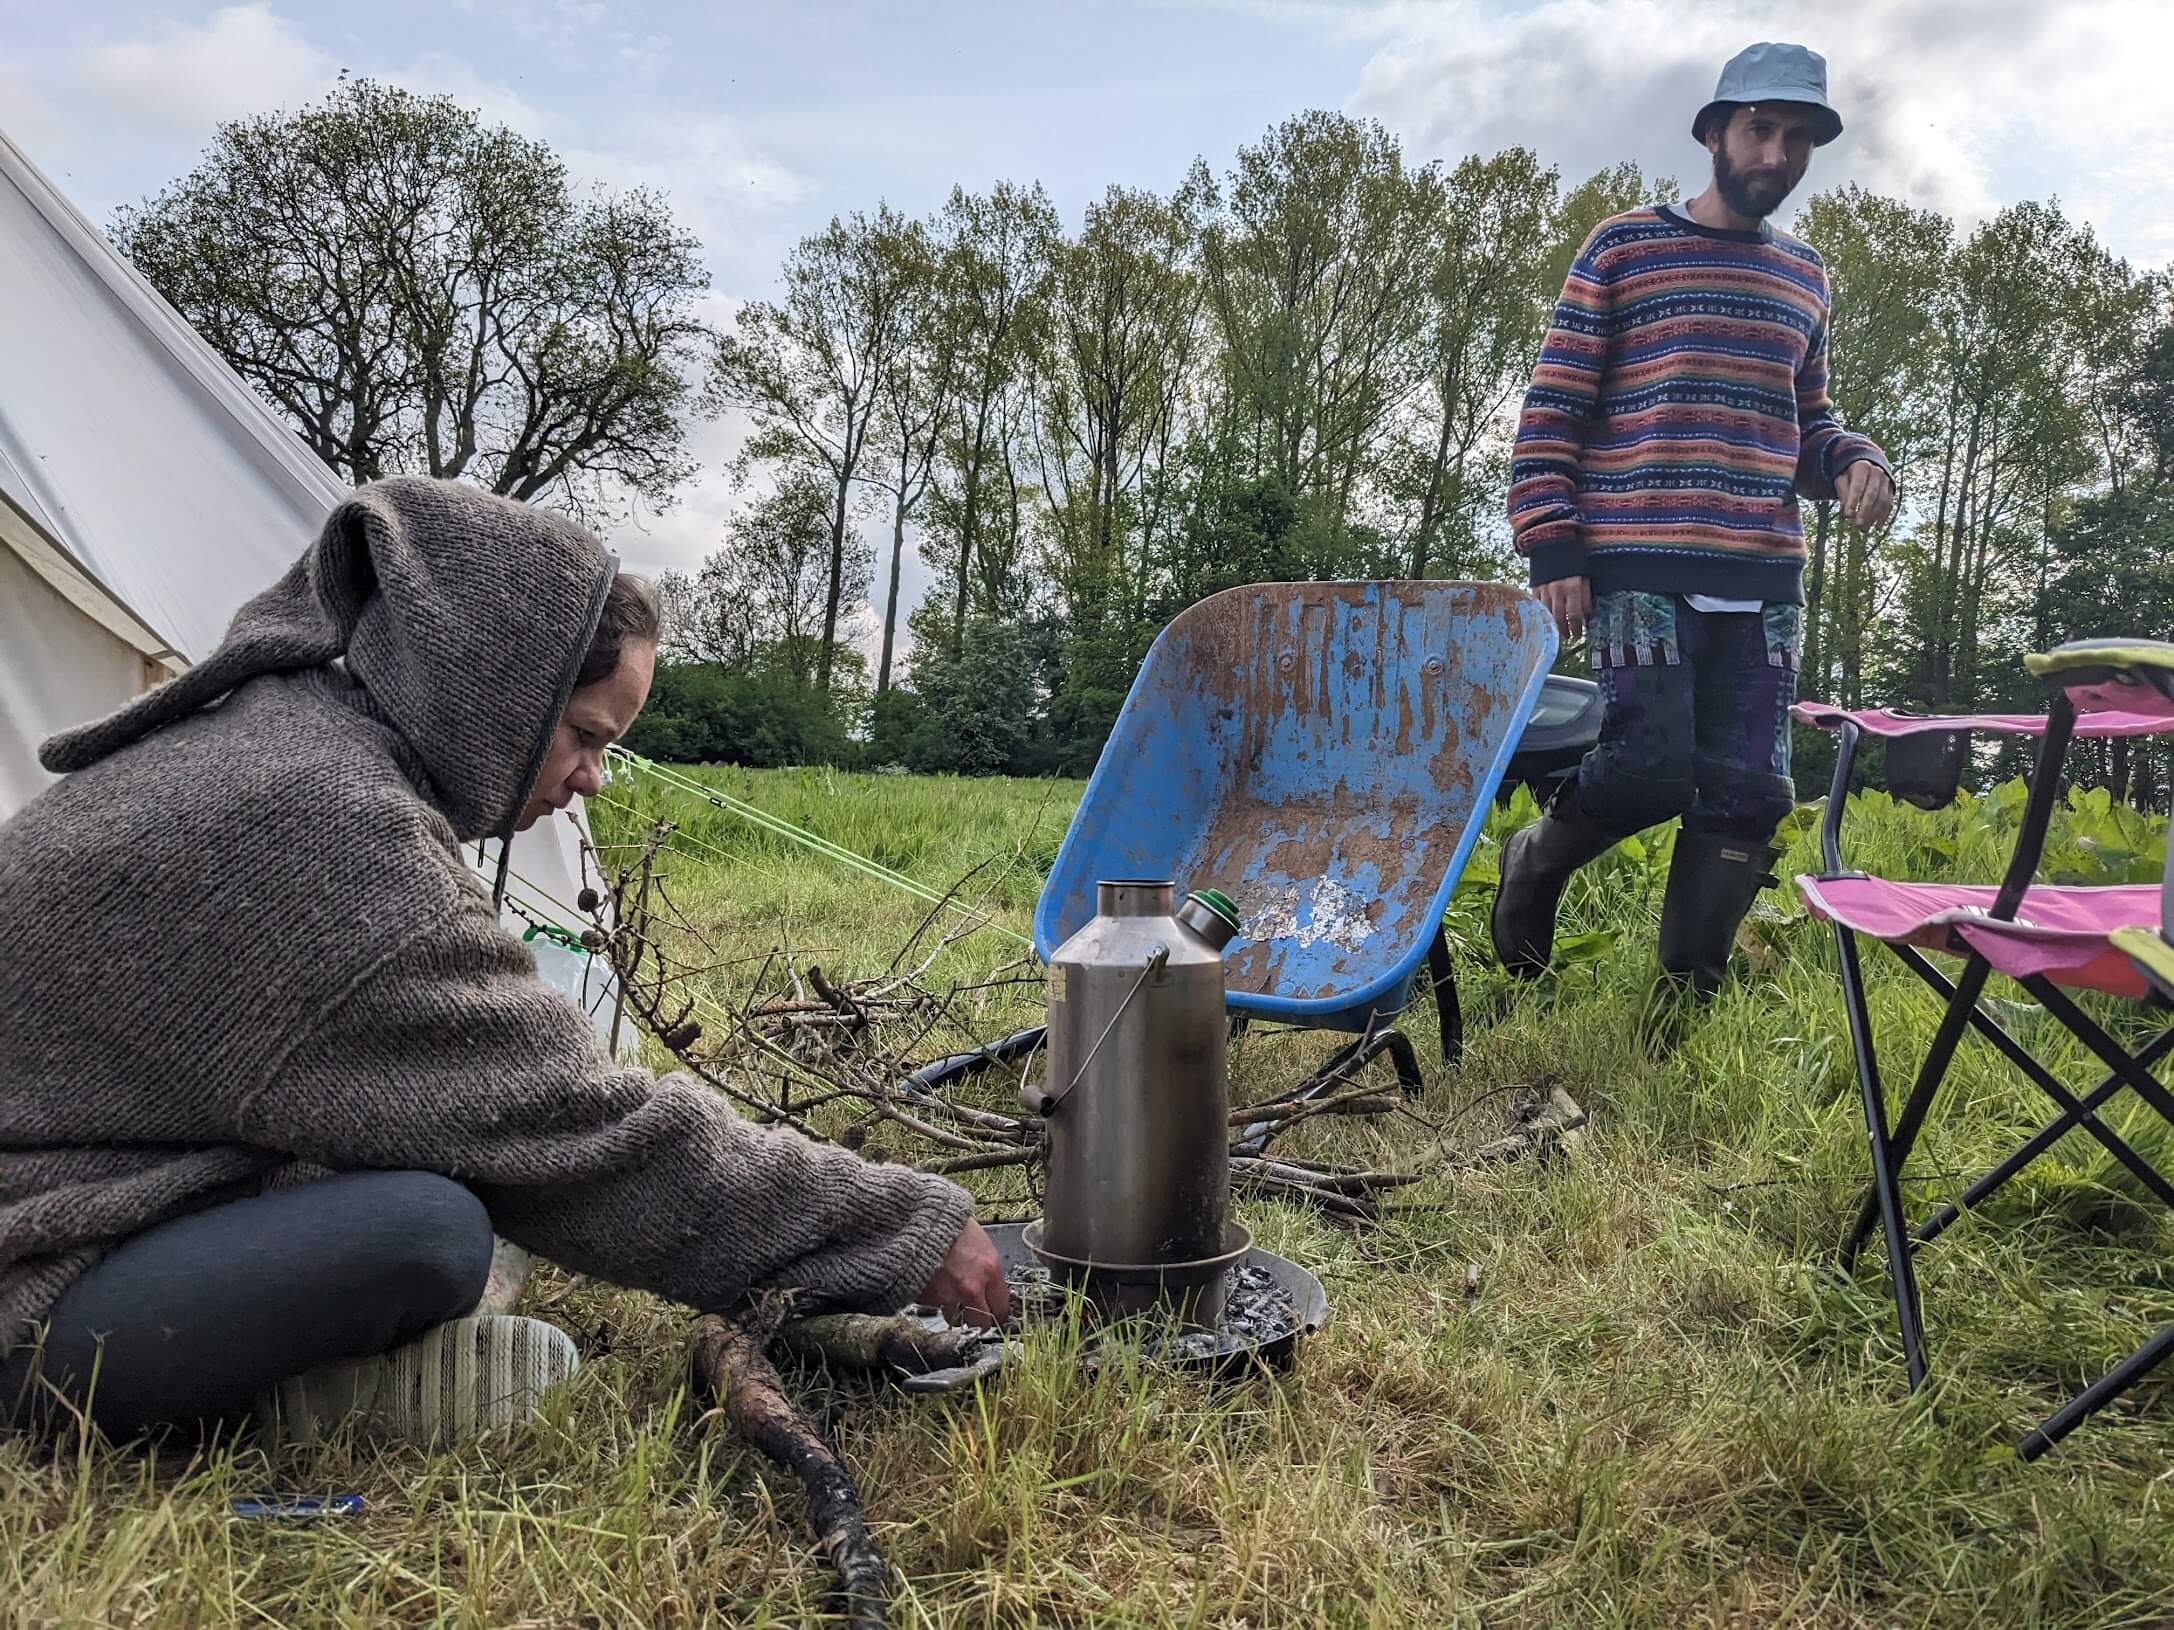
Booking flights, trains, and buses in advance is the best way to save money. That way, flights go for as little as $20 and buses $10. The same goes for accommodation: the sooner you book, the better deal you will get.
If you want to let loose a bit, drinks in bars are generally quite expensive which can be up to around $10 in some places! So most people in Europe pre-drink (buy cheap drinks from the supermarket to drink a home before they go out) . Hostel bars usually have the most reasonable prices.
One budget-saving tip for first-time backpackers is to sort out your travel banking . Currency conversions and ATM fees stack up.
Get a travel card like Wise (formerly Transferwise) . With this, you can easily combat extra charges. Especially if you’re backpacking trip through Europe has many countries, this will make things much cheaper.
A Daily Budget For Europe
I have broken down the average daily travel costs in Europe you can expect in order to help you get to grips with your own Europe backpacking budget.
Travel Tips – Europe on a Budget
Okay, so now that you got an idea of the average costs for backpacking in Europe… What if I told you that you could save even MORE? Here are some of the best money saving tips for travelling Europe on a shoestring budget.
- Camp : With plenty of awesome beaches, forests, stunning countryside, and far-flung mountains, camping whilst backpacking Europe on a budget is a great option. Grabbing a solid backpacking tent is never a bad idea! Just be aware that wild camping is illegal in most of Western Europe. So if you want to do it, you gotta be a little sneaky about it.
- Cook your own food: Travel with a portable backpacking stove and cook your own food to save some serious cash whilst backpacking across Europe. If you are on a tight budget, cooking grocery store food is your best option to save. With a stove in tow, you can do this even without a kitchen.
- Hitchhike : Hitchhiking is a 100% free and adventurous way to get around. In Europe, it’s pretty safe and easy although some countries are tougher than others.
- Couchsurf: The Portuguese, Greeks, Spanish, Germans — they are all awesome folks. Get to know some! Check out Couchsurfing to make some real friendships and see a country from the perspective of locals.
- Dive some dumpsters: Dumpster diving helps if you’re a little broke for a store-bought meal, too. There’s an art to it but you can soon get the hang of it.
Why Should You Travel to Europe with a Water Bottle?
Plastic washes up on even the most pristine beaches… So do your part and keep the Big Blue beautiful!
You aren’t going to save the world overnight, but you might as well be part of the solution and not the problem. I hope you become more inspired to continue being a responsible traveller .
Plus, now you won’t be buying overpriced bottles of water from the supermarkets either! Travel with a filtered water bottle instead and never waste a cent nor a turtle’s life again.

Drink water from ANYWHERE. The Grayl Geopress is the worlds leading filtered water bottle protecting you from all manner of waterborne nasties.
Single-use plastic bottles are a MASSIVE threat to marine life. Be a part of the solution and travel with a filter water bottle. Save money and the environment!
We’ve tested the Geopress rigorously from the icy heights of Pakistan to the tropical jungles of Bali, and can confirm: it’s the best water bottle you’ll ever buy!
So precisely when is the best time to visit Europe on a budget?!
Western Europe is a total madhouse in the summer; millions upon millions of tourists descend on the continent. Cruise ships fill the harbours, tour buses clog the road, and flight prices increase.
Whilst the middle of the summer can be a very beautiful time to visit, the summertime is the most crowded season and it is also the hottest. Portugal, Spain, France, Italy, and Greece can be so hot in July and August that all you want to do is switch places with that white wine bottle sitting in the bucket of ice.
Europe is also very prone to seasonal pricing. Prices rise with the temperatures in the summer.

Point being, come in the summer if you must, but I don’t recommend it. The spring and the fall seasons are the best time to visit Europe on a budget. The temperatures are mild, and a majority of the people who were here on summer holiday have now sulked back to their offices and suburban hells.
Springtime in Paris and other European cities is as romantic as it sounds. Flowers are blooming and the birds are out. You can go in a t-shirt during the day without having the sun cook you alive.
You will find the lowest prices in most regions in the winter. Southern Europe – Algarve in Portugal, Andalucia in Spain, and Greek islands – is still pretty warm in the wintertime.
If you love winter sports, a winter visit is an obvious choice to explore the French, Swiss, or Italian Alps. Just note that pricing in ski destinations goes heads-up in the winter. The snow season is hugely more expensive than the summer.
Also, note on common European holidays: Europeans get around on their own continent a LOT during peak school holidays. This doesn’t necessarily mean higher prices but it DOES mean impenetrable crowds. Times to avoid outside of the peak summer season are usually mid-September, mid-February, Easter, and New years/Christmas.
What to Pack for Europe
When you’re backpacking Europe, depending on where you’re going and WHEN you’re going will change your packing list. Spain in the summer looks very different from Germany in the winter. But on every adventure, there are some things that are an excellent addition to your backpacking packing list that will really help your Europe backpacking trip.
On every adventure, there are 6 things that are an excellent addition to your backpacking packing list. They will greatly enhance your Europe backpacking trip too.

Snoring dorm-mates can ruin your nights rest and seriously damage the hostel experience. This is why I always travel with a pack of decent ear plugs.

Hanging Laundry Bag
Trust us, this is an absolute game changer. Super compact, a hanging mesh laundry bag stops your dirty clothes from stinking, you don’t know how much you need one of these… so just get it, thank us later.

Sea To Summit Micro Towel
Hostel towels are scummy and take forever to dry. Microfibre towels dry quickly, are compact, lightweight, and can be used as a blanket or yoga mat if need be.

Monopoly Deal
Forget about Poker! Monopoly Deal is the single best travel card game that we have ever played. Works with 2-5 players and guarantees happy days.

Grayl Geopress Water Bottle
Always travel with a water bottle! They save you money and reduce your plastic footprint on our planet. The Grayl Geopress acts as a purifier AND temperature regulator. Boom!
In order to get the most of your backpacking trip around Europe, you want to ensure that you get your phone plugged in and connected to a local network as soon as possible. That way you can use map apps to save yourself hours of being lost in city streets, get on Tinder to find yourself some company, and order in food on those days when you just can’t be bothered to go outside.
Note that if already have an EU SIM then it will work seamlessly in all over EU member states. However it will stop working when you leave the EU (such as when you cross from Eire to Northern Ireland or Montenegro to Serbia) . Likewise if you are visiting Europe from the US or Australia, you may find yourself having to change sims multiple times during your trip…unless…

Our recommendation is to get yourself the HolaFly e-SIM Europe package . It works in 32 different European countries and offers unlimited data. There are a number of different packages available and the 30-day one costs $64 USD. What we particularly love about e-Sim is that you don’t need to remove your native sim, and can download your e-Sim package before you even leave home!
We have previously written a full HolaFly eSIM review which you can check out or else you can just hit the button below and check out the European Packages.
So how safe is Europe ? Very, very safe, actually.
There’s very little violent crime in Europe, traffic is mostly organised, and there are few natural disasters… The possibility of something bad happening to you on your journey backpacking Europe is slim, to say the least.
Your biggest concern is probably pickpockets and thieves. They particularly target crowded markets and train stations. Always be alert when moving about in big cities especially if you have all of your gear with you.
And those operating in big European cities are true pros – it’s not always enough to just keep your wallet in a purse instead of a back pocket. Keep a keen eye out, especially in Paris, Barcelona, and Rome.
The most popular European tourist sites are also teeming with scammers. With a little research on the most common tourist scams in Europe, it’s not hard to avoid them at all.
It is never a good idea to be out shit-faced drunk, alone, and loaded with cash – especially not at 3 am. Be smart, make good choices and it shouldn’t be too difficult to guard yourself and your belongings.

A few years back, Europe faced a string of terrorist attacks. Nothing new has arisen in the past few years so travellers shouldn’t feel worried about terrorism… And besides, unfortunately, we now know that these kinds of attacks are not only happening in Europe.
These events were rare but they did receive a lot of attention and negative press. That led to a lot of pro-nationalist anti-Muslim rhetoric across Europe even though plenty of other groups were also committing acts of violence.
And as diverse as a lot of cities in Europe are, Europeans, in general, are pretty damn white, and everyday racism is still well and alive. This doesn’t necessarily make Europe unsafe, it just means that it’s not impossible that ethnically diverse travellers might hear some snide commentary.
However, there are some happy news for other possibly-vulnerable backpackers: solo female travellers and LGBTQ+ travellers can thrive in Europe since Western Europe is generally safe for them.
- Is Amsterdam Safe?
- Is London Safe?
- Is Barcelona Safe?
- Is Naples Safe?
- Is Berlin Safe?
- Is Paris Safe?
Sex, Drugs, and Rock n’ Roll in Europe
Europe likes to party, a lot .
And not just one kind of partying, but all kinds of European Backpacking trip debauchery. There are your squats in Paris, beach clubs in Ibiza , warehouse raves in Berlin, music festivals in the Netherlands, all of that, and then some. You can’t beat chilling on some church steps at 3 am sipping negronis with friends either.
When it comes to partying, each culture has its own way of doing things. The Italians like the slow burn, starting with a spritz at aperitivo, then a nice dinner with wine, a cocktail at a local bar, before finally moving on to shots at the bar.
The Spanish are similar except they start all of this at 9 pm and go until 4 am. The Dutch appear to be hydrating all the time, but don’t be so sure; they’re big fans of the molly water.
You get the gist though. If you’re going to tour the party cities in Europe , you need to choose your parties well .
There are a couple of parties that shouldn’t be missed:
- Staying at one of the legendary party hostels .
- Going to a nightclub in Berlin. (Berghain is overrated – there are multiple that stay open 24/7!)
- Drinking in the piazzas of Rome.
- Dipping into a baggy in Amsterdam.
- A night in the Delirium Brewery in Brussels.
Also, be aware that not all European cultures take kindly to drunkenness. The Mediterranean cultures tend to frown upon people who can’t handle their shit. The further north you go, the less people care about your state of mind.
Getting Insured BEFORE Visiting Europe
Europe is a safe place to travel but that doesn’t mean you’re completely invulnerable. Sometimes you fall down the stairs in a club in Athens… or get your iPhone nicked on the Paris metro…
Going anywhere without travel insurance is too risky – so do consider getting good backpacker insurance sorted before you head off on an adventure. The best kind of travel insurance will cover both your material stuff as well as your physical self. Backpacking Europe can be a dangerous occupation.
ALWAYS sort out your backpacker insurance before your trip. There’s plenty to choose from in that department, but a good place to start is Safety Wing .
They offer month-to-month payments, no lock-in contracts, and require absolutely no itineraries: that’s the exact kind of insurance long-term travellers and digital nomads need.

SafetyWing is cheap, easy, and admin-free: just sign up lickety-split so you can get back to it!
Click the button below to learn more about SafetyWing’s setup or read our insider review for the full tasty scoop.

Of course, there is no one answer to this question. Where do you want to go backpacking?!
Once you dial in where you plan to go, it is only natural to start your backpacking Europe trip in the country first on your list. Easy!
Whilst looking for cheap airfare to your destination, I advise that you look at multiple cities and find cheap flights – even if that city isn’t in your targeted country. You can easily fly between capitals in Europe on the cheap, or take a super-cheap bus.
For example, if you want to begin your backpacking Europe adventure in Spain but the tickets to Paris are going for $200 less, odds are you can score a budget flight to Madrid or Barcelona from Paris for less than you would have paid flying directly to Spain.
Be wary that the Schengen zone is threatening to introduce a nice new piece of red tape for anyone outside of the EU for 2024. Keep up to date on the ETIAS website , where the EU are concocting new ways of making it hard to travel.
Insider tip : Those budget-friendly flights often charge an arm and a leg for baggage. If you just travel with hand lugagge, you’ll save money and spend less time in the airports. That means more time to actually visit Europe.
Entry Requirements For Europe
If you want to travel long-term in Europe , then you may need a Visa. Entry and Visa requirements vary between different European countries although many of them do follow broadly similar criteria.
For travel in EU countries, a Schengen Visa is required (unless you are from another EU country in which case all you need is your passport/ID). Note that some EU countries are not part of the Schengen agreements and separate visas are required for visiting. Thanks to almost borderlessness of the EU though, travelling between EU/Schengen countries is usually super easy.
The ETIAS system will begin working in 2024, so make sure you stay prepared for that!
Out of the countries covered in this guide, countries that are not part of the EU are the UK, Ireland, Switzerland, and Liechtenstein.

Citizens of the US, Canada, Australia, New Zealand, and Singapore can usually obtain visas for most European countries on arrival. It can be significantly harder for everybody else. Overstaying visas is not recommended.
It is very wise to work out which countries you wish to visit and check their individual entry requirements before you set off. Regarding overland travel, note that even if you are only passing through a country en route to another, entry requirements will still apply.
There are many great ways to get around Europe – and it’s super easy! Western Europe has excellent transportation networks and usually booking tickets online is hassle-free.
The cost of travelling around Europe CAN lighten your wallet though, especially if you travel a lot. To be able to travel Europe cheaply, you have to know the tricks to do it.
Here’s a quick breakdown of the best ways to travel Europe.

Long-distance buses are probably the cheapest option, though they tend to be the most time consuming as well. A 9-hour journey with a company like Flixbus is likely to cost you between 25-50 Euros depending on when you book.
I like Flixbus because, if plans change, you can cancel for a small fee and re-book when you’re ready. You can score long-distance buses for as little as 10 Euros if you’re really on it.
Many Western European countries might also have their own national budget bus lines.
Train travel is an awesome way to backpack Europe. Many backpackers specifically build their backpacking Europe itineraries around travelling on a train – this is called interrailing.
They’re really easy to use and there are all different kinds. Smaller domestic trains connect all corners of the countries.
High-speed trains and sleeper trains connect countries. The central train stations are usually right in the middle of the major European cities, often making it more convenient than flights.
If you plan on hitting up multiple countries in Europe, the Eurorail Pass is a great option. You can buy a rail pass for one country or for all of Europe. Buying train tickets individually adds up fast, so buying a pass is a great trick to travel Europe on a budget.
Renting a car is surprisingly affordable in Europe and will give you unrestricted freedom to go and do what you want. And finding a car rental is no trouble at all.
Booking in advance is the best way to ensure you score the lowest price and your choice of vehicle. Often, you can find the best car rental prices when you pick up the rental from the airport. You can easily rent a car from any major city in Europe.
Driving in Europe is also pretty easy with lots of well-maintained highways and clear signage ahead!
You don’t feel like driving yourself? BlaBlaCar is a great website for connecting drivers with people interested in carpooling. You do have to pay for the ride. However, it’s usually cheaper than a train, faster than a bus, and more fun than travelling alone!
Travelling by campervan is the most classic, most awesome option. You have unparalleled freedom and access to places you would not otherwise have. You also eliminate the need to pay for accommodation every night.
If you’re travelling long term, it can be a great way to travel Europe on a budget if you buy your own campervan. For shorter term travellers, renting a campervan is easy to do all across Europe. Then you get complete freedom within the contient.
Those long, long highways of Europe are just begging for someone to get on them on two wheels… Europe is an excellent destination for long-distance motorbikers and bicyclists.
For motorbiking, France and Germany are particularly popular. For bikepackers , the Netherlands is pleasantly flat to cycle around.
Europe is one of the best places in the world to hitchhike, even long distances. I recommend studying a map before sticking your thumb out there.
Try to get an idea of which roads you need to take to get to your destination. Europe is full of tiny, winding backroads that splinter off in all directions.
It goes without saying that you should not try hitchhiking in major cities. While hitchhiking in Europe is safe generally, it is important to be on your guard and use good judgement when accepting rides.
From personal experience, hitching rides in Western Europe can be tricky. Finding rides along major highways – that Western Europe is full of – can be hard as there aren’t good places for cars to stop (looking at you, Germany and Northern Greece).
In other places, like Spain, I struggled to find rides because lots of people (falsely) seemed to think that hitchhiking was illegal. Plus, Western Europeans’s got places to be and might not be receptive to picking up a stranger.
The best hitching luck I had was in Switzerland, Austria, and France. I highly recommend trying it everywhere though!
Onwards Travel from Europe
Europe is home to many major global travel hubs and international airports. This means you can get anywhere in the world – often with a direct flight – depending on where you’re going. If you are on a grand European or world tour, heading to Eastern Europe and making your way into Turkey and beyond is a straightforward affair.
In fact, you can fly from London or Paris to Istanbul for as little as 20 Euros with some forethought (although rare). Plus, you’ll find lots of train options going to Istanbul from all over Europe.

Keep in mind as well that countries in North Africa are sometimes just an hour or two flight away. Backpacking Morocco and Tunisia are great options after travelling Europe on a budget. There are also daily boats from Southern Spain to Morocco for about $40 USD – not too pricey at all!
Boats run to North Africa from Sicily too, so if you fancy marauding in Tunisia , you can easily hop over from Italy. I would strongly advocate for this, because backpacking Europe is not complete without a little Africa.
Want to spend more time in Europe? No problemo!
While the cost of living in most Western European countries is quite high and work visas can be tricky to navigate, there are lots of options available for industrious backpackers. (Though you DO need a work visa pretty much everywhere.)
The UK and Ireland are especially popular for native English speakers; there are tons of Aussies living in London.
EU nationals don’t usually need visas to work in other EU countries so things are easier for them.
And you didn’t hear this from me… but there might be a chance for backpackers to do a bit of work under the table as well. Get chatting with locals, stay open, and keep your ears perked. There are lots of backpackers earning a bit of extra cash from helping out in bars, farms, and festivals, especially in the summer travel season.

A new country, a new contract, a new piece of plastic – booooring. Instead, buy an eSIM!
An eSIM works just like an app: you buy it, you download it, and BOOM! You’re connected the minute you land. It’s that easy.
Is your phone eSIM ready? Read about how e-Sims work or click below to see one of the top eSIM providers on the market and ditch the plastic .
The Digital Nomad Scene in Europe
Despite certain weather challenges, Europe is HUGE for digital nomads. Sure, most countries in Western Europe are real expensive to live in. That doesn’t mean they wouldn’t attract digital nomads.
London, Berlin and Amsterdam all have massive digital nomad communities. However, these nomads may not stay in the city all year. They are also usually more high-earning nomads.
Those just starting to learn how to be a nomad prefer to head to eastern Europe – Bulgaria, Ukraine, Romania, and Hungary are all top destinations for broke nomads.
Portugal is hands down the best country for digital nomads in Europe. It’s one of the more affordable countries (although getting more and more expensive), extremely nomad-friendly both in terms of community and locals’s attitudes towards nomads, and super fun. The weather also isn’t half bad! In the Algarve, you can get +30 Celsius temperatures even in the winter.

If Lisbon and Porto are not your speed, definitely consider staying in Madeira . The Portuguese island is rapidly becoming one of the top destinations in the world for digital nomads.
Other cool places for nomads are Greece (especially Athens) and the Canary Islands in Spain. Both are affordable on Western European standards.
Internet is pretty much a non-issue in Europe . Most of the major cities have high-speed fiberoptic cables lain and the more remote villages have decent coverage. Whilst hiking the Dolomites, I even got 4G using my local SIM card. I could’ve worked in a local rifugio for a few days!
Is this the best digital nomad-friendly hostel in the world?
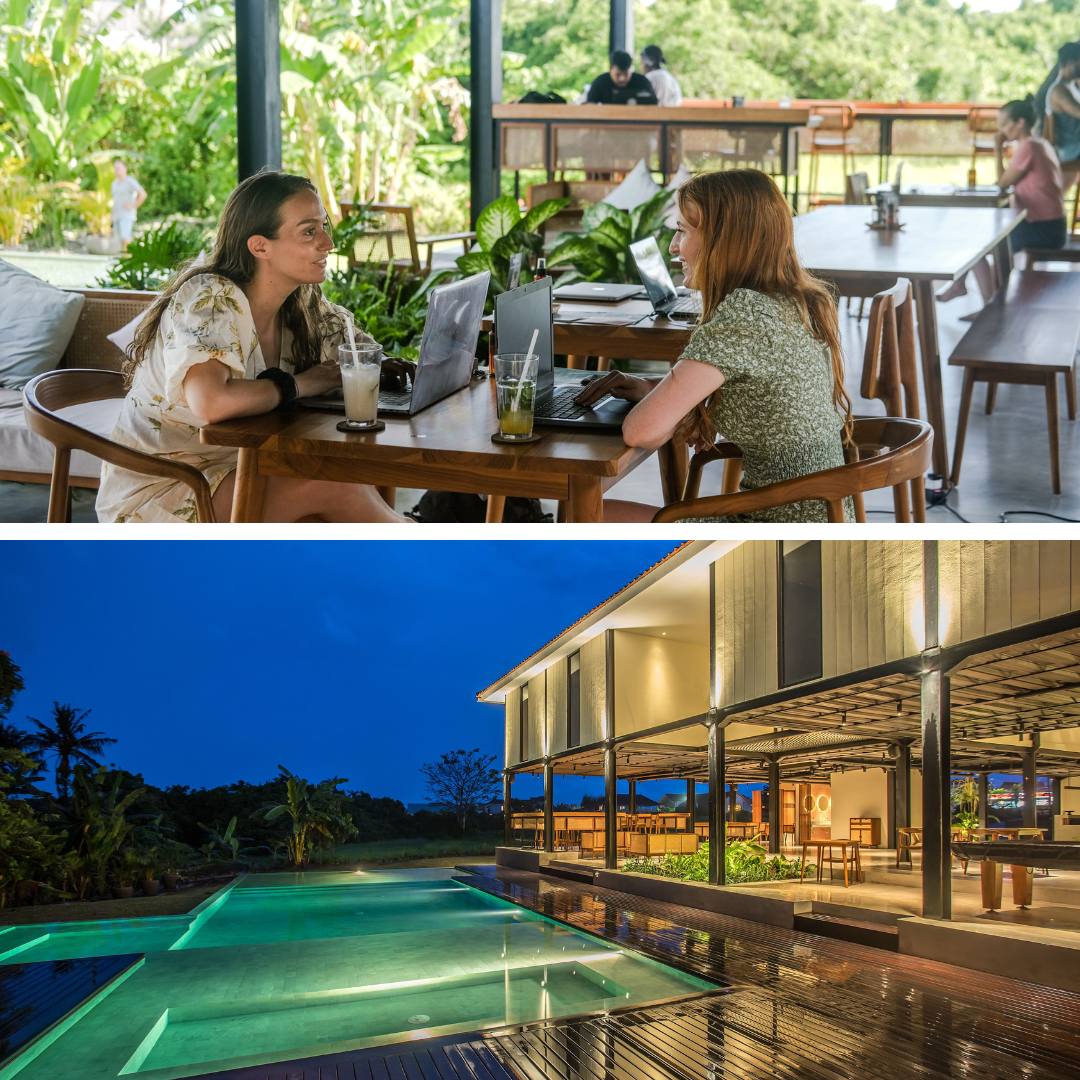
Come visit Tribal Bali – Bali’s first specially designed, custom-built co-living hostel…
Bali’s most special backpacker hostel is finally open…. Tribal Bali is a custom-designed, purpose-built co-living hostel – a place to work, rest, play and stay. A place to find your tribe and hands down the best place in Bali to hustle hard and make new friends…
Volunteer in Europe
Volunteering abroad is an amazing way to experience a culture whilst helping your host community. There are plenty of different volunteer projects in Europe including teaching, construction, agriculture, and pretty much anything.
The list of volunteering opportunities in Europe is pretty much endless. Will you run pub crawls at a hostel in Spain? Help herd sheep in the French Alps? Give hand to a music festival in the UK? The sky’s the limit.
Short-term volunteers usually won’t need a permit, but anyone from outside the EU will need a Schengen Visa to volunteer in Europe for over 90 days.
There are many ways to find volunteer opportunities but the best way is to start online. Check out some of the best work exchange websites to get started.
The team at The Broke Backpacker have used and can personally recommend Worldpackers . I feel like Workaway is the biggest platform but that doesn’t make it the best.
A heap of the European cultural identity is built on its history. Italy and Greece are home to some of the most brilliant ancient cultures; France is considered the origin of enlightenment; Portugal has a strong (although complicated) history in seafaring and exploration.
It’s no coincidence that Europe has more UNESCO World Heritage sites than any other continent. When it comes to art, heritage, sports, and music, Europe is considered by many to be the heart and origin of Western culture.
The first and absolutely most important thing that you need to know about culture in Europe is that people are not “just European”. In fact, using “European” as a blanket term for everyone who lives on the continent is pretty ridiculous since it doesn’t really begin to describe anything.
According to Britannica , there are over 160 distinct cultures in Europe, though if we’re being honest this number could be higher. Within each of these cultures are sub-sections and divisions with their own national, religious, and historical identities.
There are over 160 distinct cultures in Europe , though if we’re being honest this number could be higher. Within each of these cultures are sub-sections and divisions with their own national, religious, and historical identities.

What this means is that many people are very proud of their cultural identities and can be mildly offended if you try to paint everyone in the same colour. For example, the Scots are very proudly Scottish, and you definitely shouldn’t try to call them English.
At best, culture in Europe shows in celebration. At worst, rising tensions related to immigration have given wind to some ultra-right nationalist ideals. (Yikes.)
Europe is also, overall, very modern. Expecting “traditional” stereotypes is a bit silly. People mostly don’t dress in national costumes; at Oktoberfest, the people wearing the fake lederhosen and dirndl are tourists. Not everyone knows flamenco in Spain – in fact, it’s a dance that originated from the Romani community especially in Southern Spain.
Football fans are crazy everywhere though, that much is true.
What to Eat in Europe
The food in Europe is so varied that my mind reels just trying to think about it. Where do I even begin?
First off, people are extremely proud of their culture’s cooking. Italians sing praise about the quality of ingredients and the simplicity of their style. The French boast about their prowess in the kitchen and complex techniques. The Spanish of course love to talk about their tapas culture.
Secondly, though European culinary traditions have very long histories, most changed completely in the last few centuries. The introduction of new ingredients from the new world was nothing short of revolutionary. The Italians received the all-important tomatoes, the English imported curry, and the Germans got the Turkish kebab.

Most European culinary traditions have very multicultural pasts. North African traders and immigrants have had a profound effect on the Mediterranean diets and cultures as distant as China have purportedly influenced the creation of pasta.
All I can say is that a backpacking trip through Europe will be like a tour of heaven for your stomach. There are so many different kinds of food to try and a staggering amount of diversity. My best advice: try the usual suspects but be sure to experiment a bit.
Must-Try Dishes in Europe
Here are some of the best foods you have to try while backpacking in Europe:
- Pasta (Italy) – A VERY general term: pasta can mean a lot of things. Be sure to have more than just spaghetti.
- Coq Au Vin (France) – A simple, yet delicious stew made from chicken, wine, mushrooms, and garlic.
- Pies (UK) – A staple of just about every pub and inn in the UK. Simple and satisfying.
- Haggis (Scotland) – A slightly spicy mixture of internal organs cooked in a lamb’s stomach is actually really delicious.
- Pastel de Nata (Portugal) – A small, custard-filled egg tart that originates in Lisbon.
- Paella (Spain) – Rice prepared in a special pan and often prepared with seafood.
- Moules Frites (Belgium) – Mussels prepared in different kinds of sauces and served with fried potatoes.
- Souvlaki (Greece) – What most people imagine to be “gyros” when gyros is just a general term for shaved meat.
- Schnitzel (Germany) – Meat flattened, breaded, and fried.
- Sachertorte (Austria) – A delicacy of Vienna and perhaps one of the best cakes in Europe.
- Stroopwafel (Netherlands) – The best sweet treat ever.
Europe’s super-varied landscape and wealth of cultures mean that there are heaps of cool new experiences to have. Go beyond your regular pub crawls and walking tours and check out some unique experiences you can only have in Europe.

Things go wrong on the road ALL THE TIME. Be prepared for what life throws at you.
Buy an AMK Travel Medical Kit before you head out on your next adventure – don’t be daft!
Hiking in Europe
Europe is a land blessed of incredible hiking opportunities with trails both for expert trekkers and beginner hikers . Each country has a wide range of day hikes and multi-day treks on offer. Trekking is a great way to get to know any country by experiencing its wild side.
In addition to well-maintained trail systems, many regions in Europe have a network of mountain huts. For a fee, you can enjoy these super comfortable and unique fixtures of the European mountains.

Here are a few of the best hikes in Europe to get you psyched for an outdoor adventure of your own.
- Mt. Etna Trek, Sicily, Italy : Climbing an active Volcano in Sicily is as much fun as it sounds.
- Walkers Haute Route, France-Switzerland (Chamonix to Zermatt): A famous high route from Chamonix to Zermatt. The trek features absolutely classic alpine scenery, snowy peaks, glaciers, high meadows and deep valleys, and close-up views of such icons as Mont Blanc and the Matterhorn.
- Tour Du Mont Blanc, France: The unforgettable circuit around the Mont Blanc massif. Outstanding views up to Mont Blanc, Western Europe’s highest at 4,810m, and out across the dramatic peaks, glaciers, and deep green valleys of the high Alps. If you have the time, this might just be the most scenic (and most trafficked) hike in Western Europe.
- El Camino de Santiago, France – Spain: Perhaps the most popular long-distance trek in the world , El Camino is an important trek in the hearts of religious pilgrims and outdoor enthusiasts alike. The Camino is actually multiple trails leading to Santiago de Compostela and eventually Finisterre, “the end of the world”.
- Mount Olympus, Greece: The fabled mountain where the ancient Greek Gods were supposed to have lived is very climbable in just one day.
Surfing in Europe
Many backpackers are unaware that there is some killer surf to be found all across Europe. Portugal is certainly famous for having massive waves and the associated surf competitions.
That said, if you are keen on surfing at some point as you’re backpacking through Europe, you do have some options. Below I have provided a shortlist of surfing hotspots in Europe.

- Biarritz, France : One of the oldest known surf meccas of Europe. The surfing here is great for beginners as well as seasoned rippers.
- Newgale, Wales : Surfing on this beautiful stretch of coast facing out towards the Irish Sea; the waves here are powerful and the views are epic.
- Belhaven Bay, Scotland : This surf spot is only an hours drive from Edinburgh! Make sure you have a good wetsuit. Not the warmest water in the world, but the waves are good at times.
- San Sebastian, Spain : When not eating and drinking, it is easy to hit the beach and catch a few waves before resuming the former.
- Lagos, Portugal : Probably the unofficial capital of surfing in Portugal. There are many surf schools across Lagos that will help you tune up your surfing game in no time.
Museums in Europe
Europe is the world’s best continent to tour museums, both art and history adjacent. (That might have something to do with plundering other countries’ national treasures and refusing to return them… But uh, let’s not focus on that.)
Europe’s best museum city is London. Most of London’s museums are free to visit, and they have some of the best collections of art and historical relics from everywhere in the world. (Again, for certain reasons…) My favourite museums in London are The National Gallery, The Natural History Museum, The British Museum, and Victoria and Albert Museum.

Paris is strong in the museum game too. Definitely visit the Louvre and its most iconic resident Mona Lisa. Don’t grumble about it being small, it’s still awesome. For more morbid explorers, the Paris Catacombs offer a cool glimpse into the city’s history.
More honourable mentions to go Reina Sofia in Madrid, Rijksmuseum and Anne Frank House in Amsterdam, and Dachau concentration camp in Germany (it counts).
Bring your ID – some places, like the Louvre, have free admission to students and people under 25.
Got questions about backpacking Western Europe? I’ve got the answers!
Where should I start backpacking through Europe?
Backpacking through Europe is a momentous task, but starting in Britain or Portugal will stop you having to make tedious back and forth journeys. You don’t want to be doubling back on yourself when distances are so large! That said, you can really start anywhere, just make sure you’ve got enough cash to fly home 😉
How long is the average backpacking Europe trip?
On average, backpackers make a 2-3 week route travelling around Europe. If you want to visit Europe properly, you can easily spend 6 months or more pedalling around. Try going for 2-3 months if you want to get a much fuller picture of what it is like.
What is the Cost of Backpacking Through Europe?
As with anywhere, the cost of backpacking Europe will be down to you, where you go, and how you spend. Western Europe is more expensive and will most likely require $50-$90/day, whilst heading east can put your budget lower, at around $30-$60/day. On top of transport and flights, Europe can seriously add up…
Where are the hottest people in Europe?
I’d say Finland. Source: I’m Finnish. Apparently Nordic people are, statistically, very sexually liberated on a global scale. But I would personally like to guide your attention towards Southern Europe… Greek Tinder is something else, hey.
Who feeds the Loch Ness monster in Scotland?
The park rangers feed the sea snake with tourists that behave badly and/or ask stupid questions. There’s also a bloke who has been on the lookout for years and never seen it. Take from that what you will.
Congratulations! You made it to the end of my Europe travel guide!
I hope the information I have provided will help you navigate the exciting European journey you have decided to embark on. Backpacking in Europe will be one of the most fun experiences of your life, I have no doubts about that.
Europe can be one hell of a place to let loose and have a good time. Between the party-hearty music festivals, discotheques, rave scenes, pub crawls, and other venues of hedonistic tendency, there is ample opportunity for backpackers to get down.
Have fun on your Europe backpacking journey – but like my mum would say, not too much fun! Partying every day is one of the most common backpacker traps that travellers fall into.
When visiting historic sights or religious monuments, be respectful. Certainly do not climb on old ruins or touch priceless paintings. Europe is full of historical treasures. Don’t be that dickhead that contributes to their demise and destruction.
When you can, make an effort to learn at least a few words of the local language of the country you are backpacking in. It’s a challenge as every country has a different language, but a little effort goes a long way. The world need not revolve around us native English speakers!
Do your best to support local artisans, organic farmers, and craftspeople while travelling around Europe. Keep your dollars local, especially in small villages or towns.
Never take it for granted that you are healthy and financially able to go travelling. Show the world around you some gratitude and help to make a positive impact on it.
Most of all, have the time of your life and spread the love!

Updated May 2023 by Abe Lea

Nic Hilditch-Short

Share or save this post

16 Comments
I am dreaming of backpacking Spain. The only thing I found out of the league in this country is the timing of breakfast, lunch, and dinner. Anyway, given the fact that Spain never sleeps, it can be understood.
Great post! I can’t wait to start planning my European backpacking trip.
My big dream is to visit Oia, Santorini. This place is just magical.
I would suggest you to put Slovenia in this list. In this small country you can find beautiful places for low price and save society
We can’t wait to get there! Once we do, we will add it to the list! cheers.
the most honest and helpful backpacking guide yet. thankyou!!!!!
I really enjoyed reading this post. Especially as a European.
Some insider tips of my own. UK: * Trains are expensive, budget airlines and coaches are great though. Maybe even cycle, we have some amazing National Cycle routes that really open up the countryside (borrow a Boris bike in London-great cheap way to discover the city) *The coastline in the UK is so varied, some of my favourite beaches in the world are on the West cost of Scotland (check out the isle of Skye and the fairy pools). Or try surfing in Cornwall. *Accommodation, Hotels are pricey but try the Youth Hostel Association (YHA) it’s a charity that run hostels up and down the country, usually near iconic landmarks and hiking trails. You can wild camp in Scotland but not the rest of the UK so you’ll have to find a proper campsite in England and Wales.
As for what season to go to Europe: My general rule of thumb is Mountains in the Summer, beaches in the Autumn. Ski resorts are much cheaper in the summer and offer amazing hiking opportunities (think the Dolomites of Ital or Soca Valley in Slovenia). It is simply too hot to be in Greece in August 100 degrees quite frequently. Places like Greece and Croatia are amazing but a lot less hot, and less crowded at the end of September/early October. Netherlands is great in the spring- think colourful fields of tulips. Also consider that the sun doesn’t really set in the summer in places like Iceland and northern Scandinavia.
For almost all parts of Europe wear layers and pack a light weight, windproof waterproof jacket. The temperature and weather conditions can vary so much in just a couple of hours. Leave high heels at home. Trainers are perfectly acceptable almost everywhere…A lot of streets across a lot of Europe are cobbled you don’t want a twisted ankle.
Some awesome tips there, thanks Kayleigh!
Wonderful post.Very helpful and awesome info.really informative post!Nice post.Amazing article.
Thanks for sharing ideas, really informative post! I’m thinking about to do The Kings Trail in Sweden. Is it possible to do only in summer or spring should be fine as well. I’m traveler with tents, so would like to sleep outside as much as possible. Cheers, Rob
You can do the King’s Trail hike in the spring, but you must be aware that there will be few other hikers (maybe that’s a good thing for you), it will be really cold still, and there will be lots of snow to walk through. You would need to be outfitted with the right gear for it to be possible/enjoyable for you. The later in the spring your start (Late April/Early May) the warmer it will be and the less snow you will find on the trail. The best weather for sleeping outside is obviously in the summer. You won’t need to carry as much cold weather gear then either. Hope that helps! Good luck on your hike 🙂
Very helpful and awesome info. Very entertainingly written as well!
Nice post. I’d have to recommend checking out Poland though if you haven’t already (it isn’t mentioned). It is great for backpacking through.
Amazing article. Each and every information shared here is very useful. I went to Europe on a short trip. Visited Switzerland and fell in love with its beauty. A must visit.
Wonderful post. Europe is super backpack friendly – I did Eastern Europe and it is full of hidden gems.
Leave a Reply Cancel reply
Your email address will not be published. Required fields are marked *
Save my name, email, and website in this browser for the next time I comment.
Notify me of followup comments via e-mail.
Tired of overcrowded national parks? Here’s how to go backcountry camping.
How to dig a toilet and other essential lessons for backcountry camping.

Everyone seems to be a camper these days, including folks who once feigned an allergy to nature.
According to recreation.gov , which handles reservations for nine federal agencies, the number of camping reservations increased from 2.72 million in 2019 to 4.14 million last year. For this summer, 143 campground facilities are sold out from June through August, and another 232 campgrounds are at capacity for a least one peak month.
If your version of the outdoors does not include trunk-slamming car campers and wheezing RVs, then you need to venture deeper into the wild.
“Backcountry camping is an opportunity to connect more with the wilderness, to have a little more solitude and to get away from cellphone service,” said Sarah Martin, Rocky Mountain director of the National Outdoor Leadership School .
Not surprisingly, wilderness or backcountry camping has also grown in popularity. Recreation.gov issued 371,000 permits last year, compared with 188,000 in 2019. Due to demand, the number of permit facilities has jumped from 38 in 2019 to 81 this year. However, the rigors of backpacking without standard services work as a filter; only the heartiest apply.
“Nobody is responsible for taking care of you, for cleaning up after you, for making sure that you put out your fire,” said Andrea Ference , an experienced backcountry camper based in the Canadian Rockies. “It is more self-reliant camping than traditional front-country camping.”
For first-timers, backcountry camping might seem intimidating. But with the right tools, digging a latrine and sleeping far from civilization can become second nature.
What is backcountry camping?
The National Park Service defines the category as “one or more primitive or wilderness areas which are reached primarily by hiking, boating, or horseback.”
The agency emphasizes that a developed campground on a remote parcel of land, such as Isle Royale National Park in Michigan, does not qualify. The campsites fall into one of three categories: designated, designated-dispersed and dispersed , the most rugged option.
Backcountry camping is available on public lands in a range of environments, such as mountains, deserts and wetlands. The parks distinguish the backcountry from the more established hiking and camping areas.
For example, Shenandoah National Park in Virginia boasts more than 196,000 acres of backcountry and wilderness. Denali National Park in Alaska divides its 6 million acres into 87 backcountry units covering thousands of acres each. In Everglades National Park, the 1.4 million-acre Marjory Stoneman Douglas Wilderness is the largest subtropical wilderness in the country.
Though backcountry campers carry all of their gear and basically fend for themselves, the activity has a few guardrails. Many parks will map out routes and designate campsites for backcountry campers. You might even share trails with day-trippers or less ambitious campers. But in the wilder spots, you will be alone. Well, not entirely alone.
Purchase your permit
Many parks require backcountry campers to acquire a permit during peak times or year-round. Purchase it as soon as possible. The number of spaces is capped, and demand can be high.
“Gaining access to the permit has become a much bigger hurdle, especially since the pandemic,” said Ference, who has camped in about 20 national parks. “If you don’t have a permit in advance, there’s almost a zero-percent chance that you’ll be able to go backcountry camping, especially within a national park.”
The booking systems vary by park.
- Mount Margaret in Mount St. Helens National Volcanic Monument opens reservations to the Washington state lands the first day of a month before the month of your reservation.
- Santa Rosa Island in Channel Islands National Park uses a six-month rolling system. On May 9, the California park started releasing permits for its Aug. 15 through Nov. 9 camping season.
- Yellowstone National Park , which maintains roughly 300 backcountry campsites, offers an early-access lottery, a general sale period and walk-up permits two days before your trip.
When purchasing a permit, note any restrictions, such as length of stay, group size, open fires and pets. Also check the reservation policy. You can often cancel a few days before your booking and receive a partial refund. (Unless you’re Yosemite and keep the entire $15.)
Test equipment
For a backcountry camping trip, you don’t need to train with the same intensity as a marathon. Frequent neighborhood walkabouts in your hiking boots and pack will suffice.
“The biggest part of physical training is just time on your feet. Go on long walks and break in your gear,” Ference said. “The worst thing you can do is head out on the trails with a pair of brand-new hiking boots.”
If you purchased gear for your adventure, Ference recommends camping out in your yard for a night. This way, you can familiarize yourself with your equipment, work out any kinks and identify any ill-conceived items. On a test run, Ference discovered that her sleeping pad did not fit inside her one-person tent.
Campers not ready to invest in gear can rent a variety of items from REI . Inventory varies by store, but some common objects include sleeping bags, tents, propane stoves, trekking poles and bear canisters.
Bring only essentials
Before packing your rucksack, determine whether the campsite offers any amenities. The perk might be minor, such as an animal-proof food container, but it’s one less thing you’ll have to lug.
At Mammoth Cave National Park in Kentucky, for example, the sites come with campfire rings and tent pads. Yellowstone provides bear-resistant food boxes or storage poles (35-foot rope not included). Sylvania Wilderness camping in Michigan’s Ottawa National Forest has pit latrines.
Many national parks and outdoor outfitters provide checklists. (Check backcountry.com . ) NPS spokesman Dave Barak shared some of his essential items:
- Navigational supplies, such as maps, a GPS unit and a compass.
- Sun and insect protection.
- Extra clothing for insulation.
- A light source, such as a headlamp and flashlight.
- A first-aid kit.
- Fire starter.
- Extra food and water.
- A repair kit and tools.
- A communication device that is more reliable than a cellphone, such as a personal locator beacon or a satellite phone.
Ference brings a camping pillow, her one little luxury, and dehydrated meals, which she swears are tasty.
“The backpacking meals they make these days are shockingly delicious,” she said. “They are also made for the activity that you’re doing. So, it has a really high sodium content, because you’re sweating all day.”
As your camping skills advance, so can your cooking. If you carry a pot or pan, choose the nonstick kind, because cleaning burned, dehydrated eggs is a thankless chore.
To calculate your food quantity, take into account the activity level, weather and weight you are carrying. NOLS recommends 1 to 1.5 pounds of food (2,000-3,000 calories) per day for a short, leisurely trip in mild temperatures. For a more strenuous outing, increase your supply to 1.75 to 2 pounds, or 3,000 to 3,500 calories.
For drinking water, Martin plots out routes with natural water features, such as rivers and lakes in the mountains and springs in the desert. She uses chlorine tablets called Aquamira to purify the water. To rinse off before bed, she carries a hanging shower bag and a small bottle of Dr. Bronner’s biodegradable soap.
“It keeps me feeling more like a human and less like a wild animal,” she said.
Martin reminds campers to keep at least 200 feet away (or 70 paces) from a water source, to avoid contamination.
Find a campsite
If your permit includes a designated campsite, then you can stop there. If you are in charge of scouting out a site, location is critical.
The Park Service advises against ledges, high peaks and the middle of a field, which can be a vulnerable spot in high winds or lightning storms. Also avoid setting up camp under dead branches, which could crash down on your tent. Stay away from ravines that might flood.
Stake your tent at least 200 feet away from any trails and natural water sources. Ditto for your toilet and food storage and cooking area, especially in bear country.
Dig a toilet
When constructing a latrine, dig a hole at least eight inches deep. Martin said most people bury their toilet paper, but she said the product does not always quickly decompose.
“We cannot count on toilet paper to break down season after season. It just takes a lot longer than we think,” she said. “I think any sort of human products that we use in the backcountry need to be packed out.”
To reduce the ick factor, she said some people store the used toilet paper in empty coffee bags, so the coffee scent masks the less pleasant odors. If you use a plastic zip-top bag, she recommends covering it with duct tape.
“You don’t need to look at what’s in that trash bag,” Martin said.
More travel tips
Vacation planning: Start with a strategy to maximize days off by taking PTO around holidays. Experts recommend taking multiple short trips for peak happiness . Want to take an ambitious trip? Here are 12 destinations to try this year — without crowds.
Cheap flights: Follow our best advice for scoring low airfare , including setting flight price alerts and subscribing to deal newsletters. If you’re set on an expensive getaway, here’s a plan to save up without straining your credit limit.
Airport chaos: We’ve got advice for every scenario , from canceled flights to lost luggage . Stuck at the rental car counter? These tips can speed up the process. And following these 52 rules of flying should make the experience better for everyone.
Expert advice: Our By The Way Concierge solves readers’ dilemmas , including whether it’s okay to ditch a partner at security, or what happens if you get caught flying with weed . Submit your question here . Or you could look to the gurus: Lonely Planet and Rick Steves .


The Ultimate Guide to Backpacking Through Southeast Asia
E mbarking on a backpacking adventure through Southeast Asia is a dream for many travelers seeking vibrant cultures, stunning landscapes, delicious cuisine, and unforgettable experiences. With its rich history, diverse traditions, and budget-friendly options, Southeast Asia offers an incredible journey for backpackers of all ages and interests. In this guide, we’ll cover everything you need to know to plan an epic backpacking trip through this enchanting region.
- Research destinations: Southeast Asia is vast and diverse, so research countries and regions that interest you. Popular destinations include Thailand, Vietnam, Cambodia, Laos, Malaysia, and Indonesia.
- Consider your interests: Are you drawn to ancient temples, pristine beaches, bustling cities, or lush jungles? Tailor your itinerary to include activities and attractions that align with your interests.
- Budget and duration: Determine your budget and how long you plan to travel. Southeast Asia offers options for all budgets, from shoestring backpacking to luxury travel, so plan accordingly.
- Lightweight backpack: Choose a durable and comfortable backpack that fits your body and can hold all your essentials.
- Clothing: Pack lightweight, breathable clothing suitable for the region’s tropical climate. Don’t forget to include swimwear, comfortable walking shoes, and a waterproof jacket.
- Travel essentials: Bring essential items such as a passport, travel insurance, visas (if required), a money belt, a first aid kit, and a universal adapter.
- Toiletries: Pack travel-sized toiletries, sunscreen, insect repellent, and any necessary medications.
- Overland travel: Southeast Asia has a well-established network of buses, trains, and ferries that make overland travel between countries relatively easy and affordable.
- Budget airlines: Take advantage of budget airlines for longer journeys or when traveling between islands. AirAsia, VietJet, and Lion Air are popular options.
- Local transportation: Embrace local transportation options such as tuk-tuks, motorbike taxis, and songthaews for short distances within cities and towns.
- Hostels: Backpacker hostels are plentiful throughout Southeast Asia and offer budget-friendly accommodation with dormitory beds or private rooms.
- Guesthouses: Guesthouses are a step up from hostels and provide affordable private rooms with basic amenities.
- Homestays: Experience local culture by staying with a local family through homestay programs, particularly in rural areas.
- Street food: Southeast Asia is renowned for its delicious and affordable street food. Embrace the local culinary scene by trying dishes such as pad Thai, pho, nasi goreng, and banh mi.
- Local markets: Explore bustling markets to sample fresh produce, tropical fruits, and local delicacies. Don’t be afraid to haggle for the best prices.
- Hygiene precautions: While street food can be delicious, exercise caution to avoid foodborne illnesses by choosing stalls with high turnover rates and observing food preparation practices.
- Vaccinations: Consult with a healthcare professional or travel clinic before your trip to ensure you are up-to-date on routine vaccinations and receive any recommended vaccinations for specific destinations.
- Travel insurance: Purchase comprehensive travel insurance to cover medical emergencies, trip cancellations, and other unforeseen circumstances.
- Personal safety: Exercise caution and common sense when traveling, particularly in crowded areas, at night, and when using public transportation. Keep valuables secure and be aware of common scams targeting tourists.
- Respect local customs: Familiarize yourself with local customs, traditions, and etiquette to show respect for the cultures you encounter.
- Dress modestly: In many Southeast Asian countries, particularly in rural areas and religious sites, conservative dress is appreciated. Avoid wearing revealing clothing and always cover up when visiting temples and mosques.
- Learn basic phrases: Take the time to learn basic phrases in the local language, such as greetings, thank you, and please. Your efforts will be appreciated by locals.
- Angkor Wat, Cambodia: Explore the awe-inspiring temples of Angkor Wat, a UNESCO World Heritage Site and one of the most significant archaeological sites in Southeast Asia.
- Ha Long Bay, Vietnam: Cruise through the stunning limestone karsts and emerald waters of Ha Long Bay, a UNESCO-listed natural wonder.
- Phi Phi Islands, Thailand: Relax on the pristine beaches and snorkel in the crystal-clear waters of the Phi Phi Islands, known for their breathtaking beauty.
- Bali, Indonesia: Immerse yourself in the cultural and natural wonders of Bali, from vibrant temples and lush rice terraces to world-class surfing spots and vibrant nightlife.
Backpacking through Southeast Asia is a transformative experience that offers a blend of adventure, culture, and natural beauty. By planning your itinerary, packing essentials, embracing local transportation and accommodation options, and respecting local customs, you’ll create memories that will last a lifetime. So grab your backpack, embark on an unforgettable journey, and discover the wonders of Southeast Asia for yourself.

Nomadic Matt's Travel Site
Travel Better, Cheaper, Longer
United States Travel Guide
Last Updated: April 14, 2024

The United States isn’t a popular destination for backpackers and budget travelers. Most overseas tourists come here for a short vacation, visit one or two cities, and then head home. They usually stick to the big coastal cities or places like Disney.
And it wasn’t until COVID that Americans en-masse bothered to hop in their cars and explore their backyard.
The U.S. is massive country that lacks a lot of tourist infrastructure or good cross-country transportation. Hostels haven’t quite caught on, trains don’t go to many places, and we don’t offer working holiday visas to attract young working backpackers. In short, it’s hard to get around.
However, the United States has a lot to offer: stunning national parks, gorgeous landscapes, incredible and diverse culture, world-class music, and a variety of delicious cuisine that varies from region to region.
I think the U.S. is one of the best destinations in the world to road trip . I’ve done several multi-month road trips across the United States . While the coastal cities are fun, the U.S. really reveals itself in the middle and countryside (it’s much more affordable there too). It’s in the nooks and crannies of America that you get a sense of its quirks.
But even if you aren’t spending months visiting the country in a car, there’s still a lot you can do via train, bus, or plane.
This travel guide to the United States can help you navigate the country, save money, and get off the beaten path.
Table of Contents
- Things to See and Do
- Typical Costs
- Suggested Budget
- Money-Saving Tips
- Where to Stay
- How to Get Around
- How to Stay Safe
- Best Places to Book Your Trip
- Related Blogs on the United States
Click Here for City Guides
Top 5 things to see and do in the united states.

1. Explore New York City
The city that never sleeps is one of the greatest cities in the world. There’s nothing you can’t do or see and you’ll find every language and food from around the world here. From world-class museums and art galleries to innovative theater performances to unique restaurants to the expansive Central Park, you can fill a lifetime of activities here. You can take the ferry to Ellis Island, see the Statue of Liberty, hang with the hipsters in Brooklyn, see a Yankees game, and so, so much more. Check out my detailed guide for everything you need to do .
2. Visit the Grand Canyon
Words can’t describe how epicly beautiful the Grand Canyon is. It’s simply breathtaking. Most people just look out at the canyon from the overlook at the top, but its vast size and beauty are best appreciated with a hike down to the Colorado River so try to do that if you have time (make the time). The canyon itself is 6,000 feet deep, and you can find plenty of hikes to take you further into the canyon that will give you a chance to experience it in more detail. For a shorter hike, Grandview Trail to the first overlook at Coconino Saddle and back is only a couple of miles. If you have a whole day to spend and want to challenge yourself, try the 12.5 miles from Bright Angel Trail to Plateau Point. Just be sure to bring plenty of water!
3. Discover Austin
The warm weather, lively honky-tonks, funky house bars on Rainey Street, amazing walking and biking trails, tons of outdoor activities — Austin is great (I lived there for many years). You can always find great live music on 6th Street. On a hot day, Barton Springs pool is the perfect place to cool off, there’s always something to do, the food scene gets better and better, and everyone is very welcoming. It’s one of the best cities in the U.S., boasting a combination of nature, city, and delicious food. Be sure to binge on BBQ while you’re here!
4. Visit Glacier National Park
This is my favorite national park in the country. It’s home to gorgeous snow-topped mountains, a beautiful lake from which to admire said mountains, large glaciers, and hiking trails galore. It is one of the most mind-blowing places I’ve seen on my adventures. There are more than 700 miles of hiking trails in the park that provide everyone an opportunity to explore the landscape. Park rangers offer various programs and guided tours are also available. There are spots for fishing and additional trails for biking and horseback riding. (If you plan to visit multiple national parks while traveling throughout the United States, it’s worth it to get the America the Beautiful Park Pass, which costs just $80 USD and provides entry to all the national parks for a year.)
5. Drive the Pacific Coast Highway
The Pacific Coast is considered one of the most scenic landscapes in the world, offering sheer cliffs, forests descending to the shoreline, miles of beaches, and giant redwoods. The Pacific Coast Highway (PCH) runs 1,650 miles from San Diego, California to Seattle, Washington taking you from the warm, sunny beaches to the lush temperate rainforests of the Pacific Northwest. Highway 1 thorough California is one of the longest historic state highways in the country. The California portion alone route takes 10 hours without stopping but I recommend dedicating at least several days to enjoy all the great stops along the way.
Other Things to See and Do in the United States
NOTE: There’s a lot to do in the United States and you can spend months traveling around the country . I could write an entire book on the places to visit! This is just a list to give you some ideas. Be sure to check out some of my other articles and city specific guides (scroll to the bottom of this guide for links) for more suggestions.
1. Have fun in Memphis
Gritty and industrial, Memphis appears like its best days are behind it. But don’t let the rough exterior fool you — the city is home to some killer food and a vibrant blues music scene. It is a cool city with boisterous and friendly locals. I love the vibe here. There’s Graceland (Elvis’s home) for fans of the King, a big waterfront for walking, and the phenomenal Museum of Civil Rights (it’s huge, so don’t rush it!). The city is going through a big revival right now. To use a cliché, it’s a hidden gem as most people, to their detriment, skip over it.
2. Discover Asheville
Asheville is full of tasty craft beer, great restaurants, and plenty of outdoor loving residents. The beautiful Smoky Mountains are a short drive away, Asheville Botanical Gardens are right near the university, and the gigantic Biltmore estate (the largest privately-owned home in the U.S. and once home to George Vanderbilt) is on the outskirts of the city. (If you’ve ever seen Downton Abbey, that’s what the house is like!) The town has a lot of parks and there are a lot of beautiful biking and hiking trails that you can get to from the center of town.
3. Explore Redwood National Park
Along the Pacific Coast is Redwood National Park, a huge expanse of towering redwood trees filled with picnic areas, places to camp, and miles upon miles of hiking trails. Trails range from easy to strenuous, and there are many loops that head out to nearby beaches. The trees range from 200-240 feet tall. It’s utterly beautiful, awe-inspiring, and humbling in every way. Admission is free, though the three adjoining state parks (Prairie Creek Redwoods State Park, Del Norte Coast Redwoods State Park, and Jedediah Smith Redwoods State Park) each charge $10 USD.
4. Explore Denver
Known as the Mile High City (the city is one mile above sea level), Denver offers a mix of outdoor ruggedness and big-city living. It has a huge craft beer scene, excellent restaurants (including, Sushi Sasa, one of my favorite sushi restaurants), a large international airport with lots of connections, and is close to the mountains. There are a lot of interesting museums, including the Denver Art Museum, Meow Wolf Denver, and the Clifford Still Museum. There’s plenty of art outside of the museums as well and there are walking tours available to show you around, if you prefer that to exploring on your own. It’s clean, lively, and the locals are incredibly friendly.
5. Get off-the-beaten-path in Natchez
I was surprised by Natchez . I didn’t know anything about it when it was recommended as a place to see historic 19th-century homes. These mansions were built by white plantation owners wanting to escape the summer heat and socialize with each other. As cotton became king, the houses became ever larger and more elaborate. Today, the homes are historic monuments you can tour while enjoying a view of the Mississippi River. It’s far off the beaten path and you’ll need a car to visit but it’s worth the trek.
6. Visit Savannah
Sitting on Georgia’s coast, Savannah escaped the wrath of the Civil War, allegedly because General Sherman thought it was too pretty to be destroyed. With streets lined with Spanish moss-covered oaks, large and inviting parks, and a bustling waterfront, Savannah is a wonderful place to experience the slow pace of the South. There are a number of interesting historical sites like the Bonaventure Cemetery and Factors Row. The city is full of small squares and sprawling parks where you can enjoy a stroll or a picnic. And nearby Tybee Island is a draw for many visitors due to its sandy beaches and slow pace of life.
7. Dive into Nashville’s music scene
Nashville is one of the fastest-growing cities in the U.S. It’s got a wonderful music scene (duh), a growing cocktail bar culture, and some world-class down-home Southern restaurants. There’s not a lot of “touristy stuff” to do here, but what makes this city one of my favorites are the music, the food, the wildly friendly people, and the positive energy the city seems to exude. When you’re here, plan to spend a few hours at the Tennessee State Museum. It goes into detail about the state’s history (and it’s more exciting than you might think!).
8. Catch some rays in sunny San Diego
I love San Diego. San Diego’s weather is almost always perfect, leading to a permanently happy population that’s friendly and outgoing and that loves the outdoors. From hiking, days at the beach, or running, people here love to get out and enjoy the sun. The downtown Gaslamp area — as well as the famous Pacific Beach — is full of trendy restaurants, bustling bars, and some seriously life-changing taco stalls.
9. Get tipsy in California’s Wine Country
California is home to some of the best wine in the world, and a visit to the Sonoma or Napa Valley shouldn’t be missed. While Sonoma is cheaper than Napa, both these destinations are meant for splashing out. Take a tour, book a cozy vineyard Airbnb, and enjoy a relaxing few days learning about the region’s wines. Tastings usually cost between $15-20 USD. If you go to Sonoma, check out Three Fat Guys winery. They have phenomenal reds.
10. Hike around Lake Tahoe
Lake Tahoe is impressive and beautiful. Ringed by tiny mountain communities, this is a terrific place for hiking and boating in the summer and skiing in the winter. For fun in the sun, be sure to spend some time lounging at Kings Beach. For hikes, check out the Rubicon Trail (16 miles/25.7 kilometers) or the Cascade Falls Trail (1.4 miles/2.2 kilometers). You can’t really go wrong here.
11. Anywhere in Montana
A lot has been written about how stunning Montana is, but words cannot do this state justice. To me, it’s the most beautiful state in the Union, filled with wondrous mountains and hills as far as the eye can see. It’s a nature-lover’s paradise and there is a huge craft beer scene here too, with tons of local breweries all around the state. If you want nature, good food, friendly locals, and just quiet, Montana is it!
12. Relax in Cape Cod
I spent a lot of summers on the Cape since I grew up in Boston. You’ll find plenty of small beach towns along the coast (Provincetown and Hyannis being the most famous but I also love Chatham, Falmouth, Wellfleet, and Brewster). There’s not a lot to “do” but if you’re looking for seafood, beaches, boardwalks, and that perfect family vacation, visit the Cape! Just avoid the weekends when it gets a little too crowded.
13. Explore Deadwood
Tucked away in western South Dakota, this town was famous during the Old West days (noteworthy enough to be the focus of the eponymous HBO series). Wyatt Earp, Calamity Jane, Wild Bill Hickok, and many other infamous gunslingers all spent time here. Sort of kitschy and re-created, it’s nonetheless a very cool place where you can experience a taste of the old frontier days. It’s also conveniently located near the Black Hills and Mount Rushmore so you can use it as a base for exploring the region.
14. Be surprised by Kansas City
I really loved this city, which features some of the world’s best BBQ and a lively downtown core. There’s a detailed and enlightening jazz museum here, as well as the eye-opening Negro Leagues Baseball Museum (that’s the actual name). This is yet another super underrated and under-visited destination.
15. Stay weird in Portland
Portland , Oregon is incredible. Here you’ll find an impressive food truck scene, cool bespoke bars and cocktail lounges, a craft beer scene that’s religion to residents, relaxing parks (including a peaceful Japanese garden), a vibrant art scene, and hiking in the nearby mountains. Portland is just an awesome city, especially in the summer when the weather is perfect and there are festivals and events galore.
16. Hike our national parks
America has 63 national parks as well as countless state and local parks. These parks highlight the best of the American wilderness. Yellowstone, Yosemite, Glacier, Zion, Byrce, the Smokey Mountains, Rocky Mountain Park, the Badlands — the list goes on. Make sure you visit as many national parks as you can to get a sense of the grand and diverse landscape that is the United States. You can use this government map to find a park near you! If you plan to visit multiple parks, get the America the Beautiful Park Pass, which costs just $80 USD and gets you free entry to all the national parks for a year.
17. Admire the architecture in Chicago
One of my favorite cities in the world, Chicago is full of amazing architecture, great parks, delicious and hearty food, and a fun nightlife. One of the best ways to see the city’s unique architecture is on a river cruise. There are multiple operators and prices start around $45. Don’t miss trying deep-dish pizza (it was invented here, along with stuffed-crust pizza) and seeing the iconic “Bean” sculpture in Millennium Park. Additionally, check out the city’s famous pier, aquarium, and waterfront park. The city also hosts one of the biggest St. Patrick’s Day celebrations in the country.
18. Enjoy Lively New Orleans
This French-influenced city has incredible seafood and Cajun cuisine and even better live music. A visit to New Orleans is a must for any jazz or blues fan. Live music is available seven nights a week. Frenchman Street is one of the best places to go (my favorite venue is the Spotted Cat). There are also tons of amazing walking tours that highlight the city’s unique culture and history (including ghost and voodoo tours). Nature lovers will enjoy wandering through the massive oak trees in City Park where you can also visit the city’s Botanical Gardens, which are open year-round. Admission is $12. Plus, there’s incredible independent bookstores, creole food, art museums, and the simply incredible and informative World War 2 museum. Don’t skip roaming the redone and revitalized Bywater district too. It’s a bit hipster. If you plan on celebrating Mardi Gras in NOLA , book early. Accommodations fill up fast.
19. Get some sun in Hawaii
Closer to Asia than the United States, Hawaii is America’s slice of South Pacific paradise. White sands beaches, clear blue water, tropical jungle, and great surf — Hawaii has it all! Don’t miss the otherworldly landscapes of Hawai’i Volcanoes National Park, the somber memorial at Pearl Harbor, and the hikes at Diamond Head and the Lanikai Pillbox Trail near Honolulu. There are a ton of opportunities for snorkeling and scuba diving where you get a chance to see manta rays, sea turtles, and plenty of colorful fish. Waimea Canyon and the Napali coast on the island of Kauai are places you can get up close and personal with the natural landscape. There are helicopter and boat tours or, if you’re up for a challenge, you can hike the iconic Kalalau Trail. Every island has its own vibe so, if you can, visit more than one.
20. Check out Boston
The birthplace of the revolution (and my hometown), no one leaves Boston disappointed. It’s a big city, but its lack of high-rises, as well as its cobblestone streets and brick buildings, give the city a small-town feel. The Freedom Trail, which covers all the main historic stops, is a must because it gives you a look at the city’s historic past. Be sure to lounge in the Boston Common and catch a Red Sox game at Fenway Park too (the city is big on sports).
21. Visit the nation’s capital
The country’s capital is home to many of the best museums in the country. And, given the large number of international embassy workers here, it’s unsurprising one of the most international cities in the country. You can find food from anywhere in the world thanks to all the embassies in the city. Plus, there’s a vibrant music and cocktail scene. Don’t miss the National Mall and all its monuments, the Holocaust Museum, and the various Smithsonian Museums (some of the best are the Air and Space Museum, the Museum of the American Indian, the African American Museum, the National Zoo, the Smithsonian Castle, and the American Art Museum). If you visit in the spring, you’ll get to see the cherry blossoms bloom along the Mall.
22. Learn about Mt. Rushmore
Completed in 1941, this historic monument in the Black Hills of South Dakota is a lot smaller than you expect, but it makes a good stop while driving. Originally, the indigenous Lakota Sioux inhabited this area, however, when gold was found in the hills, white settlers forcibly removed them from their homeland. At the Wounded Knee massacre, U.S. forces killed over 250 indigenous women and children. Decades later, Rushmore was built, much to the dismay of the local indigenous population, who consider the land to be sacred. Take a guided tour to learn more about this iconic monument’s complex and tragic history.
23. Be a kid at Disney World
Sure, it’s cheesy . Yes, it’s built for kids. True, it’s not authentic. But despite all that, Disney World is still a fun time and they have a lot of rides for adults too. I recently went back as an adult and there’s a lot to do there: they have some good restaurants, and Disney Springs has a fun nightlife. If you are in Florida, take a stop for a few days. Indulge your inner child. Tickets cost around $110 USD per day and go up from there.
24. Hike the Appalachian Mountains
Stretching the east coast of America, these mountains are almost 500 million years old and offer great hiking, camping, and trekking. For a multi-month adventure, hike the 2,190-mile (3,524-kilometer) Appalachian Trail which covers the entire mountain range and takes 5-7 months to complete. You can also do day hikes or weekend hikes of its various sections if you want a more manageable outdoor getaway.
25. Unwind in Put-In-Bay
One of the coolest, not-so-hidden places in the U.S. is this group of islands in Lake Erie. Widely known to Midwesterners (but unknown to most everyone else), South Bass Island is home to Put-in-Bay, where Midwest hospitality meets Caribbean vibes (you ride around in golf carts and bars have sand as floors). My favorite spot is Mojito Bay, an outdoor tiki bar with sand floors and swings for bar seats that offers up more than 25 different mojitos. These places get very wild on the weekends too.
26. Explore Maine
Tucked away up in the northeast, Maine evokes images of endless shorelines, wild forests, iconic lighthouses, and lots and lots of lobster dinners. It’s often overlooked yet it’s incredibly beautiful and perfect for a short road trip. Don’t miss trying lobster rolls (a regional favorite) and hiking in Acadia National Park. Portland has some great eateries (such as Duckfat and Eventide Oyster Co.) and picturesque historic lighthouses, including Maine’s oldest operating lighthouse, the Portland Head Light, which opened in 1791 when George Washington was president. Additionally, tiny Bangor is home to tons of breweries and Moosehead State Park is an incredible place to go hiking for a few days. And you can’t go wrong stopping in any of the quintessential New England fishing villages up and down the coast. Maine is one of the best states in the union!
27. Take a road trip
The only good way to see this vast and diverse landscape and the small towns that populate it is with a road trip . I highly suggest renting a car and driving across the U.S. It’s an amazing experience. I’ve done several coast-to-coast trips as well as regional trips around New England , California , and the South . It’s the best way to see the country and you can do it for under $50 USD a day.
For the best rental car deals, use Discover Cars .
28. Take a tour
You can find all sorts of amazing walking tours, bike tours, and food tours all around the country. They’re a great way to get an in-depth look at the city you’re in with the help of an expert local guide. Take Walks is my go-to walking tour company when I’m looking for something thorough and insightful (and fun). They can get you behind the scenes and are much more comprehensive than your average free walking tour.
For information on specific cities in the United States, check out these city guides:
- Austin Travel Guide
- Boston Travel Guide
- Chicago Travel Guide
- Hawaii Travel Guide
- Las Vegas Travel Guide
- Los Angeles Travel Guide
- Miami Travel Guide
- New York Travel Guide
- Philadelphia Travel Guide
- San Francisco Travel Guide
- Seattle Travel Guide
- Washington D.C. Travel Guide
United States Travel Costs

Accommodation – Hostels can be found in most major cities, though options are generally slim in the country. A bed in a dorm room with 4-6 beds usually costs between $35-55 USD per night. Rooms with more beds are marginally cheaper (they start around $25-30 USD per night). Private rooms are usually $75-125 USD. Expect prices on the higher end in bigger cities and during peak season. Free Wi-Fi is standard and most hostels also have self-catering facilities. Hostels with free breakfast are rare.
If you plan on camping, expect to pay at least $20-30 USD per night for a basic tent plot for two without electricity.
Cheap motels usually start around $60-75 USD per night and can be found along any highway. Expect basic amenities like TV, Wi-Fi, and AC. Some have pools.
Budget two-star hotels start at $90 USD per night. But, in major cities like NYC, LA, or Chicago, they start closer to $125 USD. The U.S. is very vast and prices fluctuate a lot depending on what region you’re in so check out the specific city guides listed above for more detailed information on accommodation. The United States is too diverse to pin down a specific number!
Airbnb is available around the country, with private rooms starting at $40 USD per night, though for good rooms, you’ll likely pay closer to $60 USD. For an entire home/apartment, expect to pay at least $100 USD per night. Prices in large cities are usually double. Again, there’s a lot of variation depending on where you’re going so check out the city guides for more specific prices!
Food – From seafood in New England to BBQ in the South to Tex-Mex and organic whole foods in the West to German influenced food in the Midwest, there is no singular food culture in the US. Every region has its own staples, which means you’ll never get bored of eating your way around the country.
Since the country is so big, prices for food vary a lot. What is $5 USD in Kansas is probably $15 USD in New York City. Below are some country averages but, if visiting a big metropolis/coastal city, add about 25% to the price.
Grab-and-go sandwiches usually cost around $10 USD while fast food costs $10-12 USD for a combo meal. Meals from food trucks will cost between $10-15 USD. Mid-range casual restaurants cost between $25-30 USD for a meal and drink. At some place a little nicer (think white table cloth), expect to spend at least $60 USD per person on dinner. Prices go up from there and the sky is the limit. Again, consult the city and destination guides for specific prices.
You can generally find takeout pizzas for around $10-15 USD while Chinese and Thai cuisine start around $10-12 USD for a main dish.
Beer is around $6-8 USD, a glass of wine is $8-10 USD, and cocktails start at $14 USD in most cities (about $20 USD in NYC though!). A latte/cappuccino is $4-5 USD and bottled water is $2 USD.
If you cook your own food, expect to pay about $60-80 USD per week for basic staples like rice, pasta, vegetables, and some meat.
Backpacking the United States Suggested Budgets
How much does it cost to visit the United States? Well, how much you spend largely depends on where in the United States you’re going to visit. For example, New York City is much more expensive than Memphis and San Francisco is going to hit your budget harder than Boise. The South is cheaper than the North and the interior states are cheaper than the coasts. The comparisons are endless! However, this overview can give you a basic look at what to expect based on your travel style and assuming you’re going to mix cheap and expensive destinations.
On a backpacking budget of $75 USD per day, you can stay in a hostel dorm, cook your meals, use public transportation to get around, limit your drinking, and do free activities like walking tours, hiking, and hanging out at beaches. If you plan on drinking, add another $10-20 USD per day. If you can camp or Couchsurf, you can likely get this down to $50-60 USD per day.
On a mid-range budget of $210 USD per day, you can stay in a private Airbnb or motel, eat out for most meals, enjoy some drinks, take the occasional taxi to get around, and do more paid activities like museum visits and food tours.
On an upscale budget of $350 USD or more per day, you can stay in a midrange hotel, eat out for all your meals, drink more, rent a car to get around, and do as many guided tours and activities as you want. This is just the ground floor for luxury though. The sky is the limit!
You can use the chart below to get some idea of how much you need to budget daily, depending on your travel style. Keep in mind these are daily averages – some days you’ll spend more, some days you’ll spend less (you might spend less every day). We just want to give you a general idea of how to make your budget. Prices are in USD.
United States Travel Guide: Money-Saving Tips
There are plenty of ways to save money when you travel the U.S. but it varies a lot by region (as I’ve been repeating). The general tips below can help you get started but, for more specific tips, visit my city guides.
- Take a free tour – Taking a free walking tour is the best way to get introduced to a new place, and most major cities in the U.S. have free walking tours. You get to see the main sights and ask all your questions to a local guide. Just be sure to tip your guide at the end!
- Take the bus – The cheapest way to get around the U.S. is by bus. Bus fares cost as little as $1 USD, though 2-3-hour journeys start around $30 USD. Between cities, the best companies are Megabus, Greyhound, and FlixBus.
- Redeem hotel points – Be sure to sign up for hotel credit cards before you go and use those points when you travel. This is especially helpful in big cities. Be aware that most hotels charge parking fees if you have a car.
- Get a U.S. Park Pass – This national park pass lets you into all the national parks for free so you don’t have to keep paying admission. The annual fee is $80 USD and it pays for itself after four parks.
- Cook – The United States has some of the cheapest groceries in the developed world, while eating out here can add up quickly once you factor in a tip and tax (which varies by state). Grocery shopping can about $60 USD per week and is way cheaper and healthier than eating out every day. Cook and save!
- Stay with a local – Couchsurfing lets you stay with a local for free, cutting your accommodation costs drastically. You’ll get to spend time with a local who can share their tips and advice while sharing your own travel stories and culture. You can also use the app to meet people for activities (coffee, museum visits, etc.) if you don’t feel comfortable staying with a stranger.
- Camp – Most campsites start around $20-30 USD per night for a tent — much cheaper than a hostel. You can use nps.gov to find campsites run by the National Park Service. You can also camp for free in National Forests or Bureau Land Management (BLM) lands (search for “dispersed camping” options). Just be sure to respect the environment and follow Leave No Trace principles when camping.
- Use city tourism cards – City tourism cards allow you to see a large number of attractions (and often include free public transportation) for one low price, usually $75–100 USD. If you plan on seeing a lot, these can save you a ton.
- Share your ride – If you have a car, taking on riders can be a way to lower your costs. On my first trip across the U.S., I offered rides to people I met in hostels. On another trip, I had friends and readers join me along the way. You can post ads on Craigslist and at hostels to find riders. This not only makes the trip more enjoyable but lowers your gas costs too. If you don’t have a car, you can use look for rides in the same places.
- Stay at roadside hotels – There are a plethora of cheap roadside hotels such as Motel 6 and Super 8 to the rescue. Rooms start around $60-75 USD a night (plus tax). They’re great when you’re traveling with someone and can split the cost.
- Find free museums and events – Inquire at tourism offices, use Google, or ask hotel or hostel staff for information about free events and museums. Many museums offer free or discounted admission times throughout the week.
- Get free water or free refills – If you order a drink, most restaurants allow free refills while you eat your meal or refills at a low cost. If you ask, tap water is usually provided for free.
- Save on gas – If you’re on a road trip, use the app GasBuddy to find cheap gas near you. Also, sign up for gas station loyalty programs as they can save you money on fill ups.
Where to Stay in the United States
Hostels are not all that plentiful across the United States yet. Generally, those that do exist are clean, social, and fun. You’ll find a lot of budget hotels wherever you go. here are some of my recommended places to stay around the USA (the cities guides will have even more suggestions):
- HI Hostel (Boston)
- The Revolution Hotel (Boston)
- HI Hostel (Chicago)
- The Arlo (Chicago)
- Banana Bungalow (Los Angeles)
- Hollywood Historic Hotel Los Angeles
- Hostel Memphis (Memphis)
- Hu Hotel (Memphis)
- Freehand (Miami)
- Hotel Ocean (Miami)
- HI New Orleans (New Orleans)
- Villa Convento (New Orleans)
- The Local (New York City)
- Heritage Hotel (New York City)
- ITH Adventure Hostel (San Diego)
- Old Town Inn (San Diego)
- The Green Tortoise (San Francisco)
- SW Hotel (San Francisco)
- The Green Tortoise (Seattle)
- MarQueen Hotel (Seattle)
How to Get Around the United States

City transportation – Most U.S. cities have public transportation, including metro systems and buses. Fares cost around $2-3 USD for a single journey, but there are usually packaged options for visitors. For example, you can get a 7-day unlimited MetroCard in New York City for $34 USD, which covers both buses and the subway system, while San Francisco offers a 7-day transit pass for $41 USD.
Outside of major cities, subways are rare. Some of the smaller cities have trams. Everywhere has a bus though and that’s usually the best way to get around.
Taxis – Taxis are metered with charges starting around $3 USD plus $2-3 USD per mile. This is one of the most expensive ways to get around, however, so I’d skip it unless you have no other choice.
Ridesharing – Uber and Lyft are generally cheaper than taxis and are the best way to get around a city if you don’t want to take a bus or pay for a taxi.
Intercity Bus – Taking the bus is one of the cheapest options for getting around the country, with fares as low as $1 USD if you book far enough in advance. Popular bus companies include:
A 4-5-hour bus ride from New York to Washington D.C. starts at $30 USD, while the 7-hour journey from Chicago to Detroit starts at $27 USD. Austin to New Orleans is around $54 USD. Booking early can save you upwards of 50% so try to plan ahead if you’re going to be taking the bus.
To find bus routes and prices, use BusBud .
Flying – Flying is your quickest option for long distance. You can occasionally find sales for as little as $100 USD so it’s worth it to check several websites ahead of time to see what deals are on. Post-COVID, fares are a lot higher than they were in the past. But if you find a deal, book in advance, or go off season, you can usually get a cheap fare. Sample one-way fares include San Francisco to Maui for $100-150 USD, Seattle to Austin for $85-115 USD, or New York to L.A. for $250 USD (round trip). However, prices can easily double if booked last minute.
For more information on how to find a cheap flight, check out this article .
Train – Amtrak is the rail provider for the United States, but it’s not the quickest or most affordable way to travel. They have routes all around the country ( here’s their route map ) and offer a cross-country pass for $499 USD. The USA Rail Pass gives you 30 days of travel over 10 segments, which averages out to around $50 USD per leg.
If you have a valid student ID you can save 15% on your tickets.
As for prices, A 20-hour train ride from Chicago to New Orleans costs around $110 USD, while a multi-day trip from New York to Los Angeles is around $280 USD. Book in advance to find the best deals. Shorter trips lasting 2-4 hours are usually under $40 USD.
Car rental – Roadtripping is a great way to explore the country, and car rentals can be found for as little as $35 USD for a multi-day rental. Renters need to be at least 21 years old. For the best rental car deals, use Discover Cars .
Hitchhiking – Hitchhiking in the United States is common and safe. Dress respectably, smile while making eye contact with drivers, and use a cardboard sign to tell people where you’re headed. Be prepared for long bouts of no pick-ups, especially if you’re traveling through more rural areas. Pack plenty of water and a light meal or two, like sandwiches and fruit. Hitchwiki is a great resource for additional hitchhiking tips.
When to Go to the United States
Since the United States is such a large country, the climate and temperature change drastically from coast to coast and from north to south.
The northern states have clearly defined seasons. In cities like Chicago, Boston, and New York, winter can bring heavy snowfall and more severe temperatures. Coastal areas like Seattle and Portland, Oregon, tend to be milder. Spring can start as late as May in the northernmost parts of the country, but this is a good time to visit because the weather begins to warm up and the busy tourist season hasn’t started yet. Summers are gorgeous and temperatures climb into the 80s°F (30s°C). It’s also the busiest time of year for tourism. Autumn is a wonderful time to visit the northern states because many parts of this region have a lot of trees. Temperatures have cooled, crowds have dwindled, and the changing leaves offer an something extra to enjoy.
The southern states have less defined seasons. In the southwest, winters tend to be dry and mild. In the southeast, temperatures are mild but places like and Memphis can be rainy. Spring is a wonderful time to visit this part of the country because temperatures are warm but not stifling. Summers get incredibly hot and humid in the southeast. In the desert areas of the southwest, like Las Vegas, temperatures can soar well above 104°F (40°C) on some days. Autumn cools things off across the southern states, but can also bring severe weather in the southeast. .
Ultimately, the best time to travel to the United States depends on where you’re headed and what kind of activities you’d like to do. Visit our city guides for more specific information on when to go.
How to Stay Safe in the United States
The United States is a massive country and “safety” changes a lot depending on where you go and what you do. Generally, the US safe place to travel around — even if you’re traveling solo.
Violent attacks tend to be confined to certain areas (especially where drug and gang violence are a problem). You may encounter petty crime, like theft, especially around popular tourist landmarks and in larger cities, especially on the west coast where theft is a much more common problem. Keep an eye on your belongings at all times, especially while taking crowded public transportation.
Gun violence and mass shootings tend to dominate headlines when they happen. However, the chances of it happening to you are slim. Do not let this discourage you from exploring the United States. The U.S. is very big and very, very diverse. And, due to this size, there is a lot of cultural (and political) variation. Despite what you hear, crime in America is low. (There was far more crime in the US in the 1990s!). For more information, read this post, “ Is it Safe to Visit the United States?”
If you rent a vehicle, don’t leave any valuables in it overnight. Take common sense safety measures and you’ll be fine.
Moreover, be sure to read about common travel scams to avoid here .
When hiking, always bring water and sunscreen. Be sure to check the weather before you depart and dress accordingly.
Solo female travelers should generally feel safe but all the standard safety cautions apply. For specific tips, I would read one of the many incredible solo female travel blogs on the web. They’ll give you tips and advice that I can’t.
If you do experience an emergency, dial 911 for assistance.
Always trust your gut instinct. Make copies of your personal documents, including your passport and ID.
The most important piece of advice I can offer is to purchase good travel insurance. Travel insurance protects you against illness, injury, theft, and cancellations. It’s comprehensive protection in case anything goes wrong. I never go on a trip without it as I’ve had to use it many times in the past. You can use the widget below to find the policy right for you:
United States Travel Guide: The Best Booking Resources
These are my favorite companies to use when I travel. They consistently have the best deals, offer world-class customer service and great value, and overall, are better than their competitors. They are the companies I use the most and are always the starting point in my search for travel deals.
- Skyscanner – Skyscanner is my favorite flight search engine. They search small websites and budget airlines that larger search sites tend to miss. They are hands down the number one place to start.
- Hostelworld – This is the best hostel accommodation site out there with the largest inventory, best search interface, and widest availability.
- Booking.com – The best all around booking site that constantly provides the cheapest and lowest rates. They have the widest selection of budget accommodation. In all my tests, they’ve always had the cheapest rates out of all the booking websites.
- Get Your Guide – Get Your Guide is a huge online marketplace for tours and excursions. They have tons of tour options available in cities all around the world, including everything from cooking classes, walking tours, street art lessons, and more!
- SafetyWing – Safety Wing offers convenient and affordable plans tailored to digital nomads and long-term travelers. They have cheap monthly plans, great customer service, and an easy-to-use claims process that makes it perfect for those on the road.
- LifeStraw – My go-to company for reusable water bottles with built-in filters so you can ensure your drinking water is always clean and safe.
- Unbound Merino – They make lightweight, durable, easy-to-clean travel clothing.
- Top Travel Credit Cards – Points are the best way to cut down travel expenses. Here’s my favorite point earning credit cards so you can get free travel!
United States Travel Guide: Related Articles
Want more info? Check out all the articles I’ve written on United States travel and continue planning your trip:

Where to Stay in San Francisco: The Best Neighborhoods for Your Visit

The 12 Best Things to Do in Chicago

The 5 Best Hotels in San Francisco

How to Experience Milwaukee Like a Local

The 7 Best Hotels in New York City

The 7 Best Hotels in Miami
Get my best stuff sent straight to you, pin it on pinterest.
- Where To Stay
- Transportation
- Booking Resources
- Related Blogs
- Alaska Tourism
- Alaska Hotels
- Alaska Bed and Breakfast
- Alaska Vacation Rentals
- Flights to Alaska
- Alaska Restaurants
- Things to Do in Alaska
- Alaska Travel Forum
- Alaska Photos
- All Alaska Hotels
- Alaska Hotel Deals
- Last Minute Hotels in Alaska
- Things to Do
- Restaurants
- Vacation Rentals
- Travel Stories
- Rental Cars
- Add a Place
- Travel Forum
- Travelers' Choice
- Help Center
Trip Planning Help - Alaska Forum
- United States
- Alaska (AK)
Trip Planning Help
- United States Forums
- Europe Forums
- Canada Forums
- Asia Forums
- Central America Forums
- Africa Forums
- Caribbean Forums
- Mexico Forums
- South Pacific Forums
- South America Forums
- Middle East Forums
- Honeymoons and Romance
- Business Travel
- Train Travel
- Traveling With Disabilities
- Tripadvisor Support
- Solo Travel
- Bargain Travel
- Timeshares / Vacation Rentals
- United States forums
- Alaska forum

We are considering a weeks cruise which will leave Seward and arrive in Vancouver. We have seen an option to do a land tour with the cruise line which is appealing as I don't have to arrange all transfers myself but I think we could probably do better and cheaper ourselves. The cruise land tour would take us from anchorage to Denali with a husky kennel tour on the way and a bus tour around the park. Then it would be a train ride to Talkeetna with an overnight stay there before going down to Seward and stopping at the acquarium etc.
If I did myself we would like at flying in either to anchorage or Fairbanks late either Sunday or Monday night and our cruise is on the Friday.
My idea of some kind of itinerary is:
Fly to Fairbanks and arrive late Sunday evening - any accommodation recommendations and how easy is it to get from airport to hotel and then from hotel to the train station?
Monday go to Hot Springs - Any feedback on whether this is worth a visit?
Tuesday catch 8.15 train to Denali - arriving at 12.10 and aim to do Tundra Wilderness Tour at 1-2pm. Couple of questions here - I've heard that there is a shuttle that can pick you up from train station - does anyone know what accommodations offer this? Does the shuttle take you to the meeting point for the bus tour?
Wednesday morning - Kennel Tour before catching 12.30 train to Talkeetna. Spend rest of the day and Thursday possible flight tour, zipline or kayak for the kids - any recommendations for things to do from here that may appeal to the children and flying excursion recommendations. Any accommodation recommendations and how difficult is it to get from train station to accommodation.
Thursday evening train to Anchorage (train leaves at 5.20pm) - Are there any other public transport options to leave earlier? Any recommendations for accommodation and how easy is it to get to/from station?
Friday - Early coastline train to Seward to arrive at 11.20 and couple hours to look around before joining the cruise .
I have heard a lot about fjords from Seward. As we are going on a cruise already, is this still worth doing as we would need to drop either Talkeetna or Fairbanks to fit it in. Would you say the fjords are a better visit than visiting Fairbanks or Talkeetna?
If we decided to do the fjords, is there an option to do an afternoon tour or are there only morning tours available?
Should we make time to see Anchorage?
Any recommendations on glacier visits?
I'm sorry for the long post, I have done quite a bit of research but it would be good to have input from people who have been and use others experience.
Thank you so much if you've taken the time to read and replyx
6 replies to this topic

I'm not a train-lover. It is always easier driving by your own all of your tour. To mention: the train goes almost all the route through forest and you'll see no wildlife, because it flee from the sound of the train. But driving your own rental car you can stop whereever you want, enjoying the view, and maybe watching some wildlife.
But if you are at Denali NP, don't take the Wilderness tour, but book the East-fork-shuttle instead. In the National park is only one road, so all busses can only drive this road. And by booking the EFS you can book an exact time you want, whereas with the Wildernes Tour you only have a choise if morning or afternoon and only get the exact time shortly before. And it is much more expensive.
You can drive with your rental car into the NP until Mile 15 (Savage River) and can do a short or longer hike there.
You can visit the Kennel at Denali Nationalpark with a lot of explanation. It is for free.
I think your kids would be bored out of their heads on those long, long train rides......and it would be extrememly rare to see wildlife from the train........
Why is it that you don't want to drive ??.....The roads in Alaska for the most part are two lane, paved and clearly marked.....
What did you want to do in Fairbanks ?.....If nothing in particular, just fly into Anchorage ......
The train from Anchorage to Sewerd however, is more scenic and could work well if your schedule was to pick up and return a rental car in Anchorage........
If we can't do the hot springs due to the kids age, looks like Fairbanks may be something to knock out :-)
“aim to do Tundra Wilderness Tour at 1-2pm”
As Beate said, you don’t get to choose your time for the TWT. You are *assigned* a time 48 hours in advance. That could mean you’re assigned a time before you arrive...or else late in the day...PM departures vary from 12 to about 5 pm. Nothing you can do about it. A much better (and far cheaper) idea is to take the East Fork Shuttle into the park. Then you can choose your start time, get off to hike/walk if you feel like it—or if the kids get antsy--before flagging down a later shuttle on a seat-available basis, and the kids are FREE (but of course need tickets to reserve their seats). EFS for adults costs about $33 plus the park entrance fee of $15. Best deal in Alaska IMHO. By comparison, booking your family on the Tundra Wilderness Tour would run about $340. Same road, same views, same chance of coming across wildlife.
Many people are enjoying getting off at the turnaround point (mile 43) and taking the stairs down to the riverbed to hike further along for views or just to break up the drive. Here's a short vid of that: https://www.youtube.com/shorts/uGEgKPP9TL0 At that stop only, is a bus dispatcher who can arrange a bus back to the entrance that has seats for your whole family (if you get off elsewhere, you might have to wait a bit for a bus with 4 empty seats).
“I've heard that there is a shuttle that can pick you up from train station - does anyone know what accommodations offer this? Does the shuttle take you to the meeting point for the bus tour?”
Only a few hotels offer transportation between themselves and the train depot or park entrance. That list is here: https://www.alaska.org/destination/denali-national-park/hotels BTW, prices haven’t been updated for a while, or maybe those are off-season—they are way more now. Denali Bluffs would be about $400 per night. If you stick with the Tundra Wilderness Tour, it picks up at all the same hotels that have shuttles *except* for Grizzly Bear. For the East Fork Shuttle, you’d make your way (by hotel shuttle or on foot, roughly 40 min. walk from the entrance hotels) to the Bus Depot inside the park, to line up in advance to choose your seats.
A Kenai Fjords cruise with Major Marine or Kenai Fjords Tours is by far your best *chance* to see a variety of marine wildlife. No guarantees of course where wildlife is concerned. Watch for sales of up to 40% at Thanksgiving from those two companies. Also you can do kayaking in Seward —watch for discounts early next year. If you arrive the day before your cruise ship departs, you could do kayaking/SeaLife Center/maybe a short hike and/or sled dog tour with Ididaride, overnight, then do the 7.5 hr. (or longer) Kenai Fjords cruise at 9:30 a.m. the next morning prior to boarding your ship. Or if all you want to do is the KF cruise , the afternoon before take the 3 pm park connection bus from ANC to Seward: https://www.alaskacoach.com/routes/anchorage-seward.html. Adults are $75 (might be a bit more next year of course), kids under 12 half price. The highway and railway tracks parallel each other most of the way.
You might want to have a car for the Anchorage area—some ideas would be driving to Matanuska Glacier (2 hrs) for an easy guided hike on that glacier, and zipline. You could visit Reindeer Farm and/or Musk Ox Farm in Palmer, and also Iditarod HQ in Wasilla (film, displays, and usually $10 dog cart rides available). You could also drive 1 hr. south to Wildlife Conservation Center (check website for possible programs). This is the most scenic drive IMO, with lots of pull-outs to enjoy the views. Also Indian Valley Mine or Crow Creek Mine if anyone wants to try gold panning. In Anchorage itself is Native Heritage Center, the museum, 1 hr. trolley tour of city ($25 for adults, half price for kids 12 and under): https://anchoragetrolley.com/tours/one-hour-tour/
“If we decided to do the fjords, is there an option to do an afternoon tour or are there only morning tours available?”
*Usually* the train arrives in time for the 11:30 tours with Kenai Fjords Tours or Major Marine; however, if the train is late (I don’t know how often that happens, maybe someone else knows) then the boat would leave without you. In which case Major Marine usually tries to substitute their afternoon wildlife cruise of the bay if there’s room (doesn’t get to tidewater glaciers or go into the national park). Or, you could just book the wildlife cruise if getting out to the glaciers isn't that important to you.
Thank you so much for your replies, it's really helping me to rethink my itinerary! Thank you
- Pre Cruise itinerary question 10:58 pm
- help on itinerary- 6 day trip in first week of June, 10:55 pm
- Hikers need Alaska travel advice 4:40 pm
- Exit Glacier open? 3:58 pm
- August 2024 - Itinerary help 2:36 pm
- Anchorage area - hiking trail suggestion 1:11 pm
- Free shuttle to aviation museum, zoo and botanical garden yesterday
- Planning for 2025 and have questions yesterday
- last minute trip yesterday
- Trip Planning Help May 17, 2024
- Reserve or not reserve May 17, 2024
- Skagway - Carnival cruise May 17, 2024
- Juneau - Carnival cruise May 17, 2024
- rental car price changed unexpectedly May 17, 2024
- "TOP 10" Recommended Things to See & Do in Alaska 7 replies
- Best way to see Alaska 5 replies
- Alaska cruise - best choice cruise line 10 replies
- Train to Alaska from Vancouver 3 replies
- Alaska in August... WHat to expect 7 replies
- Holland america vs Princess Cruise 16 replies
- Bear Lodge in Fairbanks 10 replies
- Estimated Drive Times - are these accurate? 5 replies
- Cell Phone Coverage 16 replies
- Best time of year for Whales & Bears 3 replies
Alaska Hotels and Places to Stay
- Why KEEP ALL QUESTIONS in 1 original thread?
- Why post SPECIFICS about your question initially?
- RESOURCES for planning a trip?
- Why study a MAP of Alaska?
- Weather and sunrise/sunset?
- Which rental companies offer one way car rentals?
- BEAR viewing trips?
- Coupon books?
- FISHING in Alaska?
- CLOTHES for summer travel?
- Renting an RV in Alaska?
- Web cameras for Alaska?
- Car camping in Alaska?
- Trip Reports 2020
- Self-serve laundromats?
- Free wifi in Alaska?
- Panning for gold ?
- Seeing NORTHERN LIGHTS?
- Mileage and travel times?
- Scenic drives?
- Alaska by TRAIN: Alaska Railroad?
- BEAR SAFETY in Alaska?
- Where can I go bear viewing by boat?
- TRIP REPORTS 2020
- TRIP REPORTS 2019
- Trip Reports for previous years
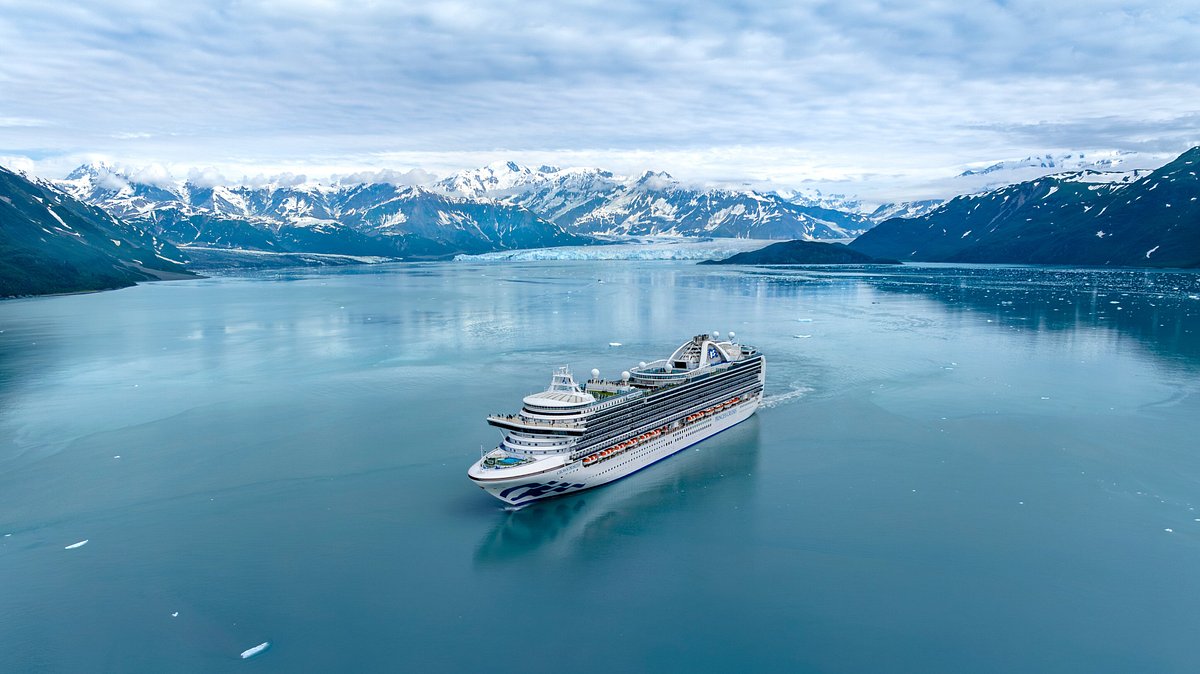
Press Herald
Account Subscription: ACTIVE
Questions about your account? Our customer service team can be reached at [email protected] during business hours at (207) 791-6000 .
Garden tours, plants sales and more ways to spend time among flowers
Visit Maine's botanical gardens or get a sneak peek of what your neighbors are growing in their back yards.

You are able to gift 5 more articles this month.
Anyone can access the link you share with no account required. Learn more .
With a Press Herald subscription, you can gift 5 articles each month.
It looks like you do not have any active subscriptions. To get one, go to the subscriptions page .
Loading....
One of the loveliest ways to ease yourself fully out of the post-winter blahs and into springtime is to quit being a wallflower and instead surround yourself with living, blooming plants.
From botanical gardens to plant sales and garden tours, it’s time to make like the Scarecrow in “The Wizard of Oz” and while away the hours, conferring with flowers.

The waterfall at Coastal Maine Botanical Gardens in Boothbay. Photo by Tory Paxson, Courtesy of Coastal Maine Botanical Gardens
TOTALLY BOTANICAL
Coastal Maine Botanical Gardens in Boothbay is open for the season, daily from 9 a.m. to 5 p.m. Maine Days are May 31 to June 2, when anyone with a Maine driver’s license or state ID gets in for free. Ditto for dads/father figures on Father’s Day (June 16). Advance registration is required. With more than 300 acres of gardens and natural spaces, including a waterfall, there will be plenty to see, smell and bask in the scenery.
Here are more things to do in Boothbay
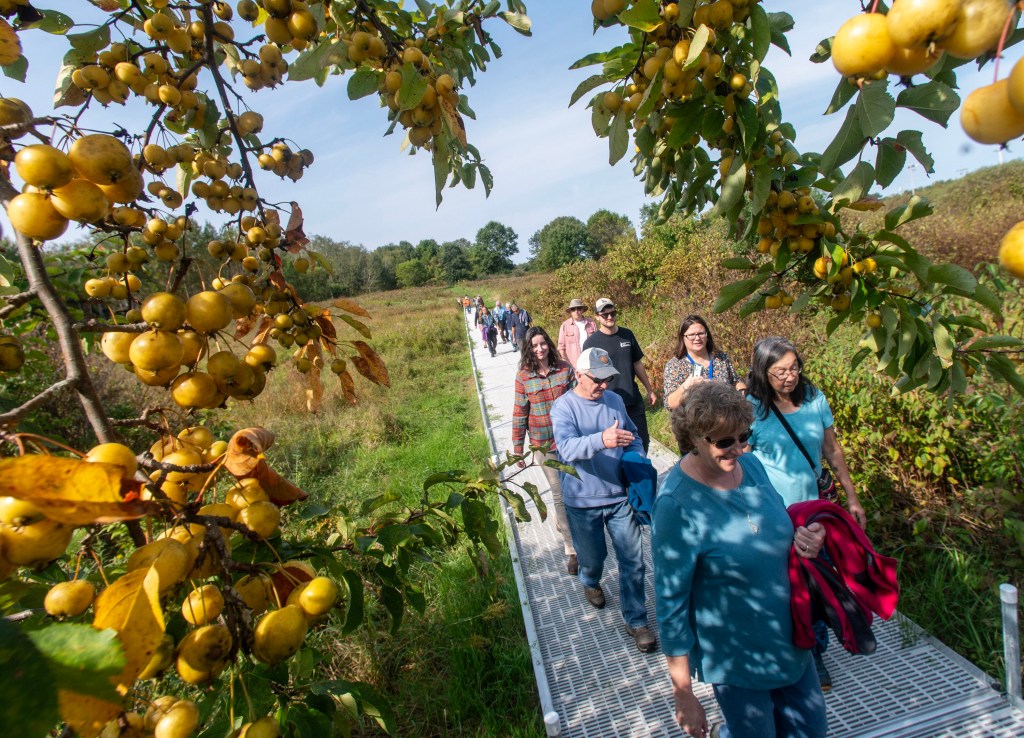
A tour group walks on the boardwalk at Viles Arboretum in Augusta. Joe Phelan/Kennebec Journal
Viles Arboretum is a botanical garden in Augusta with 6 miles of trails and more than 20 botanical collections. It’s open daily from sunrise to sunset, and admission is free. There are 224 acres with all sorts of flora and fauna to discover. Leashed dogs are welcome, and the visitor center is open from 10:30 a.m. to 4:30 p.m. Wednesday through Saturday.
Viles Arboretum offers medicinal plant walks, and although the May 18 session is full, you can still register for the June 15 and Sept. 14 events, lead by herbalist, homeopath and flower essence practitioner Debra Bluth. Tickets are $25. Advertisement
The Mount Desert Land & Garden Preserve has four areas to explore on its property in Northeast Harbor: the Asticou Azelea Garden (dawn to dusk daily), the Abby Aldrich Rockefeller Garden (noon to 4 p.m. Tuesday through Sunday from July 9 to Sept. 8, reservations required), Thuya Garden (dawn to dusk daily, June 15 to Oct. 14) and Little Long Pond Natural Lands (hiking trails and carriage roads open dawn to dusk daily). On June 26, at the Wildflowers of Little Long Pond event, participants can wander around the garden’s fields and forest, spotting wildflowers along the way while practicing how to identify them.
Joyce Saltman, right, and Beth Anisbeck embrace a tree for 60 seconds during a tree hugging event sponsored by Portland Parks and Recreation, at Deering Oaks Park last year. Carl D. Walsh/Staff Photographer
TOURS AND MORE
2nd Annual Tree Hugging 11 a.m. to 1 p.m. Saturday. Deering Oaks Park, Portland. portlandmaine.gov The tree hugging is a family-friendly community gathering to celebrate Portland’s many trees. Park ranger Liz Collado will lead a sensory awakening and forest bathing session. Along with tree hugging, there will be a storytime, and you can touch a forestry truck and meet naturalist Noah Querido and Portland city arborist Mark Reiland. Just down the road, you’ll find Fessenden Park, on the corner of Brighton and Deering Avenues. The tulips have arrived, and it’s worth a visit to see them.
McLaughlin Garden Lilac Festival 10 a.m. to 4 p.m. May 24. McLaughlin Garden and Homestead, 97 Main St., South Paris, $5. mclaughlingardens.org You’ll find more than 125 varieties of lilacs at the McLaughlin Garden Lilac Festival. Explore on your own or take a guided tour led by a horticulturist. There will also be family-friendly activities, and you can shop for native and unusual plants.
4th annual Woodfords Community Garden Tour 1-4 p.m. June 8. Woodfords Corner Community in Back Cove, Deering Highlands, Oakdale and Deering Center, $20 suggested donation. woodfordscorner.org Presented by Friends of Woodfords Corner, this self-guided tour features at least 10 gardens. As you make your way down the list, you’ll find yourself pleasantly surprised by all of the hidden havens bursting with flowers, plants and impressive yardscaping elements.
Peony Society of Maine 23rd annual Garden Tour 10 a.m. to 3 p.m. June 8 and 15. Both tours start at 1348 Ohio St., Bangor, $5 donation. peonysocietyofmaine.net You’ll visit multiple gardens in Bangor, Winterport, Ripley and St. Albans, and your senses will be filled with countless peonies. A peony plant will be raffled off at the end of each tour. Advertisement
Hidden Gardens of Historic Bath 10 a.m. to 2 p.m. June 22. Sagadahoc Preservation Inc., 880 Washington St., Bath, $40. sagadahocpreservation.org The Hidden Gardens of Historic Bath house and garden tour features several homes in North Bath. Every stop on the tour will be a treat for your senses and may motivate you to make some of your own magic when you get back home.
Garden Conservancy Open Garden Days 10 a.m. to 4 p.m. June 29. Beckett Castle Rose Garden, Singles Road, Cape Elizabeth, $10. gardenconservancy.org You’ll see plenty of roses as well as ocean views at Beckett Castle, which sits right on the water, with views of five lighthouses. The castle was built in 1871, and its rose garden features more than 70 varieties of heirloom roses. A 50-foot stone tower doubles as the rose arbor entrance to the castle.
PICK A PLANT SALE
Tate House Museum’s Annual Plant and Herb Sale 9 a.m. to 1 p.m. May 18. Tate House Museum, 1267 Westbrook St., Portland, 207-774-6177. tatehouse.org The wide selection includes perennials divided from the museum’s 18th century reproduction garden. Visitors can also make their own “seed bombs” and get a sneak peak at a new installation by artist Ashley Page from 10 a.m. to noon.
Animal Refuge League of Greater Portland Spring Plant S ale 9 a.m. to 11 a.m. May 18, Animal Refuge League of Greater Portland, 217 Landing Road, Westbrook, 207-854-9771. arlgp.org Perennials, house plants and more will be on sale, and plants that don’t have specific pricing are “name your own fee.” Anyone interested in donating plants or pots to the sale should send a message to [email protected] .
Taking Root Plant Sale 9 a.m. to 1 p.m. June 1, Tom Settlemire Community Garden, Maurice Drive, Brunswick, 207-729-7694. btlt.org This annual sale is organized by the Brunswick-Topsham Land Trust. Proceeds benefit the Common Good Garden, which provides food and gardening education for the Mid Coast Hunger Prevention Program. Master gardeners will be on hand to help shoppers choose their best options.
Scarborough Land Trust Native Plant Sale and Spring Festival 9 a.m. to 1 p.m. June 1, Broadturn Farm, 388 Broadturn Road, Scarborough, 207-289-1199. scarboroughlandtrust.org Visitors will find native plants, food vendors, local artisans, guided nature walks and activities for kids. To preorder plants, visit the Scarborough Land Trust website.
Maine Audubon Society Native Plants Sale and Festival 9 a.m. to 3 p.m., June 8, Gilsland Farm Audubon Center, 20 Gilsland Farm Road, Falmouth, 207-781-2330. maineaudubon.org More than 75 species of native wildflowers, shrubs and tree seedlings will be available, along with workshops, info tables and experts.
Staff writer Megan Gray contributed to this report.
Related Headlines
Headed to Coastal Maine Botanical Gardens? Here’s what else to check out in Boothbay
Success. Please wait for the page to reload. If the page does not reload within 5 seconds, please refresh the page.
Enter your email and password to access comments.
Forgot Password?
Don't have a commenting profile? Create one.
Hi, to comment on stories you must create a commenting profile . This profile is in addition to your subscription and website login. Already have a commenting profile? Login .
Invalid username/password.
Please check your email to confirm and complete your registration.
Create a commenting profile by providing an email address, password and display name. You will receive an email to complete the registration. Please note the display name will appear on screen when you participate.
Already registered? Log in to join the discussion.
Only subscribers are eligible to post comments. Please subscribe or login first for digital access. Here’s why .
Use the form below to reset your password. When you've submitted your account email, we will send an email with a reset code.
Send questions/comments to the editors.
Member Log In
Please enter your username and password below. Already a subscriber but don't have one? Click here .
Not a subscriber? Click here to see your options
IMAGES
VIDEO
COMMENTS
This article is one of Backpacking Light's curated gateway pages (a trailhead, so to speak). Think of it as a starting point. Here, you'll find information and resources about how to plan a backpacking trip. We've got lists of our favorite software, gear guides for navigation and trip planning, video and podcast embeds, and other trip ...
5) Make your transportation plan. The next step in how to plan a backpacking trip is to make plans for getting to and from the trailhead. If your trail is a loop, you can typically leave your car at the trailhead parking area (check to see if there is an overnight fee or parking permit required). If you're doing a one-way hike, you have a few ...
Planning a backpacking trip: How to plan your route. Effectively planning a route takes time and practice and is an important part of planning a backpacking trip. In general, start with popular and well-traveled trails and areas that have lots of available information. Here are some other considerations when planning your route:
Trip Planning. Photo: Peter Cade/Stone via Getty Images. For your first overnight, choose an easy route with low mileage and manageable elevation gain. Remember, you'll hike slower with a full pack than you might on a regular dayhike. Apps like Gaia GPS are useful for finding route suggestions, trail info, and maps.
Find planning resources (like my expert e-guides and Custom Trip Planning) with detailed information about your trip, including: • When and how to apply for a backcountry permit if one is required—which is months in advance of your trip dates for popular parks like Grand Teton, Yosemite, Mount Rainier, Glacier, and Grand Canyon.See my "10 Tips for Getting a Hard-to-Get National Park ...
How to Plan a Backpacking Trip. Below you'll find a step-by-step guide to planning a backpacking trip. You can do these in order or jump around a little bit based on what works for you. The most important thing is that you cover all the steps and are adequately prepared for your big adventure. Not bringing the right gear or enough food and ...
Planning meals is an essential part of planning a backpacking trip. You need to eat (and drink enough fluids) regularly throughout your hike, especially when hiking at altitude. Having three solid meals a day with a snack or two in between is recommended. Food plays a large part in how much you enjoy the outdoors.
Focus on replicating the elements of a real trip: hike with a loaded pack, refill your water bottles, change layers, set up your shelter, cook a meal, etc. 7. Conduct a Final Check. In the days ...
In addition to the map you used to plan the trip, bring a compass (and know how to use it), whistle, an emergency bivy or mylar thermal blanket, a knife, gear-repair kit or simple duct tape, and ...
Backpack. Choose an internal frame backpacking pack, preferably from a company with a lifetime warranty. For overnight trips, 35-50 liters should be sufficient; multi-day trips will require 50-75 liters. Consider the gear requirements of the activities you plan to do on your trip (fishing, climbing etc.).
Discover your next great backpacking trip with Backpack Map, a free, comprehensive trip planner. WIth the ability to search and compare over 500 backpacking destinations across the United States as well as view site links, restrictions, maps, and more, Backpack Map is the essential guide for backpackers everywhere.
The Hungry Hiker Backpacking Trip Planning Masterclass will cover everything (in detail) from how to prepare, research and plan for your trip to the backpacking gear you'll need. This masterclass also includes navigation and trip planning video tutorials and digital and printable trip planning resources along with tips and tricks for first ...
If you're new to backpacking, check out our 12 Tips for Planning Great Backpacking Adventures Tutorial. Plan your trip to match your goals for the most enjoyable experience. REST BEFORE THE BIG DAY - As your trip date approaches, plan to rest for a few days, or even a whole week before your trip. This will give your body a chance to fully ...
Pack a reusable water bottle (with an in-built filter if necessary) like the LifeStraw Go. Look for packaging-free or refillable toiletries. Bring lightweight bamboo straws and cutlery like this travel cutlery set that comes in a neat roll with a brush for cleaning.
Hiking Gear Preparation Checklist. 7. Just Show Up. [Show More] 1. Finding Cheap Flights. The first thing we have to do to plan a backpacking trip is to look for the best deal on flights from our home country to our destination.
I created this step-by-step travel guide to prove that planning budget travel doesn't have to be daunting — whether you're backpacking through Europe or just a budget-minded independent traveler. This guide is broken down into different phases of the planning process: Initial Trip Planning; Budgeting and Money; Packing Lists and Advice ...
Outgoings. In this section you can plan the travel expenses of your trip. Simply assign expenses to a waypoint or to the whole trip and your expenses will be calculated. The travelers and the number of nights are included in the calculation, so you can easily and quickly adjust your travel plan and immediately see the impact on your travel budget.
Table of Contents. Step 1: Plan Your Backpacking Europe Trip. Step 2: Get Your Gear for Backpacking Europe. Step 3: How to Get Amazing Accommodation in Europe. Step 4: Get Around Europe on the Cheap. Step 5: Save Money While Backpacking Europe. Step 6: Find Out What to See and Do in Europe.
Backpacking Gear Checklist. This is the backpacking gear checklist Mark and Katie use for 3+ Season trips (most summer, spring, and fall conditions and locations). For winter trips, or for more extreme conditions, they change the items on this list. This list is considered "Light" but not "Ultralight".
Barcelona, Spain, 5. Nice, France, 6. Milan, Italy, 7. Florence, Italy, 8. Venice, Italy, 9. Florence, Italy, 10. Rome, Italy. One month is the ideal Europe backpacking trip for first-timers. You'll have time to explore a few countries and stay an extra few days in the places you fall in love with.
Yellowstone National Park, which maintains nearly 300 backcountry campsites, offers an early-access lottery, a general sale period and walk-up permits two days before your trip.
In this guide, we'll cover everything you need to know to plan an epic backpacking trip through this enchanting region. Planning Your Itinerary: Research destinations: Southeast Asia is vast and ...
Plan was to head up Mt Washington, over to Change Peak, down Olallie Trail toward Hall Point, then down back to the Iron Horse Trail. On the Mt Washington Trail, snow becomes consistent around 3,100 feet just before the intersection with the Olallie Trail, though its intermittent all the way up and a lot of the snow still left on the trail is newer snow.
On a backpacking budget of $75 USD per day, you can stay in a hostel dorm, cook your meals, use public transportation to get around, limit your drinking, and do free activities like walking tours, hiking, and hanging out at beaches. If you plan on drinking, add another $10-20 USD per day.
Anchorage area - hiking trail suggestion 12:19 pm; Exit Glacier open? 12:08 pm; Free shuttle to aviation museum, zoo and botanical garden 12:04 pm; Planning for 2025 and have questions 11:57 am; last minute trip 10:14 am; August 2024 - Itinerary help 5:33 am; Trip Planning Help yesterday; Reserve or not reserve yesterday; Skagway - Carnival ...
Viles Arboretum is a botanical garden in Augusta with 6 miles of trails and more than 20 botanical collections. It's open daily from sunrise to sunset, and admission is free. There are 224 acres ...