We explain and teach technology, solve tech problems and help you make gadget buying decisions.

How to Remove Remembered Credit Cards on iPhone
For user convenience, browsers like Safari, Chrome, and Microsoft Edge save information such as login info, passwords, payments methods, and more. However, these are not the safest solutions to save confidential credit card information, you should opt for a dedicated password manager on your phone. Before that, you need to remove remembered or saved credit cards from the preferred browser on iPhone.

Browsers are less secure than dedicated password managers. In a browser data breach, your data might become vulnerable to hackers. You need to remove remembered credit cards from your iPhone completely.
1. Remove Remembered Credit Cards from Safari
When you try to add payment information through Safari on Mac or iPad, the browser saves the information to auto add card number and expiry date in future transactions.
Here’s how you can find the remembered credit cards and remove them using Safari on iPhone.
Step 1: Open the Settings app on iPhone.
Step 2: Scroll down to the Safari browser.
Step 3: From the General menu, select AutoFill.

Step 4: Go to the Saved Credit Cards menu.
Step 5: iOS will ask for authentication. Authenticate yourself, and you will be able to see saved credit cards from the following menu.
Step 6: Tap on the Edit button in the upper right corner.

Step 7: Select credit cards that you want to delete.
Step 8: Tap on Delete, and you are good to go.
You can edit the existing credit card from the same menu and even add a new credit/debit card manually.
2. Remove Remembered Credit Cards from Chrome
With iOS 14, Apple offers an option to change the default browser on iPhone. Similar to many GT members, we are sure that many of our readers have changed the default browser from Safari to Chrome on iPhone.
In that case, you need to remove remembered credit cards from the Google Chrome browser on iPhone. Go through the steps below to make changes.
Unlike default Apple apps, you don’t need to rely on the Settings app to make necessary changes. With Google Chrome, you can easily remove remembered credit cards from the app. Here’s how.
Step 1: Open Google Chrome on iPhone.
Step 2: Tap on the three-dot menu at the bottom right corner.
Step 3: Open the Settings menu.

Step 4: Select Payment Methods.
Google collects payment information from the saved cards as well as Google Pay accounts. You can’t remove Google Pay accounts from the same menu. However, you can easily remove saved cards.
Step 5: Tap on Edit at the right corner and select the credit card you want to remove.

Step 6: Tap on Delete at the bottom left corner.
3. Remove Remembered Credit Cards from Microsoft Edge
Microsoft Edge is another capable Safari alternative on iPhone. If you are using Microsoft Edge as your daily driver on your iPhone, you should follow the steps below to remove forgotten cards from Microsoft Edge.
Step 1: Open Microsoft Edge on iPhone.
Step 2: Tap on the three-dot menu at the bottom and open the Settings menu.
Step 3: Go to your profile.
Step 4: Tap on Payment info.

Step 5: You will see all your saved card info from the menu.
Step 6: Tap on Edit at the top and remove the card from Microsoft Edge.

Disable Credit Cards from Safari on iPhone
You have already disabled saved credit cards from your iPhone. Now you won’t want Safari to remember credit card information in the future. You can disable the Credit Card toggle from Safari Settings. Here’s how.
Step 2: Scroll down to Safari.
Step 3: From the General menu, select Autofill.

Step 4: Disable Credit Card toggle from the following menu.
From now on, Safari won’t remember your credit card information in the app.
Use Third-Party Password Managers
Third-party password managers such as 1Password, LastPass, and Dashlane offer more functions and better security to remember your credit card information. Now that Safari extensions are available on iPhone with iOS 15, you can install your preferred password manager extension in the browser and access all the data without leaving the app.

Whenever you need to add payment information, you can tap on the More menu in Safari and access 1Password from the list. Check the screenshots for reference.
Delete Credit Cards from iPhone
Like Safari, you can also disable the save credit card function from Microsoft Edge or Google Chrome. You should also remove credit cards that are inactive and no longer in use. Which third-party password manager are you picking? Share your choice in the comments below.
Last updated on 07 February, 2022
The above article may contain affiliate links which help support Guiding Tech. However, it does not affect our editorial integrity. The content remains unbiased and authentic.
DID YOU KNOW

Parth Shah is an evergreen freelance writer covering how-tos, app guides, comparisons, listicles, and troubleshooting guides on Android, iOS, Windows, Mac, and smart TV platforms. He has over five years of experience and has covered 1,500+ articles on GuidingTech and Android Police. In his free time, you will see him binge-watching Netflix shows, reading books, and traveling.
More in iOS

11 Ways to Fix Apple Watch Not Reading Heart Rate

5 Best Fixes for Dark Mode Not Working in Apple Maps on iPhone and Mac
Join the newsletter.
Get Guiding Tech articles delivered to your inbox.
Pocket-lint
How to save, edit, and delete credit cards in autofill on iphone.
If you want to easily declutter all the payment methods saved on your iPhone, you just need to learn how to manage your Autofill data.
Key Takeaways
- Autofill on iPhone stores contact and credit card info for convenience.
- You can find, view, and delete saved credit cards in Autofill on iPhone.
- Easily add a new credit card to Autofill on iPhone for online shopping.
The iPhone and Mac have this cool feature called Autofill that you're probably using a lot without even realizing it. It stores your contact and credit card info in Safari, so you don't have to type in all those numbers every time you shop online. Super convenient, right?
But the catch is, it keeps all your old cards, even the expired ones, which can clutter things up. If you're someone who likes to keep things organized, we'll show you how to find and clean up those old cards in your iPhone's Autofill.
What is Apple Pay, how does it work, and how do you set it up?
Apple iphone 15, how to find your saved credit cards on iphone.
To find and view your stored credit cards on your iPhone, just follow these steps.
It's super handy, not just for deleting old cards from Autofill, but also for those times when you don't have your physical cards handy. Like when you need to share your card details for a friend to book a flight for you. You can access all your card info, from the long card number to the expiry date and security code. And no stress about security -- your details are safe behind your iPhone's security features, accessible only to you or someone you've shared your passcode with.
- Open Settings on your iPhone.
- Scroll down to Safari .
- Tap on Autofill under the General section.
- Tap on Saved Credit Cards,
- Authenticate using Touch ID, Face ID or your iPhone passcode.
You'll see a list of your saved credit cards pop up. Tap on any card to view details like the cardholder name , card number , expiration date , security code , and card description . Want to change something? Hit Edit in the top right corner. You can even rename the card description by tapping on a card, hitting Edit , and then tapping the description .
How to delete your credit card info in Autofill
To delete Autofill info on your iPhone and prevent an expired card from popping up during Safari checkouts, just clear out expired cards. This way, you avoid the hassle of accidentally choosing one and facing a declined payment during your purchase process.
- Tap on Saved Credit Cards .
- Authenticate using Touch ID, Face ID, or your iPhone passcode .
- Tap on Edit in the top right corner.
- Select the credit cards you want to remove or delete.
- Tap on Delete in the top left corner.
- Confirm Delete .
You can also delete a card by tapping on it. Then, hit Edit in the top right corner and select Delete Credit Card to remove it.
How to add a credit card to Autofill on iPhone
To add a new credit card to your iPhone's Autofill, so it pops up as an option when you're shopping online, just add it once and you're set. Perfect for when you get a new card and want to use it in Safari without having to carry it around all the time.
- Tap on Add Credit Card .
- You can then use your iPhone's camera to scan your card by selecting Use Camera .
- Alternatively, enter the cardholder name, number, expiry, security code, and description manually.
- Tap Done in the top right corner when you've finished.
Apple iPhone 15 Pro
Q: how to delete saved credit card info on mac.
To delete saved credit card info on a Mac, just follow these steps. It's a good idea to do this to avoid a cluttered list of old cards, which can be a hassle if you accidentally choose an expired one while shopping online, especially in places where Apple Pay isn't an option.
- Open Safari on your Mac.
- Click on the Safari tab in the menu bar at the top of your screen.
- Select Settings .
- Click on the Autofill option at the top of the pop-up box.
- Click on the Edit button next to the Credit Cards box.
- Enter your password.
- A list of your credit cards saved on Autofill will appear.
- Select the credit card you want to remove or delete from Autofill.
- Hold down the shift key to select multiple cards.
- Press the Remove button.
Q: How to add a credit card to Autofill on Mac
To add a credit card to Autofill on your Mac, just go through these steps. It's smart to add your new card as soon as it arrives so it's all set for autofill, making your online shopping smooth and hassle-free.
- Click on the Add button below the list of credit cards.
- Enter the description, card number, cardholder, security code, and expiry by clicking the relevant boxes.
- Click Done .
Great tips and insight
- Apple / iOS / Mac / Tips
How to stop Safari remembering the wrong credit card
by Jonny Evans · Published October 10, 2018 · Updated October 10, 2018

When entering credit card details online, does your Safari regularly recommend old or deleted cards? That’s less of a problem for you lucky Apple Pay users on modern Macs, but for most users its a pain.
Don’t worry – changing this behaviour won’t mess up your insurance, mortgage or loan payments, but will make it much easier to shop online.
What has happened is that Safari’s AutoFill feature has remembered your old card numbers and continues to recommend them. I will confess that this has been a problem for me for a long time, I’d just never got round to dealing with it – too busy writing stories for you, I suppose.
The good news? Fixing this is super-easy.

The secret’s in AutoFill
What you need to do
The procedure is slightly different on both Mac and iOS device
- Open Settings>Safari>AutoFill>Saved Credit Cards
- You’ll be asked to confirm your ID – FaceID, TouchID or your passcode will be required.
- On the next page you can see all your active cards, to delete one just tap and hold the item, swipe right-left and tap Delet e.
- You can also edit cards with up-to-date information here.
Now you can buy stuff on Amazon or anywhere else without needing to enter new details.
[amazon_link asins=’B01CU1EC6Y’ template=’ProductCarousel’ store=’9to5ma-20′ marketplace=’US’ link_id=’defa9a07-cc77-11e8-b1e2-bd1780d292bb’]
- Open Safari>Preferences>AutoFill
- In the Credit Card section click Edit
- Now you can review your available cards, select the one(s) you no longer use, and tap Remove to get rid of them.

Problem solved
In future Safari won’t recommend the deleted card – better yet, the card will also be removed from all the Apple devices you use that are logged into the same Apple ID.
Tags: Apple How to iPad iPhone Mac Safari

Jonny Evans
Watching Apple since 1999. I don't say what they should do. I say what they might do. They sometimes do.
- Pingbacks 0
Thanks! That worked great!
Leave a Reply Cancel reply
Your email address will not be published. Required fields are marked *
This site uses Akismet to reduce spam. Learn how your comment data is processed .
Support this site
What we do takes time and care...
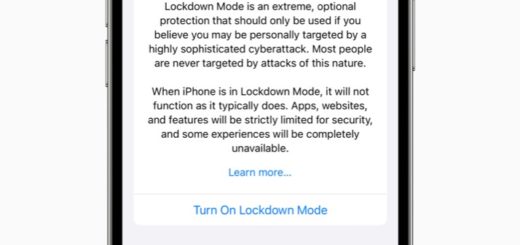
How to use Lockdown Mode on your iPhone, iPad, and Mac

12+ tips to make your iPhone battery life last

9+ last minute emergency gift ideas for Apple users

6 Mac Save dialog tips that will save you a little time

7 more Photos tips for Mac users
- Apple Watch
- Tips & Tricks
How to Merge Duplicate Contacts on iPhone
How to delete game pigeon on iphone, how to add pronouns on iphone contacts.
How to View and Delete Saved Credit Card Numbers in Safari on iPhone
If you use Safari on your Mac or iPhone, you might have saved your card details for faster shopping. But have you ever needed to view or remove your credit card details in Safari? It’s quite simple once you know how.
In this quick guide, I’ll show you an easy way to view and delete saved credit card numbers in Safari, ensuring your information stays safe and secure. Let’s dive in!
View and Edit Saved Credit Card Numbers in Safari
If you need to check or change your saved credit card details in Safari, then follow the steps below.
- First, grab your iPhone or iPad and open the Settings app. Scroll down and tap on “ Safari .”
- Inside Safari settings, look for “ AutoFill ” and tap on it.

- Here, you’ll find an option that says “ Saved Credit Cards .” Tap on this.
- Now, enter your PIN or use Touch ID or Face ID . Once you’re in, you’ll see all the credit cards Safari has stored.

- If you want to edit card details, choose the card you want to check or change by tapping on it. You can see details like the card number and expiration date if Safari has them saved.
- If you need to change something on the card, hit “ Edit ” at the top right of the screen.
- After you’re done making changes, just tap “ Done .”

Delete Saved Credit Card Numbers in Safari
If you need to clear out old or unused credit card details from Safari, then follow the steps below to delete saved credit card numbers.
- If you are on the edit credit card page, just press the back button to return to the list of credit cards.
- Now, select the card or cards you want to delete. (You can select multiple cards at the same time.)
- Finally, tap the “ Delete ” button at the top left corner.

Secure your card Info…
In summary, managing your credit card information in Safari is easy and straightforward. Whether you’re adding, editing, or deleting card details, these simple steps ensure your Safari experience remains convenient and secure.
If you have any queries related to Apple Pay and keeping your digital wallet up-to-date and your online transactions safe, then follow our guide.

Bhavik Chauhan is a tech-savvy Apple fan and expert tech content writer. He loves analyzing the latest gadgets and watching movies.
Related Posts
How to add emergency contact on iphone, customize your apple music playlists with artwork, how to use block quotes in apple notes, how to delete safari history on iphone.
Comments are closed.
Type above and press Enter to search. Press Esc to cancel.
iPhone User Guide
- iPhone models compatible with iOS 17
- R ' class='toc-item' data-ss-analytics-link-url='https://support.apple.com/guide/iphone/iphone-xr-iph017302841/ios' data-ajax-endpoint='https://support.apple.com/guide/iphone/iphone-xr-iph017302841/ios' data-ss-analytics-event="acs.link_click" href='https://support.apple.com/guide/iphone/iphone-xr-iph017302841/ios' id='toc-item-IPH017302841' data-tocid='IPH017302841' > iPhone X R
- S ' class='toc-item' data-ss-analytics-link-url='https://support.apple.com/guide/iphone/iphone-xs-iphc00446242/ios' data-ajax-endpoint='https://support.apple.com/guide/iphone/iphone-xs-iphc00446242/ios' data-ss-analytics-event="acs.link_click" href='https://support.apple.com/guide/iphone/iphone-xs-iphc00446242/ios' id='toc-item-IPHC00446242' data-tocid='IPHC00446242' > iPhone X S
- S Max' class='toc-item' data-ss-analytics-link-url='https://support.apple.com/guide/iphone/iphone-xs-max-iphcd2066870/ios' data-ajax-endpoint='https://support.apple.com/guide/iphone/iphone-xs-max-iphcd2066870/ios' data-ss-analytics-event="acs.link_click" href='https://support.apple.com/guide/iphone/iphone-xs-max-iphcd2066870/ios' id='toc-item-IPHCD2066870' data-tocid='IPHCD2066870' > iPhone X S Max
- iPhone 11 Pro
- iPhone 11 Pro Max
- iPhone SE (2nd generation)
- iPhone 12 mini
- iPhone 12 Pro
- iPhone 12 Pro Max
- iPhone 13 mini
- iPhone 13 Pro
- iPhone 13 Pro Max
- iPhone SE (3rd generation)
- iPhone 14 Plus
- iPhone 14 Pro
- iPhone 14 Pro Max
- iPhone 15 Plus
- iPhone 15 Pro
- iPhone 15 Pro Max
- Setup basics
- Make your iPhone your own
- Take great photos and videos
- Keep in touch with friends and family
- Share features with your family
- Use iPhone for your daily routines
- Expert advice from Apple Support
- What’s new in iOS 17
- Turn on and set up iPhone
- Wake and unlock
- Set up cellular service
- Use Dual SIM
- Connect to the internet
- Sign in with Apple ID
- Subscribe to iCloud+
- Find settings
- Set up mail, contacts, and calendar accounts
- Learn the meaning of the status icons
- Charge the battery
- Charge with cleaner energy sources
- Show the battery percentage
- Check battery health and usage
- Use Low Power Mode
- Read and bookmark the user guide
- Learn basic gestures
- Learn gestures for iPhone models with Face ID
- Adjust the volume
- Find your apps in App Library
- Switch between open apps
- Quit and reopen an app
- Multitask with Picture in Picture
- Access features from the Lock Screen
- View Live Activities in the Dynamic Island
- Perform quick actions
- Search on iPhone
- Get information about your iPhone
- View or change cellular data settings
- Travel with iPhone
- Change sounds and vibrations
- Use the Action button on iPhone 15 Pro and iPhone 15 Pro Max
- Create a custom Lock Screen
- Change the wallpaper
- Adjust the screen brightness and color balance
- Keep the iPhone display on longer
- Use StandBy
- Customize the text size and zoom setting
- Change the name of your iPhone
- Change the date and time
- Change the language and region
- Organize your apps in folders
- Add, edit, and remove widgets
- Move apps and widgets on the Home Screen
- Remove apps
- Use and customize Control Center
- Change or lock the screen orientation
- View and respond to notifications
- Change notification settings
- Set up a Focus
- Allow or silence notifications for a Focus
- Turn a Focus on or off
- Stay focused while driving
- Customize sharing options
- Type with the onscreen keyboard
- Dictate text
- Select and edit text
- Use predictive text
- Use text replacements
- Add or change keyboards
- Add emoji and stickers
- Take a screenshot
- Take a screen recording
- Draw in documents
- Add text, shapes, signatures, and more
- Fill out forms and sign documents
- Use Live Text to interact with content in a photo or video
- Use Visual Look Up to identify objects in your photos and videos
- Lift a subject from the photo background
- Subscribe to Apple Arcade
- Play with friends in Game Center
- Connect a game controller
- Use App Clips
- Update apps
- View or cancel subscriptions
- Manage purchases, settings, and restrictions
- Install and manage fonts
- Buy books and audiobooks
- Annotate books
- Access books on other Apple devices
- Listen to audiobooks
- Set reading goals
- Organize books
- Create and edit events in Calendar
- Send invitations
- Reply to invitations
- Change how you view events
- Search for events
- Change calendar and event settings
- Schedule or display events in a different time zone
- Keep track of events
- Use multiple calendars
- Use the Holidays calendar
- Share iCloud calendars
- Camera basics
- Set up your shot
- Apply Photographic Styles
- Take Live Photos
- Take Burst mode shots
- Take a selfie
- Take panoramic photos
- Take macro photos and videos
- Take portraits
- Take Night mode photos
- Take Apple ProRAW photos
- Adjust the shutter volume
- Adjust HDR camera settings
- Record videos
- Record spatial videos for Apple Vision Pro
- Record ProRes videos
- Record videos in Cinematic mode
- Change video recording settings
- Save camera settings
- Customize the Main camera lens
- Change advanced camera settings
- View, share, and print photos
- Use Live Text
- Scan a QR code
- See the world clock
- Set an alarm
- Change the next wake up alarm
- Use the stopwatch
- Use multiple timers
- Add and use contact information
- Edit contacts
- Add your contact info
- Use NameDrop on iPhone to share your contact info
- Use other contact accounts
- Use Contacts from the Phone app
- Merge or hide duplicate contacts
- Export contacts
- Get started with FaceTime
- Make FaceTime calls
- Receive FaceTime calls
- Create a FaceTime link
- Take a Live Photo
- Turn on Live Captions in a FaceTime call
- Use other apps during a call
- Make a Group FaceTime call
- View participants in a grid
- Use SharePlay to watch, listen, and play together
- Share your screen in a FaceTime call
- Collaborate on a document in FaceTime
- Use video conferencing features
- Hand off a FaceTime call to another Apple device
- Change the FaceTime video settings
- Change the FaceTime audio settings
- Change your appearance
- Leave a call or switch to Messages
- Block unwanted callers
- Report a call as spam
- Connect external devices or servers
- Modify files, folders, and downloads
- Search for files and folders
- Organize files and folders
- Set up iCloud Drive
- Share files and folders in iCloud Drive
- Share your location
- Meet up with a friend
- Send your location via satellite
- Add or remove a friend
- Locate a friend
- Get notified when friends change their location
- Notify a friend when your location changes
- Add your iPhone
- Add your iPhone Wallet with MagSafe
- Get notified if you leave a device behind
- Locate a device
- Mark a device as lost
- Erase a device
- Remove a device
- Add an AirTag
- Share an AirTag or other item in Find My on iPhone
- Add a third-party item
- Get notified if you leave an item behind
- Locate an item
- Mark an item as lost
- Remove an item
- Adjust map settings
- Get started with Fitness
- Track daily activity and change your move goal
- See your activity summary
- Sync a third-party workout app
- Change fitness notifications
- Share your activity
- Subscribe to Apple Fitness+
- Find Apple Fitness+ workouts and meditations
- Start an Apple Fitness+ workout or meditation
- Create a Custom Plan in Apple Fitness+
- Work out together using SharePlay
- Change what’s on the screen during an Apple Fitness+ workout or meditation
- Download an Apple Fitness+ workout or meditation
- Get started with Freeform
- Create a Freeform board
- Draw or handwrite
- Apply consistent styles
- Position items on a board
- Search Freeform boards
- Share and collaborate
- Delete and recover boards
- Get started with Health
- Fill out your Health Details
- Intro to Health data
- View your health data
- Share your health data
- View health data shared by others
- Download health records
- View health records
- Monitor your walking steadiness
- Log menstrual cycle information
- View menstrual cycle predictions and history
- Track your medications
- Learn more about your medications
- Log your state of mind
- Take a mental health assessment
- Set up a schedule for a Sleep Focus
- Turn off alarms and delete sleep schedules
- Add or change sleep schedules
- Turn Sleep Focus on or off
- Change your wind down period, sleep goal, and more
- View your sleep history
- Check your headphone levels
- Use audiogram data
- Register as an organ donor
- Back up your Health data
- Intro to Home
- Upgrade to the new Home architecture
- Set up accessories
- Control accessories
- Control your home using Siri
- Use Grid Forecast to plan your energy usage
- Set up HomePod
- Control your home remotely
- Create and use scenes
- Use automations
- Set up security cameras
- Use Face Recognition
- Unlock your door with a home key
- Configure a router
- Invite others to control accessories
- Add more homes
- Get music, movies, and TV shows
- Get ringtones
- Manage purchases and settings
- Get started with Journal
- Write in your journal
- Review your past journal entries
- Change Journal settings
- Magnify nearby objects
- Change settings
- Detect people around you
- Detect doors around you
- Receive image descriptions of your surroundings
- Read aloud text and labels around you
- Set up shortcuts for Detection Mode
- Add and remove email accounts
- Set up a custom email domain
- Check your email
- Unsend email with Undo Send
- Reply to and forward emails
- Save an email draft
- Add email attachments
- Download email attachments
- Annotate email attachments
- Set email notifications
- Search for email
- Organize email in mailboxes
- Flag or block emails
- Filter emails
- Use Hide My Email
- Use Mail Privacy Protection
- Change email settings
- Delete and recover emails
- Add a Mail widget to your Home Screen
- Print emails
- Get travel directions
- Select other route options
- Find stops along your route
- View a route overview or a list of turns
- Change settings for spoken directions
- Get driving directions
- Get directions to your parked car
- Set up electric vehicle routing
- Report traffic incidents
- Get cycling directions
- Get walking directions
- Get transit directions
- Delete recent directions
- Get traffic and weather info
- Estimate travel time and ETA
- Download offline maps
- Search for places
- Find nearby attractions, restaurants, and services
- Get information about places
- Mark places
- Share places
- Rate places
- Save favorite places
- Explore new places with Guides
- Organize places in My Guides
- Delete significant locations
- Look around places
- Take Flyover tours
- Find your Maps settings
- Measure dimensions
- View and save measurements
- Measure a person’s height
- Use the level
- Set up Messages
- About iMessage
- Send and reply to messages
- Unsend and edit messages
- Keep track of messages
- Forward and share messages
- Group conversations
- Watch, listen, or play together using SharePlay
- Collaborate on projects
- Use iMessage apps
- Take and edit photos or videos
- Share photos, links, and more
- Send stickers
- Request, send, and receive payments
- Send and receive audio messages
- Animate messages
- Change notifications
- Block, filter, and report messages
- Delete messages and attachments
- Recover deleted messages
- View albums, playlists, and more
- Show song credits and lyrics
- Queue up your music
- Listen to broadcast radio
- Subscribe to Apple Music
- Play music together in the car with iPhone
- Listen to lossless music
- Listen to Dolby Atmos music
- Apple Music Sing
- Find new music
- Add music and listen offline
- Get personalized recommendations
- Listen to radio
- Search for music
- Create playlists
- See what your friends are listening to
- Use Siri to play music
- Change the way music sounds
- Get started with News
- Use News widgets
- See news stories chosen just for you
- Read stories
- Follow your favorite teams with My Sports
- Listen to Apple News Today
- Subscribe to Apple News+
- Browse and read Apple News+ stories and issues
- Download Apple News+ issues
- Listen to audio stories
- Solve crossword puzzles
- Search for news stories
- Save stories in News for later
- Subscribe to individual news channels
- Get started with Notes
- Add or remove accounts
- Create and format notes
- Draw or write
- Add photos, videos, and more
- Scan text and documents
- Work with PDFs
- Create Quick Notes
- Search notes
- Organize in folders
- Organize with tags
- Use Smart Folders
- Export or print notes
- Change Notes settings
- Make a call
- Answer or decline incoming calls
- While on a call
- Set up voicemail
- Check voicemail
- Change voicemail greeting and settings
- Select ringtones and vibrations
- Make calls using Wi-Fi
- Set up call forwarding and call waiting
- Avoid unwanted calls
- View photos and videos
- Play videos and slideshows
- Delete or hide photos and videos
- Edit photos and videos
- Trim video length and adjust slow motion
- Edit Cinematic mode videos
- Edit Live Photos
- Edit portraits
- Use photo albums
- Edit, share, and organize albums
- Filter and sort photos and videos in albums
- Make stickers from your photos
- Duplicate and copy photos and videos
- Merge duplicate photos and videos
- Search for photos
- Identify people and pets
- Browse photos by location
- Share photos and videos
- Share long videos
- View photos and videos shared with you
- Watch memories
- Personalize your memories
- Manage memories and featured photos
- Use iCloud Photos
- Create shared albums
- Add and remove people in a shared album
- Add and delete photos and videos in a shared album
- Set up or join an iCloud Shared Photo Library
- Add content to an iCloud Shared Photo Library
- Use iCloud Shared Photo Library
- Import and export photos and videos
- Print photos
- Find podcasts
- Listen to podcasts
- Follow your favorite podcasts
- Use the Podcasts widget
- Organize your podcast library
- Download, save, or share podcasts
- Subscribe to podcasts
- Listen to subscriber-only content
- Change download settings
- Make a grocery list
- Add items to a list
- Edit and manage a list
- Search and organize lists
- Work with templates
- Use Smart Lists
- Print reminders
- Use the Reminders widget
- Change Reminders settings
- Browse the web
- Search for websites
- Customize your Safari settings
- Change the layout
- Use Safari profiles
- Open and close tabs
- Organize your tabs
- View your Safari tabs from another Apple device
- Share Tab Groups
- Use Siri to listen to a webpage
- Bookmark favorite webpages
- Save pages to a Reading List
- Find links shared with you
- Annotate and save a webpage as a PDF
- Automatically fill in forms
- Get extensions
- Hide ads and distractions
- Clear your cache
- Browse the web privately
- Use passkeys in Safari
- Check stocks
- Manage multiple watchlists
- Read business news
- Add earnings reports to your calendar
- Use a Stocks widget
- Translate text, voice, and conversations
- Translate text in apps
- Translate with the camera view
- Subscribe to Apple TV+, MLS Season Pass, or an Apple TV channel
- Add your TV provider
- Get shows, movies, and more
- Watch sports
- Watch Major League Soccer with MLS Season Pass
- Control playback
- Manage your library
- Change the settings
- Make a recording
- Play it back
- Edit or delete a recording
- Keep recordings up to date
- Organize recordings
- Search for or rename a recording
- Share a recording
- Duplicate a recording
- Keep cards and passes in Wallet
- Set up Apple Pay
- Use Apple Pay for contactless payments
- Use Apple Pay in apps and on the web
- Track your orders
- Use Apple Cash
- Use Apple Card
- Use Savings
- Pay for transit
- Access your home, hotel room, and vehicle
- Add identity cards
- Use COVID-19 vaccination cards
- Check your Apple Account balance
- Use Express Mode
- Organize your Wallet
- Remove cards or passes
- Check the weather
- Check the weather in other locations
- View weather maps
- Manage weather notifications
- Use Weather widgets
- Learn the weather icons
- Find out what Siri can do
- Tell Siri about yourself
- Have Siri announce calls and notifications
- Add Siri Shortcuts
- About Siri Suggestions
- Use Siri in your car
- Change Siri settings
- Contact emergency services
- Use Emergency SOS via satellite
- Request Roadside Assistance via satellite
- Set up and view your Medical ID
- Use Check In
- Manage Crash Detection
- Reset privacy and security settings in an emergency
- Set up Family Sharing
- Add Family Sharing members
- Remove Family Sharing members
- Share subscriptions
- Share purchases
- Share locations with family and locate lost devices
- Set up Apple Cash Family and Apple Card Family
- Set up parental controls
- Set up a child’s device
- Get started with Screen Time
- Protect your vision health with Screen Distance
- Set up Screen Time
- Set communication and safety limits and block inappropriate content
- Charging cable
- Power adapters
- MagSafe chargers and battery packs
- MagSafe cases and sleeves
- Qi-certified wireless chargers
- Use AirPods
- Use EarPods
- Apple Watch
- Wirelessly stream videos and photos to Apple TV or a smart TV
- Connect to a display with a cable
- HomePod and other wireless speakers
- Pair Magic Keyboard
- Enter characters with diacritical marks
- Switch between keyboards
- Use shortcuts
- Choose an alternative keyboard layout
- Change typing assistance options
- External storage devices
- Bluetooth accessories
- Share your internet connection
- Allow phone calls on your iPad and Mac
- Use iPhone as a webcam
- Hand off tasks between devices
- Cut, copy, and paste between iPhone and other devices
- Stream video or mirror the screen of your iPhone
- Start SharePlay instantly
- Use AirDrop to send items
- Connect iPhone and your computer with a cable
- Transfer files between devices
- Transfer files with email, messages, or AirDrop
- Transfer files or sync content with the Finder or iTunes
- Automatically keep files up to date with iCloud
- Use an external storage device, a file server, or a cloud storage service
- Intro to CarPlay
- Connect to CarPlay
- Use your vehicle’s built-in controls
- Get turn-by-turn directions
- Change the map view
- Make phone calls
- View your calendar
- Send and receive text messages
- Announce incoming text messages
- Play podcasts
- Play audiobooks
- Listen to news stories
- Control your home
- Use other apps with CarPlay
- Rearrange icons on CarPlay Home
- Change settings in CarPlay
- Get started with accessibility features
- Turn on accessibility features for setup
- Change Siri accessibility settings
- Open features with Accessibility Shortcut
- Change color and brightness
- Make text easier to read
- Reduce onscreen motion
- Customize per-app visual settings
- Hear what’s on the screen or typed
- Hear audio descriptions
- Turn on and practice VoiceOver
- Change your VoiceOver settings
- Use VoiceOver gestures
- Operate iPhone when VoiceOver is on
- Control VoiceOver using the rotor
- Use the onscreen keyboard
- Write with your finger
- Use VoiceOver with an Apple external keyboard
- Use a braille display
- Type braille on the screen
- Customize gestures and keyboard shortcuts
- Use VoiceOver with a pointer device
- Use VoiceOver for images and videos
- Use VoiceOver in apps
- Use AssistiveTouch
- Adjust how iPhone responds to your touch
- Use Reachability
- Auto-answer calls
- Turn off vibration
- Change Face ID and attention settings
- Use Voice Control
- Adjust the side or Home button
- Use Apple TV Remote buttons
- Adjust pointer settings
- Adjust keyboard settings
- Adjust AirPods settings
- Turn on Apple Watch Mirroring
- Control a nearby Apple device
- Intro to Switch Control
- Set up and turn on Switch Control
- Select items, perform actions, and more
- Control several devices with one switch
- Use hearing devices
- Use Live Listen
- Use sound recognition
- Set up and use RTT and TTY
- Flash the LED for alerts
- Adjust audio settings
- Play background sounds
- Display subtitles and captions
- Show transcriptions for Intercom messages
- Get Live Captions (beta)
- Type to speak
- Record a Personal Voice
- Use Guided Access
- Use built-in privacy and security protections
- Set a passcode
- Set up Face ID
- Set up Touch ID
- Control access to information on the Lock Screen
- Keep your Apple ID secure
- Use passkeys to sign in to apps and websites
- Sign in with Apple
- Share passwords
Automatically fill in strong passwords
- Change weak or compromised passwords
- View your passwords and related information
- Share passkeys and passwords securely with AirDrop
- Make your passkeys and passwords available on all your devices
- Automatically fill in verification codes
- Automatically fill in SMS passcodes
- Sign in with fewer CAPTCHA challenges
- Use two-factor authentication
- Use security keys
- Manage information sharing with Safety Check
- Control app tracking permissions
- Control the location information you share
- Control access to information in apps
- Control how Apple delivers advertising to you
- Control access to hardware features
- Create and manage Hide My Email addresses
- Protect your web browsing with iCloud Private Relay
- Use a private network address
- Use Advanced Data Protection
- Use Lockdown Mode
- Use Stolen Device Protection
- Receive warnings about sensitive content
- Use Contact Key Verification
- Turn iPhone on or off
- Force restart iPhone
- Back up iPhone
- Return iPhone settings to their defaults
- Restore all content from a backup
- Restore purchased and deleted items
- Sell, give away, or trade in your iPhone
- Erase iPhone
- Install or remove configuration profiles
- Important safety information
- Important handling information
- Find more resources for software and service
- FCC compliance statement
- ISED Canada compliance statement
- Ultra Wideband information
- Class 1 Laser information
- Apple and the environment
- Disposal and recycling information
- Unauthorized modification of iOS
Automatically fill in your information in Safari on iPhone
Important: Never enter your password or credit card number on sites with a “Not Secure” warning. See the Apple Support article If you see a “Not Secure” warning while browsing with Safari .
Set up AutoFill
You can save your personal information or credit card number on your iPhone to speed up filling in online forms and making purchases.
Do any of the following:
Set up contact info: Turn on Use Contact Info, tap My Info, then choose your contact card. The contact information from that card is entered when you tap AutoFill on webpages in Safari.
Set up credit card info: Turn on Credit Cards, tap Saved Credit Cards, then tap Add Credit Card. Enter your credit card information into the fields provided or tap Use Camera to enter the information without typing.
Fill in your contact information automatically
You can quickly add your personal information to online forms using AutoFill.
In a form on a website that supports AutoFill, tap a blank field.
Tap AutoFill Contact above the keyboard, then select a contact.
Tap any field to make changes.
Follow the onscreen instructions to submit the form.
Note: You can use AutoFill to enter another person’s information from your contact list. For example, if you’re purchasing a gift and shipping it to a friend, you can use AutoFill to enter their address. Tap AutoFill Contact, tap Other Contact, then choose their contact card.
Fill in your credit card or Apple Cash information automatically
After you add a credit card or Apple Cash, you can use AutoFill to make online purchases without having to enter your full card number.
Note: In iOS 17.4 or later, you can use Apple Cash in apps or on the web where Apple Pay isn’t yet accepted. See Set up and use Apple Cash in Wallet on iPhone .
In a form on a website, tap the credit card information field.
Tap the saved card you want to use, or tap Scan Card to take a picture of the front of a credit card.
Tip: After you enter a new card, you can save it in Safari AutoFill, then add it to Wallet. See Set up Apple Pay in Wallet on iPhone .
When you sign up for services on websites and in apps, you can let iPhone create and save strong passwords for many of your accounts. See Automatically fill in strong passwords on iPhone .
Turn off AutoFill
You can turn off AutoFill for your contact or credit card information, and for passwords. This is helpful in situations where you don’t want your contact or credit card information to be readily available—for example if you share a device with others.
Turn off AutoFill for passwords: Go to Settings > Passwords, unlock the screen, tap Password Options, then turn off AutoFill Passwords and Passkeys.
How to Update Autofill Credit Card Information on an iPhone
What to know.
- To update your credit card on an iPhone open Settings, tap Safari, then AutoFill, Saved Credit Cards, Add Credit Card, and Done when you're finished.
- To edit saved credit cards on an iPhone, follow the steps above, but tap the card you want to edit instead of Add Credit Card, then tap Edit.

You can save credit card information on your iPhone using AutoFill, then make online purchases using the saved information without having to dig your card out of your wallet. Here's how to edit and change saved cards, and delete saved credit card info in AutoFill.
- How to Change Autofill Credit Card Information
How to Change Autofill Credit Card Information on Your iPhone & iPad (for Safari)
We've already gone over how to autofill credit card information in the Wallet app with your iPhone's camera, how to enable iCloud keychain on your iPhone, and how to use iCloud keychain to create strong passwords . Now, let's learn how to update the credit card information in AutoFill for Safari.

If you have iCloud set up and iCloud Keychain enabled , iCloud Keychain securely stores AutoFill information across all your devices.

- When finished, tap Done in the upper-right corner of the screen to add the credit card to your iPhone's autofill.

For more great tutorials about Apple Wallet and autofill on iPhone and iPad, check out our free Tip of the Day !
- How do I delete a card from Apple Pay on my iPhone or iPad? We've written a step-by-step tutorial that shows you how to remove a card from Apple Pay .
- How do I change the default card on Apple Pay? We've written a how-to that shows you how to set a default card in Apple Pay .
Now, you know how to update autofill credit card info on an iPhone or iPad, edit saved cards on an iPhone or iPad, and delete cards from Safari autofill that you no longer need. Next, find out if you can share purchases without sharing payment methods through Family Sharing.
Author Details

Leanne Hays
Leanne Hays has over a dozen years of experience writing for online publications. As a Feature Writer for iPhone Life, she has authored hundreds of how-to, Apple news, and gear review articles, as well as a comprehensive Photos App guide. Leanne holds degrees in education and science and loves troubleshooting and repair. This combination makes her a perfect fit as manager of our Ask an Expert service, which helps iPhone Life Insiders with Apple hardware and software issues. In off-work hours, Leanne is a mother of two, homesteader, audiobook fanatic, musician, and learning enthusiast.

Article Spotlight
The perfect beach bag for your tech.

Introducing the Ultimate Beach Tech Bag : Keep Your Gadgets Safe and Your Beach Day Essentials Organized!
Featured Products

Now you can try Informant 5 for free and experience a productivity boost by managing projects with tasks and notes, syncing your calendar among all your devices, enjoying a user-friendly 30-day calendar view, and so much more. Informant 5 features SmartBar navigation which makes it so much easier to use and master this calendar app. Plus, you can use it almost anywhere thanks to Dark Mode. With a dark background, you can check in on your tasks and schedule anywhere, even the movie theater. Upgrade to the best calendar app and task manager for iOS! Embrace an "out with the old, in with the new" spirit with Informant 5 .
Most Popular

6 Ways To Know if Someone Blocked You on iMessage

What Does Restarting Your Phone Do? Benefits & Risks

Why Is Find My iPhone Not Working? Here’s the Real Fix

Step Counter: How To Show Steps on Apple Watch Face

10 Simple Tips To Fix iPhone Battery Drain

How To Put Two Pictures Together on iPhone

Answered: Can the Apple Watch Measure Blood Pressure?

How to Tell If a Dead iPhone Is Charging

How To Hide an App on Your iPhone

What Is SOS on iPhone? Learn This Key Emergency Feature!

Apple Maps vs Google Maps: Which Should You Use?

How to Schedule a Text Message on iPhone
Featured articles.

How to Find a Lost iPhone, Even If It's Dead or Offline

Create a Contact Group on iPhone—the Easy Way! (iOS 17)

How to Add a Driver's License to Apple Wallet (2024)

How to Cast Apple TV to Chromecast for Easy Viewing

Fix Photos Not Uploading to iCloud Once & for All (iOS 17)

There Was an Error Connecting to the Apple ID Server: Fixed

CarPlay Not Working? 4 Ways to Fix Apple CarPlay Today
Check out our sponsors.

- Each email reveals new things you can do with your phone (and other devices) with easy-to-follow screenshots.
- Enter your email to get your first tip immediately!
Tips & Tricks
Troubleshooting, how to save credit card info in safari on iphone & ipad.

Did you know that you can save credit card info into Safari to make quick purchases from iPhone or iPad? If you are you tired of filling out your credit card details every time you make an online purchase, this excellent autofill credit card feature is for you as it allows for quick access to credit card payment info in Safari on iPad and iPhone.
Safari, the default web browser that’s included with iOS, ipadOS, and macOS devices, is fully capable of securely storing your credit card information and automatically filling it whenever required for online purchases. The feature works in a similar way to using iCloud Keychain , a feature that autofills login information and passwords upon request. However, for this functionality to work, users need to manually enter their credit card details first.
If you want to try this nifty Safari AutoFill payment info feature on your iOS or iPadOS device, then read on to learn how you can save your credit card information in Safari on both the iPhone & iPad.
Before you go ahead with this procedure, make sure your iPhone or iPad is running at least iOS 12 or later, since this feature isn’t available on older versions. Follow the steps below to learn how to manually input your credit card details for later use with Safari autofill:
That’s really all there is to it, now your credit card info is stored on the iPhone or iPad and ready access through Safari when making online orders or purchases through the web browser.
From now on, whenever you visit a page where you’re asked to type in your credit card details, you could use the Safari AutoFill feature that shows up on your iOS or iPadOS keyboard to automatically fill your name, card number and expiry date. The information is stored encrypted so there’s little security concern, and furthermore you’ll be asked to authenticate the credit card autoFill with Face ID, Touch ID, or passcode, depending on the device you own.
This obviously applies to iPhone, iPad, and iPod touch, but if you own a Mac you’ll be able to take advantage of Safari AutoFill on your macOS machine as well.
Additionally, you can also choose to sync the stored credit card information across all your other macOS, ipadOS, and iOS devices with the help of iCloud Keychain. Using iCloud Keychain for autofill is incredibly useful for owners of multiple devices and is definitely a nice perk of the cloud service. For this to work however, you need to be signed into all the devices using the same Apple ID and make sure Keychain is enabled in the iCloud settings, on any of your devices.
Most of us have multiple credit cards that we use for different purposes. It’s safe to say that you can add all your cards to Safari and access them whenever you like, eliminating the need for constantly having to open your wallet, just to find that one card you want to shop with.
Another saved payment option which is handy to use is Apple Pay, which you can also add cards to for using with Apple Pay compatible payment protocols both on the web, in apps, and with some NFC payment kiosks in stores too.
We hope you managed to add all your credit cards to Safari, for making online purchases a whole lot easier. What do you think about the convenience that Safari AutoFill has to offer? Do you use iCloud Keychain to securely store your credit card info and passwords as well? Let us know your thoughts and opinions in the comments.
Enjoy this tip? Subscribe to our newsletter!
Get more of our great Apple tips, tricks, and important news delivered to your inbox with the OSXDaily newsletter.
You have successfully joined our subscriber list.
Related articles:
- How to Add Credit Cards to Safari AutoFill on Mac
- How to Edit AutoFill Info on iPhone & iPad
- Store Credit Cards Securely in Safari AutoFill on Mac
- How to Delete Specific Chrome Autofill Suggestions
» Comments RSS Feed
Don’t most online retailers that accept credit cards also ask for the 3-digit authentication that is on the reverse side of the card as well?
Yes, often anyway. And so you enter the three digit authentication code, but all credit card info is saved reducing the amount of data you have to input.
Leave a Reply
Name (required)
Mail (will not be published) (required)
Subscribe to OSXDaily
- - Use an iPad as an HDMI Display with Orion & a USB-C Capture Card
- - How to Find Universal Control Settings on MacOS Sonoma & Ventura?
- - Use the Terminal cheat Tool to Generate CheatSheets for Commands
- - Compare Loans Easily on iPhone, Mac, iPad, with Numbers App
- - 6 Helpful Mac Keyboard Shortcut Tips
- - USB Hub & External Monitors Not Working After MacOS Sonoma 14.4 Update for Some Mac Users
- - MacOS Ventura 13.6.5 & macOS Monterey 12.7.4 Updates Available
- - MacOS Sonoma 14.4 Update Released with New Emoji & Bug Fixes
- - iOS 16.7.6, iPadOS 16.7.6, iOS 15.8.2, & iPadOS 15.8.2 Released for Older iPhone & iPad Models
- - iOS 17.4 Update Released to Download with New Emoji, Podcasts Transcripts, & Bug Fixes
iPhone / iPad
- - Create a Budget on iPhone, Mac, & iPad, with Numbers
- - Arc Browser is a Web Browser, Reimagined
- - What is fileproviderd on Mac & Why Does it Use High CPU?
- - Fix WeatherWidget Using Heavy CPU & Slowing a Mac
- - Fix iPad Temperature Warning: iPad needs to cool down before you can use it

About OSXDaily | Contact Us | Privacy Policy | Sitemap
This website is unrelated to Apple Inc
All trademarks and copyrights on this website are property of their respective owners.
© 2024 OS X Daily. All Rights Reserved. Reproduction without explicit permission is prohibited.
Add Credit Cards to Safari AutoFill on iPhone, iPad, and Mac
Filling credit card details every time you make an online purchase can be tedious. Under such circumstances, Apple’s AutoFill feature in Safari is a big relief. You can add credit cards to Safari Autofill on iPhone, iPad, and Mac, and you’re free from refilling them for future transactions. Like saved passwords , storing credit cards is easy. Let me show you how!
How to Add Credit Card to Safari AutoFill on iPhone and iPad
- How to Add Credit Card to Safari AutoFill on Mac
How to Use Credit Card Across any Apple Device
How to update or delete stored credit cards to safari autofill.
- Open the Settings app on your iPhone.
- Scroll down and go to the Safari settings.

- Turn on the toggle for Credit Cards.

- To view credit cards, access with Touch or Face ID, or enter the passcode.
- Tap Add Credit Card.

How to Add Credit Cards to Safari AutoFill on Mac
- Open the Safari browser on your Mac.
- Click on its name at the top-left corner.

- Select AutoFill from the Menu.
- Tick the box of Credit Cards.

If you are using multiple Apple devices for online shopping, you can use your saved credit cards across any device with the help of iCloud Keychain. It keeps your credit card details updated and synchronized on all your devices connected with the same Apple ID. Turn on iCloud Keychain on your iPhone with these simple steps.
- Launch the Settings app on your iPhone
- Tap on your Profile Name to view Apple ID, Media & Purchases section.

- Scroll down and tap on Keychain.

In case you want to remove a credit card or edit the details, you can easily update your information. Here we go!

Open the Settings app → Safari → AutoFill → Saved Credit Cards → Tap on the Credit Card → Tap Edit on the top right corner. Tap on Delete Credit Card or Edit the card according to your preferences.
Important Things to Note:
- Don’t save your Credit Card’s CVV and pin to Safari.
- All your details on iCloud Keychain are encrypted and cannot be read by Apple, so you don’t need to worry about synchronizing your credit card on all devices.
Signing Off…
Safari will auto-fill the credit card details every time you’re making a new purchase through any of your Apple devices. But ensure remembering and securing the other two essential things – CVV and card pin. Happy Shopping!!
You may also want to read!
- How to use Touch ID to autofill passwords in Safari on Mac
- Backup iPhone and iPad to iCloud, Mac or Windows PC
- How to Remove Credit Card from Apple Pay
- How to use AutoFill Passwords on iPhone and iPad
🗣️ Readers like you help support iGeeksBlog. When you make a purchase using links on our site, we may earn an affiliate commission. Read Disclaimer .

Leave a Reply Cancel reply
Your email address will not be published. Required fields are marked *
Save my name, email, and website in this browser for the next time I comment.
This site uses Akismet to reduce spam. Learn how your comment data is processed .

Security how-to: Remove saved credit card info your browser
- Click to share on Twitter (Opens in new window)
- Click to share on Facebook (Opens in new window)
- Click to share on Pinterest (Opens in new window)
You might find when you pay for something online, your web browser offers to save your credit card information, so you can pay faster next time. That can be convenient, but also dangerous if other people ever get to your computer.
A smart reader recently noticed that and asked an excellent question. How can you remove saved credit card information from your browser once it’s in there? RELATED: How to protect yourself from credit card fraud.
We know exactly how to remove your saved credit card info, and we know how to do it for most browsers. Read on to find out why removing a saved credit card is a good idea, and how to go about doing it.
Why you don’t want your credit card saved
We mentioned before that an astute reader prompted our writing of this piece. Here’s their full message to us:
“When I purchase something online, I have some autofill credit cards that pop up on the screen. This must be really old information from back in the day when used them for online shopping. It asks me to type in the three-digit security code from the cards, but I really prefer to dismantle these autofill pop-ups. How do I get rid of these autofill credit cards on my screen?” Brenda from Wichita Falls, Texas
Brenda touches on something important for why you shouldn’tkeep your credit card information saved in your web browser. That informationcan become out of date, resulting in failed payments or annoying shoppingexperiences.
By this we mean, you might lose the chance to get great concert or show tickets because your credit card information auto-filled but that card has expired. By the time you get your proper information in, the tickets could be sold out.
But even more importantly, keeping credit card information saved in your web browser is a safety concern. If your laptop is stolen, or your desktop accessed by someone else, your credit or debit cards can be hacked or drained.
Yes, the autofill will still prompt you to fill in the security code as a means of keeping strangers from using your cards. But with number generators, and other hacking techniques, your cards are vulnerable. Tap or click here to learn about Wi-Fi hacks.
Related: 5 credit card theft hot spots and how to keep yourself safe at them as well.
That’s why it’s best to keep your credit and debit cards safe by not saving them on your web browser. But what if you already saved the card to your browser?
How to remove a saved credit card
Different browsers store credit cards differently from one another. Find your browser below, and follow its steps for removing the information permanently.
To remove a saved credit card from Google Chrome:
- Click on the three-dot icon to the far right of the address bar, and click on Settings.
- Beneath the “Autofill” heading, click on “Payment methods.”
- Click on the three-dot icon to the right of a saved credit or debit card beneath the “Payment methods” heading and click “Remove” in the drop-down menu that appears. Do that for all of the saved cards.
- Turn the “Save and fill payment methods” switch at the top of this page to off to keep Chrome from auto-filling or trying to save payment methods in the future.
To remove a saved credit card from Firefox:
- In the top right corner of a window, click the three-bar icon and select Settings.
- On the left menu, click “Privacy & Security.”
- Scroll down to “Forms & Autofill” and click “Saved Addresses” to see what cards you have saved.
- Select a saved card and click “Remove” to delete it. Do this for all saved credit and debit cards.
- To keep Firefox from auto-filling, or asking to autofill in the future, back under the “Forms & Autofill” heading in the Privacy & Security settings page, uncheck the “Autofill addresses” checkbox.
To remove a saved credit card from Safari:
- Click on the “Safari” tab at the very top of your screen and select “Preferences” from the drop-down menu that appears.
- Select the “Autofill” tab, and click the “Edit…” button beside “Credit cards.”
- Click on a card and click the “Remove” button to the bottom left of the window. Do this for all of the cards and click “Done” on the bottom right.
- To keep credit and debit cards from being saved or autofilled, uncheck the box to the left of “Credit cards” in the Autofill tab.
To remove a saved credit card from Microsoft Edge:
- Log in to your Microsoft Account, and click on the “Payment & billing” tab. Click on “Payment options” in the drop-down menu that appears.
- Scroll to the bottom of the page to see what payment methods you have saved. Click “Remove” beneath each of them.
- To keep Edge from saving credit and debit cards and auto-filling them in the future, go to the top right corner of the window and click on the three dots.
- Click on Settings. In the left menu, click on the key icon to get to the “Passwords & autofill” page. Scroll down to the “Save cards” switch and turn it to “Off.”
For safety, it’s better not to keep credit card information saved on your browser. You can leave a burner card on there, maybe — tap here to learn about an app that generates burner credit cards — but it’s better to have nothing there at all.
We love to hear from readers and listeners and want to answer your tech questions as often as we can. Tap or click here to ask Kim a question . In the meantime, hopefully, this article was helpful to you and you’ll be removing your saved cards ASAP.

Join the Komando Community
Get even more know-how in the Komando Community! Here, you can enjoy The Kim Komando Show on your schedule, read Kim's eBooks for free, ask your tech questions in the Forum — and so much more.
- Is a New iPad Pro Coming Soon?
- Get It Now: Spring Tech Deals at Amazon
How to Enable or Change AutoFill Information on an iPhone
Update AutoFill for personal info, credit cards, passwords, and more
:max_bytes(150000):strip_icc():format(webp)/ScottOrgera-f7aca23cc84a4ea9a3f9e2ebd93bd690.jpg "safari remembered cards")
- Switching from Android
What to Know
- To autofill contact info or credit cards on your iPhone: Settings > AutoFill and toggle Use contact settings or Credit Cards to On .
- To change your info, go to Contacts > My Card > Edit or Saved Credit Cards > Add Credit Card .
- To autofill passwords: Ensure iCloud access is on, tap Settings > Passwords & Accounts, and toggle Autofill Passwords to On .
This article shows how to add and change the information such as your name, email addresses, credit cards, phone numbers, usernames, and passwords that iPhone's AutoFill feature uses in iOS 12 and later.
Enable AutoFill to Use Your Contact Info
To enable AutoFill to use your contact data:
Open the Settings app.
Tap Safari to open Safari Settings .
Tap AutoFill .
Turn on the Use Contact Info toggle switch.
Tap My Info .
Select your contact info .
Your contact info is now enabled for AutoFill.
To change to a different contact, tap My Info and update it with the new contact.
Change or Update Your Personal Info for AutoFill
AutoFill pulls your personal information, including your name, phone number, and email address, from your My Card contact card in Contacts. Here's how to change or update this information:
Open Contacts .
Tap My Card at the top of the screen.
Change your name or company name, and add a phone number, email address, birthday, URL, and more.
Your personal contact information is changed, and AutoFill will now pull this updated data.
Your phone number is automatically pulled from Settings. You can add additional phone numbers, such as a home number. Similarly, email addresses are pulled from Mail and can't be changed here, but you can add a new email address.
Enable or Change AutoFill for Credit and Debit Cards
To enable AutoFill to use your credit and debit card information, and to add a new credit card to AutoFill:
Turn on the Credit Cards toggle switch to enable Credit Card AutoFill.
Tap Saved Credit Cards.
Enter your iPhone passcode or Touch ID if asked, or use Face ID if supported.
Select Add Credit Card .
Add a credit or debit card manually or use the camera to take a picture of the card.
AutoFill can now access your updated credit card information.
To edit or delete any saved credit card, go to Settings > Safari > AutoFill > Saved Credit Cards , and tap the card you want to edit or delete. Tap Edit and then tap Delete Credit Card or change the credit card information. Tap Done .
Enable or Change AutoFill for IDs and Passwords
Activate the icloud keychain.
To enable AutoFill to save and use IDs and passwords, the iCloud Keychain must first be activated. To activate the iCloud Keychain:
Open the Settings app and tap your Apple ID banner at the top of the screen.
Tap iCloud .
Scroll down the list and select Keychain .
Turn on the iCloud Keychain toggle switch and enter your Apple ID password if prompted.
Enable AutoFill to Use Saved IDs and Passwords
To allow AutoFill to use your saved IDs and passwords:
Go to Settings and scroll down to Passwords and Accounts .
Tap AutoFill Passwords .
Toggle AutoFill Passwords to On .
Under Allow Filling From , make sure iCloud Keychain is checked.
Open the Chrome app on your iPhone and tap More > Settings . Tap Payment methods or Addresses and more to view or change your settings.
To turn off Chrome Autofill settings , open the Chrome app, tap More > Settings . Tap Payment methods and turn off Save and fill payment methods . Next, select Addresses and more and turn off Save and fill addresses .
In Firefox, go to Menu > Options > Privacy & Security . In the Forms and Autofill section, turn Autofill addresses on or off, or select Add , Edit , or Remove to make changes. You can manage Firefox Autofill settings in several ways, including disabling the settings completely and manually adding contact information.
Get the Latest Tech News Delivered Every Day
- How to Scan Credit Card Numbers in Safari for iPhone
- How to Use NameDrop on iPhone
- How to Manage Chrome Autofill Settings
- How to Update Apple ID Account Information
- How to Manage Android Autofill Settings
- How to Control iPhone Safari Settings and Security
- Using Form Autofill or Autocomplete in Your Web Browser
- The 8 Best Apps to Send Money in 2024
- 13 Hidden iOS 17 and iPadOS 17 Features
- How to Change the Payment Method on Netflix
- How to Set Up and Use Apple Pay Cash
- How to Set up a New iPhone
- How to Use AutoFill in the Safari Browser
- How to Use Apple Wallet
- How to Pay With PayPal in Stores
- How to Manage Firefox Autofill Settings
How-To Geek
How to autofill your credit card number (securely).
Online shopping is great, but typing in your credit card number on every new website can get annoying fast.
Quick Links
Save it in your web browser, store it in your password manager, pay with apple pay or google pay.
Online shopping is great, but typing in your credit card number on every new website can get annoying fast. Here's how to skip the typing and check out sooner, whether you're on your iPhone, Android phone, PC, Mac, or Chromebook.
Your web browser can store your credit card details and fill them in whenever you want.
On an iPhone or iPad, this is part of the Safari browser's settings. head to Settings > Safari > AutoFill > Saved Credit Cards. Tap "Add Credit Card" and enter your credit card details.
You can also control your name and mailing address from the Settings > Safari > AutoFill screen.
When you're checking out online in the Safari browser, tap one of the credit card fields. You'll be prompted to fill in that information automatically by tapping the option above the keyboard.
You must authenticate with Touch ID or Face ID before your iPhone fills in the details, so it's pretty secure.
In the Chrome web browser on a PC, Mac, Android device, or Chromebook, you can enter payment methods that Chrome will remember and offer to you automatically.
To do so, open Chrome and click Menu > Settings > Payment Methods. Click the "Add" button to the right of "Payment methods" add your credit card details here. Make sure the "Autofill forms" option at the top is enabled, too.
You can also click the "Add" button to the right of Addresses to fill in your mailing address.
On Android, tap Menu > Settings > Autofill and Payments > Cards to manage your saved credit cards.
Now, when you're checking out online, you just have to click a credit card field, and you'll be prompted to fill in the information.
Chrome requires you enter the security code from the back of the card to authenticate before Chrome actually fills in the details.
This feature is also part of other web browsers, too.
- Safari on a Mac: Click Safari > Preferences > AutoFill > Credit Cards > Edit to edit your saved credit cards.
- Microsoft Edge: Click Menu > Settings > Passwords & Autofill > Manage cards to manage your saved credit cards.
- Mozilla Firefox: This feature is not available in Mozilla Firefox yet. According to Mozilla's roadmap, it should be added in the next few versions .
If you use a third-party password manager like LastPass , 1Password, or Dashlane, you can have your password manager securely remember your credit card number and offer to fill it, just as it automatically remembers your passwords.
In the LastPass browser extension, for example, you'll find this feature by clicking the LastPass icon on your browser's toolbar, clicking "Form Fills," and clicking "Add Credit Card." You can also click "Add Form Fill" to save form data like your name, address, and phone number so it can easily be filled.
Related: Why You Should Use a Password Manager, and How to Get Started
While on a page with a credit card field, you can click the LastPass icon, click "Form Fills," and click the name of your credit card to fill in the details automatically.
Of course, you'll have to sign into your password manager and unlock your vault before these details are available, just like your saved passwords. They're just as secure as your saved passwords.
You may also be able to fill these details from your password manager into apps on your phone, but it may be a little more complicated. For example, iOS 12's new password autofill feature only extends to passwords, so you'll have to use actions to fill credit card numbers from your password manager on an iPhone.
It's worth noting that you can use Apple Pay or Google Pay to skip the credit card process entirely, assuming a website or app supports these payment methods. Unfortunately, most apps and websites don't support these.
As long as you've added your credit card number to Apple Pay, you can tap the "Apple Pay" option in supported applications and on supported websites on your iPhone and in the Safari browser on your Mac. You'll be able to pay with any saved payment method.
This also applies on Android, where you'll see a "Pay With Google Pay" option in some apps.
Just select Apple Pay or Google Pay while checking out, if it's available.
Of course, you could also just shop at the same websites where you already have your credit card number saved. That's a big part of why so many people shop for so many products on Amazon.com---there's a good chance you've already told Amazon to save your credit card number.
Image Credit: chainarong06 /Shutterstock.com.
We Are the Mutants
“the world’s great animals come to life”: safari cards, 1976 – 1986.
Exhibit / April 10, 2018

Safari Cards were an English translation of a set of collectible zoological information facts first devised and published in Switzerland. Original publisher Éditions Rencontre in Lausanne, Switzerland specialized in subscription encyclopedias and other educational toys in the 1950s and ’60s. Intended explicitly from the very beginning to democratize learning and bring the classics of French-language literature to the public at an inexpensive cost , one of Rencontre’s other collectible marketing schemes was L’Encyclopédie du monde actuel , a set of fact cards that could be assembled by the child collector to form a full set of encyclopedias. The collectible book series was a popular concept in the postwar Francophone world .
Earlier than this, the book club , a long-standing model on both sides of the Atlantic, was a way for families who had not inherited massive libraries to assemble and collect an impressive display of erudition in the home, whether it was the classics of the Western canon, new popular fiction (sometimes given a lease on inclusion in the canon thanks to massive success, like Margaret Mitchell’s Gone With The Wind ), or an authoritative encyclopedia that could be used by the children in the family for school reports.
In 1976, American publishers Margrace Corporation of Middlesex, New Jersey optioned and translated the French language Safari Cards and used TV ads like the one above (from 1981) to entice children and their parents to subscribe for an educational experience. The cards themselves were compulsively collectible and sortable, and contained a real wealth of information. As the khaki-clad pitchman in the TV ad mentions, “These symbols let you file your cards the way naturalists do.” The cards’ headers were color-coded by climate and habitat, with a world map showing their geographical spread, and supplemented with symbols noting their taxonomic information (admittedly useless without the collectible card featuring the symbols’ key and legend). The backs of the cards featured a fairly substantial explanation of the animals’ behavior, habitat, and other fun facts. (Sample cards can be seen here .) In an era well before Wikipedia, in a time when the closest encyclopedia was likely at the local public library, Safari Cards were a boon to promising naturalists.
Safari Cards followed a marketing model familiar to most consumers in the 1970s and 1980s: advertisements in wide-circulating print magazines (like TV Guide ) or through long-form television commercials, and a subscription model where your first set of orders would be close to free, after which the costs would kick in. These sorts of offers ran parallel with other marketing schemes. The collectible card set model was thoroughly milked by Margrace: they also offered a series titled “ Story of America ” with a practically identical visual design to Safari Cards. Margrace also branched out into comic-book versions of classic literature later in the 1980s, a quaint and old-fashioned offering considering the golden years of lines like Classics Illustrated had petered out in the early ’70s.
Throughout the rest of the 1980s, other publishers’ attempts to get on the buy now/pay later gravy train abounded: full-color encyclopedias for children were often sold in grocery stores , either volume by volume in the supermarket itself or by picking up a discounted first volume at the market and mail-ordering the rest. As seen in the mission statement of Editions Rencontre, these inexpensive offers appealed to working- and middle-class families seeking to provide an educational edge for their children. But they were also at their root exploitative, locking those same paycheck-to-paycheck families into schemes where “ cancel at any time ” might be much easier said than done . Given the recent return of a vogue for subscription boxes , it seems like this model is alive and well in the 21st century, expanding its tendrils into an upper-middle class desirous of curated experiences in the form of monthly treats delivered to its door.
Share this:
Related posts.

Laserium Brochure, Circa 1977

From Alphaville to Mos Eisley: How the French New Wave Influenced Hollywood Sci-Fi

A Great Painter Did It: The Compelling Weirdness of Magnus

Flying Saucers, Common Sense, and the Enigma of Cedric Allingham

Ninjutsu, Aerobics, and Exorcism: How ‘Ninja III: The Domination’ Embodies the 1980s Aesthetic

Adventures in Atari BASIC: Lesson One – Programmer Kids and Plotting Stars

Don Post “Nuclear Death” Mask, 1979

The Eye, The Pyramid, The Map: The Psychogeography of ‘The World According to Ubi’

“A Little Human Compassion”: Fascism and Freedom in ‘Death Wish’ and ‘Escape from New York’

‘Necronomicon’ Advertisement, 1980
Leave a comment cancel reply.
- Already have a WordPress.com account? Log in now.
- Subscribe Subscribed
- Copy shortlink
- Report this content
- View post in Reader
- Manage subscriptions
- Collapse this bar
Memory Cards Needed for Safari (What I found Surprised Me)

Since you are going to be taking a million photos on your African Safari, one of the things you need to ask yourself is how much memory you need to store all of those Safari photos and how big your memory cards should be to allow you to capture all the memories without them getting filled up.
How many memory cards do you need for an African Safari? You Need at least Two 64GB Memory Cards when going on an African Safari. This memory is sufficient for you to take 2000 high-quality photos per day for a 10 day Safari and you will not need to carry an external device to transfer the photos each day. Let’s look a bit more deeply at the average number of pictures you expect to take on your Safari and how this and the size of each picture will affect the size of memory cards you need to carry.
How Many Memory Cards Should I Take?
You should take two 64 GB Memory cards to your African Safari.
I got this figure after doing some research using a Canon EOS 700D Camera : when preparing an article on how beginners can improve their safari photos
I took a photo of the same subject 7 times; each at a different image size setting. The data collected is illustrated in the table below.
I tested a Canon EOS 700D (Rebel T5i) and found that a high quality large photo (5181x3456Px) takes up about 5MBs of space). This file size usually varies depending on the level of detail in the picture and the number of colors in the photo. Assuming that you will be talking an average of 2000 photos per day and if you don’t intend on transferring them to a computer at the end of the day, you may end up using 100Gb of space on a 10 day Safari.
Carry enough memory cards to avoid running out in the middle of your Safari.
How many memory cards for for safari videos
The amount of memory you need if you are planning to take safari videos will depend on the quality of the video and how much video you intend to record.
Just a few videos to supplement photos
If you will be recording a few clips to add to the pictures you already have, then the 2 64GB cards will be sufficient for you. This is because, according to the table I showed earlier, you will only need 110GB of space for your photos and this leaves you with 18GB of space to store the videos you will have
Vlog videos more than just a few minutes
However, if you will be recording a vlog or video that will be more than just a few minutes, 128GB will not be sufficient.
One way you can get around this is recording each day, then transferring the recorded videos to a separate device like the laptop. With that configuration, you would only need the recommended 128GB of memory from the two 64GB cards.
You won’t find cards available to buy when on safari
You may be thinking, “Cant I just buy more memory cards if my cards get filled up?”.
Trying to shop for extra gear when you arrive in Kenya is not advisable for a number of reasons:
- You are unlikely to get good quality memory cards for your camera unless you are in a large city.
- The cards will cost a lot more than how much you would buy them for when in your home country
- You are not sure that you will find a memory card that is compatible with the camera you are using.
- Delivery service in Kenya is very inefficient and you are unlikely to get the memory cards on time if you order for them online.
My advice is that you get all the memory cards you need before starting your journey to avoid getting frustrated when the cards you have fill up and you are not able to get an easy alternative to solve your problem.
Should You carry a laptop to transfer the photos
If you don’t want to buy a new memory card, one of the options you may want to consider is carrying your laptop for you to transfer all the photos at the end of each day.
This will have two advantages
- You will be able to store away each day’s worth of photos so if something were to happen to your camera, you would not loose all of the photos.
- You will also have a machine you can browse the internet with while on safari ( let me mention here that you are unlikely to find very high speed internet when out on safari. You will have great internet in the city but the connection is really bad in the safari lodges. This is unless the lodge has invested in a satellite internet connection)
However, the downside to this would be that you have extra weight for you to carry around and the stress of one more device you need to worry about.
I would recommend that you don’t carry the laptop with you to the safari if your only reason for carrying it is to back up your photos. This is especially true if your laptop is heavy or bulky.
What About uploading Safari Photos to The cloud everyday
Another option you may have considered is uploading all of your content to the cloud after the end of each day.
The challenge with this option is that you still need to carry some type of machine with you to do the upload.
On top of this, internet speeds in the Safari country are bad and you will have a rough time trying to upload high quality images to your online storage
Many cards with small storage or one card with huge storage?
Another question you may have pondered about is whether you should have many memory cards that have low capacity or one large capacity memory card to store your safari pictures
I did some research and found that carrying multiple cards is a better option than just one high capacity one. You will not be putting all your eggs in one basket so if something goes wrong with one card, you will be able to recover some of your pictures.
Having multiple cards comes with a few downsides which you will need to consider:
- It will cost you more to get the same memory capacity when you have multiple cards compared to having one high capacity one.
- You are likely to lose one of the memory cards if you are not very careful
- The challenge of swapping out memory cards in the middle of a safari
The other possible downside to having multiple car
I recommend that you have the two 64GB cards and an emergency spare 32GB memory card in case you run into problems with the first cards. However, this might be overkill for most beginner photographers.
What kind of memory cards should I buy
If you are looking to buy memory cards for your African Safari, you may want to consider the SanDisk Ultra 64GB Memory Card (available on Amazon) . It is a mid-range memory card that has thousands of great reviews on Amazon and I think it’s a good price.
There were a number of other memory cards that were more expensively priced than this that allow for faster writing and reading but I think for most of you, this particular memory card will be sufficient for your needs.
If you would like to learn more about how to improve your Safari Photography, you can check out the in-depth article I wrote on how to take better safari photos . I wish you the very best as you prepare for your African Safari .
Keep in mind that we may receive commissions when you click our links and make purchases. However, this does not impact our reviews and comparisons. We try our best to keep things fair and balanced, in order to help you make the best choice for you. As an Amazon Associate, I earn from qualifying purchases.
Antony Njoroge
Hi, I'm Antony & I'm from Kenya. I love traveling around Kenya when I get off from work and this website is a great way for me to share my local knowledge and tips that will help you travel well in East Africa. Having lived in East Africa my whole life, I share my personal experiences and knowledge with the goal of helping you optimize your East African Safari and make it an unforgettable expereince.
Recent Posts
Internet & WiFi in Kenya (A Complete Tourists' Guide)
If you are planning to visit Kenya any time soon, you might have wondered if Kenya has Internet and whether WIFI is easy to find. I have lived in Kenya all my life and I would love to answer this...
Is Mt Kilimanjaro Active? (And Should You Be Worried?)
If you are planning to visit Mt. Kilimanjaro like I am, you must have been doing a lot of research about your climb. During your research, you might have stumbled upon the fact that Kilimanjaro is a...
VPNoverview.com Privacy Anonymous Browsing Everything You Need to Know About Safari Private Browsing
Everything You Need to Know About Safari Private Browsing
Ever wondered what Safari Private Browsing does exactly? Chances are it might not be giving you the level of online privacy you expect. Safari Private Browsing does have some perks, including:
- Stopping Safari from remembering the websites you’ve visited
- Not storing any new usernames, passwords, payments cards, and other information you input into private browsing
- Forgetting any search engine queries you’ve run
- Allowing you to save money by avoiding marketing cookies that might inflate prices
However, this is pretty much all the privacy that you’ll get with Safari Private Browsing. This incognito mode won’t cloak your IP address, encrypt your internet traffic, or make you safe on public Wi-Fi . Private browsing still leaves you pretty exposed to a lot of the risks that come with connecting to the internet.
For true online anonymity, you’ll need to use a VPN to change your IP address . We’re big fans of ExpressVPN, one of the fastest VPNs in the industry.
Below, you’ll find more information on how to use Safari Private Browsing on all your Apple devices, as well as more details on how this incognito mode does and doesn’t protect your privacy.
If you use a Mac, iPhone, or iPad, then chances are you’ve encountered Safari Private Browsing before. Whether you’re shopping for a partner’s gift or want to snoop on a long-lost colleague’s LinkedIn, there are many reasons why you might want to use private mode in Safari.
In this article, we answer the question, what is Safari Private Browsing ? We’ll also tell you what this handy tool can’t do to save you any embarrassment or risk to your online security.
What is Safari Private Browsing?
There’s a little more to this method of browsing than meets the eye, but we’ll go into specifics further down in this article. The point is, for a more private experience, you can use Safari’s incognito mode . You’ll be logged out of all accounts, and Safari won’t autofill user logins, passwords, or payment information. When you turn on private browsing, Safari won’t remember :
- Your search engine history
- Webpages you’ve visited
- Browsing activity or history
You should, however, be aware of a major drawback of this tool on Macs: your browsing activity likely isn’t as hidden as you might think. Websites you visit can still see who you are and what you’re doing . You can read more about this in our general incognito mode article .
With Macs, Private Browsing information is logged in a different place, as well: your Terminal archive.
Beware the Mac Terminal archive
On Macs, there’s something called the Terminal archive , and it’s as scary as it sounds — well, for fans of privacy at least. It’s a treasure trove for snoops. The Terminal archive contains all of the websites you visit , whether you’re using Safari Private Browsing or not. This is because your Mac stores static images and other files when you visit a website for the first time. This makes future visits to these sites and page loading much faster, as your Mac pulls the relevant files from the Terminal archive.
This command-line function also lets you make systemic changes to your Mac . For most users, there’ll never be a need to make any changes in the Terminal archive, and you shouldn’t if you don’t know what you’re doing. You could end up breaking something critical in your computer’s operating system if you tinker with the Terminal.

However, it is good to know that, even when you’re using Safari’s Private Browsing mode, your online activity is logged here.
Make your Safari Private Browsing truly private
By now, you might be asking yourself: how do I clear the cache on my Mac? Well, today’s your lucky day. Below, you’ll find a brief, step-by-step guide to clearing the cache on a Mac . Just make sure not to do anything else while inside the Terminal.
- Open “ Finder ,” then search for “ Terminal ” in the search bar.
- Run the Terminal application.
- Paste the following text into the Terminal and hit enter: sudo killall -HUP mDNSResponder
You may have to enter your Admin password to proceed. This is going to flush the DNS cache.
Remember that you shouldn’t do anything else inside of the Terminal application unless you know what you’re doing. It only takes a short command to nuke files or entire directories in this app forever! So, tread carefully.
Why You Should Use Safari Private Browsing on Macs and iOS
We can hypothesize all we want, but you’ve probably got a good idea of why you use private browsing. According to a 2018 research study , the most common reason people use private browsing is so others that are using a shared device can’t see what they’re doing. This comes down to protecting two things from other users of your device:
- Their personal data
- Their browsing activity
Fortunately, these are two things that Safari Private Mode manages to do wonderfully. Below, you can read more about what else Safari Private Browsing does for you .
Online privacy
- Your browser won’t remember what websites you’ve visited. Anything you browse while you’re in private browsing mode won’t be remembered by Safari. So, if you start shopping online for gifts or a product that you find embarrassing, you won’t usually have to worry about your friends or family coming across your browsing history.
- Safari won’t suggest usernames, passwords, credit card numbers, and so on. You’ve probably noticed that Safari can remember usernames, passwords, credit cards, and other information when you use it for the first time. If you tell your Mac, smartphone, or tablet to remember those details, they’ll be automatically filled in the next time you visit the website. With Safari Private Mode enabled, these kinds of details won’t be stored: you won’t be prompted to save or autofill them at all.
- Your search engine queries won’t be remembered . If you’ve been shopping for gifts or trying to self-diagnose, you probably don’t want other users of the computer to see what you’ve searched for . Normally, you’ll see suggested searches popping up in search engines like Google. Based on your past searches and clicks, some links might be colored purple instead of blue, too. In private browsing mode, these won’t appear, nor will any new searches be stored.
How to pay less with Safari Private Browsing
There’s more to private mode options than just online security. You could also save money with Safari Private Browsing, as you won’t be quoted higher prices for products you’ve already viewed. When you visit a website, cookies (small text files) are stored on your computer by your browser.
These kinds of cookies aren’t delicious or rewarding at all. Instead, they allow the site to track you and figure out that you’re interested in, for example, a particular holiday destination. This can result in you seeing higher airfares, hotel booking fees, and more. Just turn on Safari’s Private Browsing to s top cookies from being stored on your browser and avoid hiked prices.
How to Go Incognito on Safari
Safari Private Browsing on a Mac
Using Safari Private Browsing on a Mac is simple. If you’re reading this on a Mac, you can skip step one in our step-by-step guide below:
- Open Safari on your Mac.
- Click on “ File ” in the menu bar at the top of the screen.
- Select “ New Private Window .” This will open a new private tab, but you can open as many private tabs in your tab bar as you need.

It’s that simple. Now, any new tab you open within this new private browsing window will be a private browsing tab. Give it a whirl by opening some new private tabs and navigating to a website you frequently log into. You’ll notice that your username and password aren’t suggested for autofill as they usually would be .
Also, you’ll know that you’re in private browsing, as the URL bar will have a gray background rather than the usual white. Just remember to ignore or close your existing browser window if you had any open. If in doubt, check the background color of the URL bar.
Finally, to turn off private browsing in Safari , simply click the red cross in the corner of the browser window as you usually would.
Safari Private Browsing on an iPhone
Using Safari’s private browsing mode on an iPhone or iPad is fairly straightforward and could increase your privacy on an iPhone . If you’re running iOS 14 or earlier , simply follow the steps below:
- Open Safari on your phone.
- Tap on the “ Tabs ” button. That’s the two small squares in the bottom-right corner of your Safari window on iPhone.
- A new option called “Private” should appear.
- Tap “ Private ” and you’ll be taken to a blank screen confirming that you’re using Private Browsing Mode . You’ll notice that it’s using the same gray color scheme as Safari for Mac.
- Lastly, click on the small “ + ” (plus) icon to launch a private browsing window.

If you’re using Apple’s latest iPhone update, iOS 15.1.1 , you’ll need to follow a slightly different (and hey, we’ll say it — more confusing) set of steps:
- Tap on the “ Tabs ” button.
- Tap where it says “ X Tab(s) ” – this number will reflect the number of windows you have open.
- Tap “ Private .”
- Now, you’re in Private Browsing mode and can click the small “ + ” (plus) icon to launch a new private window.

Again, turning off private browsing in Safari for iPhones or iPads is simple. Just press the same “ Private ” button that you used to enable the feature. Don’t forget, if you have multiple private tabs open, they won’t close automatically. Swipe each tab closed before you exit private mode if you want to leave no trace.
How to Set Safari Private Browsing as the Default
If you’d rather always browse privately, you can also set Safari Private Browsing as your default, so that it opens automatically whenever you open a new tab or window. Check out the step-by-step instructions below for a Mac :
- Make sure your active application is Safari, then select “ Safari ” from your Mac’s toolbar at the top of your screen. Click on “ Preferences ” next, which can also be accessed using the keyboard shortcut “ Command ” + “ , ” (that’s Command, plus a comma).
- Now, you should see the Privacy window for Safari. Click on the “ General ” tab.
- Next to “Safari opens with”, select “ A new private window ” from the drop-down list.
While you can’t automatically use Safari Private Browsing by default on mobile , there are some options for minimizing what’s remembered, stored, or recommended. Here’s how you get there:
- Open the “ Settings ” application.
- Scroll down until you see “ Safari ” and tap on that option.
Now, you’ll have the choice to use a number of features. You can:
- Disable search engine suggestions
- Disable Safari suggestions specifically
- Turn off autofill for Safari , either for personal information, payment information, or both
- Disable “ Favorites “, which you can save in your Safari app’s home screen
- Turn off “ Frequently Visited Sites “, which appear below your favorites
In this menu, you can also prevent cross-site tracking and block all cookies on the websites that you visit. In the event that you forget to launch Safari Private Browsing, these options should give you at least a little more privacy whenever you go online.
Is Safari Private Browsing Safe?
That last risk is surprisingly common on public Wi-Fi networks too. Bear in mind that private browsing doesn’t protect you against malware (malicious software) either, nor does it protect your payment information or other personal details . For true online anonymity and to improve your online security , you should give serious thought to using a VPN (Virtual Private Network) .
How to use a VPN with Safari Private Browsing
Using a VPN along with Safari Private Browsing should give you the online security you’re looking for. In addition to avoiding any logged browsing history or search history , you’ll be much harder to track and enjoy greater online anonymity. You can check out the many advantages of a VPN for more information. Want to get started right away? The following steps will only take a few minutes of your time:
- Choose a VPN provider and create an account. We recommend checking out our list of the best VPNs if this is new ground for you. Alternatively, ExpressVPN is a market-leading VPN provider that we’re always happy to recommend.
- Download and install the VPN software onto your Mac. You can also download ExpressVPN for mobile on your iPhone. Other premium providers like NordVPN, CyberGhost, and Surfshark all offer really slick mobile apps for iOS, too.
- Log into your account , either in the desktop software or the mobile app.
- Choose a VPN server in a country of your choice. If you’re purely interested in online security, then the location you choose isn’t too important (though some will be faster than others). However, if you want to save money on subscriptions , for example, you should give it some more thought.
- Connect to the VPN server . When you connect, you’ll be changing your IP address to mirror the VPN server’s IP. It’s safe, legal ( in most countries ), and best of all, it’ll give you far greater online security than simply using Safari Private Browsing alone.
Safari Private Browsing is perfect for hiding those Christmas or birthday purchases from your family before the big day. It’s also a great way to save money on flights, hotels , or other purchases. However, it won’t do much for your online security. If you want truly private browsing , then use a VPN along with Safari private mode.
Interested in exploring other private browsers? Check out these articles below:
- How Anonymous Is DuckDuckGo?
- Is Vivaldi Browser Safe?
- How to Set Up Firefox as an Anonymous Browser
Do you want to know how to enable private browsing on Safari? Are you wondering how much privacy Safari Private Browsing actually gives you? You’ll find these answers and more in our frequently asked questions below.
To turn on Private Browsing in Safari for Mac, follow these simple steps:
- Make sure Safari is the active application that you’re using.
- Click on File in the menu bar along the top of the screen.
- Click on New Private Window to switch to private browsing mode.
To turn on Private Browsing in Safari for iPhone or iPad, the process is much the same:
- Open the Safari application.
- Tap on the Tabs icon (the two small squares in the lower-right corner of your screen).
- Tap on Private to switch to private browsing.
- Click on the small + (plus) icon to open a new private browsing tab.
Check out our full article for more information on Safari Private Browsing.
No. Safari Private Browsing, like any browser’s private mode, won’t protect you against a lot of online threats. Your IP address will still be visible to many third-party individuals and organizations. For example, your ISP will know what websites you’ve visited, and hackers could determine your location using your IP (though some private modes do limit location tracking). For true online privacy and anonymity, you’re safer using a VPN like ExpressVPN .
With Private Browsing, it’s more difficult for websites to track you, since cookies are cleared the moment you close the browser — but it’s not impossible. Your ISP (Internet Service Provider), employer, school, or college could still see your internet history . That is, unless you use a VPN along with the incognito mode.
Yes. The owner of an internet connection can absolutely check up on your browsing session if they have the right technical knowledge. Some routers can be set up to remember all URLs a device accesses. So, if you’re trying to fly under your parents’ radar, for example, they could potentially bust you using the family router, even if you’re exclusively using private browsing modes.
For true anonymity , you’ll want to use a VPN. With a VPN connection, all of your internet traffic is encrypted, which gives you far better anonymity and privacy than using private browsing on its own.

Chris Bluvshtein Author
Senior journalist.
Chris is a tech journalist with many years’ experience covering online privacy and cybersecurity. He’s also a published author and works as a Product Manager for some of the most innovative software development companies.
Share this article
More articles from the anonymous browsing section.

Kanary Review (2024): A Cheap and Secure Data Removal Service

OneRep Review (2024): Can OneRep Protect Your Private Data?

The Best Data Removal Services (Personal Information Removal Made Easy)
Hi Chris , I’m finding while using private mode in safari my sound is being cut out and I have not been able to find a way to reconnect it. I use it on a iPad with a vpn and trend anti spam for protection as much as it can in private mode. I have not been able to find any reason as to why this is happening.
Hey Wayne, I've done a bit of digging, and I've found something that might be worth a try. It seems that recent versions of Safari have a built-in feature that can prevent audio from playing when you visit a website; it's enabled by default too. Give this a try and let me know if the issue goes away: 1. Open the Safari menu and click preferences 2. Click on the websites tab 3. Look for the setting: "When visiting other websites", which has a drop-down selection beside it 4. Change this setting so that it allows websites with media to play sound. You can alternatively add individual websites to this list if you'd rather have control over which ones can play sound by default.
Hi Chris Just tried your Terminal Commands, I am running macOS Monterey The Terminal Commands Below are not working dscacheutil -cachedump -entries Host dscacheutil -flushcache
You're right. Thank you for pointing it out to us! There is a new terminal command you'll now need instead: "sudo killall -HUP mDNSResponder". We've adjusted the article to reflect this. Hope this helps!
Looking for a VPN?
Take a look at our overview of the most trustworthy, fast, and safe VPN services. Extensively tested by our experts.

Moscow City Pass

With its unique offer, the City Pass card allows you to visit the most important places in Moscow without any additional payment. You will be able to save money on visiting top attractions, depending on your length of stay: 1, 2, 3 or 5 days. Furthermore, you will stop losing time in waiting lines! Indeed, you will benefit from its priority access at the entry of some museums such as Saint-Basil’s Cathedral or before the departure of your excursion on the Radisson Flotilla for example.
Depending on your interests, you will learn about the intriguing Russian history by visiting the State Historical museum, experience the spirit of Russian flea markets in the Izmailovo State or sit and relax while the Moscow Sightseeing Bus Tour brings you for an unforgettable ride around the city or during a Radisson cruise on the Moskova River. A guide and a map of the city are included in the City Pass pack so that you can plan your trip as you wish and enjoy the city at its best!
During your stay, you will also benefit from many discounts for cafés, restaurants, bars and shops and even for a taxi ride.
The purchase of the card corresponds to your length of stay and gives you the access to all the attractions without having to buy new tickets. You will just have to show your City Pass at the entrance of any museums of the list or at the departure of an excursion.
How does it work ?
The Moscow City Pass is a personal card. You can buy your pass by selecting the number of people and the length of your stay:
- 1 day (24 hours)
- 2 days (48 hours)
- 3 days (72 hours)
- 5 days (120 hours)
Then, you can print your voucher and bring it with you at any City Pass pick-up point. The period of use of your pass starts on your first visit or excursion.
A junior price is available for children under the age of 16 and brings a 20% discount besides the advantages of the full card.
You can pay your City Pass on our website and pick it up in one of the pick-up points available in Moscow (by presenting your voucher):
- In our offices in Moscow center
- In the GUM mall
- In the museum of Soviet arcades games
When booking, don't forget to let us know your preferred time to pick-up your pass.
What can I visit ?
You can find below the list of museums and excursions available with your City Pass:
Museums and galleries:
1. The Moscow Kremlin (territory and cathedrals)
2. State Historical museum (main building)
3. Museum of the Patriotic War of 1812
4. State Tretyakov Gallery
5. State Tretyakov Gallery on Krymskiy Val
6. St. Basil’s Cathedral (Pokrovsky Cathedral)
7. The Pushkin State Museum of Fine Arts (main building)
8. Gallery of 19th and 20th century European and American Art
9. Zaryadye Park (Underground museum)
10. Shilov Art Gallery
11. Artcenter.Moscow
12. Lumiere Brothers Center for Photography
13. Shusev State Museum of Architecture
14. The Museum of Cosmonautics (VDNH)
15. Mosquarium (VDNH)
16. Historical Park “Russia – my history” (VDNH)
17. House-museum of Pushkin on Staraya Basmannaya
18. Paleontological Museum
19. Jewish Museum and Tolerance Center
20. State Pushkin Museum
21. Pushkin Memorial Apartment on the Arbat Street
22. Mikhail Bulgakov Museum
23. Bulgakov’s House Museum-Theatre
24. Liublino Estate
25. Museum Reserve “Tsaritsino”
26. Museum-reserve Kolomenskoye
27. Palace of the Tsar Alexey Mikhailovich in Kolomenskoye
28. Izmailovo Estate
29. Vodka History Museum (The Kremlin in Izmailovo)
30. Museum of Bread (The Kremlin in Izmailovo)
31. Weapon museum (The Kremlin in Izmailovo)
32. Museum of Plasticine (The Kremlin in Izmailovo)
33. Museum of the Mordern History of Russia
34. «Presnya»
35. Underground printing press of 1905-1906
36. Museum of Russian Impressionism
37. Museum of Soviet Arcade Machines
38. Memorial Apartment of Andrey Bely
39. Experimentanium Science Museum
40. Museum of Russian Icon
Excursions:
1. Zaryadye Park (Sightseeing tour)
2. Bunker-42 (The Cold War Museum)
3. PANORAMA 360 observation deck
4. Observation Deck of the Hotel Ukraine
5. Cruise along the Moskva River with The Radisson Royal Flotilla
6. Moscow City Sightseeing Bus Tour
7. Moscow Cathedral Mosque
8. Walking Tour with Moscow Free Tour
9. “Mega Ice” rink
10. Moscow Cable Car on Sparrow Hills
- Special discounts
- A guide and a map of the city
- Access to more than 50 attractions
- Get a priority access for some essential attractions of the city

+7 916 200 71 16
- How does it work?
- Terms and Conditions
- Top excursions in Moscow
- Top excursions in St Petersburg
- Tsarvisit Travel Blog

THE 5 BEST Moscow Safaris
Safaris in moscow.
- Adrenaline & Extreme Tours
- Gear Rentals
- Nature & Wildlife Tours
- 5.0 of 5 bubbles
- District Central (TsAO)
- 3rd Transport Ring (TTK)
- District North-Eastern (SVAO)
- District Eastern (VAO)
- District South-Western (YuZAO)
- Lomonosovskiy
- Ostankinskiy
- Meshchanskiy
- Krasnoselskiy
- Maryina Roshcha (Jewish Quarter)
- Good for Couples
- Good for Kids
- Good for Big Groups
- Adventurous
- Budget-friendly
- Good for a Rainy Day
- Hidden Gems
- Honeymoon spot
- Good for Adrenaline Seekers
- Things to do ranked using Tripadvisor data including reviews, ratings, photos, and popularity.

1. Rybokhotsoyuz

2. Easy Russia Tour Guide
3. UTS GROUP

4. 365AltaiMongolia

5. #1 Russia -Tanzania | Zanzibar, Serengeti Safari & Kilimanjaro Agency | BURIGI CHATO SAFARIS CO LTD

6. Aviashop.Ru

7. Transsib Moscow

8. BASK TOUR
- Easy Russia Tour Guide
- #1 Russia -Tanzania | Zanzibar, Serengeti Safari & Kilimanjaro Agency | BURIGI CHATO SAFARIS CO LTD
- 365AltaiMongolia

- About ParkNews
- Privacy Policy
FEIG ELECTRONIC: Moscow-City Skyscrapers Streamline Parking Access and Control with Secure RFID
Feig electronic partners with isbc group to deploy ucode dna rfid security and parking access control solution in moscow business district.
Weilburg, Germany — December 3, 2019 — FEIG ELECTRONIC , a leading global supplier of radio frequency identification (RFID) readers and antennas with fifty years of industry experience, announces deployment of the UCODE DNA RFID security and parking contactless identification solution in the Moscow International Business Center, known as Moscow-City, one of the world’s largest business district projects.
The management of Moscow-City not only selected long-range, passive UHF RFID to implement in its controlled parking areas, it also chose to implement UCODE DNA , the highest form of secure RAIN RFID technology, developed by NXP Semiconductors.

Panoramic view of Moscow city and Moskva River at sunset. New modern futuristic skyscrapers of Moscow-City – International Business Center, toned
“Underscoring NXP’s innovation and leadership in developing advanced RAIN RFID technologies, our UCODE DNA was chosen to be incorporated with the FEIG and ISBC implementation of the contactless identification system in the prestigious Moscow-City,” said Mahdi Mekic, marketing director for RAIN RFID with NXP Semiconductors. “This exciting project represents yet another successful deployment of NXP’s contactless portfolio, and showcases our continued ability to meet the high-security requirements of highly demanding applications without compromising user convenience.”
“UCODE DNA is considered the only identification technology to match the physical protection of a barrier with the cybersecurity necessary to truly protect entrances from unauthorized access,” said Manuel Haertlé, senior product manager for FEIG Electronic. “As a respected contactless payment technology company, FEIG applies security know-how from its payment terminals, which are fully certified according to the latest high-class security standards, into our RFID systems. FEIG vehicle access control RFID readers incorporate advanced secure key storage elements, supporting various methods for secure key injection.”
FEIG’s partner ISBC Group provided the knowledge and support for this successful implementation using FEIG’s long-range UHF RFID . The resulting system enables authorized vehicle entry into areas reserved for private residential use or corporate tenants, while also allowing availability of temporary, fee-based visitor parking. Thanks to the cryptographic authentication of UCODE DNA, both the tag and reader must go through an authentication procedure before the reader will validate the data from the tag, which is transmitted wirelessly. This level of authentication is typically used in the most secure data communication networks.
“The system’s two-step authentication means that only authorized equipment can handle the secure protocol and the data exchange with the UCODE DNA based tag. Without the required cryptographic secrets, other readers would query the tag in vain, because the tag’s response cannot be interpreted or understood,” said Andrey Krasovskiy, director of the RFID department at ISBC Group. “On top of this, each data exchange in the authentication process is unique, so even if a malicious actor were to intercept the communication, the transmission is only good for a single exchange and the tag’s unique identity is protected from cloning.”
Established in 1992 and still growing, Moscow-City is the revitalization and transformation of an industrial riverfront into a new, modern, vibrant and upscale business and residential district. A mix of residential, hotel, office, retail and entertainment facilities, it is located about four kilometers west of Red Square along the Moscow River. Twelve of the twenty-three planned facilities have already been completed, with seven currently under construction. Six skyscrapers in Moscow-City reach a height of at least 300 meters, including Europe’s tallest building, Federation Tower, which rises more than 100 stories.
Partnering with ISBC and deploying FEIG Electronic RFID solutions, the Moscow International Business Center is delivering security and access control to its city center today, as it grows into the city of tomorrow.
About FEIG ELECTRONIC
FEIG ELECTRONIC GmbH, a leading global supplier of RFID readers and antennas is one of the few suppliers worldwide offering RFID readers and antennas for all standard operating frequencies: LF (125 kHz), HF (13.56 MHz), UHF (860-960 MHz). A trusted pioneer in RFID with more than 50 years of industry experience, FEIG ELECTRONIC delivers unrivaled data collection, authentication, and identification solutions, as well as secure contactless payment systems. Readers from FEIG ELECTRONIC, which are available for plug-in, desktop, and handheld applications, support next-generation contactless credit cards, debit cards, smart cards, NFC and access control credentials to enable fast, accurate, reliable and secure transactions. For more information, visit: www.feig.de/en
Founded in Moscow in 2002, ISBC Group provides knowledge and support to integrators for their successful implementation of RFID and smart card-based solutions. The company specializes in the distribution of smart card equipment, contact and contactless card manufacturing, smart card and RFID personalization services, and information security. Its Research and Design Center is focused specifically on RFID, primarily HF and UHF solutions with NXP tags, and software development for the smart card industry. For more information visit: https://isbc-cards.com/
← Previous Post
Next Post →
Privacy Overview

- General Information
Moscow CityPass
The Moscow CityPass is a tourist card that gives you free entry to more than 40 top attractions in the Russian capital, including the Kremlin and Saint Basil's Cathedral.
Included attractions
The 10 most popular attractions included with the Moscow CityPass are:
- Saint Basil's Cathedral
- Bunker-42 Museum
- Tretyakov Gallery
- Tsaritsyno Palace Museum
- Museum of the Patriotic War 1812
- State Historical Museum
- Great Wooden Palace of Tsar Alexis I in Kolomenskoye
- Moscow Sightseeing Bus Pass
- Moscow River Cruise
Moscow CityPass Prices
You can buy the Moscow CityPass for a duration of 1, 2, 3 or 5 days depending how long you're planning to spend in the city.
Is it worth it?
Entrance into these attractions is worth much more than the cost of the CityPass, yet it offers even more, for example, the Pushkin Museum , the Museum of the History of Vodka and the Museum of Contemporary History , among others, plus discounts at restaurants, shows and shops. If you're already planning to visit these sights, then it's well worth buying the CityPass to save money on tickets.
Where to buy the Moscow CityPass?
You can buy your Moscow CityPass online in advance via our website . Then, all you need to do is collect it from the Komsomolskaya Tourist Information Centre (Komsomolskaya Square, 5-1), near the Komsomolskaya metro station. The office is open from 9 am until 8 pm.
You may also be interested in

Moscow has seen its fair share of history, from invasions to revolutions: these days it is home to a wealth of culture and is one of the most populated capitals in the world.

Russian National Ballet
Ballet is one of the most emblematic symbols of Russian culture, a dance that has infiltrated countries the world over. Watch a performance in Moscow!
IMAGES
COMMENTS
Step 1: Open the Settings app on iPhone. Step 2: Scroll down to the Safari browser. Step 3: From the General menu, select AutoFill. Step 4: Go to the Saved Credit Cards menu. Step 5: iOS will ask ...
View a Saved Card in Safari. First, open Settings on your iPhone or iPad. In Settings, tap "Safari." In Safari, tap "AutoFill." In Safari's AutoFill settings, tap "Saved Credit Cards." When prompted, enter your PIN or validate your identity with Touch ID or Face ID. After that, you'll see a list of credit cards that Safari has saved in the past.
Select Settings . Click on the Autofill option at the top of the pop-up box. Click on the Edit button next to the Credit Cards box. Enter your password. A list of your credit cards saved on ...
On iOS: Open Settings>Safari>AutoFill>Saved Credit Cards. You'll be asked to confirm your ID - FaceID, TouchID or your passcode will be required. On the next page you can see all your active cards, to delete one just tap and hold the item, swipe right-left and tap Delet e. You can also edit cards with up-to-date information here.
After unlocking, you'll see a small window with a list of credit cards Safari has saved (if any). Using this window, you can add, remove, or edit the credit card information. To edit the card info, select the card in the list and click on the property you'd like to change (such as the card number, cardholder name, expiration date).
In the Safari app on your Mac, click in a credit card field when making a purchase.. Choose from a list of your stored credit cards. If your Mac or Apple keyboard has Touch ID, you can use Touch ID to fill in the stored information for the selected credit card.To set up Touch ID to use with Safari AutoFill, see Change Touch ID preferences.. If a field is empty or showing the wrong type of ...
First, grab your iPhone or iPad and open the Settings app. Scroll down and tap on " Safari .". Inside Safari settings, look for " AutoFill " and tap on it. Here, you'll find an option that says " Saved Credit Cards .". Tap on this. Now, enter your PIN or use Touch ID or Face ID. Once you're in, you'll see all the credit cards ...
Set up AutoFill. You can save your personal information or credit card number on your iPhone to speed up filling in online forms and making purchases. Go to Settings > Safari > AutoFill. Set up contact info: Turn on Use Contact Info, tap My Info, then choose your contact card. The contact information from that card is entered when you tap ...
Tap Add Credit Card, then tap Use Camera to scan the card, or enter the data manually. When finished, tap Done in the upper-right corner of the screen to add the credit card to your iPhone's autofill. To edit saved credit cards on an iPhone or iPad, tap the name of the card. Tap Edit, then update card details on iPhone or iPad, and tap Done.
Open the "Settings" app from the home screen of your iPhone or iPad. In the Settings menu, scroll down and tap on "Safari" in order to adjust the settings for your web browser. Here, tap on "AutoFill" which is located under the General category, as shown in the screenshot below. Make sure the toggle for Credit Cards is enabled.
How to Add Credit Card to Safari AutoFill on iPhone and iPad. Open the Settings app on your iPhone. Scroll down and go to the Safari settings. Tap on AutoFill. Turn on the toggle for Credit Cards. Now, go to Saved Credit Cards. To view credit cards, access with Touch or Face ID, or enter the passcode. Tap Add Credit Card.
To remove a saved credit card from Microsoft Edge: Log in to your Microsoft Account, and click on the "Payment & billing" tab. Click on "Payment options" in the drop-down menu that appears ...
What to Know. To autofill contact info or credit cards on your iPhone: Settings > AutoFill and toggle Use contact settings or Credit Cards to On. To change your info, go to Contacts > My Card > Edit or Saved Credit Cards > Add Credit Card. To autofill passwords: Ensure iCloud access is on, tap Settings > Passwords & Accounts, and toggle ...
On an iPhone or iPad, this is part of the Safari browser's settings. head to Settings > Safari > AutoFill > Saved Credit Cards. Tap "Add Credit Card" and enter your credit card details. ... 1Password, or Dashlane, you can have your password manager securely remember your credit card number and offer to fill it, just as it automatically ...
Safari Cards were an English translation of a set of collectible zoological information facts first devised and published in Switzerland. Original publisher Éditions Rencontre in Lausanne, Switzerland specialized in subscription encyclopedias and other educational toys in the 1950s and '60s. Intended explicitly from the very beginning to democratize learning and bring the classics of French ...
Why does Safari remember credit card expiry dates wrong? I entered the correct expiry date of all my cards into Safari's credit card memory, but what it's done is: The month is always 1 month less than the actual one. It's not a coincidence because it happened with ALL of my cards. ...
Probably something like an md5/sha-1/some other hash of the card number. Reply. dfmz •. Additional comment actions. Either that, or checksums, or magic. Reply. epheterson •. Additional comment actions. Yeah gotta be a one-way hash, I can't imagine they'd even store a subset of the digits.
The challenge of swapping out memory cards in the middle of a safari; The other possible downside to having multiple car. I recommend that you have the two 64GB cards and an emergency spare 32GB memory card in case you run into problems with the first cards. However, this might be overkill for most beginner photographers.
Open Safari on your phone. Tap on the " Tabs " button. That's the two small squares in the bottom-right corner of your Safari window on iPhone. A new option called "Private" should appear. Tap " Private " and you'll be taken to a blank screen confirming that you're using Private Browsing Mode.
With its unique offer, the City Pass card allows you to visit the most important places in Moscow without any additional payment. You will be able to save money on visiting top attractions, depending on your length of stay: 1, 2, 3 or 5 days. Furthermore, you will stop losing time in waiting lines! Indeed, you will benefit from its priority ...
Hotels near Moscow P. I. Tchaikovsky Conservatory Hotels near Russian Academy of Theatre Arts Hotels near Institute for the Economy in Transition Hotels near Gnesins Russian Academy of Music Hotels near Moscow International Higher Business School (MIRBIS) Hotels near Turo Moskovskiy Universitet, NOU Hotels near Maxim Gorky Literature Institute Hotels near Moscow State University of Railway ...
Founded in Moscow in 2002, ISBC Group provides knowledge and support to integrators for their successful implementation of RFID and smart card-based solutions. The company specializes in the distribution of smart card equipment, contact and contactless card manufacturing, smart card and RFID personalization services, and information security.
The Moscow CityPass is a tourist card that gives you free entry to more than 40 top attractions. Kremlin. Saint Basil's Cathedral. Bunker-42 Museum.